As we know, the Java plugin is a component of the Java Runtime Environment (JRE) that allows a browser to interact with the Java platform in order to run Java applets in the browser. So, you must enable Java in Chrome to work with applets.
This guide will describe the procedure for enabling Java in Chrome.
How to Enable Java in Chrome?
To enable Java in Chrome, you can use the “IE Tab” Chrome Extension that permits you to view pages using the Internet Explorer browser engine.
Let’s see the steps to enable Java in Chrome using the IE Tab Chrome Extension.
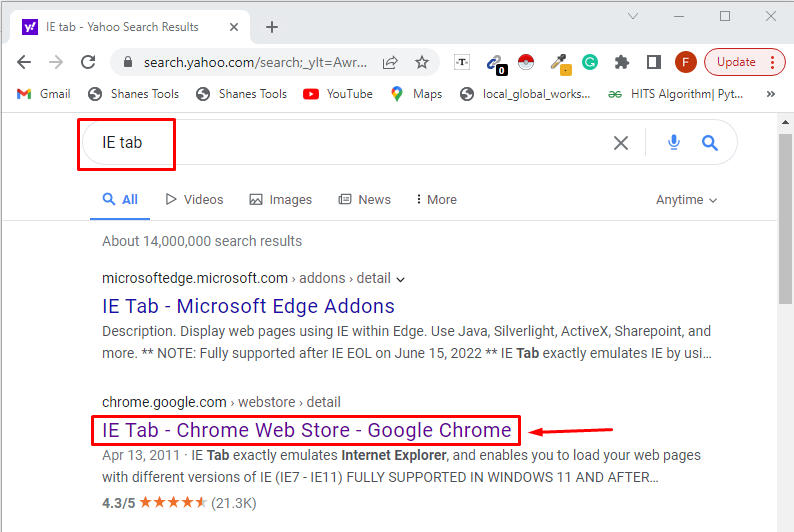
Step 1: Open IE Tab in Chrome Web Store
Open your Chrome browser and type the “IE Tab” in the search bar and click on the given link to open Chrome Web Store :
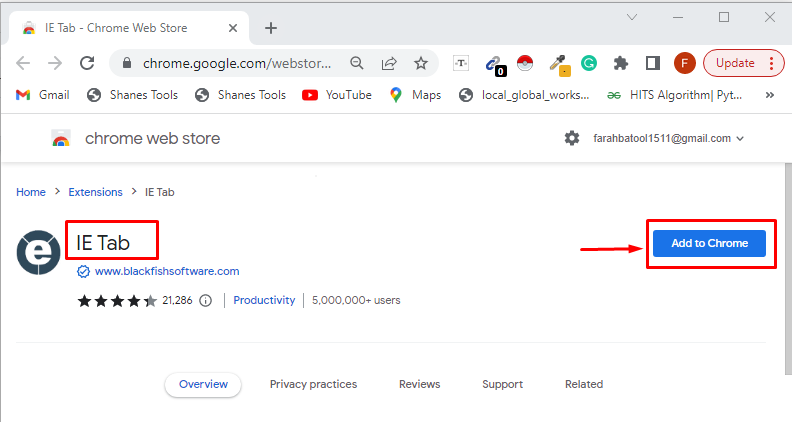
Step 2: Add IE Tab Extension
The below screen will open, click on the button “Add to Chrome”:
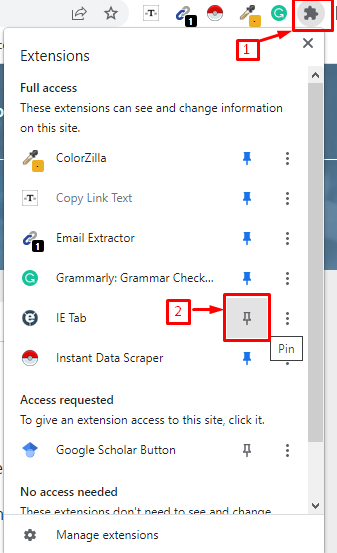
Step 3: Pin IE Tab Extension
Pin the IE Tab extension on the Chrome browser for your ease:
As a result, the icon of “IE Tab” will show at the top right corner of the address bar:
Step 4: Download ietabhelper.exe File
Then, click on the IE tab icon to download the “ietabhelper.exe” file:
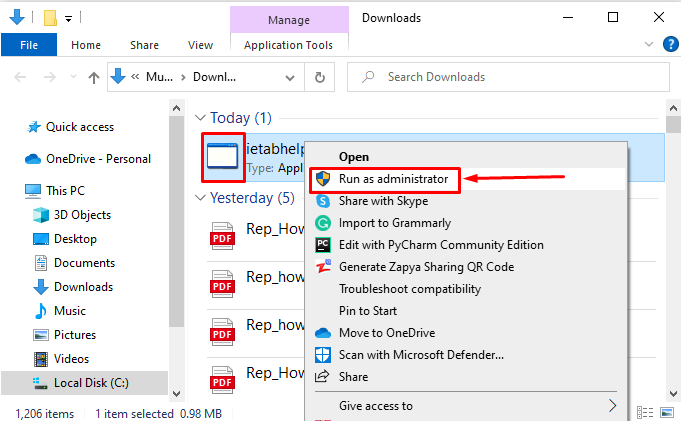
Step 5: Run ietabhelper.exe File
Open the “.exe” file, right-click on it, and run it as administrator:
Step 6: Switch to Chrome
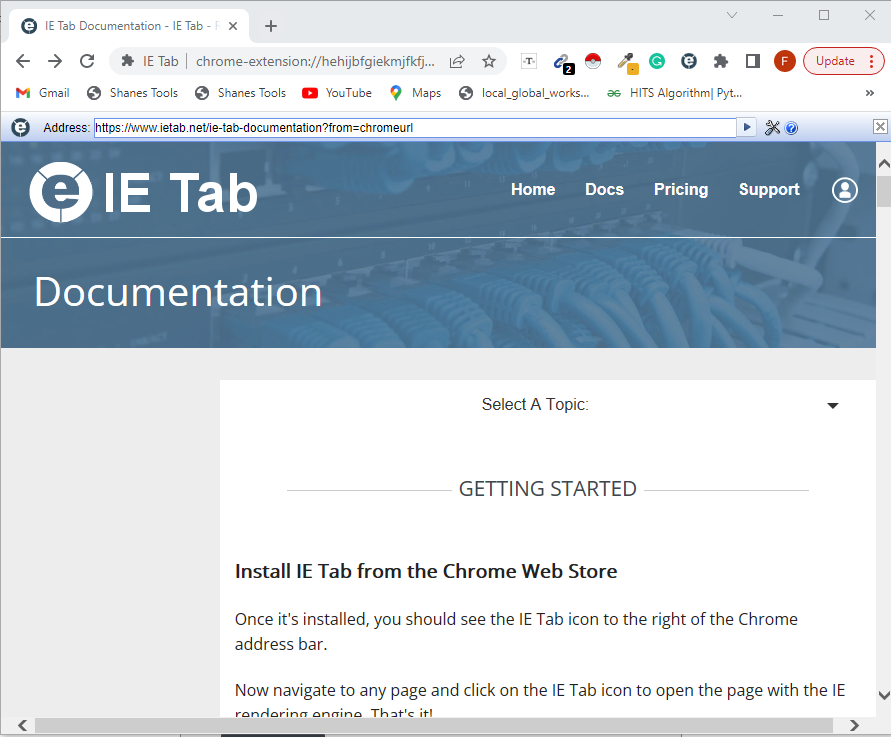
After running the “ietabhelper.exe” file, the following page will open on the browser that indicates that Java is successfully enabled in Chrome:
If you now visit a web page with Java content, click on the IE Tab icon in the browser’s top-right corner. It uses the Internet Explorer engine and supports Java while opening a new IE tab:
We gathered all the basic instructions to enable Java in Chrome.
Conclusion
To enable Java in Chrome, you must install and run the IE Tab Chrome extension. It will use the Internet Explorer engine to view the Java content by clicking on the icon of the IE Tab Chrome extension added at the top right corner; after running the iptabhelper.exe file. In this guide, we describe the steps to enable Java in Chrome with detailed snippets.

