This guide discusses the methods to enable or disable the “Test Mode” on Windows 10/11:
- What is Test Mode on Microsoft Windows 10/11?
- How to Enable/Turn on the Test Mode on Microsoft Windows 10/11?
- How to Disable/Turn off the Test Mode on Microsoft Windows 10/11?
What is “Test Mode” on Microsoft Windows 10/11?
The “Test Mode” on Windows 10/11 is an isolated environment allowing developers to preview and test the drivers unsigned by Microsoft. It can also test applications and potentially unsafe software before deploying them. “Test Mode ensures that no software affects the system badly.
How to Enable/Turn on the “Test Mode” on Microsoft Windows 10/11?
The following are the methods to enable the “Test Mode” on Windows 10/11:
- Enable Test Mode on Windows 10/11 Via the Command Prompt.
- Enable Test Mode on Windows 10/11 From the Settings App.
Method 1: How to Enable “Test Mode” on Windows 10/11 Via Command Prompt?
The “Command Prompt” is an incredibly powerful tool that enables users to manage their systems by executing commands. To trigger the “Test Mode” on Windows 10/11, follow the below-stated steps:
Step 1: Open Command Prompt
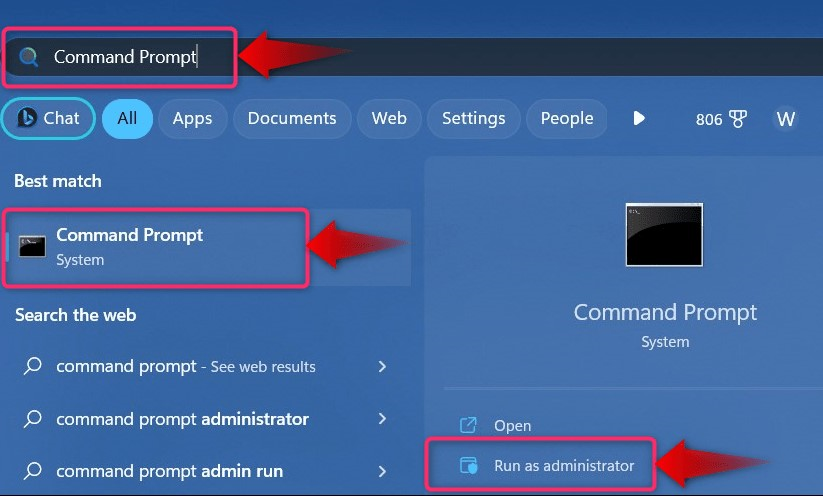
To open the “Command Prompt”, use the search bar in the Windows “Start” menu:
Step 2: Enable the “Test Mode”
In the “Command Prompt”, execute the following command to enable the “Test Mode”:
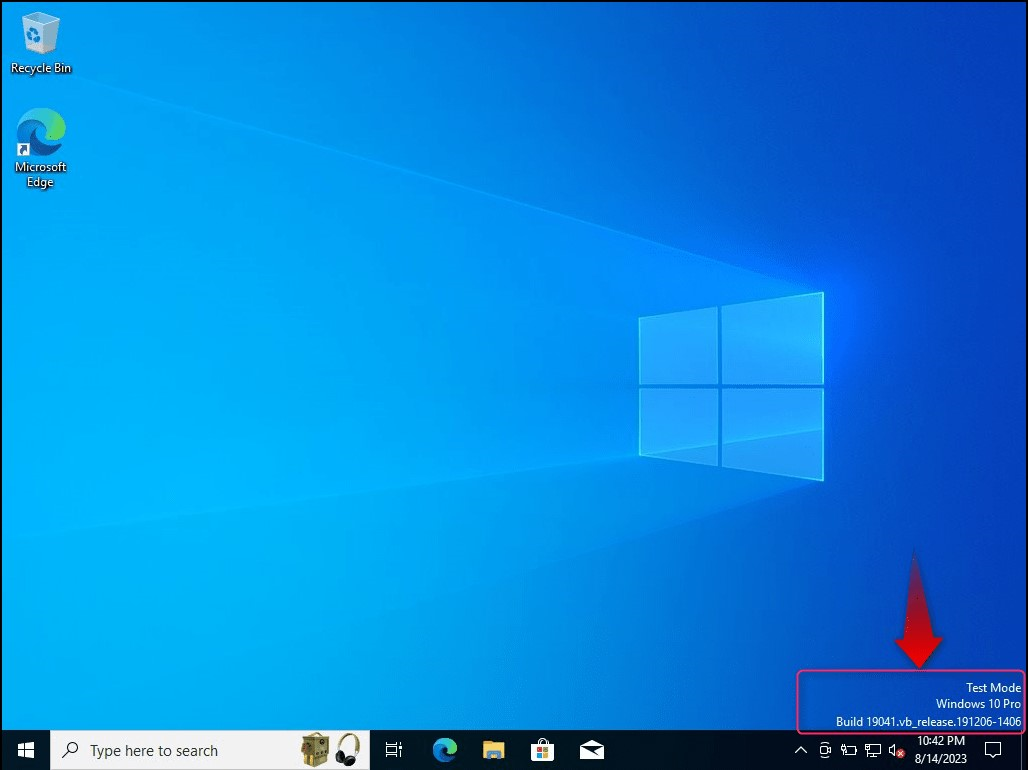
After executing the above command, reboot the system, and it will now boot into the “Test Mode”:
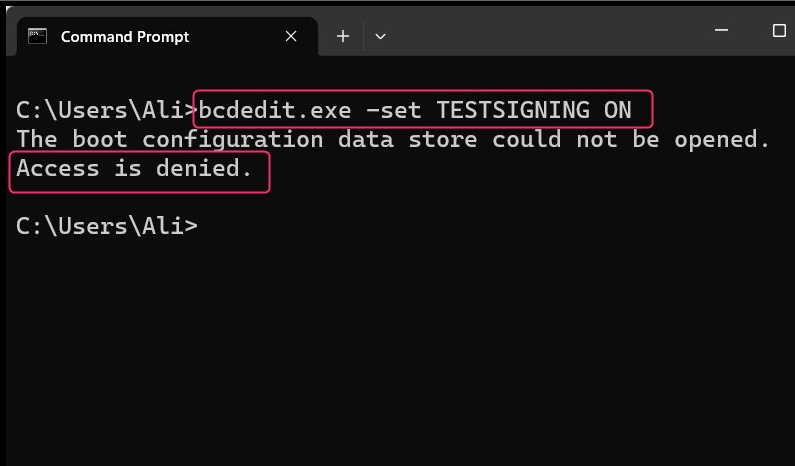
Some users may face the “Access is denied” error because they do not have administrative privileges:
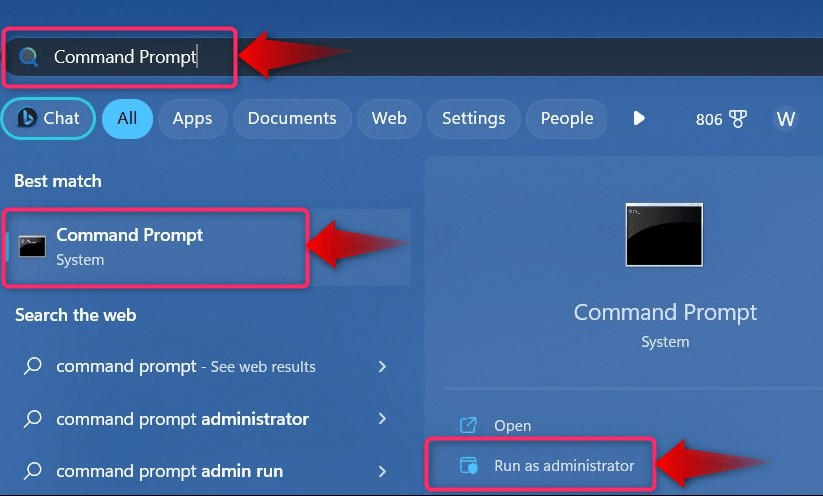
The “Access is denied” error is fixed by selecting “Run as administrator” while launching the “Command Prompt”:
Note: If you are facing other issues related to secure boot, make sure to disable it following this detailed guide.
Method 2: How to Enable “Test Mode” on Windows 10/11 From the Settings App?
The Windows “Settings” app is a centralized location where users can manage a myriad of system settings. To use it for enabling the “Test Mode” on Windows 10/11, follow these steps:
Step 1: Open the Windows “Settings” App
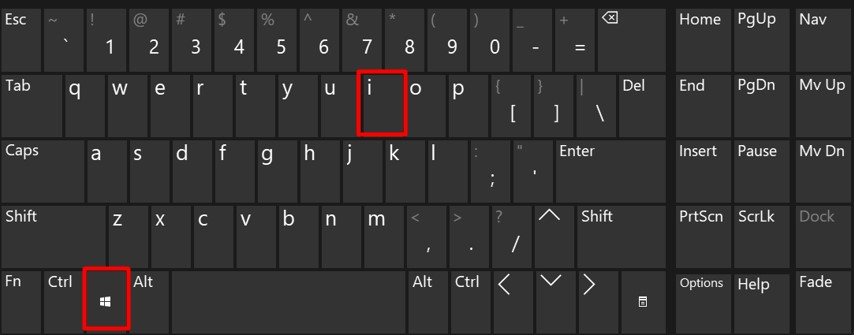
Press the “Windows + I” keys to open the Windows “Settings” app:
Step 2: Reboot into System Recovery Menu
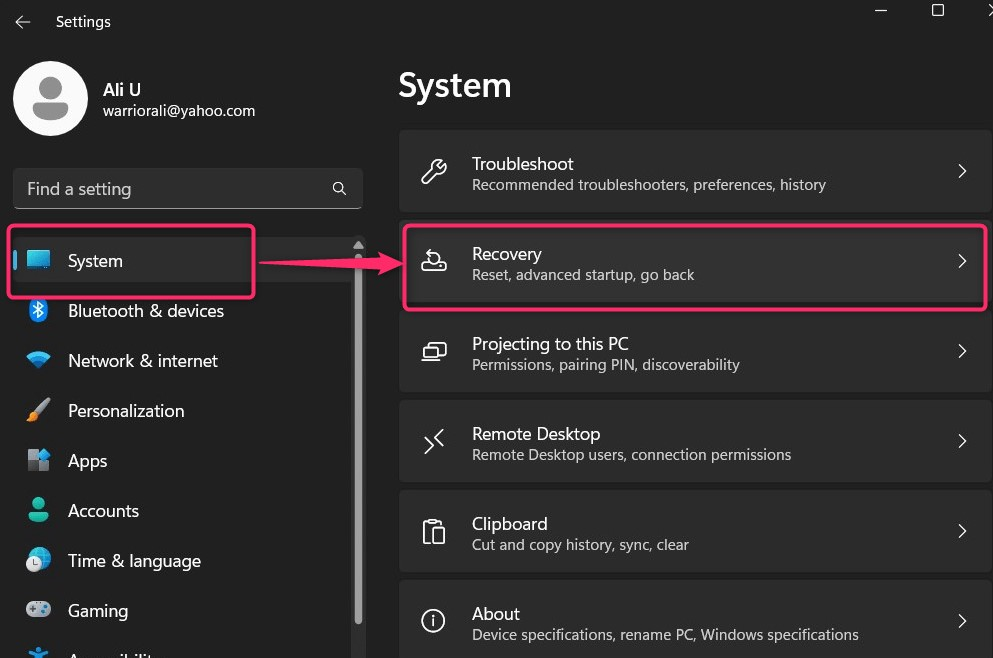
To reboot the system into the “System Recovery” menu, navigate to the “Recovery Options” from the “System” option:
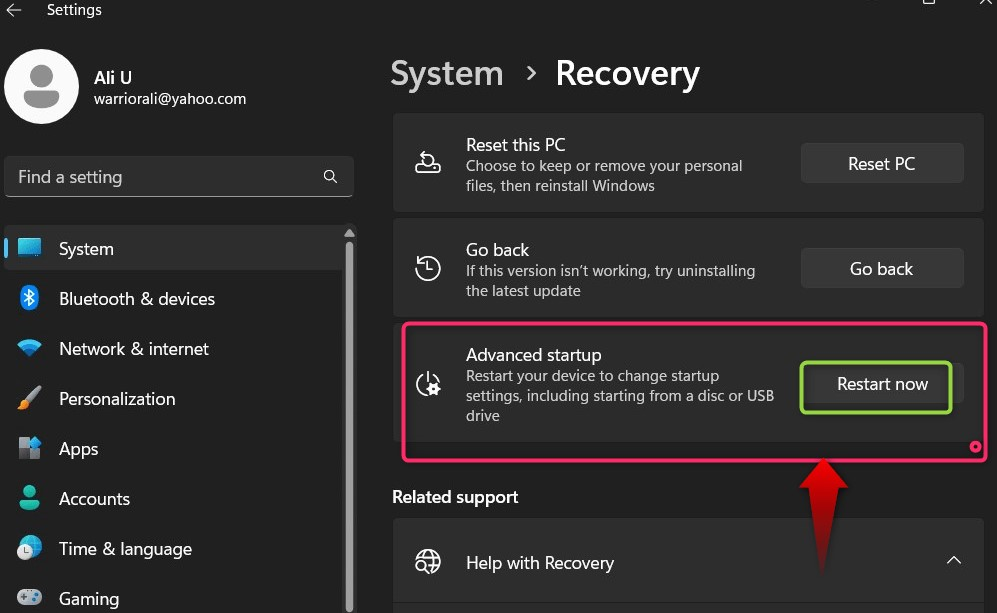
From the “Recovery”, use “Restart now” located in the “Advanced startup” and it will reboot the system into the “Windows Recovery Environment”:
Step 3: Enable the “Test Mode”
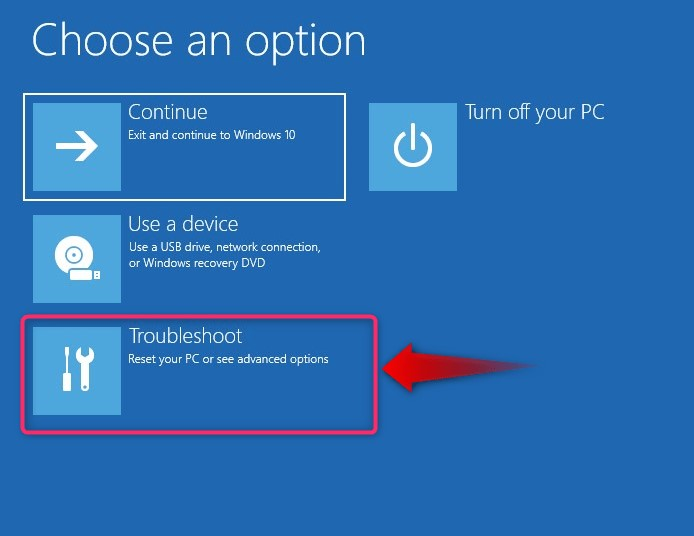
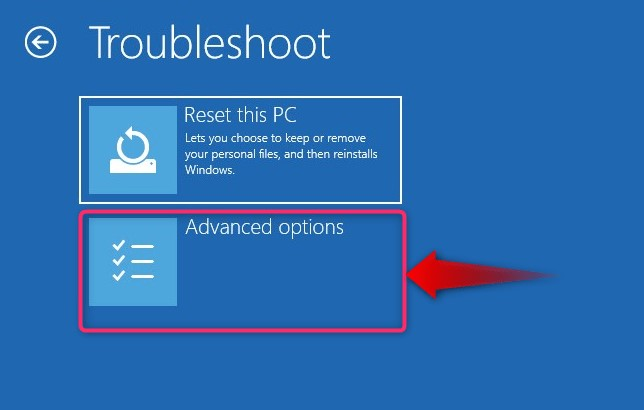
In the “Windows Recovery Environment”, select “Troubleshoot in which you can find the settings to reboot the system into the “Test Mode”:
From the “Troubleshoot” option, select “Advanced options”:
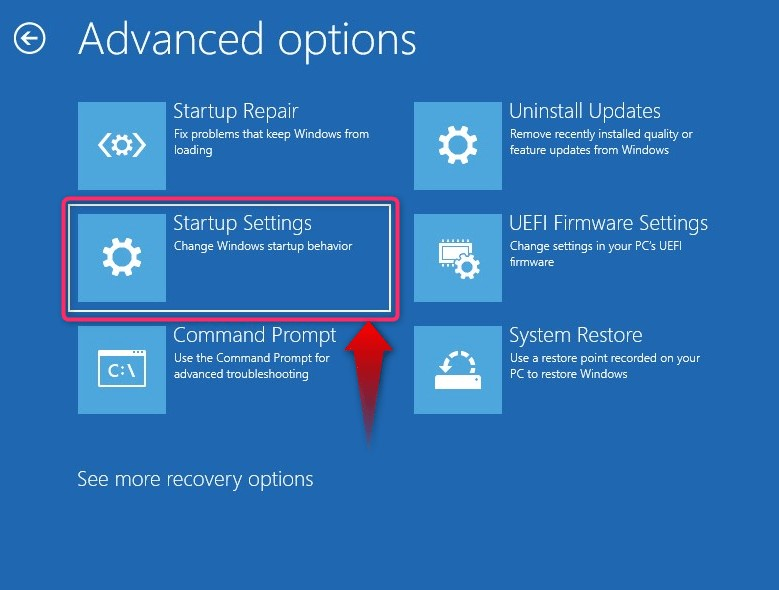
In the “Advanced options”, select “Startup Settings”:
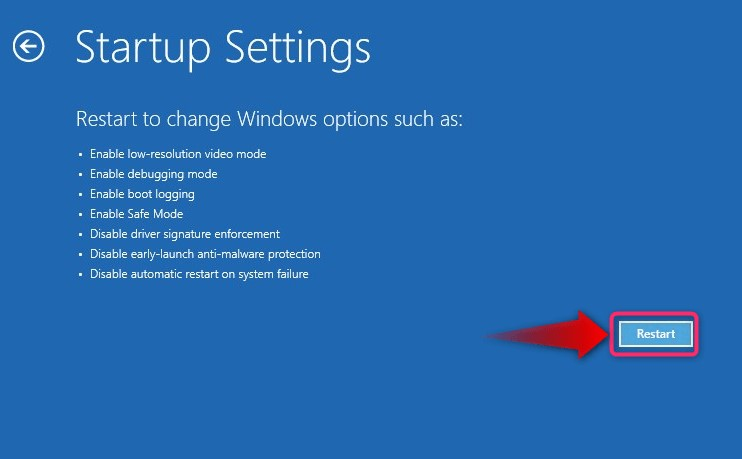
Now reboot the system using the “Restart” button:
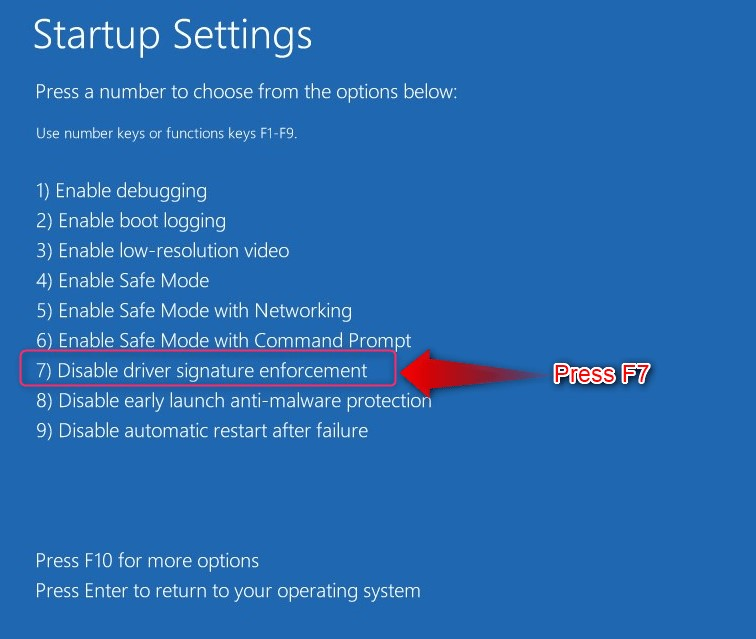
After restarting the system, press the “F7” key to reboot into the “Test Mode”:
How to Disable the “Test Mode” on Windows 10/11?
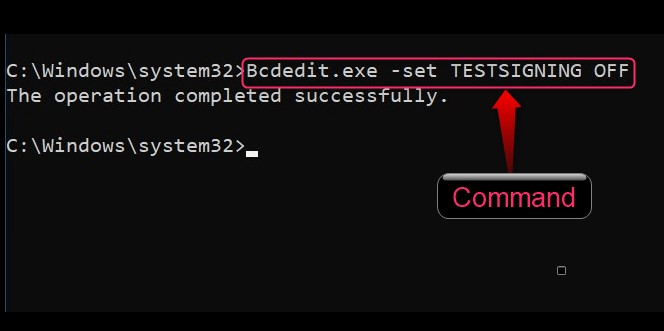
The system will keep booting into the “Test Mode” until it is disabled and to do that, execute the following command in the “Command Prompt”:
After that, reboot the system, and it will now boot into normal OS with the “Test Mode” disabled.
That’s all for enabling or disabling the Test Mode in Windows 10/11.
Conclusion
The “Test Mode” in Windows 10/11 is enabled or disabled by executing the Windows “Command Prompt” commands. The “Windows Recovery Environment” can also enable the “Test Mode” for once. The “Test Mode” Windows 10/11 is an isolated environment allowing developers to preview and test the drivers unsigned by Microsoft. It can also test applications and potentially unsafe software before deploying them. This guide has discussed how to enable or disable the “Test Mode” in Windows 10/11.

