Windows Services are used to start or stop applications such as Printing, Networking, or Bluetooth. Services start working in the background when Windows boots up and stop working when the computer is turned off. An important thing to understand is that, when a service is disabled, its dependent services are also disabled, but when it is enabled, its dependent services are not restarted.
Quick Outline:
- How to Enable and Disable Services Using PowerShell
- Bonus Tip: How to Start a Service Using PowerShell (Not Enable)
- Bonus Tip: How to Stop a Service Using PowerShell (Not Disable)
- Bonus Tip: How to Enable and Disable Services Using Command Prompt (CMD)
- Conclusion
How to Enable and Disable Services Using PowerShell?
Windows services can be managed (enabled, or disabled) using a number of methods including Services app, Registry Editor, Group Policy Editor, Command Prompt, and PowerShell.
One of the precautions before disabling a service is to create a system restore before making any changes to the Windows services. So, in case of data loss, you can switch back to the backed-up state. If in case the system gets halted after disabling any Windows service. Then, enable and boot into the Safe Mode and enable the service.
However, users need to remember that disabling a service must not affect the Windows functionality.
Disable a Service on Windows Using PowerShell
Whenever a service is disabled in Windows, it does not start by itself (automatically) with the start of Windows. But it needs to be started manually. Normally, Windows services are enabled and disabled using the Services app. To do so check the stepwise instructions mentioned below.
Syntax
Here is the syntax of disabling a service on Windows using Powershell:
Important Note: Replace the “Windows Service Name” with the real service name you intend to disable.
For instance, let’s disable the Windows Backup service using PowerShell.
Step 1: Press Windows + X to open the Quick Access Menu and select Windows PowerShell (Admin) or Terminal(Admin):

Step 2: Type the mentioned command in the PowerShell console and press the Enter button to disable a service:
According to the above code:
- First, use the Set-Service command.
- Assign the service name to be disabled to the -Name parameter.
- Then, use the -Status parameter and specify the Stopped value to stop the service.
- After that, use the -StartupType parameter and specify the disabled value to disable the service.

Enable a Service on Windows Using PowerShell
When a service is disabled it also stops working instantly. So, while enabling a service we need to make sure that it should start working right after it is enabled. To do so, we need to set its -Status to running and -StartupType to automatic.
Syntax
Here is the syntax for enabling a service on Windows using PowerShell:
Note: Replace the “Windows Service Name” with the service name you want to enable and the rest of the command will remain the same.
Step 1: Press Windows + R to launch the Run application.
Step 2: Type PowerShell and press Ctrl + Shift + Enter to open PowerShell as an administrator:

Step 3: Execute the mentioned command in the PowerShell console to enable a service:

Bonus Tip: How to Start a Service Using PowerShell (Not Enable)
PowerShell not only enables the services but it can also start the services individually that are stopped manually or automatically. To start a service on Windows using PowerShell, check the mentioned instructions.
Syntax
Here is the syntax to start a service on Windows using PowerShell:
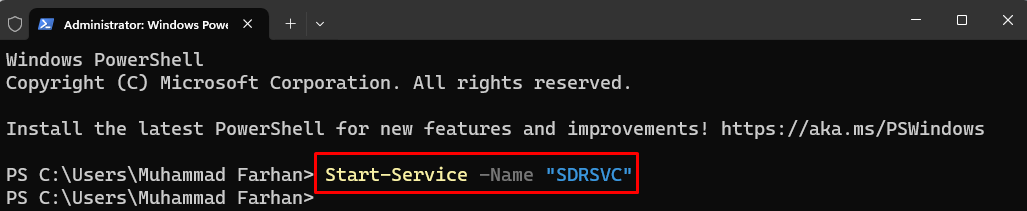
Step 1: Open the PowerShell application as an administrator:
Step 2: Run the mentioned command in the console to start a service using PowerShell:
Bonus Tip: How to Stop a Service Using PowerShell (Not Disable)
If a service on Windows causes problems such as high CPU usage, making the system speed slow, or interfering with other services then that service can be stopped from running temporarily. However, it will restart when the system reboots.
Syntax
Here is the syntax to stop a service on Windows using PowerShell:
Note: The -Force parameter will stop the dependency services as well.
Step 1: Start PowerShell as an administrator:
Step 2: Type the mentioned command in the console to stop a Windows service using PowerShell:

Bonus Tip: How to Enable and Disable Services Using Command Prompt (CMD)?
Similar to PowerShell, the Command Prompt is also a command line tool. Command Prompt can also be used to enable and disable service on Windows. However, its syntax is a bit different than PowerShell except for the service name.
Command Prompt has two commands that can stop, start, disable, or enable the services on Windows. One is NET and the other is SC. Both the commands have the same functionality, i.e., to manage Windows services, but net is the older one and sc is the newer command.
The core difference between both of the commands is that NET waits for the service to fully start or stop before returning its control to the Command Prompt. On the other hand, the SC command does not wait for the service, instead, it sends the control to the service before its return to the Command Prompt. But, in this very article, we will be using the SC command to enable or disable services because it is the new command for managing Windows services.
Disable a Service Using Command Prompt
In Windows, users can also disable a Service using CMD. To disable the service using Command Prompt, check the mentioned instructions.
Syntax
Here is the syntax to disable the service on Windows using Command Prompt:
Note: Replace the “Windows Service Name” with the intended service name to be disabled on both occasions.
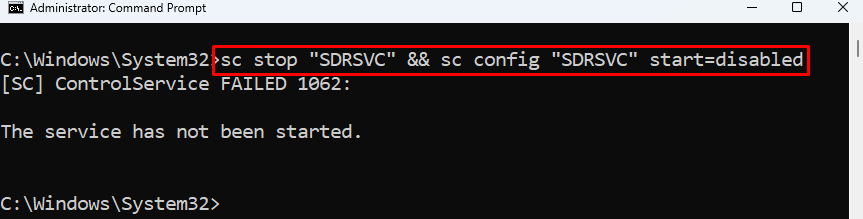
Step 1: Launch Command Prompt from the Windows Start menu:

Step 2: Type the mentioned command in the CMD console and press Enter:
Enable a Service on Windows Using the Command Prompt
Disabled Windows services can also be enabled by using CMD. To do so, check the steps mentioned below.
Syntax
Here is the basic CMD syntax to enable the service on Windows:
Note: Replace the “Windows Service Name” with the real service name.
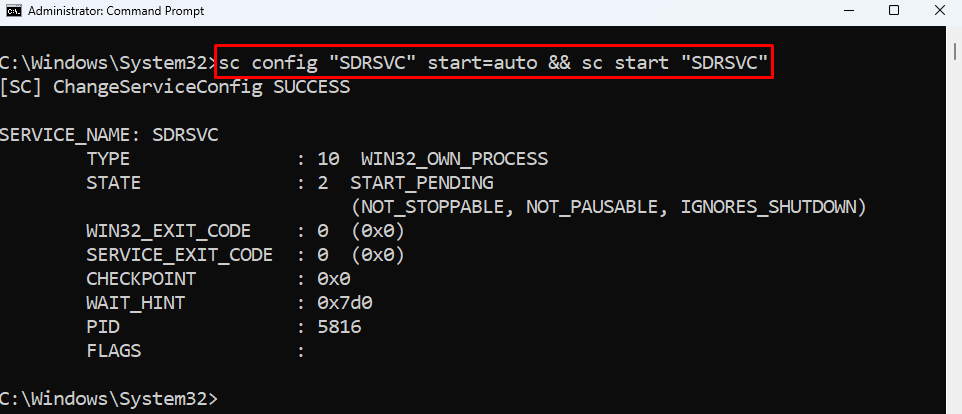
Step 1: Launch Command Prompt (CMD) on Windows.
Step 2: Run the below-given command in the CMD console to enable the service on Windows:
Conclusion
To disable the service on Windows using PowerShell, execute this command Set-Service -Name “Windows Service Name” -Status stopped -StartupType disabled. Replace the “Windows Service Name” with the real service name. To enable the service, execute this command Set-Service -Name “Windows Service Name” -Status running -StartupType automatic. Additionally, instead of enabling or disabling, services can be stopped and started individually using PowerShell, to do so read the above guide. Furthermore, the method to enable and disable service on Windows using Command Prompt (CMD) is also added in the above guide.