According to its developers, Facebook, “PyTorch” is a framework designed for machine learning models working on a combination of the “Python” programming language and the “Torch” library. These complex models have major hardware requirements for smooth processing. “CUDA” is a platform created by Nvidia to aid programmers and data scientists to utilize GPUs to run models with millions of rows of data.
In this article, we will demonstrate how to enable/disable CUDA in PyTorch.
How to Enable/Disable CUDA in PyTorch?
It is important to know how to operate CUDA in PyTorch so that the users can use the enhanced processing capabilities of its GPUs. However, simpler models do not require GPUs and can be efficiently run on local CPUs. Follow the steps below to learn how to enable/disable CUDA in PyTorch according to processing requirements:
Step 1: Launch Google Colab
The Google Colaboratory IDE is the best choice for data scientists because of its wide range of features and conducive environment. Go to the Colab website and open a New Notebook as shown:

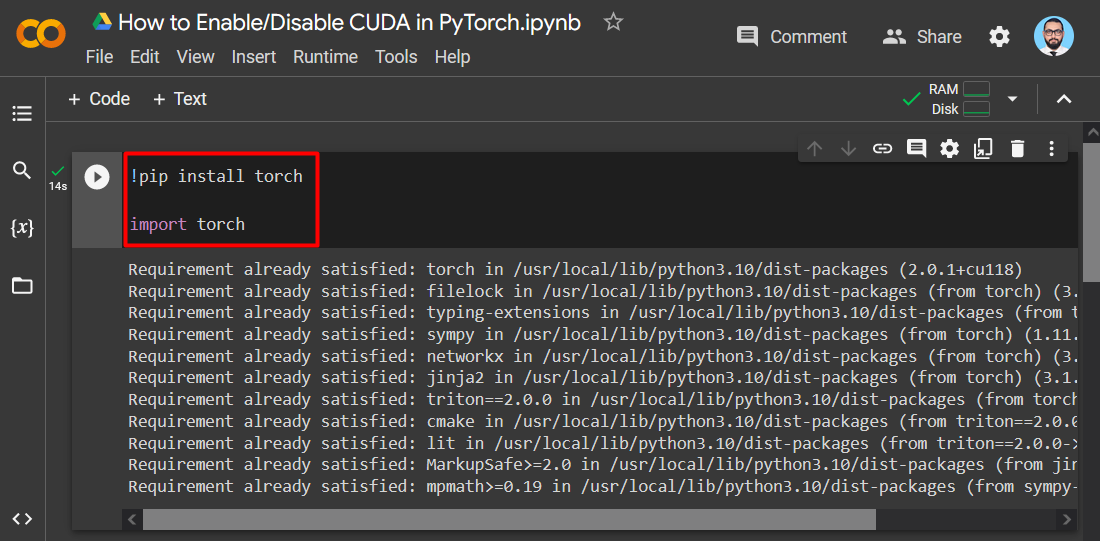
Step 2: Install and Import the Torch Library
Install the “Torch” library into the project via the “pip” installation package and use the “import” command to import it before beginning work as shown:
import torch
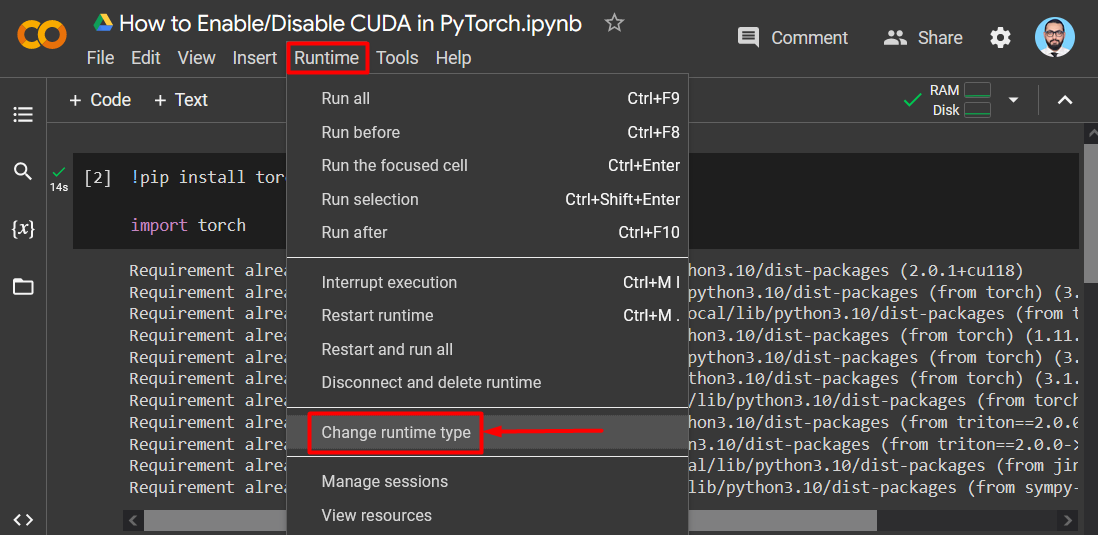
Step 3: Enable CUDA
Click on the “Runtime” option from the menu bar and scroll down and hit the “Change runtime type” option:
Select “T4 GPU” in the “Hardware Selector” to enable the CUDA GPU and then click on “Save” to apply the selected changes:

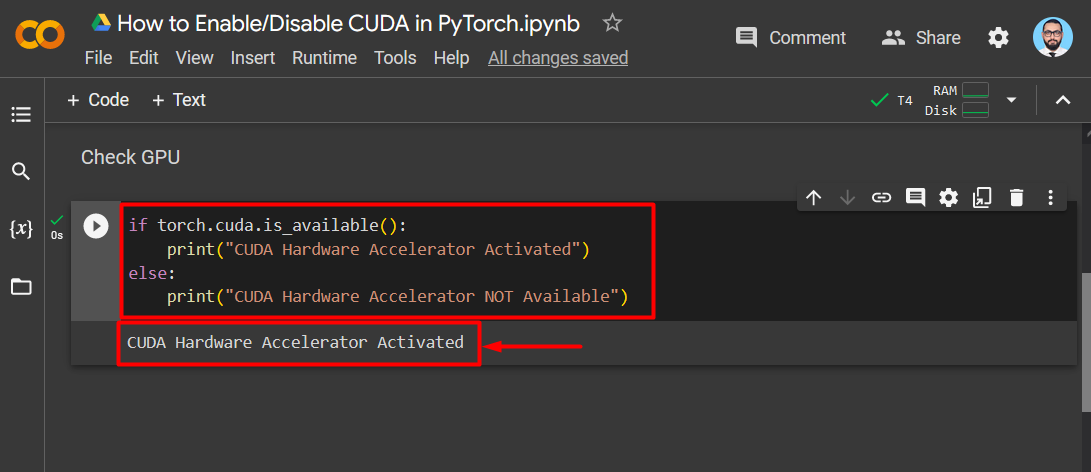
Step 4: Confirm CUDA Availability
Go back to the Colab project to check if “CUDA” is available or not. For this purpose, use the “torch.cuda.is_available()” function with an “if/else” statement:
print("CUDA Hardware Accelerator Activated")
else:
print("CUDA Hardware Accelerator NOT Available")
The output showing that CUDA is enabled:
Step 5: Disable CUDA
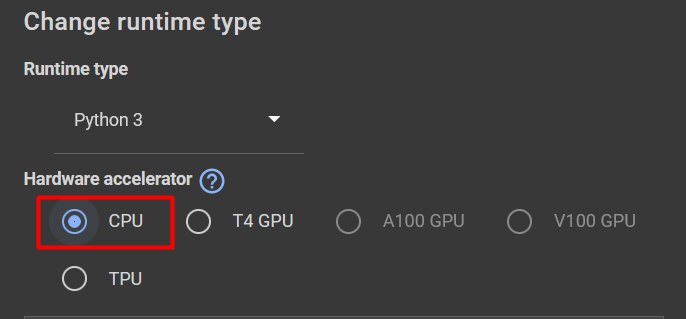
In order to disable the CUDA, go to the “Runtime” option again from the menu bar and click on “Change runtime type”. This time, select “CPU” as the “Hardware Accelerator” and hit the “Save” button to apply the changes:
Step 6: Confirm Change in Settings
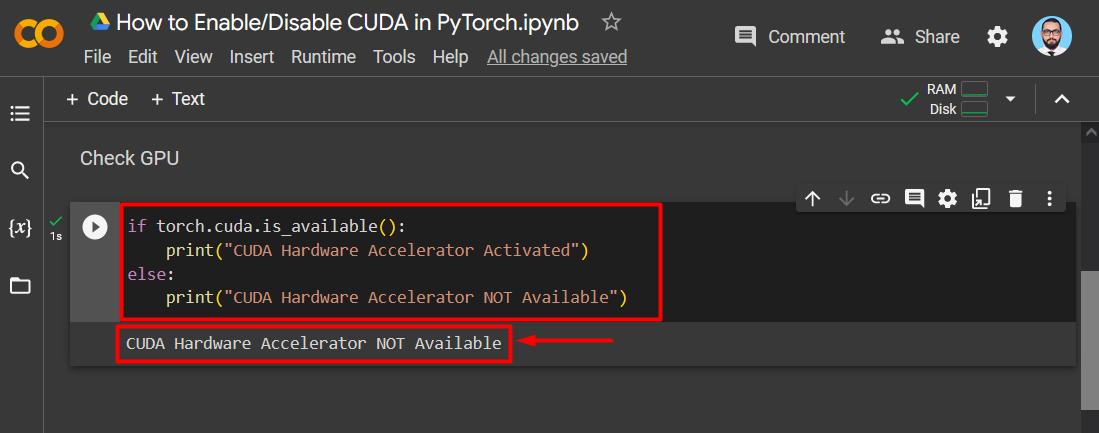
Again, open the Colab project to check if “CUDA” has been disabled or not. Use the same torch.cuda function “torch.cuda.is_available()” with an “if/else” statement to check CUDA availability:
print("CUDA Hardware Accelerator Activated")
else:
print("CUDA Hardware Accelerator NOT Available")
The output showing that CUDA is disabled:
Note: You can access our Google Colab Notebook to “Enable/Disable CUDA in PyTorch” at this link.
Pro-Tip
It is imperative to know the status of CUDA GPUs so that programmers and data scientists can efficiently manage the resources at their disposal. Using GPUs for simple models and CPUs for complex models is purposeless because of inadequate resource management.
Success! We have successfully demonstrated how to enable/disable CUDA in PyTorch.
Conclusion
To Enable/Disable “CUDA” in PyTorch, go to the “Runtime” option from the menu bar and click on “Change runtime type” from the appeared context menu. After that, select the required “Hardware Accelerator” such as “T4 GPU” to enable “CUDA”. In order to disable the CUDA, select the “CPU”. We have illustrated how to enable or disable “CUDA” from a PyTorch.