This tutorial will overview a detailed procedure to edit a text file using PowerShell.
How to Edit a Text File on the PowerShell Console?
These resources can be utilized in fulfilling the stated query:
Method 1: Use “Notepad” Text Editor to Edit File on the Console
The most convenient way to modify a text file using the “Notepad” editor through PowerShell. To make it possible, execute the “notepad.exe” command alongside the text file path in the PowerShell console:
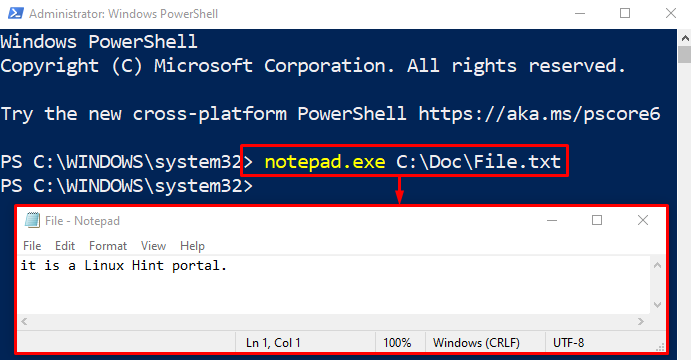
After executing the above code, PowerShell will launch the text file in the new notepad window. Now, edit the text file and press “CTRL+S” to save the file.
Method 2: Use the “Echo” Command to Edit the File on the Console
The “echo” command with the combination of the redirect “>” operator can also be used to edit the text file in PowerShell. Execute the given command in the console to edit a text file:
According to the above code:
- First, write the “echo” command, alongside the text you want to write in the file within inverted commas.
- After that, use the redirect “>” operator and add the path of the file to be edited:
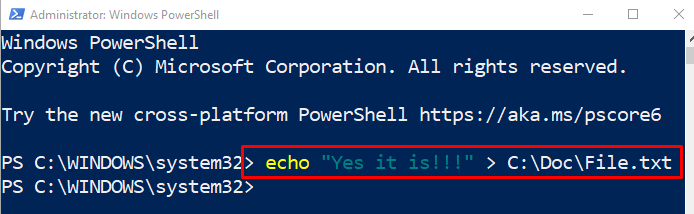
The redirect “>” will replace the text inside the file with the new one.
Execute the “Get-Content” cmdlet along with the text file address to view the edited text within PowerShell console:

Method 3: Use “Vim” Editor to Edit a Text File on the Console
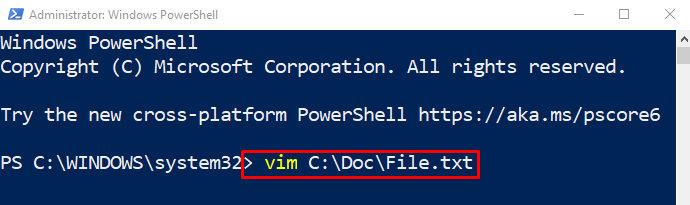
The PowerShell users can also edit the text file using the “Vim” text editor. For that reason, first, install the “Vim” text editor by reading this post. After installing it, make sure to add its path to the Windows “Environment Variables” program. Restart Windows and then launch PowerShell and execute the “vim” command along with the text file path:
After executing the above command, the “VIM” text editor will be launched. Type “i” to start editing the text file:
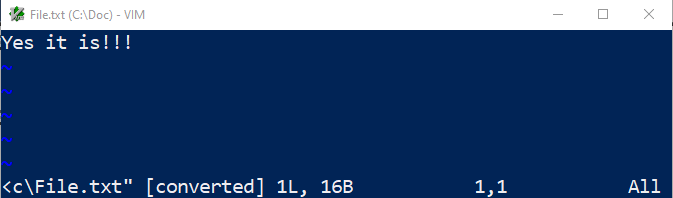
When you are done with editing the text file, type “:wq” and press the “Enter” button to save the text file and exit from the “Vim” file editor.
Conclusion
To edit a text file on the console using PowerShell, several methods can be utilized, which include “Notepad”, “Echo”, and “Vim” text editor. All these methods open up the text file and then allow you to edit it inside the PowerShell console. This write-up has overviewed a detailed guide to edit a text file using PowerShell.