Dual booting means the process of installing more than one operating system on your computer. This allows you to be able to use any number of operating systems that you installed on your machine. In recent times, dual booting the Windows 11 with Ubuntu has become increasingly popular. Many people are now discovering the benefits of running both operating systems side by side on the same computer. While some may prefer to stick with one operating system, there are several reasons why dual booting may be the right choice for you.
One of the most important reasons for dual booting Windows 11 with Ubuntu is the flexibility it offers. Windows 11 is undoubtedly a powerful operating system with a broad range of applications and games that are not available on Ubuntu. On the other hand, Ubuntu is a free and open-source operating system that is highly customizable and provides access to a vast array of open-source applications which makes it a no-brainer for developers when choosing an operating system. By dual booting, the users can enjoy the best of both worlds and keep using the applications and games that Windows offers while also being able to customize and easily use the power tools and open source features that are offered by Ubuntu.
Since Ubuntu is known for being a highly secure operating system that is less vulnerable to malware and viruses compared to Windows 11, running Ubuntu alongside Windows 11 helps the users to take advantage of the added layer of security that Ubuntu provides.
In this article, we will provide a step-by-step guide on how to dual boot Windows 11 with Ubuntu including how to partition the hard drive, create a bootable media, and install Ubuntu alongside Windows 11. By the end of this article, you will have a clear understanding of why dual booting is a great option and how to set it up on your computer.
Prerequisites:
Before we can install Windows 11 with Ubuntu, we need to take care of some things. This process will take some time and effort on your part but by the time you are done, your device will have two operating systems that are both ready to work side by side.
Creating the Ubuntu Bootable Drive
Since we will install Ubuntu on top of a machine that already has Windows installed, let’s start by creating an Ubuntu media to boot from.
Step 1: Get a USB Stick
You will need a flash memory media like a USB stick with at least 8 GB or more of free storage. This stick is used to create a bootable Ubuntu installation media that we will use to dual boot the computer.
Step 2: Download the Ubuntu Image
Follow the Ubuntu download link and download the disk image of the version of Ubuntu that you want to install alongside your Windows OS.
Step 3: Download and Install Rufus
Rufus is a free, open-source software tool that is commonly used to create a bootable USB drive to install the operating systems such as Windows, Linux, and others.
Follow the Rufus download link and install it on your device.
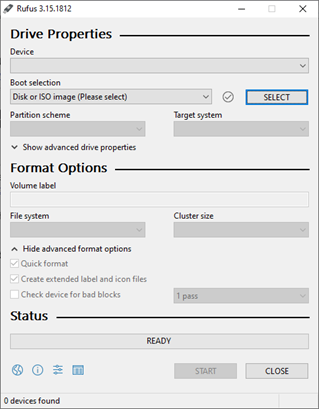
Once installed, this is what it looks like:
Step 4: Create an Ubuntu Bootable Drive
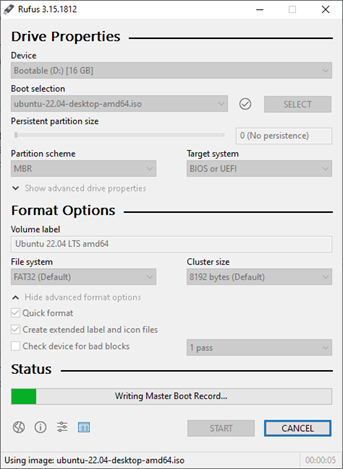
Insert the USB stick into your computer. For the purposes of this article, we named it “Bootable” and can be seen under the device heading on the Rufus homepage.
Now, click on the Boot selection “SELECT” option and add “find” and select the Ubuntu image that you downloaded in Step 2.
Once this is done, you simply have to click on the “Start” option and Rufus will make your bootable USB stick with the version of Ubuntu that you downloaded.
Note: Once this is done, you can remove your newly created bootable USB stick and proceed further.
Step 5: Create a Partition for Ubuntu
So, for you to install Ubuntu, you must allocate some space from the mass storage on your computer for Ubuntu to be installed in.
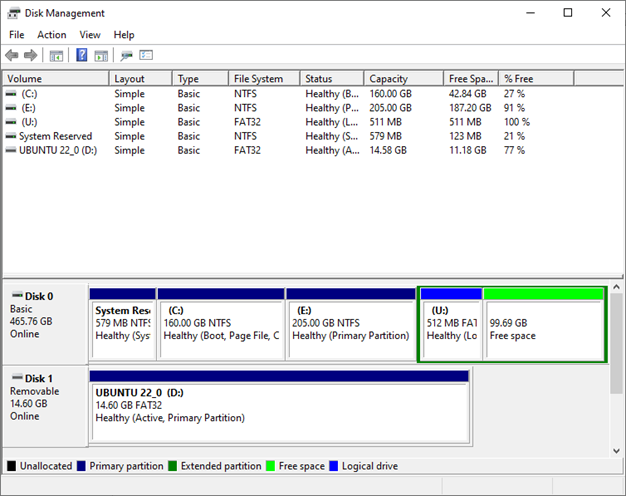
Find and open the “Windows Disk Management” tool. You should see something similar to this:
The free space option that you can see will be turned into a New Volume to install Ubuntu into.
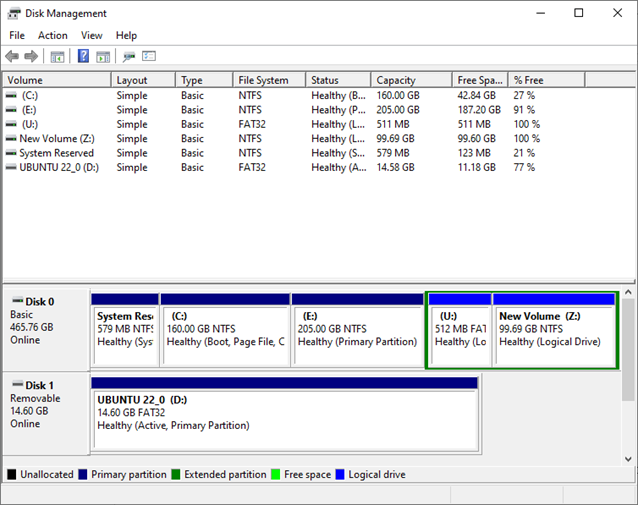
Right-click on the free space that is highlighted in green and follow along to create a partition for Ubuntu to install.
Note: For the purposes of this guide, we assigned it with the letter Z.
Step 6: Disable the Secure Boot
Before you can install Ubuntu on your machine, there is one more step that you must complete. You must disable the secure boot option for your pc by navigating into the BIOS settings. Even though Ubuntu has support for the secure boot feature that Windows provides, most other Linux-based distributions do not, which is why it is better to disable it before installing Linux.
Navigate to the “Start” menu on your Windows OS and open the “Power” menu which is placed at the bottom right corner.
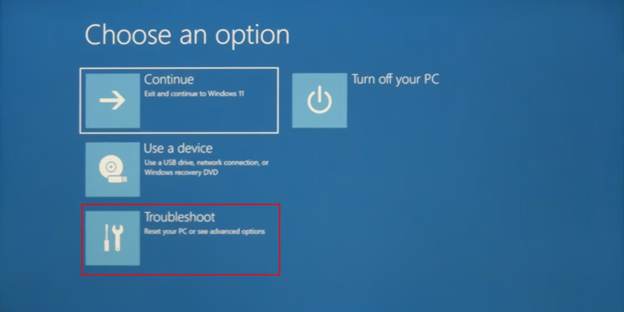
Hold down the SHIFT key and click the RESTART You will be taken to a menu with blue screen.
Here, select the “Troubleshoot” option.
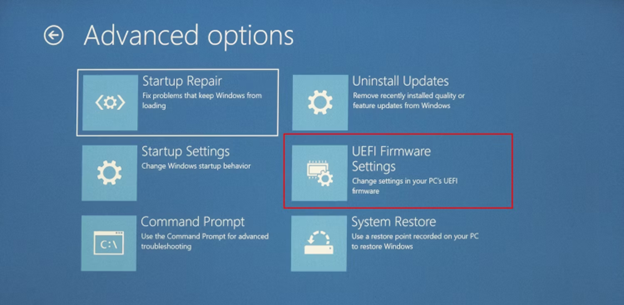
You will now proceed into the “Advanced” options and select the “UEFI Firmware Settings”.
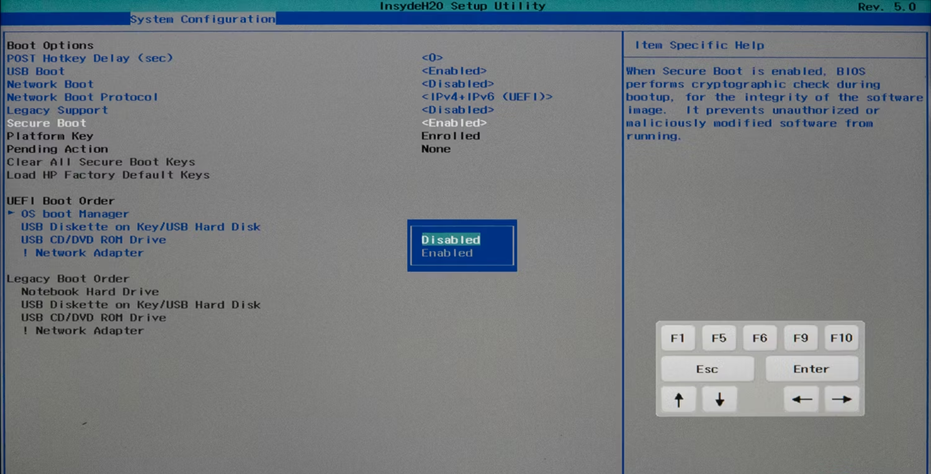
Doing this will take you to your computer’s BIOS settings. Since most BIOS settings look different depending on who the manufacturer for your motherboard is, you might have to navigate and find the “Secure Boot” option here.
Once you have found it, you should Disable it, save the settings, and proceed to restart your PC.
Installation
Now that we met all the prerequisite requirements, we can continue on to install the Ubuntu operating system alongside the Windows operating system.
Note: You should make sure that your PC does not accidentally shut down due to a sudden loss of power during this process since that could lead to data loss or even secondary memory drive corruption.
Step 1: Booting from the Bootable Linux Drive
Remember the Linux bootable drive that you created in steps 1 through 4 in the previous section. Reinsert it into your PC.
Open the “Start” menu again and while holding down the SHIFT key, click the “Restart” option.
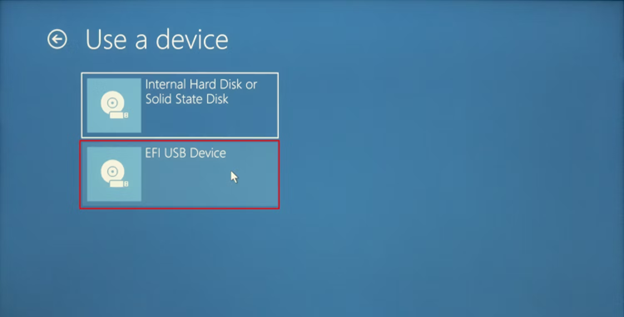
Click on the “Use a device” option and select the “USB Device” option.
Doing this will take you into an “Ubuntu boot” menu. Click “Enter” to proceed.
Step 2: Installing Ubuntu alongside Windows 11
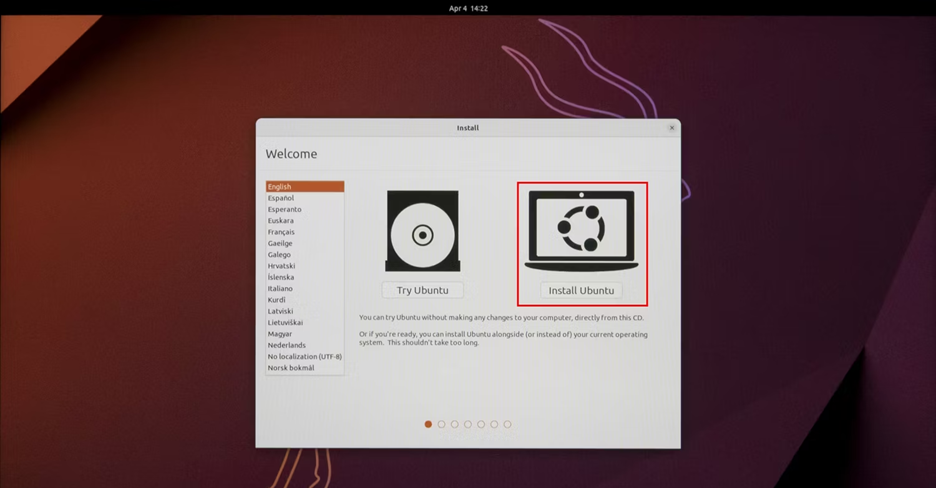
You will now be greeted with an Ubuntu installation client which will let you choose one of two options.
You can either try Ubuntu or you can install Ubuntu. Most Linux distributions let you try them out via the bootable USB without actually installing the operating system.
For the purposes of this guide, we will select the “Install Ubuntu” option.
Select and click the “Install Ubuntu” option on the installation client.
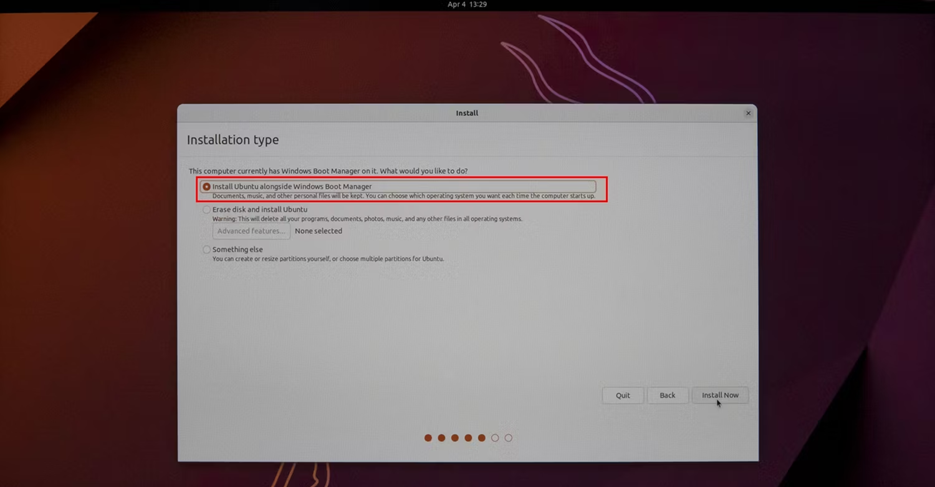
Follow along with the client and input your preferences as the client asks them until you get to the following screen:
You now select the first option that is highlighted in this image.
What this does is that it installs Ubuntu alongside Windows in the free unallocated space that you created in step 5 in the previous section.
Once this is done, you will be prompted to input some other preferential options which you will follow along with and eventually the installation process will commence.
After the installation is completed, you will be prompted to remove the USB bootable drive and restart your PC.
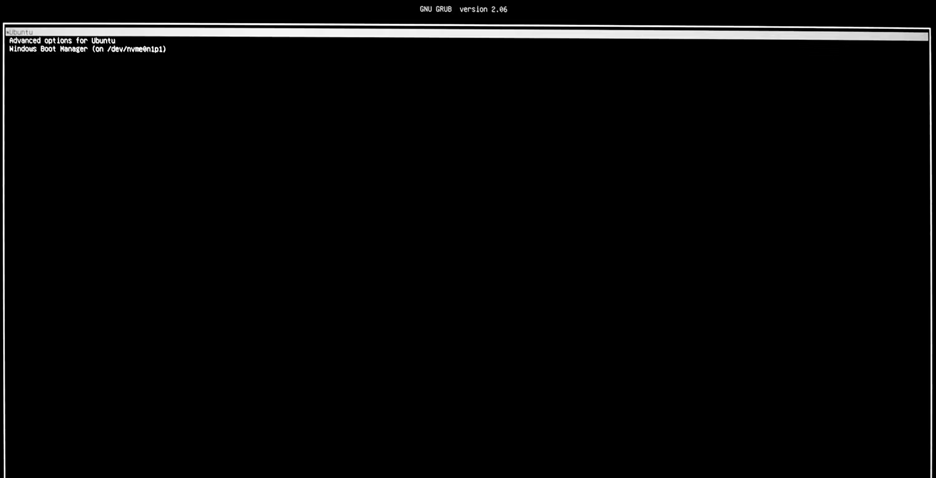
Once you have done that, you will see the following menu once the computer boots up:
This is the GRUB menu. When your computer turns on, it looks for an operating system on the secondary memory to boot into.
In the interest of keeping things simple, let’s just say that when the bootloader finds two available operating systems, it shows you the GRUB menu and prompts you to select an operating system to boot into.
You can now select either “Ubuntu” which is option 1 in the previous image or “Windows” which is option 3.
Selecting Ubuntu will boot the freshly installed Ubuntu operating system and selecting Windows will boot the existing Windows operating system.
The Grub menu will present itself every time you turn your device on after shutting it down. However, it will not be presented when you put your PC to sleep.
Conclusion
Installing two different operating systems on a single PC is not something that is unheard of. Infact, for most developers and programmers, this is one of the best solutions that enable them to have access to both the unfettered access to all the tools in the Linux shell and the perks of having a very user-friendly user interface and experience that are offered by the Windows OS.
With the exception of some steps, installing both of these operating systems alongside one another is an overall easy task if you correctly follow the steps that are mentioned in this guide. It is important to approach the dual booting with caution and ensure a proper planning and execution. Adequate partitioning, backup of important data, and a thorough understanding of the installation process are essential to avoid potential conflicts or data loss. It is also crucial to keep both the operating systems up-to-date and maintain the proper security practices to protect your system and data.

