In some situations, the user needs to use the specific node version for building and modifying the node.js application as per requirements. For this purpose, the user upgrades or downgrades the node version according to the application’s needs and specifications.
This guide will provide a complete procedure to downgrade the node version on Ubuntu.
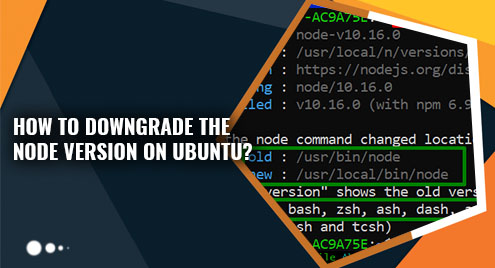
How to Downgrade Node Version on Ubuntu?
To downgrade the node version on Ubuntu, use the “n” command. This command installs, activates, and removes the node version immediately. Moreover, it can also manage the different node versions in the Linux operating systems easily.
This section carries out the practical implementation of “n” command to downgrade the node version on Ubuntu using the given steps of instructions.
Step 1: Check Node Version
Firstly, check out the already installed node version by specifying its name like “node” with the “version(v)” flag:
The installed node version is “v18.17.1”:

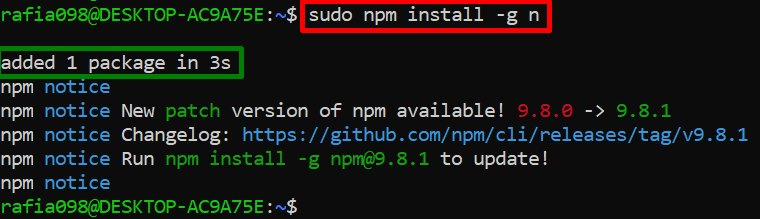
Step 2: Install “n” in Ubuntu
Next, execute the following installation command with the administrative privileges to install the “n” command globally in the Ubuntu system:
In the above command, the “npm” keyword refers to the “node package manager ” and the “sudo” denotes the administrator.
The following output confirms that the “n” package has been added to the current OS:
Step 3: Install Downgrade Node Version
Now, use the “n” command to install any older/downgrade node version in the Ubuntu operating system:
Here, the output shows that the specified node version has been installed successfully in Ubuntu. Now, the current Ubuntu OS maintains both older and newly installed node versions placed at the specified path:

In the above output, the purpose and use of the highlight “hash -r” command are discussed in the next step.
Step 4: Verify Downgraded Node.js Version
Before the verification of a newly installed node, it is recommended to start a new shell or reset the location of the node using the “hash” command along with the “-r” flag. It forgets all the remembered location from the hash table because the current shell will not show the newly installed node version until it clears the existing node location:
node -v //Checking Node version
After clearing the hash table of the current Ubuntu system, the version command shows the newly installed downgraded version of the node:
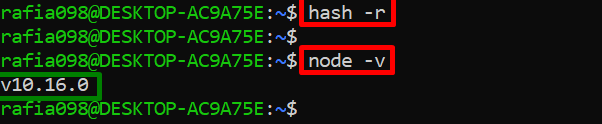
Hence it is verified that the node “v18.17.1” version has been downgraded to “v10.16.0”.
That’s all about downgrading the Node version on Ubuntu.
Conclusion
To downgrade the node version on Ubuntu, use the “n” command. It is not the built-in command so the user first needs to install it into the Ubuntu OS through the “npm” package manager and then utilize it for downgrading the node version. It switches the node version in the form of upgradation or downgradation. This guide has described the complete procedure to downgrade the node version on Ubuntu.