
DNF is an improved version of the YUM (Yellowdog Updater Modified) package manager and offers several enhancements such as faster dependency resolution, better error handling, and improved performance.
In this article, we will take a closer look at the DNF command and explore some common examples of using it to manage the packages on your Linux system.
Installing DNF
DNF is a package manager for RPM-based Linux distributions. Thus, if you’re using a Fedora-based distribution such as Fedora, CentOS, or RHEL, one of the chances is that DNF is already installed on your system.
However, if DNF is not installed on your system or you’re using a different Linux distribution, you can install DNF using the following steps:
Step 1: Access the Terminal Window
Open a terminal window on your Linux system.
Step 2: Run the Installation Command
Depending on your Linux distribution, use one of the following commands to install DNF:
For Fedora:
For CentOS and RHEL:
For other RPM-based distributions:
sudo yum install dnf
Note: The provided commands assume that you have administrative privileges on your Linux system. If you don’t, you may need to prefix the commands with “sudo” or ask your system administrator to install DNF.
Step 3: Verify the Installation
After the installation is complete, you can verify that DNF is installed by running the following command:
This utility should display the DNF version number that is installed on your system. The following is a sample output when you run the previous command:
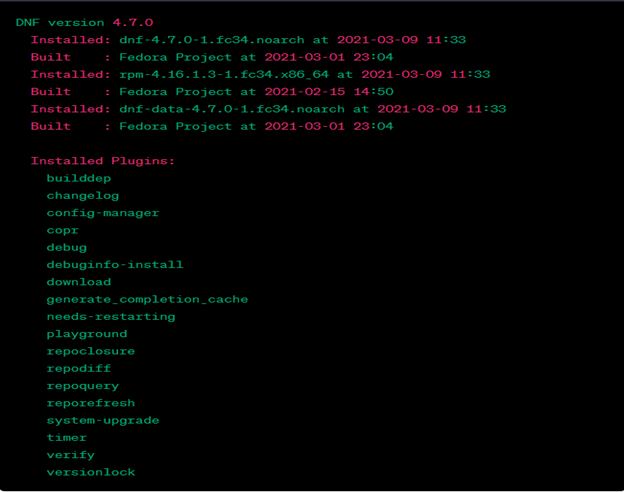
This output shows the version of DNF that is currently installed on the system, along with the information about when it was installed and built. It also lists the installed plugins for DNF.4
Using the previous steps, you should have the DNF installed in your system. You can now manage the software packages on your system easily and efficiently. In the next section, we’ll explore some common examples of how to use the DNF to manage the packages on your system.
Updating the Packages with DNF
Keeping your system updated with the latest packages is important for security and stability. With DNF, updating your system packages is a breeze. Here’s how to use DNF to update your system packages:
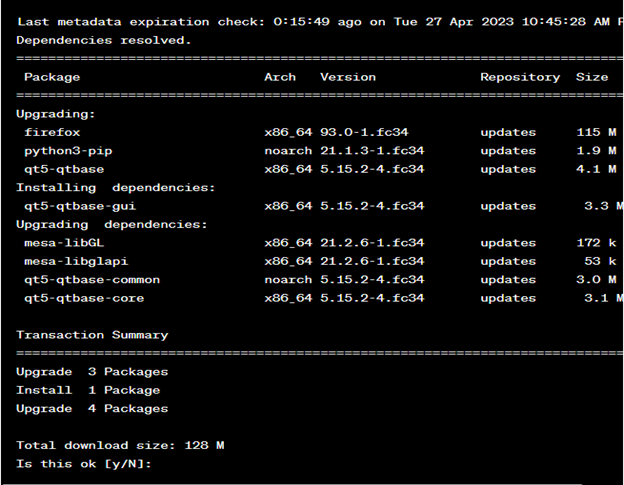
Run the following command from the terminal window of your device to update all packages on your system to the latest versions:
If a new version is available, the previous code snippet updates all installed packages to their latest versions including the kernel. The following is a sample output for the command:
If you want to update only a specific package, you can use the following command:
Replace <package-name> with the package name that you want to update.
After the update is complete, you can check the version of a specific package by running the following command:
Replace <package-name> with the package name that you want to check.
Installing the Packages with DNF
DNF makes searching for and installing new packages on your Linux system easy. Here’s how to use DNF to install a new package:
Step 1: Search for a Package
Run the following command on the terminal window of your machine to search for a package:
Replace <package-name> with the package name that you want to search for. This command displays a list of packages that match the search query.
Step 2: Install the Package
After you find the package that you want to install, use the following command to install it:
Replace <package-name> with the package name that you want to install. This command installs the package and any dependencies that it requires.
Step 3: Verify the Package Installation
After the installation is complete, you can verify that the package is installed by running the following command:
Replace <package-name> with the name of the package that you just installed. This command displays the version number of the package that is installed on your system.
Removing the Packages with DNF
If you no longer need a package on your Linux system, you can use DNF to remove it. Here’s how to use DNF to remove a package:
Step 1: List All Installed Packages
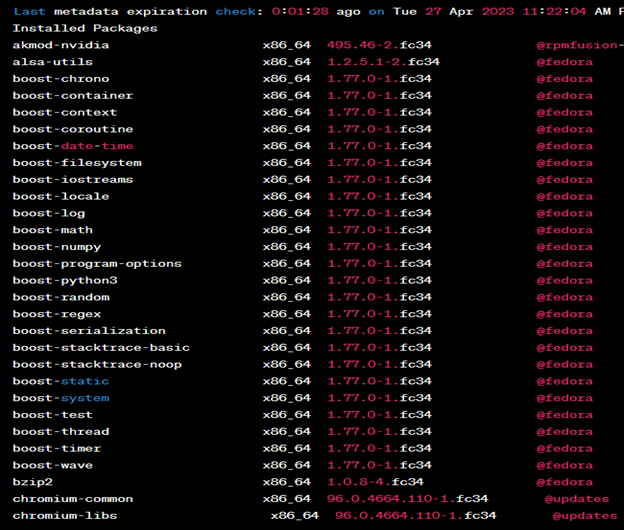
Use the following command to list all installed packages:
The previous utility displays a list of all packages that are currently installed on your system. The following is a sample output for the command:
Step 2: Specify the Package that You Want to Remove
Find the package that you want to remove from the list and use the following command to remove it:
Replace <package-name> with the package name that you want to remove. The command removes the package and any dependencies that are no longer needed.
Step 3: Verify the Removal
After the removal is complete, you can verify that the package is no longer installed by running the following command:
Replace <package-name> with the name of the package that you just removed. If the package is no longer installed, this command will not display anything.
Upgrading to a New Release with DNF
When a new version of your Linux distribution is released, you can use DNF to upgrade your system to the new release. Here’s how to use DNF to upgrade your system:
Step 1: Update All Packages
Use the following command to update all packages on your system to their latest versions:
This command updates all installed packages to their latest versions including any required packages for the new release.
Step 2: Install the Upgrade Plugin
After the update is complete, use the following command to install the DNF system upgrade plugin:
This plugin is required for the system upgrade process.
Step 3: Download and Prepare the Upgrade
Use the following command to download and prepare the upgrade:
Replace <new-release-version> with the version number of the new release that you want to upgrade to. This command downloads all required packages for the upgrade and prepare them for installation.
Step 4: Start the Upgrade Process
Use the following command to start the upgrade process:
The previous command reboots your system and begins the upgrade process. Follow the on-screen instructions to complete the upgrade.
Conclusion
DNF is a powerful package manager that makes installing, updating, and removing of packages on your Linux system easy. With its user-friendly command-line interface and rich set of features, DNF is an essential tool to manage the packages on your Linux system. In this tutorial, we covered several important aspects of using DNF including how to install the packages, update the packages, remove the packages, upgrade to a new release, and manage the repositories.