Ubuntu 22.04 has the GNOME disk utility as its default disk management tool. With the disk utility, you can use it to manage your hard drive, SD cards, and removable disks. On your Ubuntu 22.04, it’s ideal to know and manage your drives to check their health, partition them, and format them when necessary.
The disk utility is an easy tool to use. However, you still need some essential tips to maintain a smooth experience. We will cover all details of using the disk utility on Ubuntu 22.04.
Complete Guide on Using the Disk Utility on Ubuntu 22.04
The disk utility is available on Ubuntu 22.04. You can open it from your applications.
Once you open it, all the drives that you connected to your system will appear. You will see the main drive and the other removable media. In our case, we have the main drive and a removable USB drive.
When you want more information about any of the listed drives, click on it, and a menu with all its information will appear. Here, we click on the main drive and see the different partitions and their sizes. Still, we can note that we have the drive’s size, partition type, model, and other editing menu options appearing.
Moreover, you can click on a partition of the selected drive to gather its details. For instance, the previous example shows the details of partition 1. That way, you get the specifics of the partition’s disk usage.
If you click the gear icon next to the particular partition, another menu will appear which contains different options.
For instance, if we want to format the selected drive or partition, we click on the format partition option. From there, we could add the format details of the drive, such as the name to give it and the format that we want to use. Lastly, you can initiate the formatting process by clicking the “Next” button.
You can also edit the filesystem to change the label details by right-clicking on the particular drive. Then, you click on the gear icon on its left, and choose the corresponding option.
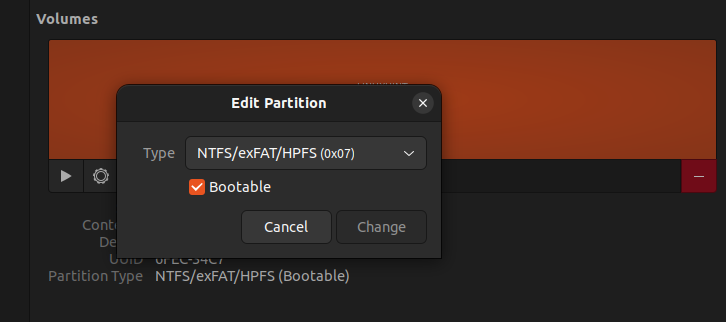
Suppose you want to edit a partition to change its partition type. Right-click on it and select the option to edit the partition. You can then tap the down arrow and select which partition type you want to set for the drive.
With disks, you can test if a given partition can increase its performance using different filesystems. This feature is available under the “Benchmark” option. Click on the target partition and tap the gear icon on the left. Click the option to benchmark the partition, and a window with various details will appear. Click on the “Start Benchmark” and add the benchmark details.
Once you initiate the benchmark for the given partition, you will get an output which details the performance results and information.
You can edit the different file systems’ mount options such as selecting whether the drive should mount at bootup or setting other options. Select a given partition and click the gear icon to bring up its menu options. You can then click on the “Edit Mount Options”.
A window with different options that you can edit for the particular partition will appear.
Creating a Partition with Disks
When you have a drive that you want to partition, the first step is to format it. Select the drive and click the gear icon. Tap the option for “Format Disk”. Then, select your preferences and click the “Format” button.
A warning prompt appears about formatting the disk. Click on the “Format” button to proceed with the formatting.
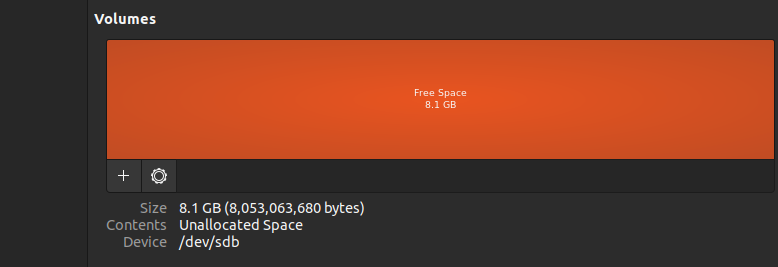
Once the formatting is completed, you have the drive which contains the unallocated space.
Click on the plus icon to create a new partition. On the window that appears, select the partition size for the new partition. Click “Next” to create your application.
The last step is to format the newly created partition. Give the partition a label, select the partition type, and click on “Next” at the top to start the formatting.
You now have your partition created successfully.
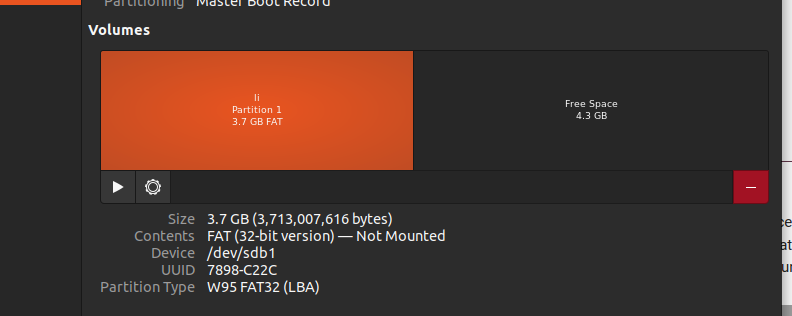
Suppose you decide to delete the partition. Click on it to select it. Then, click the red-colored minus icon on the right.
Confirm your action. Click the “Delete” button to remove the partition.
That’s how to use the disk utility on Ubuntu 22.04.
Conclusion
Ubuntu 22.04 has the disk utility installed by default. You can utilize the utility to manage your partitions including checking the drive information, formatting it, benchmarking, editing the partition, editing the mount options, creating and deleting partitions, etc. This post detailed most of the actions that you can perform using the disk utility on Ubuntu 22.04.


