The following article will overview the two methods to delete files in PowerShell.
Discover PowerShell to Delete Files with Remove-Item and WMI
These methods will be demonstrated in detail:
Method 1: Use the “Remove-Item” Cmdlet in PowerShell to Delete Files
The “Remove-Item” cmdlet deletes the items from a specified location in PowerShell. It is a go-to approach when deleting files in PowerShell. This cmdlet can delete single or multiple files.
The demonstrations explaining the “Remove-Item” cmdlet are provided below.
Example 1: Use the “Remove-Item” Cmdlet to Delete a Single File
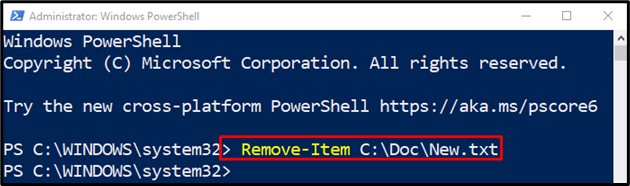
This instance will delete a single text file with the help of a “Remove-Item” cmdlet:
In accordance with the above code:
- First, define the “Remove-item” cmdlet and then specify a file path to be deleted:
Example 2: Use the “Remove-Item” Cmdlet to Delete All the Files with Extensions
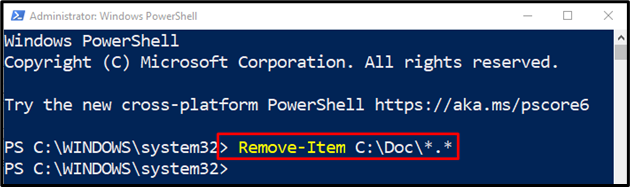
In this illustration, all the files with having any extension will be deleted:
According to the above code:
- First, write the “Remove-Item” cmdlet and then specify a directory path in which files are located.
- At the end of the directory address, add a dot between two wild characters to select all the files with extensions:
Example 3: Use the “Remove-Item” Cmdlet to Delete All the Files Including the Hidden Files
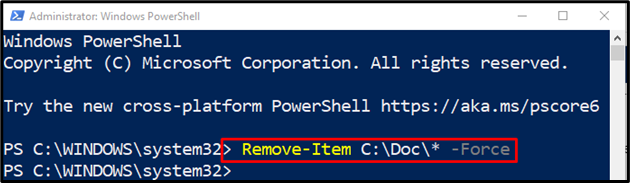
In this demonstration, all the files including hidden ones will be deleted:
According to the above code:
- First, specify a “Remove-Item” cmdlet, then define the directory address followed by a wild character after a slash, and add a “-Force” parameter.
- The “-Force” parameter will help to delete the hidden files:
Method 2: Use the WMI Method to Delete Files in PowerShell
The “WMI” is another method that can be used to delete files in PowerShell. It has two classes that are utilized to delete files: “Get-WmiObject” and “Get-CimInstance”.
Example 1: Use the “Get-WmiObject” Cmdlet of WMI Class to Delete a File
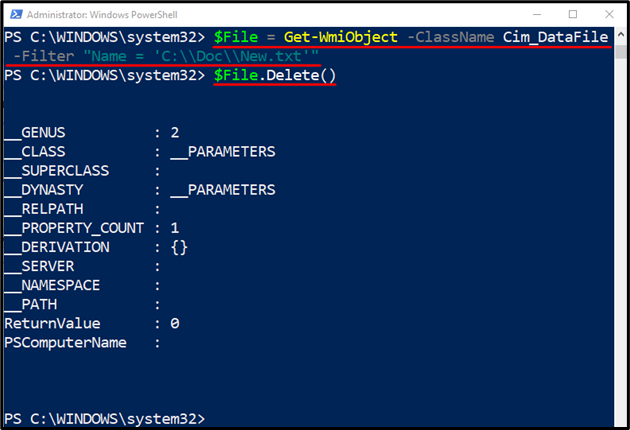
In this example, a file will be deleted using “Get-WmiObject” cmdlet:
$File.Delete()
According to the above-mentioned code:
- First, initialize a variable “$File”, invoke the “Get-WmiObject” cmdlet, along with a “-ClassName” parameter, and assign it a “Cim_DataFile” class.
- After that, specify a “-Filter” parameter and assign a file path to be deleted.
- Lastly, concatenate the “$File” variable with the “Delete()” method:
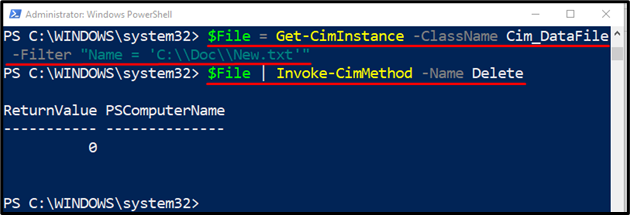
Example 2: Use the “Get-CimInstance” Cmdlet of WMI Class to Delete a File
This instance will delete a file using a “Get-CimInstance” cmdlet:
$File | Invoke-CimMethod -Name Delete
In accordance with above code:
- First, initialize a variable “$File”, then assign it a “Get-CimInstance” cmdlet, along with a “-ClassName” parameter and associate it with the “Cim_DataFile” class.
- After that, specify a “-Filter” parameter and assign a file path to be deleted.
- Then, define a “$File” variable, then add pipeline “|” to transfer the output of the previous command to the next command.
- After that, add an “Invoke-CimMethod” cmdlet, then specify a name parameter and assign the value “Delete” to it:
That was all about deleting files in PowerShell.
Conclusion
To delete files in PowerShell the “Remove-Item” cmdlet is used. To do so, first, specify the “Remove-Item” cmdlet and then add the file path to be deleted. However, in order to delete the hidden files also just add the “-Force” parameter after the file path address. This article has covered a guide to delete files in PowerShell.