Below you’ll find instructions to turn off the screen lock from Gnome settings and the command line using the gsettings cli. You’ll also find instructions to disable the screen lock at boot, allowing automatic login.
How to Disable / Turn Off the automatic Lock Screen in Ubuntu
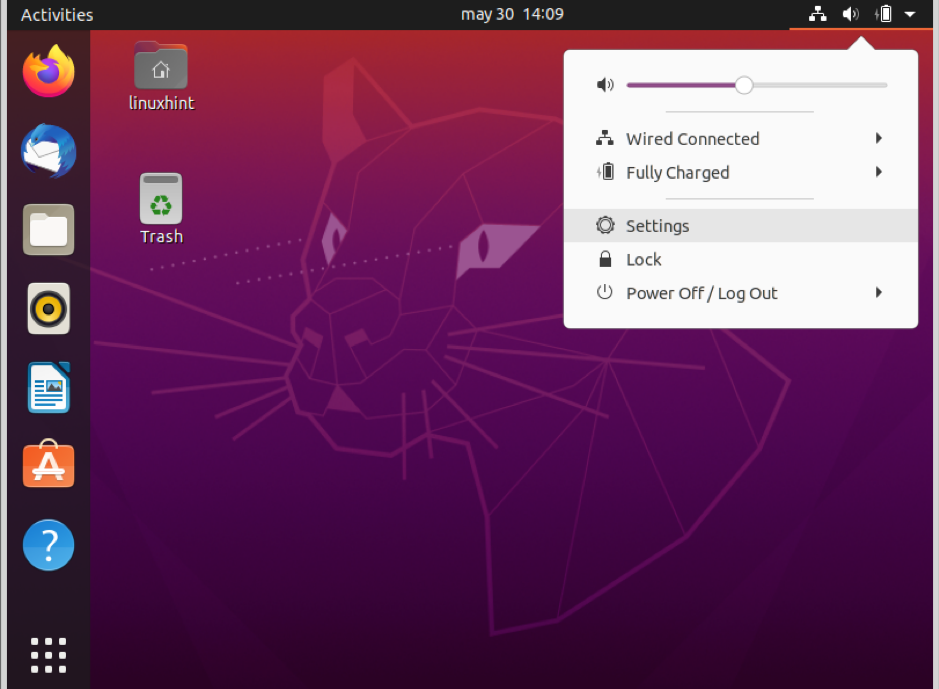
To turn off the automatic screen lock from Gnome, first, click on the top right corner and press Settings, as shown in the screenshot below.
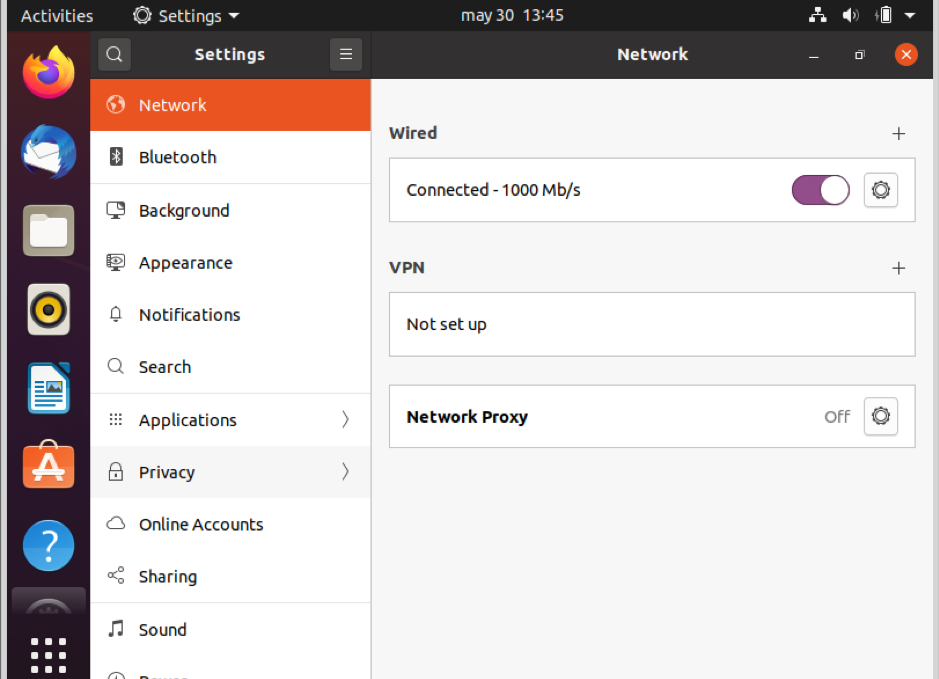
On the left menu, click on Privacy.
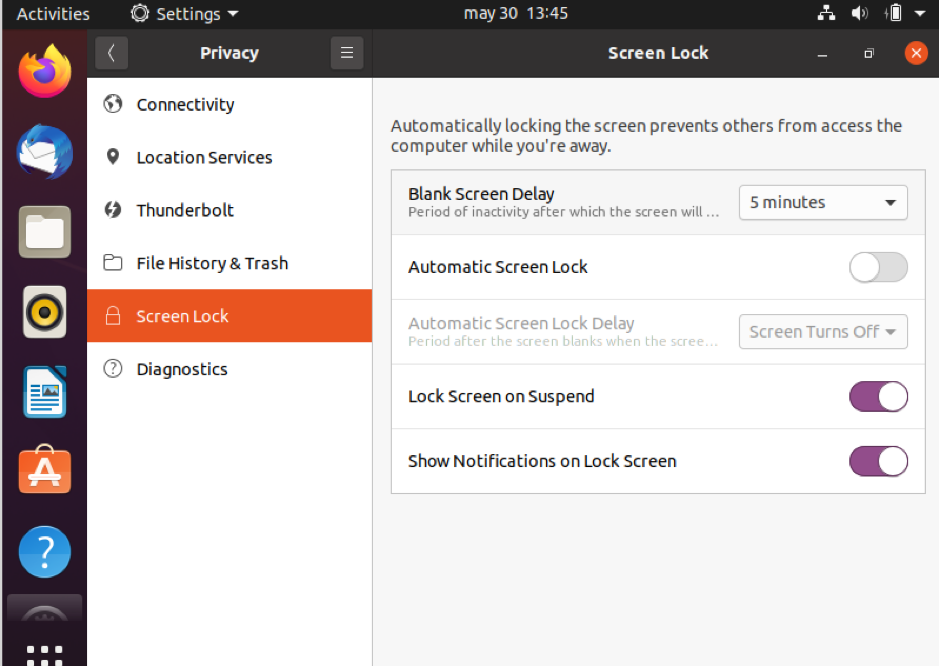
Press ScreenLock in the left menu and disable the option Automatic Screen Lock.
After disabling Automatic Screen Lock, your system won’t be locked again. From those settings, you can also configure the Blank Screen Delay timing. If you enable the Screen Lock, you can define the timing in the option below Automatic Screen Lock Delay. This is useful if, instead of disabling the screen lock, you want to delay it. You also can select Never, and the screen lock will not show up.
That’s all; the following video shows the whole sequence to disable the screen lock in Ubuntu Linux.
Disabling the screen lock in ubuntu using the command line
You can also disable the screen lock from the command line using gsettings, a command-line interface to manage Gnome settings.
From the command line run:
If you want to enable the screen lock back from the command line. execute the following command:
Now the screen lock is enabled again, to disable it repeat the operation is replacing true with false.
The gsettings command-line interface used in this tutorial allows you to set or monitor changes related to Gnome settings and applications; you can read additional information on it http://manpages.ubuntu.com/manpages/trusty/man1/gsettings.1.html.
Disabling the screen lock at boot
You can also disable the startup lock screen from Gnome settings.
To do it, right-click on the right corner and press Settings like in the previous steps.
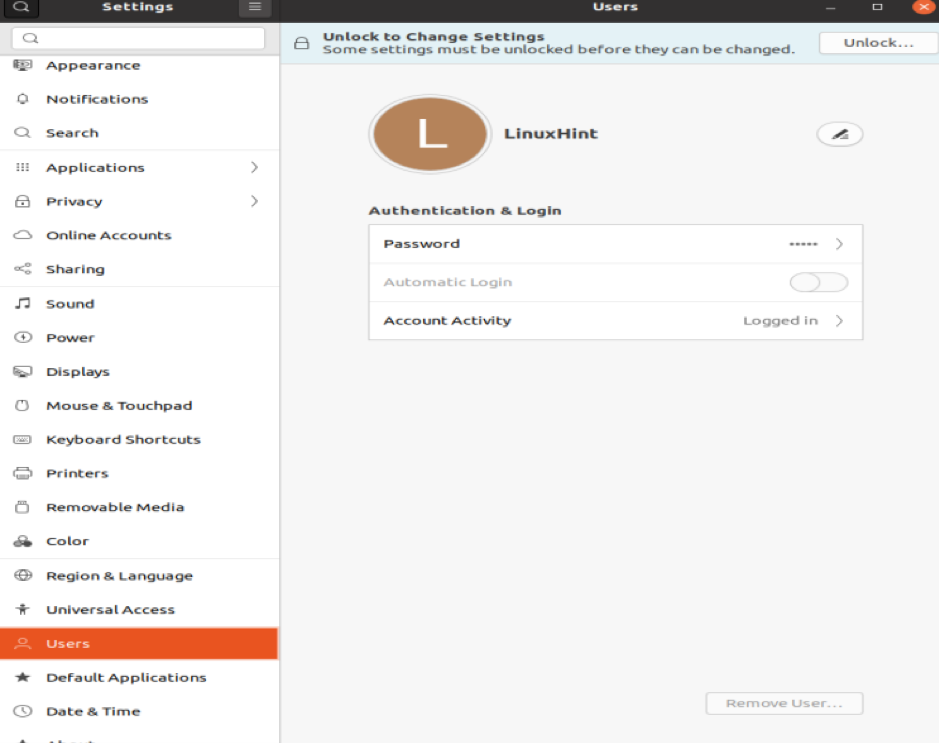
Scroll down the left menu and select Users, and press the button Unlock to allow changes.
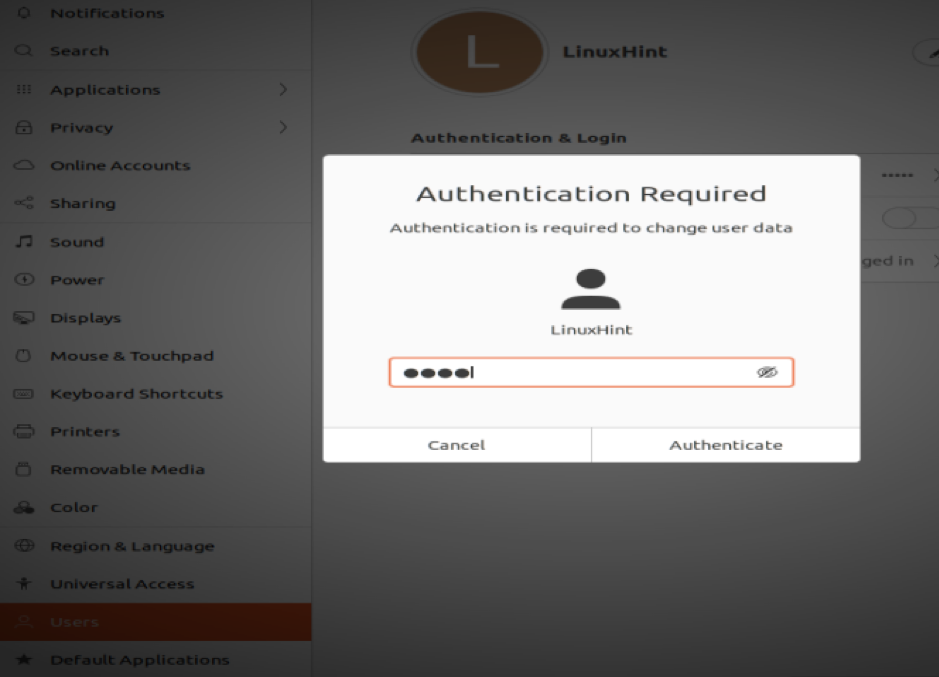
Type your password and authenticate.
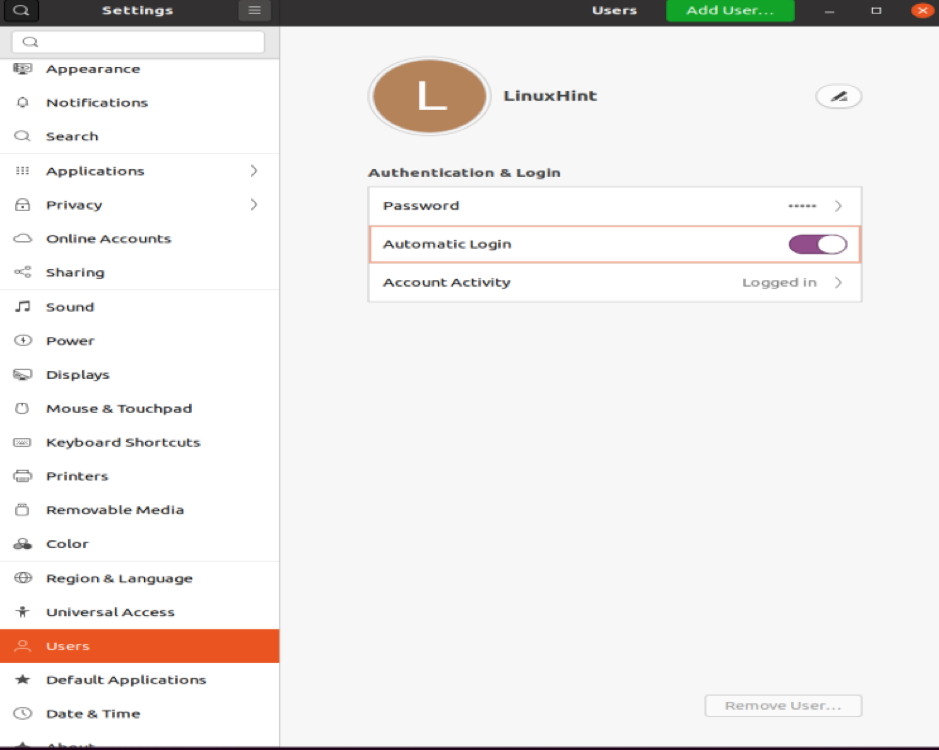
Enable the option Automatic Login, as shown in the image below.
Conclusion
The tutorial above explains how to disable the screen lock in 3 clicks or a single command showing any user-level can do this simple 5 seconds process.
The screen lock feature provides security to users who share their physical space with more people, granting privacy when they aren’t present. Yet many users who don’t share their physical space or don’t care about privacy from family members don’t like this feature enabled.
The Ubuntu lock screen also allows users to get reports on what happened when they were away from the computer. It also provides information on date and time, battery and network status. From this screen, users can also turn off, suspend a device or switch accounts. If the lock screen is enabled to unlock your computer, just click with your mouse or press Esc/Enter to show the login screen where you need to fill in your username and password to access the system.
If instead of moving your mouse or pressing a key to show the login screen, you start typing your password, the login screen will process it. This screen may also show notifications of applications, such as email reception. You can also disable these notifications from the Gnome settings menu.
It is important to clarify that the screen lock provides a light security mechanism, if someone has physical access to your device, even with a screen lock, he will be able to gather the information from the disk or to reset the root password, scenarios you can prevent by encrypting your data, you can find instructions to encrypt hard disks and partitions here.
I hope this tutorial was useful. Keep following Linux Hint for more Linux tips and tutorials.

