Using ‘cd’ command
‘cd’ command is used in both Bash and Zsh shell to change the current directory. The feature by which the directories are recursively searched to find out files and folders is called recursive path expansion which is supported by zsh only. The use of ‘cd’ command in bash and zsh shell is shown here.
Bash
You have to type the full path of the directory in bash to change the directory and the recursive path expansion is not supported by bash.
Zsh
The directory and file can be searched easily in this shell. If you type cd + space + c + tab in zsh shell, then it will search any file or folder name start with ‘c’ and it will show the name of file or folder that is found first.
For example, if the code folder is found and it will display. If you again typed ‘/p’ then it will show the files and folder name starts with ‘p’.
Spelling Correction
The spell checker is a very useful feature for any shell. The users can easily correct the typing error by this feature. This feature is supported by both Bash and Zsh. But spelling correction can be done more efficiently in Zsh shell. The use of this feature is shown for both shells below.
Bash
Suppose, you want to go to the directory ‘Music’ but you have typed ‘Mugic’ by mistake, then bash shell will not detect the spelling error by default and it will show an error message: “No such file or directory”.
You have to enable the spell checker to correct this type of problem. Open ~/.bashrc file in any editor for adding the line to enable spell checker. Here, the nano editor is used to edit the file.
Add the following line at the end of the file, save and close the file.
Now, Run the following command to confirm the change permanently.
If you run the above ‘cd’ command with spelling error from the terminal, then it will automatically correct the folder name.
Zsh
The spelling checker is not enabled by default in zsh shell also. So, if you run the ‘echo’ command like the following command with spelling error then it will show the error message.
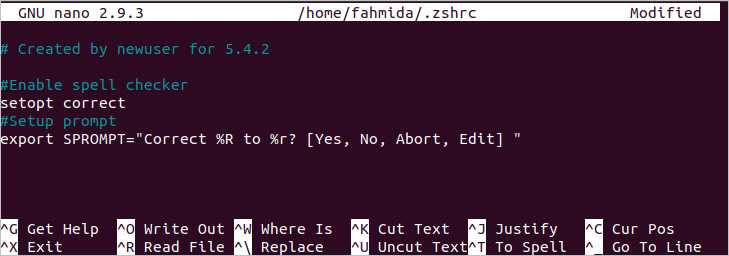
Open ~/.zshrc file in any editor and add the following lines at the end of the file. The first line will enable the spell checker in Zsh. The default option values of the spell checker are, [nyae] that indicates not, yes, abort and edit. The second line will change the default values for making the options more understandable for the user. Here, nano editor is used to editing the file.
setopt correct
export SPROMPT="Correct %R to %r? [Yes, No, Abort, Edit] "
Save and exit the file and run the following command to update the change.
Again run the previous command and check the output. Now, the user will get the options to correct the output. If you type “y” then the spelling will be corrected automatically.
If you want to make the output more effective by using colors then run the following command from zsh shell to enable the color.
After that, add the following line in ~/.zshrc file like before.
[Yes, No, Abort, Edit] "
Now, run any command with spelling error and check the output. Here, the error word will be displayed by red color and the correct word will be displayed by green color.
Using themes
The looks of the shell prompt can be changed by using different themes and plugins. Both bash and zsh shells have many types themes for changing the look of the shell. How theme can be used in bash and zsh shell is shown in the next part of this article.
Bash
You have to install git to install any bash theme. Run the following command to install git package.
After installing the git, run the following command to make a clone of Bash-it template.
Run the following command to install Bash-it template after cloning it. Press ‘y’ when it will ask to keep the backup of ~/.bash_profile or ~/.bashrc and append bash-it template at the end of the file.
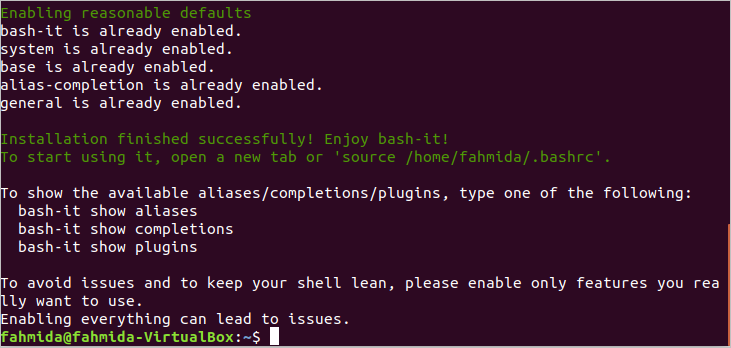
The following output will appear after completing the installation process.
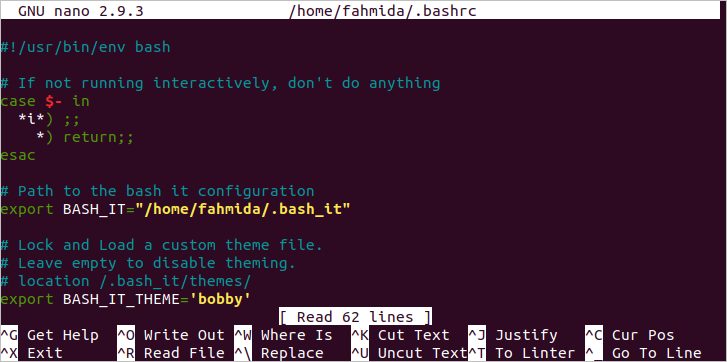
Now, if you open the ~/.bashrc file by using any editor the file will contain the following content. ‘bobby’ is set as default theme for bash-it template.
Run the following command to confirm the update of the shell.
The following prompt will appear in the terminal after installing the template properly. Now, close the terminal. You will see the same bash prompt whenever you open the terminal.
Many themes are available for bash-it template those display bash prompt in different ways. One of them is ‘envy’ theme. If you want to set this theme then open ~/.bashrc file by using any editor and change the ‘BASH_IT_THEME’ value to ‘envy’.
Again, run the ‘source’ command to confirm the update permanently. The following output will appear after setting the ‘envy’ theme.
Zsh
Like bash, zsh shell has many themes. One of the zsh themes is oh-my-zsh. Run the following command to install this theme for zsh shell.
https://raw.github.com/robbyrussell/oh-my-zsh/master/tools/install.sh)"
After installing the theme, press ‘y’ to make the default shell to zsh.
It will ask for the root password to complete the installation process. The following output will appear after completing the installation process.
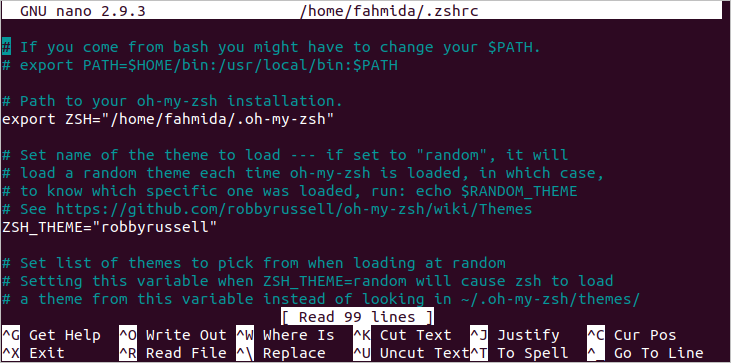
Now, if you open the ~/.zshrc file then you will see the entries for oh-my-zsh template. ‘robbyrussell’ is set as default theme for the template.
To keep the change permanently, you have to run the ‘source’ command.
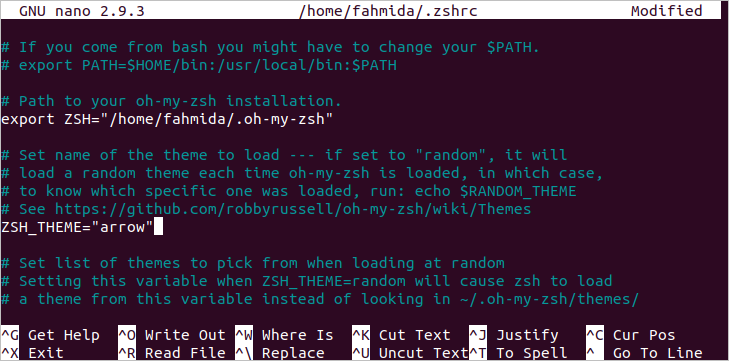
If you want to change the theme to ‘arrow’ then open ~/.zshrc file in any editor and change the value of ‘ZSH_THEME’ to ‘arrow’.
You have to run the ‘source’ command again to update the change permanently for zsh shell. The following arrow symbol will appear after setting this theme.
If you close the terminal and again open the zsh shell then the following output will appear.
Using Wildcard Expansion
Wildcard expansion can be used in bash in different ways without any setting. But wildcard expansion is not enabled in zsh shell by default. How wildcard expansion can be used in bash and zsh is shown in this part of this article.
Bash
Suppose, you have to find out all files with the extension ‘log’ of the current location using ‘echo’ command. Here, the value, ‘*.log’ is assigned to the variable, files that are used in ‘echo’ command to display the list of all log files.
$ files="*.log"
$ echo $files
Zsh
If you run the above commands in zsh shell then the value of $files will print instead of the log file list because wildcard expansion is not enabled by default for zsh shell.
% file="*.log"
% echo $files
Run the following command to enable wildcard expansion for zsh.
Now, if you run the previous commands then the list of log files will display.
Conclusion
Bash and Zsh are very useful shells for Linux users. Both shells have some useful features. The user can select the shell based on the task required. Some important differences between these two shells are described in this article using proper examples. Hope, the differences between these two shells will be cleared for the readers after reading this article


