There are two versions of DHCP: v1 and v2. Version 1 only provided IP addresses to hosts and version 2, which is being used in Microsoft Windows 2000 & 2003 Server operating system offers more features. Although both work on the same concept, it has different implementations of vendor specific options (VSOPs), user classes, lease periods etc.
The biggest advantage to use DHCP over static addressing is ease-of-maintenance when your network grows or shrinks. You also have the ability to centrally manage your IP addresses which is an added benefit over static addressing. A DHCP database can be located on a DCE NetServer running Windows 2000/2003 Server or locate it on an individual computer using Dynamic DNS service such as ddclient (a Perl based solution).
How Does DHCP Work?
A DHCP server listens on the network for any DHCP client (a host computer) to request an address and services. Once a client has requested an IP address, configuration parameters and scope information, the DHCP server assigns it an available IP address from a pool of addresses in the scope given by an administrator.
When a new or existing PC connects to your network, it will broadcast an “DHCP Discover” packet onto your LAN or subnet looking for a DHCP server. When this packet makes contact with your network’s router & then passes through to get into your LAN segment where it is received by one or more DHCP servers configured on that subnet/LAN segment, then each server can see if they are allowed to respond back with their offer of IP address to the client.
A DHCP server that receives a “DHCP Discover” broadcast packet from a new or existing PC on its subnet/LAN segment must provide an offer of IP addresses for that subnet. The offer is contained in a “DHCP Offer” packet and contains details such as, scope range, lease duration, and option fields along with other configuration options. This response will also contain the TCP/IP configuration parameters for each host including: the IP address, subnet mask, default gateway (if any), lease duration, DNS servers (if any), domain name, etc.
The client then sends a DHCPREQUEST packet back to the server as a positive acknowledgment of the IP address offer. This packet will also contain its hardware address (MAC) along with other configuration parameters such as, DNS servers, domain name, etc.
When the DHCP server receives this request, it marks that client’s address pool in its database for “assigned” and replies with an acknowledgement (DHCPACK) packet which includes all of the above information plus any specific options configured on that server. The client then configures its network interface using this information. It will store lease duration and administrator specified options in nonvolatile RAM so they are available next time when system restarts and used existing clients don’t have to query DHCP server each time they restart.
To one or more hosts with a unique, local hardware address all the time. Not to one or more hosts with different global IP addresses in each boot-up. This means that static address management of individual systems is not easily automated by any DHCP client utilities: you need to write your own software to do it (in shell or Perl script). Most of them use Berkeley NetUtils tools which can be found here: https://netutils.com or Microsoft products such as netsh command and netshell utility to manage static addressing.
This guide will show you how to set up a DHCP server using ISC’s DHCP server utility package: DHCPD. This guide is targeted for Debian based servers running the following OSes: Debian 6, 7, 8, 9,10.
Prerequisites
A static IP address is required to enable you to administer (add, delete, modify) your DHCP database (the DHCPD configuration file and its database file). Using one of your current PC’s IP addresses would work fine but it may cause you some issues down the road when assigning IP addresses to client computers on your network since you will not be able to reach that machine from the network to administer the DHCP server remotely without getting a new PC on your network or shutting down your PC for a while.
This guide assumes that you are at least familiar with Linux OS command line interface (CLI). If you are not familiar with Linux CLI, please get familiar with it or ask a friend for help to configure your DHCP server manually.
Since this guide is aimed towards beginners, we will assume that you do not have any firewall enabled on your system yet, so you can reach the internet from within the LAN. This is required in order to download and install required packages for your server.
Installing DHCP Server
First, we have to make sure your package tree has the latest software versions. To do this, type in the below command in your terminal:
Sample output:
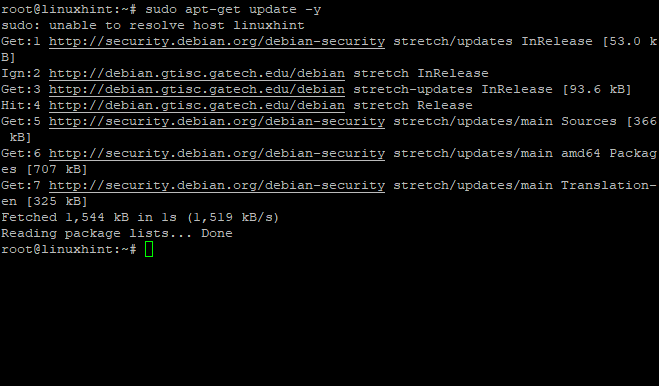
Updating Your System
apt-get update command will update the package information database to ensure that you are using up-to-date software.
-y flag will automatically confirm any prompts/confirmations of recommended actions such as to continue with any available updates.
Now, your system is up to date. Let’s install the DHCP server utility on your system by using the following command:
This command will download and install the DHCP server utility package from your Debian repositories. This process may take a few minutes (depending on your system performance) so just be patient until it completes its installation task successfully.
Sample output:
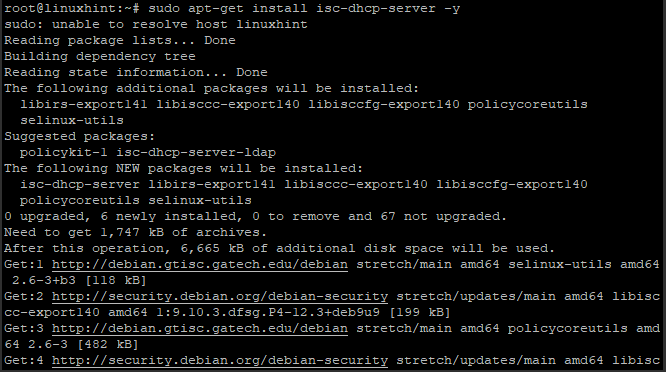
Installing DHCP Server
Configuring DHCP Server
After the installation is completed successfully, we’ll configure the DHCP server.
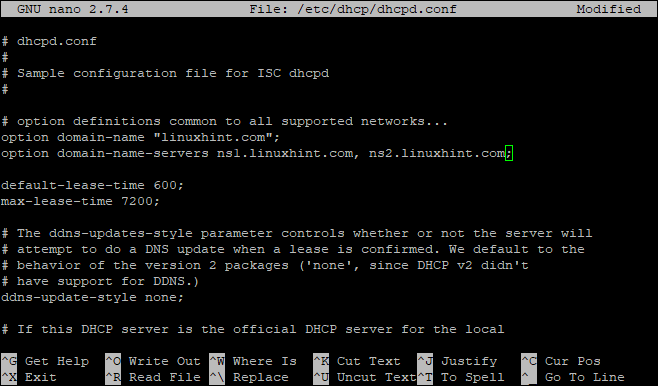
The DHCP main configuration file dhcpd.conf is located at /etc/dhcp/ directory. It’s a good idea to back up the original file before making any modifications. We will copy it with new name, edit the file and then rename it back to original filename after we’re done editing.
Now, open the file for edit using an editor of your choice:
dhcpd.conf file excerpt:

In order to configure the DHCP parameters, you will need to understand what they are:
All parameter lines end with a semicolon (;) to let DHCPD know that this line is complete. There are many DHCP parameter lines in the sample configuration file.
Some parameters might have the same name but they are different and may have different functions. Some parameters are 3-byte (XXX) hexadecimal numbers while some are normal characters.
Some parameters might have more than just one value. When this is the case, there must be a semicolon between values. Some parameters have only one value with no semicolon as in: interface “eth0”
Some common configuration options that you may like to configure for your DHCP server are: (make the changes on a new line)
option domain-name “example.com”; – This assigns a domain name to your network Example.com
option domain-name-servers ns1.example.com; – This tells DHCP client computers which DNS server(s) to use when performing DNS queries
default-lease-time 600; – This tells client computers to release the IP address that they have been given on a system restart or shutdown.
max-lease-time 7200; – This will tell dhcpd.conf file and its database file which is specified using dbfilename option to cycle through all of the available IP addresses in your DHCP pool every 2 hours (or 7,200 seconds).
ping -timeout 0; – A ping will be sent to test the address every 60 seconds. If this times-out, it will not be used.
option routers (router IP address); – This is the gateway IP address for your internal network
option subnet-mask 255.255.255.0; – Defines the size of your subnet /24 (subnetwork in CIDR notation) values to be used on the network. Your mask must match up with what has been defined in your DHCP pool range values/start value and end value.
Setting Interfaces to Listen
First, let’s identify the interfaces in our system to which we want DHCPD to listen on. In this example, eth0 is connected to the Internet connection and eth1 is connected to our LAN. We will change the configuration so that DHCPD listens on both interfaces.
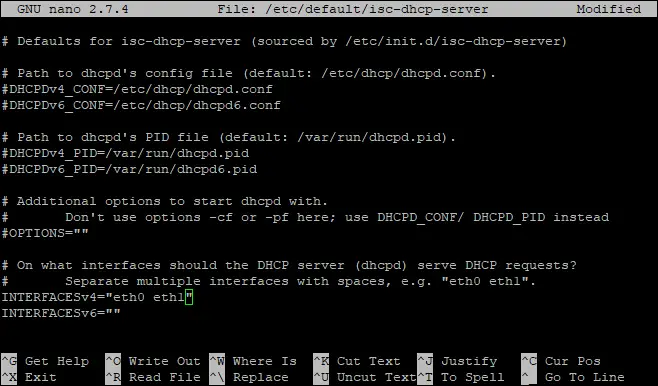
The command above open and edit the file /etc/default/isc-dhcp-server.
Search for “INTERFACES =” on the page and uncomment it by deleting the “#” in front of it. It should look like this: INTERFACES=”eth0 eth1″
Then, just replace eth0 with your internet interface device (it can be anything you want) so that it will look like this: INTERFACES=”eth1″
Save the file by pressing Ctrl+X, then press Y to confirm saving, and then press Enter.
Finally, after you’ve made all the changes, save them and then restart DHCP to apply any new configurations accordingly. If everything went well, service status should show a running DHCPD process as green with a number listed in brackets.
sudo systemctl status isc-dhcp-server

Global Configuration
Please note that all the options used here are just examples to describe the functions of various lines and they may not work on other Linux distributions. It is always a good idea to read through your dhcpd.conf file regularly and understand what each configuration line does. You may even need some extra configurations based on your network environment so please make sure that you are familiar with these commands before applying it to your system.
You may want to set some global configuration options such as the domain-name, domain-name-servers, and default lease time here.
IP Subnet Declaration
We want our DHCP server to be authoritative for all the IP subnets in our network and this is where we define what these subnets are. It consists of 4 space-separated values: the netmask, the IPs of the two routers on either side of it (the gateway), and then finally your local LAN segment’s starting and ending addresses.

Setup Host with Fixed IP
In some cases, you may want to restrict IP address assignment from specific clients using mac address filtering or even a custom client ID. For example, a system with MAC address “00:11:1A:2B:3C:4D”, will get ip 192.166.88.99.

Conclusion
What this guide shows you here is a basic configuration that will get you started. For detailed information, please see the wiki pages of isc-dhcp-server (https://wiki.debian.org/DHCP_Server).