There could be several possibilities to customize the desktop; research shows that children are attracted to the colorful themes. If your children are not interested in studies, let’s make the colorful customization that attracts and helps them to concentrate on studies since everything nowadays happens on a system.
If you’re a game lover, you can apply gaming themes, change the icons according to your favorite game, and customize the desktop background.
Girls usually love to set desktops with natural wallpapers and apply beautiful themes and icons that look elegant. Thus, everyone has their own choices and preferences when it comes to customization.
But the most common reason among all the users is that they get bored while seeing the same look every time.
A good desktop environment consists of attractive icons and a user-friendly interface that uses eye-catching colors. A successful person understands all circumstances while designing the system.
The Linux system has introduced several desktop environments for the Ubuntu operating system. All of them are well customized and keep the user’s preferences in mind. List of most of the well-liked and amazing Ubuntu desktop environments are:
- Gnome Desktop
- KDE Plasma Desktop
- Cinnamon Desktop
- LXQT Desktop
- Gnome Flashback Desktop
- Xfce Desktop
- Pantheon Desktop
- Mate Desktop
- Budgie Desktop
- Deepin DDE
And many others.
Gnome is the default desktop environment when you move from any other Operating system to Ubuntu. But Linux doesn’t stick its user to the single choice; if you don’t like the Gnome, then don’t worry, change it whenever you want.
Gnome is an attractive desktop environment; it’s all about the first look. Sometimes, you get prisoned by beautiful looks, and the appearance of the Gnome desktop is one of them. Every time Ubuntu releases its latest version, Gnome also comes with advanced and enhanced features related to appearance.
Gnome desktop has an applications grid where each application is represented by icons that precisely tell the user what that specific icon is about. Furthermore, they are arranged as fixed 24 items, and the number of icons, including rows, columns, and margins, depends on the size of the screen. It offers the user multiple theme options like a dark theme, light theme, and standard set by default.
Gnome Tweak Tool:
An application manager for Gnome desktop helps customize and configure the Ubuntu system, named “Gnome Tweak Tool.” It is developed particularly to help users tweak elements of the Gnome desktop environment that can be installed from the Ubuntu repository directly. Gnome tweak tool provides various options to install and switch Gnome shell, icons, cursor, themes, wallpapers, and menu buttons; hence we can change anything using this tool.
Let’s check how we can get Gnome Tweak Tool on Ubuntu:
(This is for Ubuntu 20.04, as I am currently working on it)
Installing Gnome Tweak Tool on Ubuntu 20.04:
It is always recommended to upgrade the system before installing any utilities or software packages. By this, your system will get the smooth installation of all-new packages, and also it upgrades the installed packages to the latest versions.
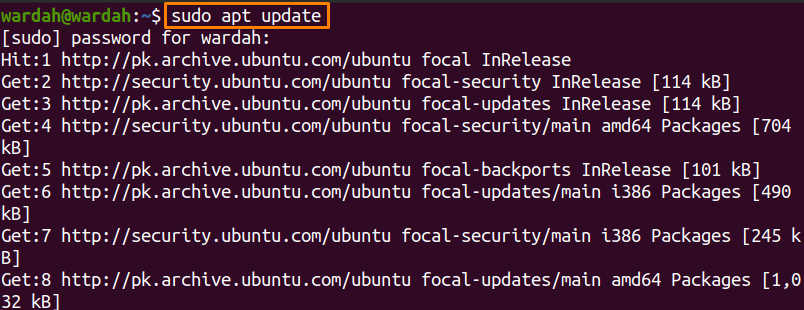
So, to upgrade all the packages, open the terminal by right-clicking anywhere on the Ubuntu desktop, and in the context menu, you will see the “Open the Terminal” option. Hit this option, and the terminal will display on the screen. There’s also a shortcut key to open this “Ctrl+Alt+T”:
So, open it and run the following command to let the system update all the packages:
Once done, check if the universal repositories are enabled in the system or not. You may wonder why we need to install or enable “Universal Repositories.” When you install universal repositories via the apt package management tool, you get access to many software packages, and they can be installed easily.
To check if it is enabled, type:

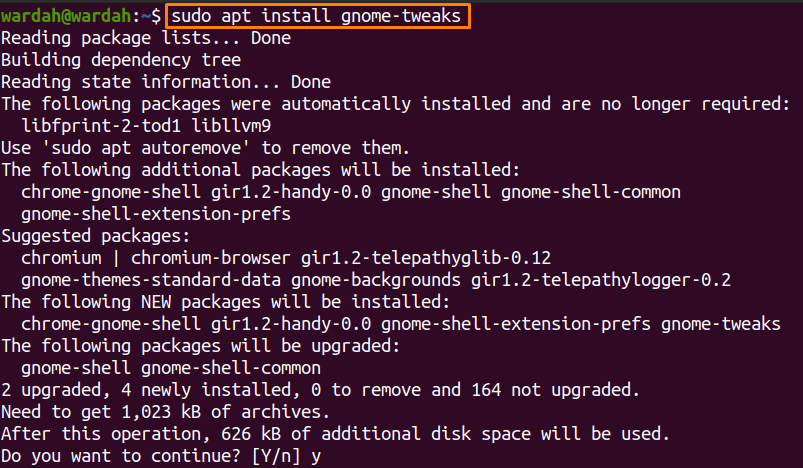
Now, execute the mentioned command to install “Gnome Tweak Tool” on the Ubuntu system:
When it is installed, type in terminal to open it:

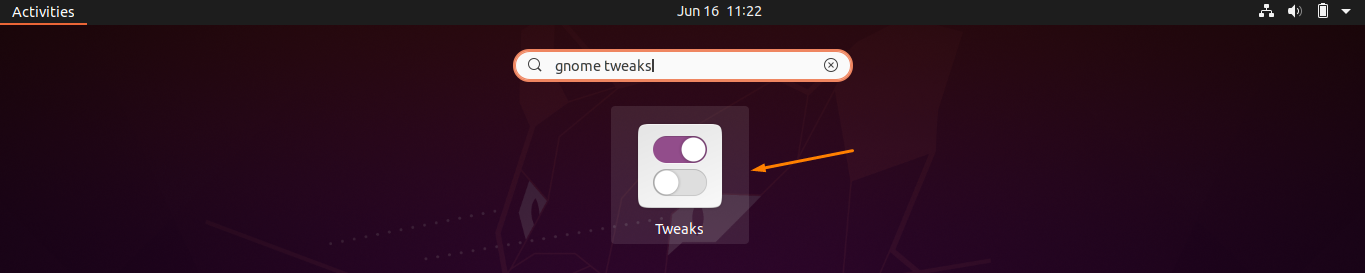
Or you can also get it from the applications manager by typing “gnome tweaks” in the search box:
The “Gnome Tweak Tool” screen will look like this:
Gnome Tweak Tool Features:
With the help of Gnome tweak utility, one could change the complete look of the Ubuntu desktop and may take benefits from this to explore. Some of the prominent features of this tool are; enabling or disabling animation, changing the background, hide and unhide the icons on the desktop; similarly, we can enable or disable Ubuntu extensions.
Moreover, in the appearance tab, you will get multiple categories; in the Themes category, we have several options.
Let’s explore these features individually:
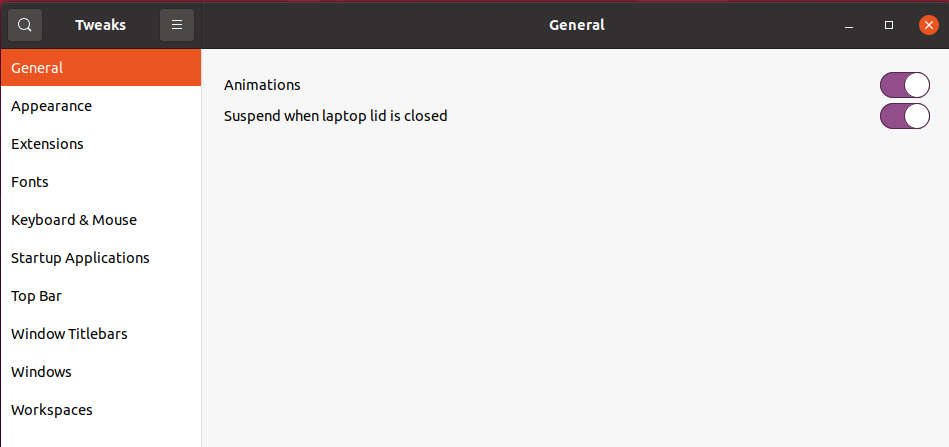
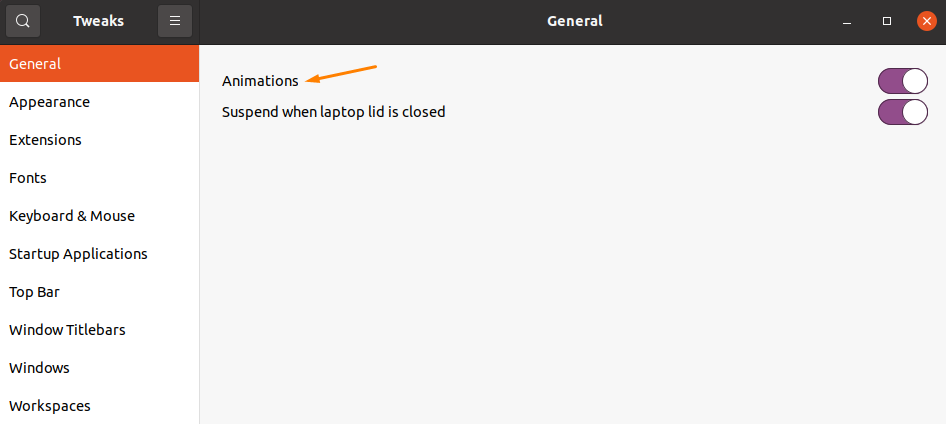
General:
When you open the Gnome Tweak utility, the first screen will come with the “Animations” category in the General tab. From where you can enable or disable the animation feature:
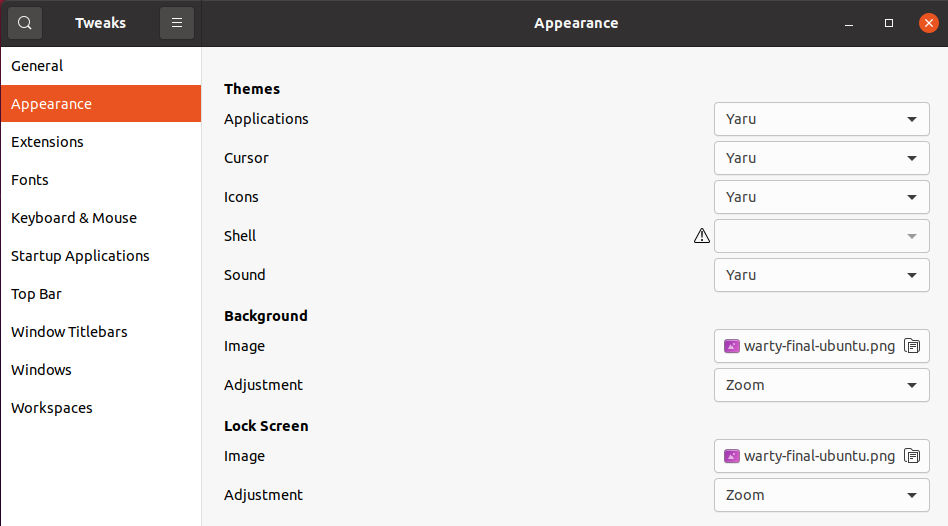
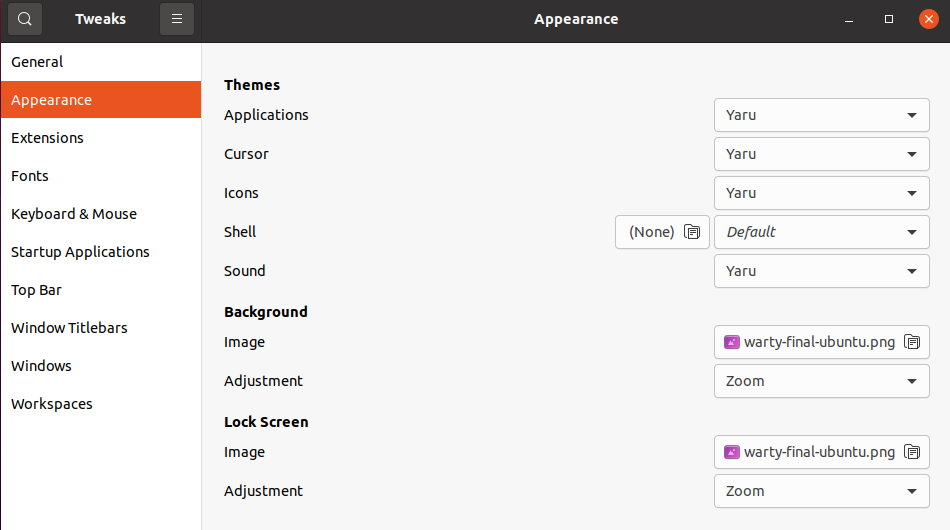
Appearance:
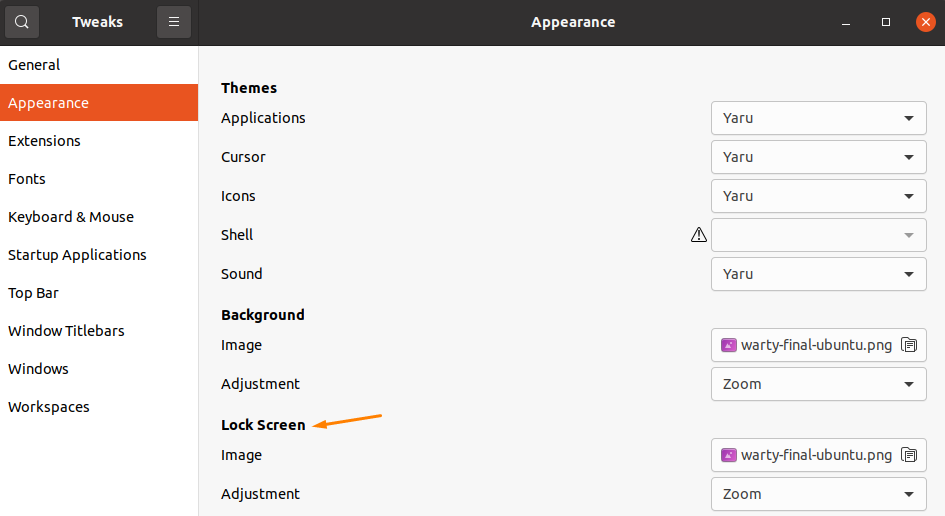
Moving forward in the “Appearance” tab, a list of options will display. All of these are really helpful to get a new appearance of your system. As you can see, the default setting to all the categories is “Yaru.” But no worries, you can change it the way you want. The Appearance tab is further divided into Themes, Background, and Lock Screen categories. And each of the categories has different options:
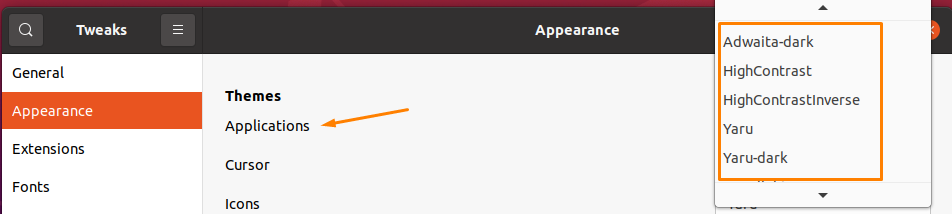
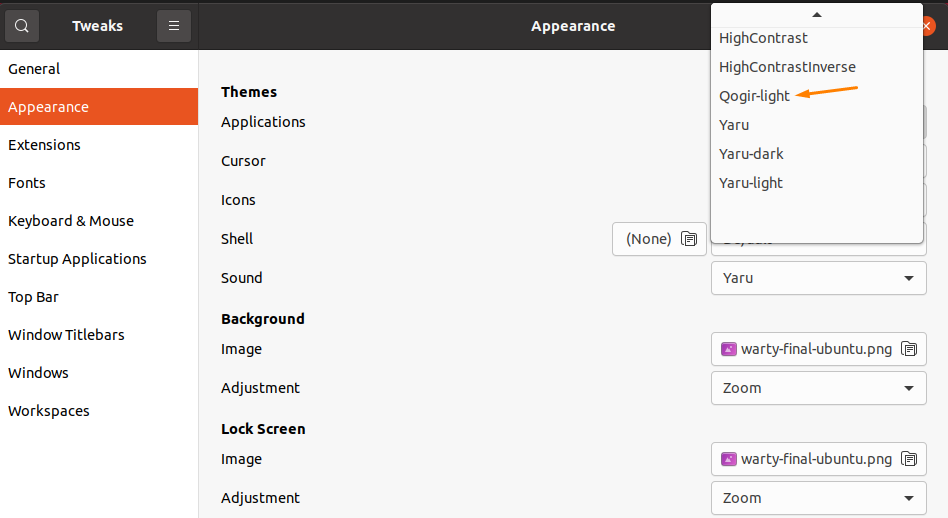
There are more options other than the default “Yaru” in the Applications dropdown menu, such as High-Contrast, Yaru-dark, etc., as mentioned in the image.
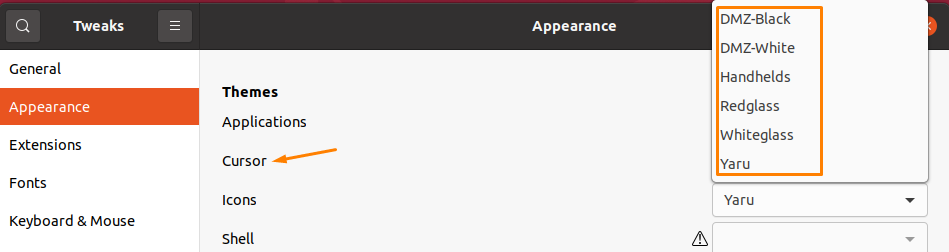
If we navigate the “Cursor” dropdown menu, we have amazing cursor choices like Redglass, Whiteglass, Handhelds, etc.
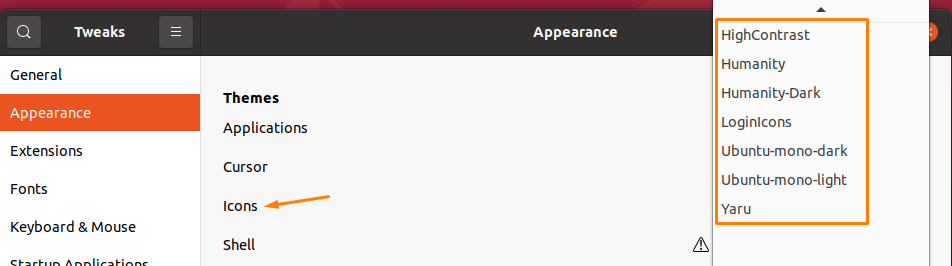
Similarly, if we move towards the “icons” category, you will also get a list of possible icons options.
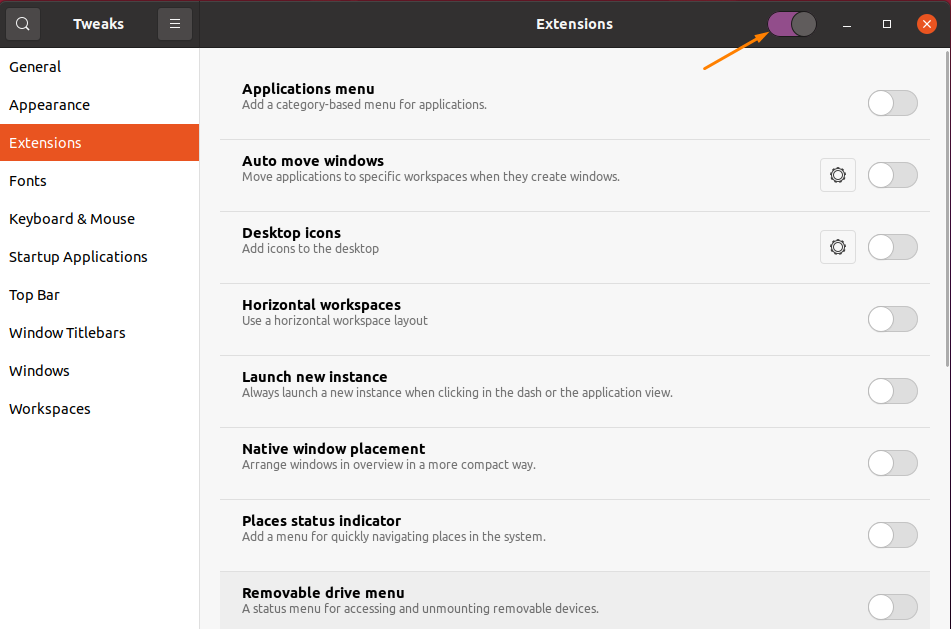
As you can see, the Gnome shell extension is disabled by default.

To enable it, follow the steps listed below:
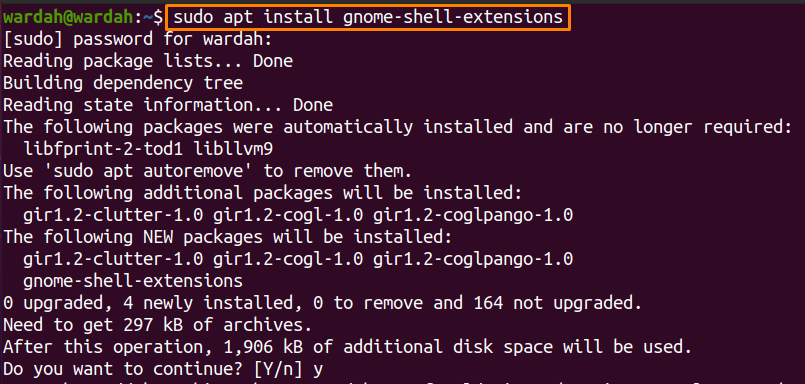
Execute the given command to download the “Gnome-shell-extensions” in the terminal:
After installing the “gnome-shell-extensions,” restart your Ubuntu machine to refresh the software.
When you get back to the screen, open the “Gnome Tweak Tool” applications; a list of new extensions will be added to the “Extensions” tab; enable the Extensions tab:
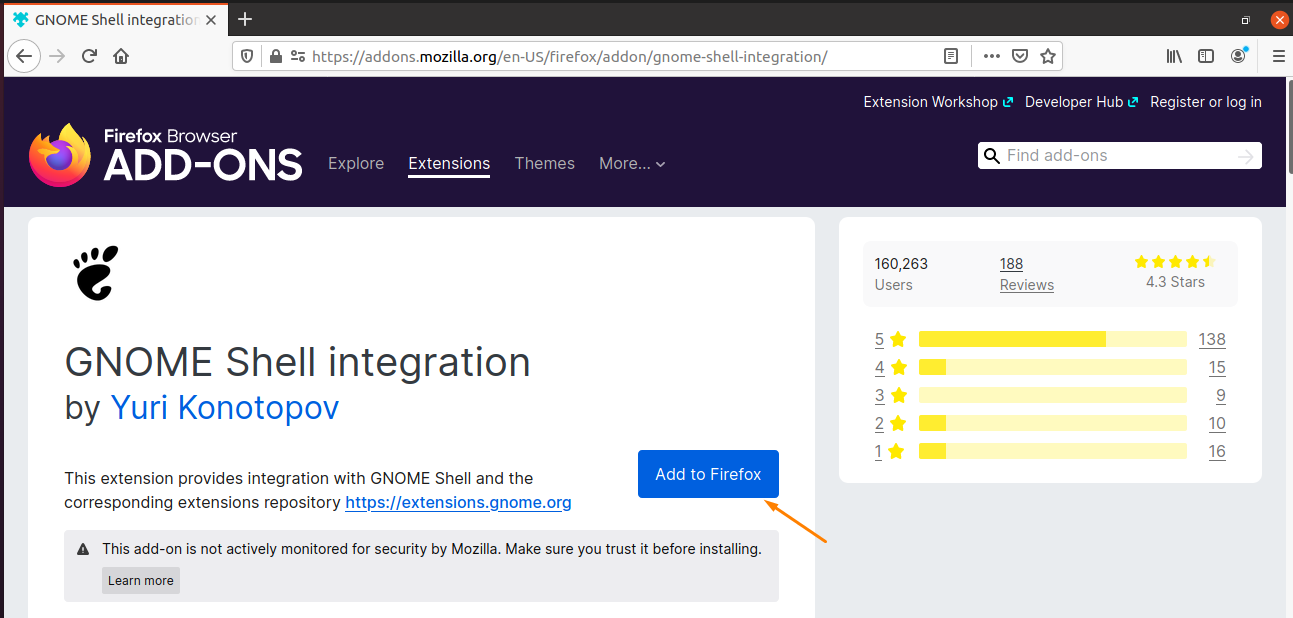
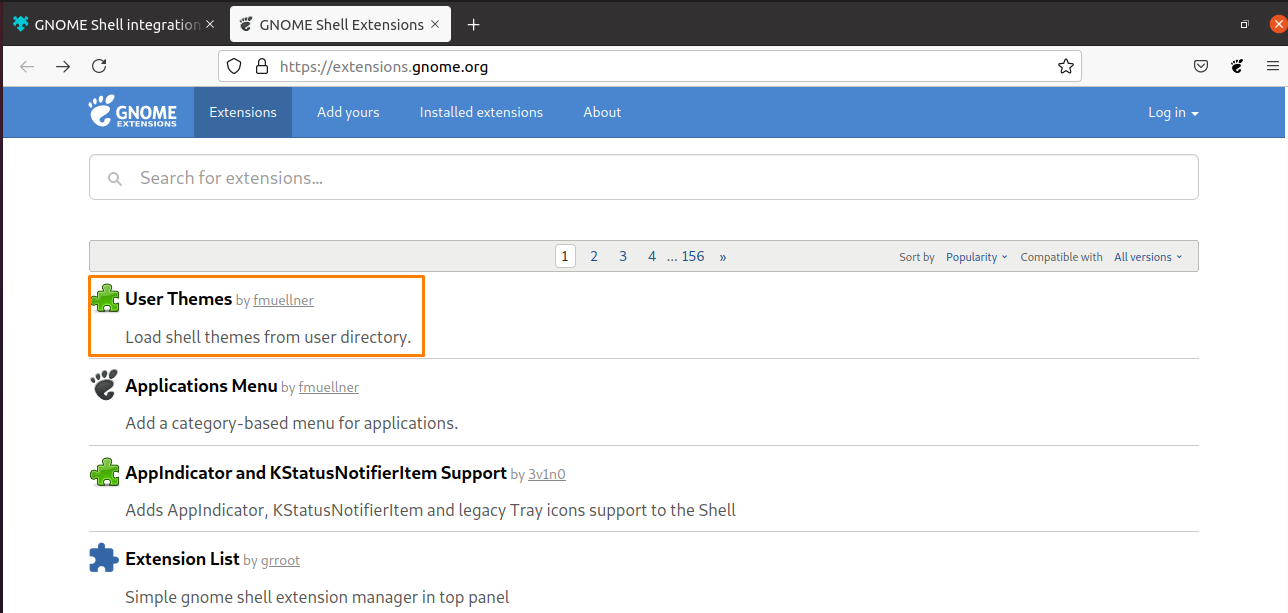
Gnome shell extensions can be accessed through the web browser. Open Ubuntu Firefox browser and navigate to the gnome-shell add-ons page Gnome-Shell-Integration to add Firefox extension and click to “Add to Firefox”:
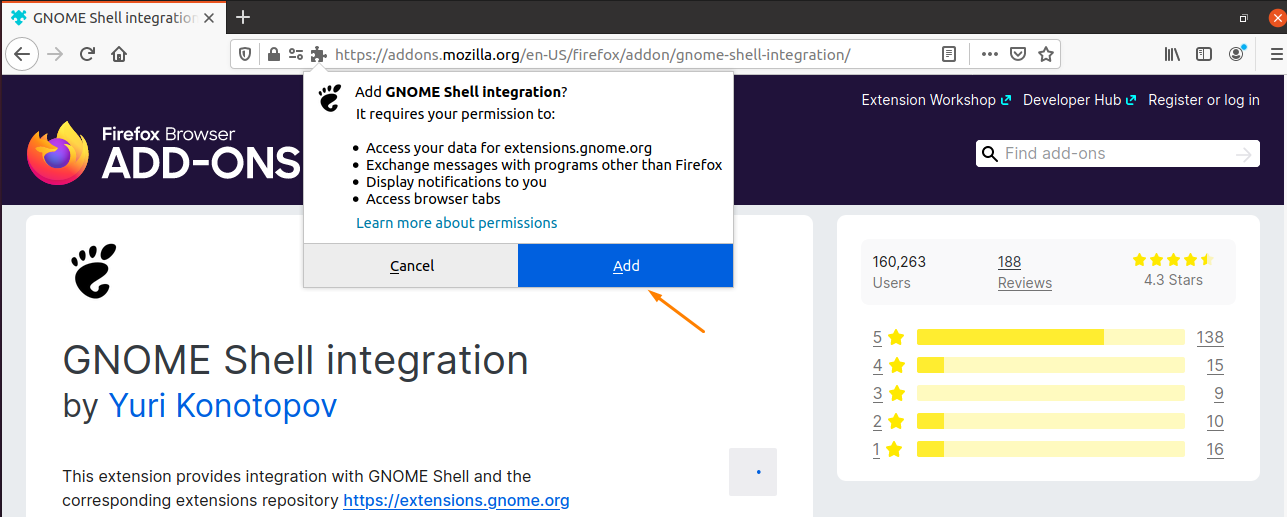
A dialogue box will appear to confirm if you really want to add Gnome Shell Integration and some permission access.
Click on the “Add” button to get an extension:
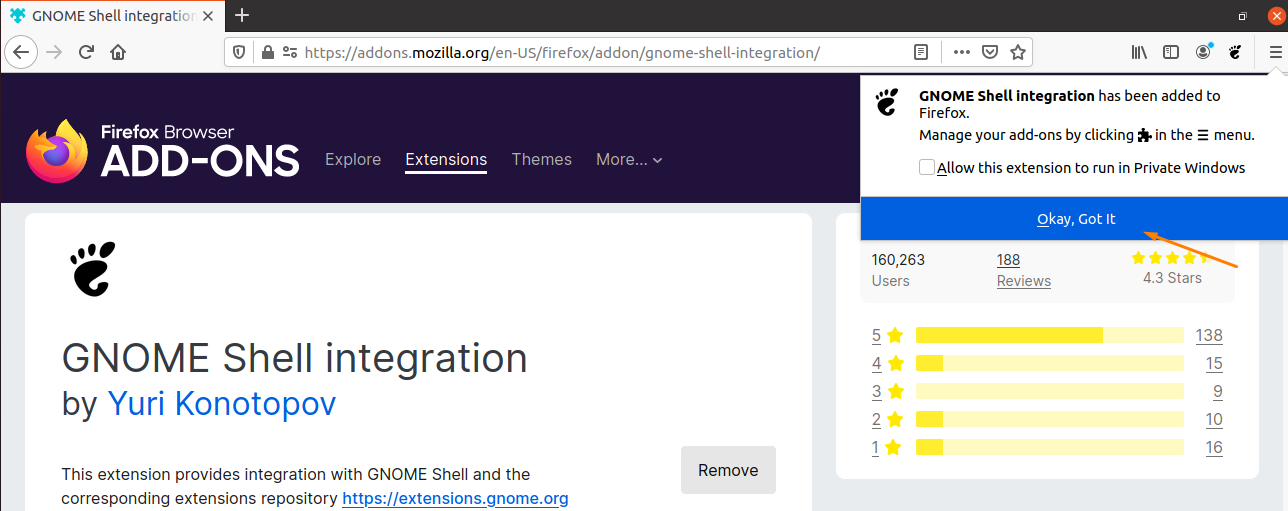
An extension will be added to the Firefox browser:
An extension icon will appear at the top right corner of the browser; it will look like this:
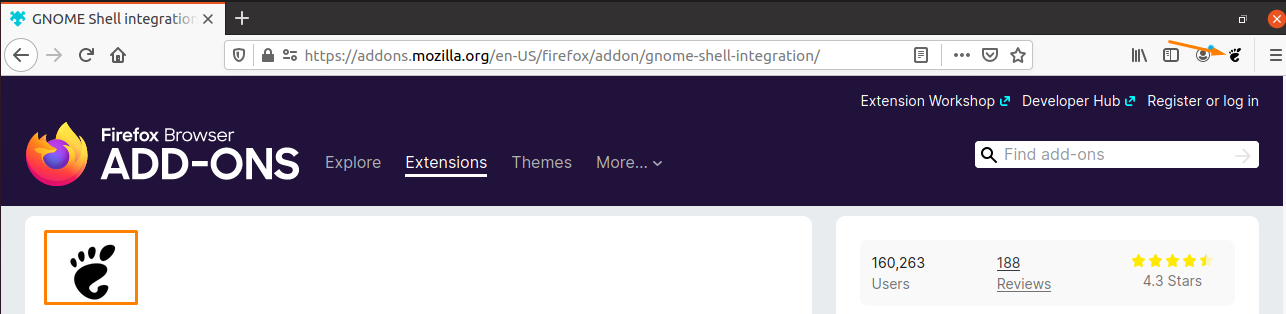
Now, we can add “gnome-shell-extension”; So, open the Firefox browser and click on the extension icon (highlighted above).
You will get several gnome extensions, pick the “User Themes” extension and click on it:
In the coming window of the “User Themes” extension, the default setting is disabled. So, click on it to enable it:

Now, open the “Gnome Tweak Tool” application again to check if the shell is enabled or not:
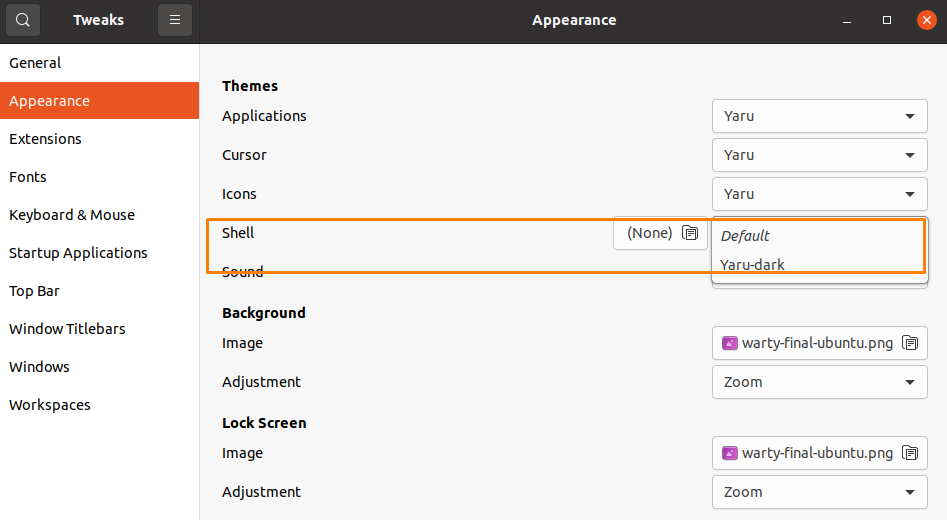
So, you can see that “Shell” is enabled, and it is set to “None” by default. You can also change it to “Yaru-dark” while customizing your system.
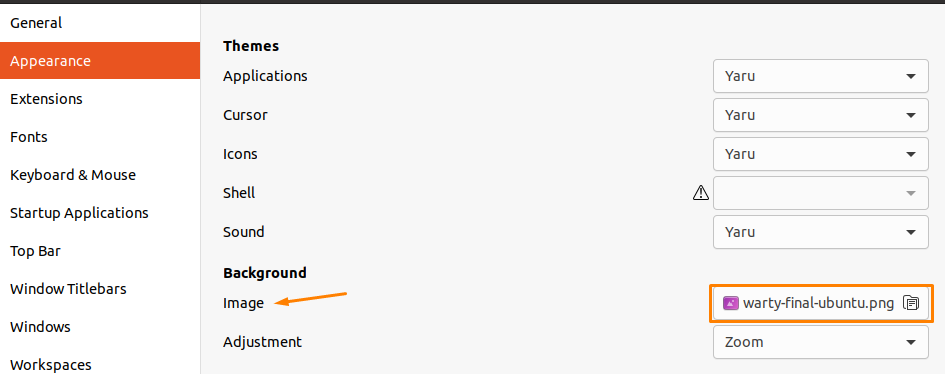
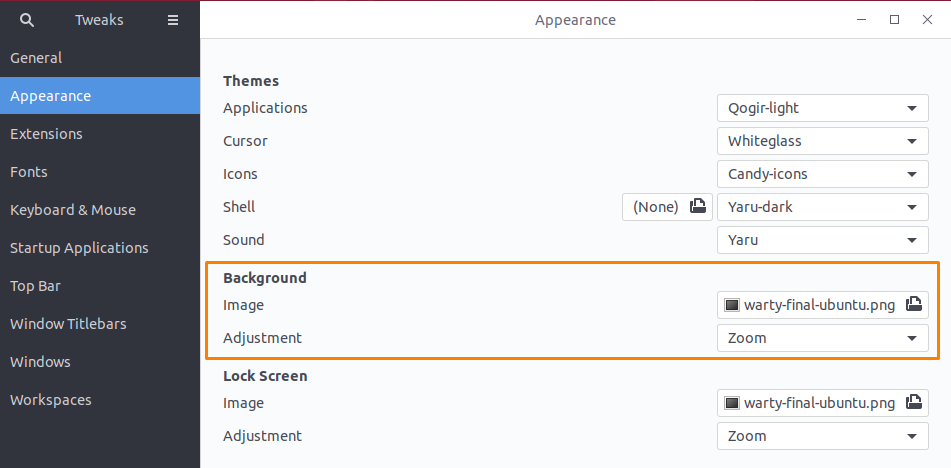
In the next category, “Background,” we have image and adjustment options:

There is no hard and fast rule to stay with the same background image; you can change it whenever you want:
When you click on the image’s icon (highlighted), a list of default images will be displayed in front of you; you can also add your own backgrounds; select the image and click on the “Open” button:

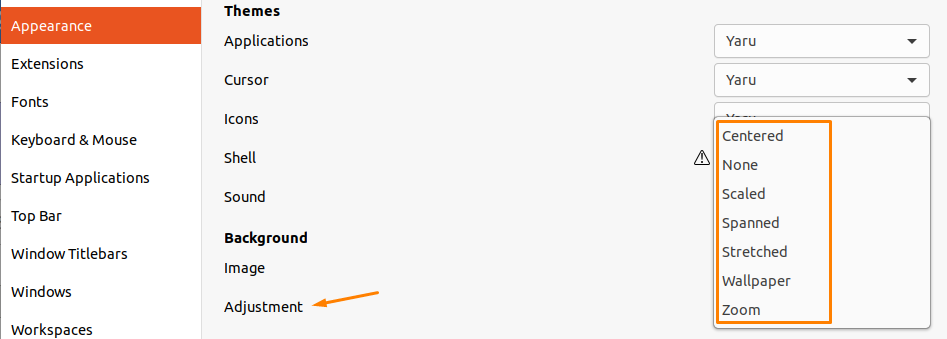
Well, I think this is a helpful thing for all the users; some people may wish to adjust the background image; options like, Centered, Scaled, and Stretched can be seen in the Adjustment menu:
And the last category of the Appearance tab is “Lock Screen”; almost everything necessary to modify the system’s look is offered by Gnome Tweak Tool. It gives you the option to choose a background image and modify the Lock Screen option with the same images list as we have seen in the “Background” option.
When you select the highlighted icon, a list of all images for the lock screen will be visible to you. And you can choose any from there: similarly, if you want to adjust the image, you can simply select the option from the dropdown menu.
Extensions:
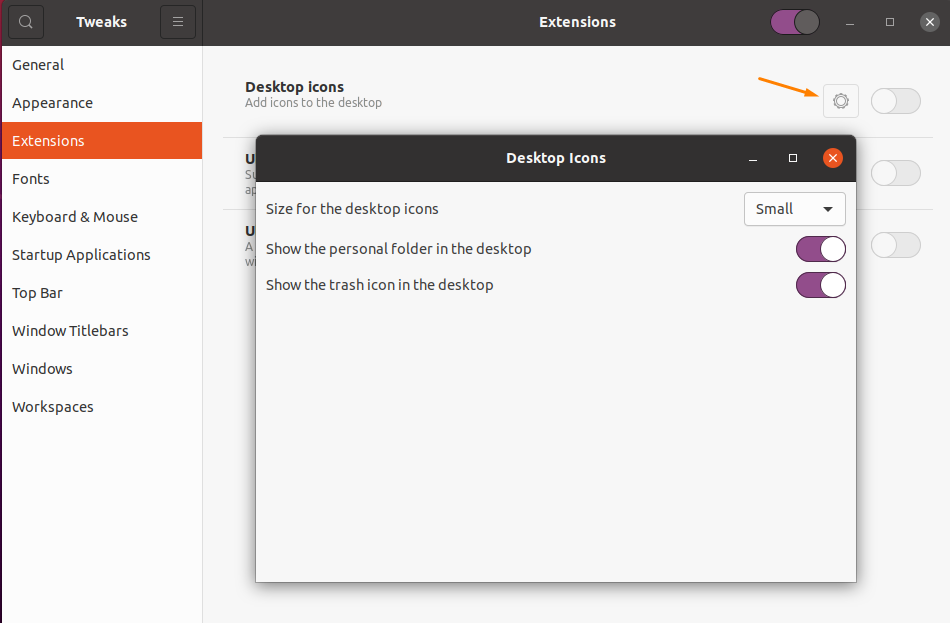
In the Extensions tab, we have three default extensions i-e, Desktop icons, Ubuntu app indicators, and Ubuntu dock:

When you click on the gearbox in the desktop icon extension, a dialogue box will appear with desktop icons size and folders option.
Downloading and installing the “Gnome Shell Extension” will add more options to the extensions list. The list of extensions that comes with “Gnome shell extension” is shown in the image below:

You can enable or disable any of them according to the need.
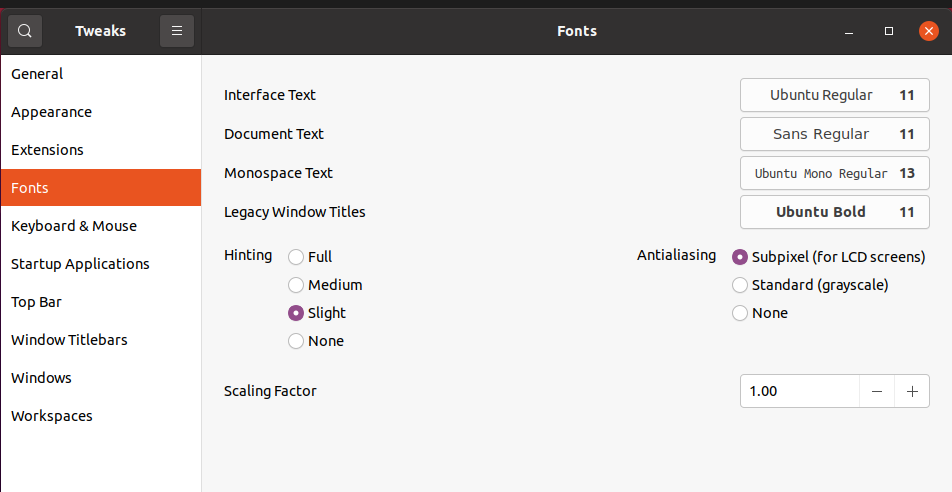
Fonts:
Gnome Tweak Tool also allows the user to modify font settings. This is helpful to save time as all the modifications can be made with just one click.
In the “Fonts” tab, you can change the interface text, document text, monospace text, set the scaling, hint size. All of these factors help to make text perfectly legible.
Now, let’s move towards Top Bar:
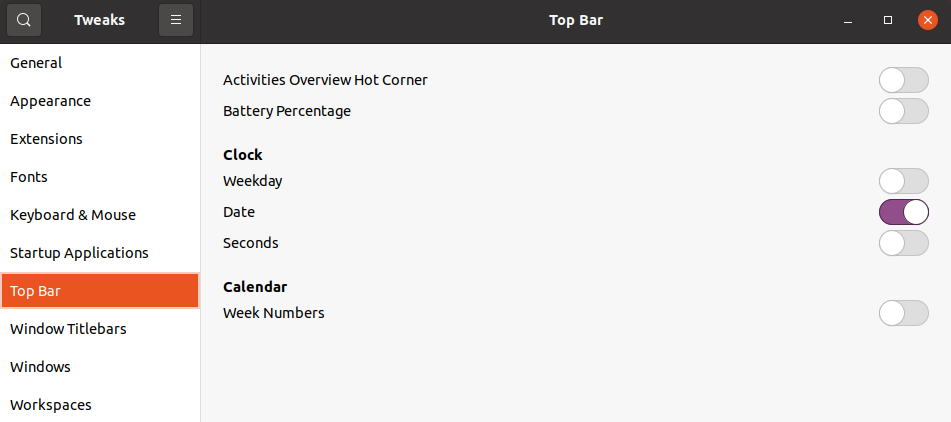
Top Bar:
In the Top Bar tab, you can enable the battery percentage, adjust clock settings, and set the calendar.
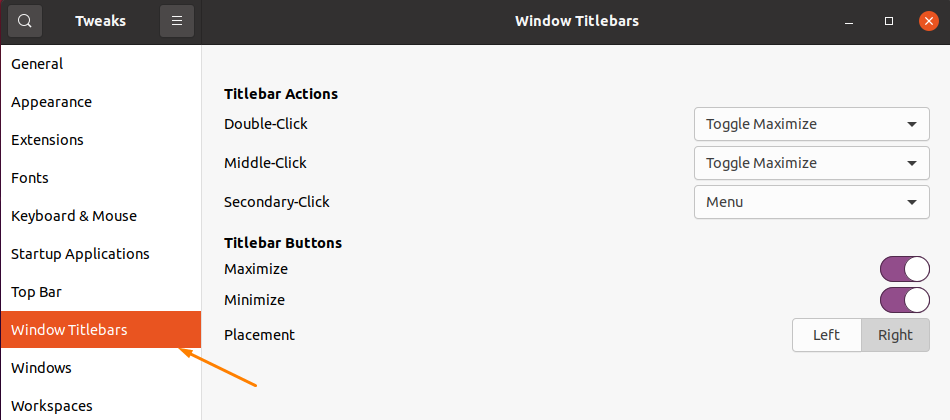
Window Titlebars:
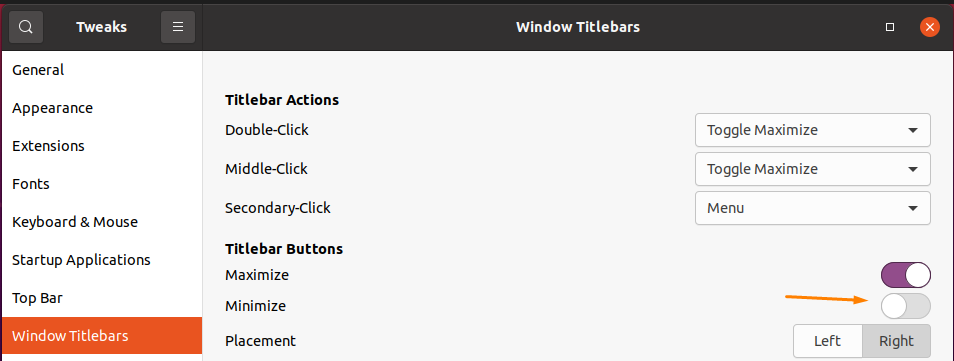
In the Window Titlebars tab, you can change the mouse behaviors. Moreover, you can disable the maximize or minimize button from the top bar or change their position according to your comfort.
For example, if you disable the “minimize” option, the minimize icon will be disappeared from the top bar:
As we mentioned above, Ubuntu’s default desktop environment is “Gnome.” That’s why we have explained each aspect of the Gnome Tweaks tool to let you understand what features you can customize for your system’s environment. Let’s discuss some other desktop environments that ubuntu supports:
Ubuntu desktop environments:
The last section of this article will see how to customize the Ubuntu desktop through the Gnome Tweak Tool.
Before starting it, let’s discuss all the Ubuntu desktop environments individually we have mentioned above. Although Gnome is the default, you can install any other desktop environment as well.
KDE Plasma Desktop:
The KDE plasma desktop is one of the advanced desktop environments and has the most adaptable features. It is widget-based and well-designed that helps to remove and add anything you want to.
Moreover, when you install the KDE plasma desktop, you will see icons with different shapes that may trouble you. But, no worries, KDE plasma allows the user to adjust the icons; that may take less space on the system screen.
You can adjust various settings: the default desktop wallpaper, which is changeable, the application launcher, virtual workspace selector handled by activities, several widgets options since we cannot explain all the features in a single or two paragraphs. For more, visit the official site of KDE plasma desktop “KDE.ORG” and also get the download link.
Cinnamon Desktop:
Cinnamon desktop is quite similar to the XFCE desktop environment. It derives from Gnome 3, a default desktop environment of Linux mint but available for all the other Linux and UNIX-like operating systems.
There’s no complication to understand the Cinnamon desktop; it is well designed for beginners and can easily be customized. Some prominent features of Cinnamon desktop are: it has many desktop effects with the animation and transition effects, multiple extensions, also the applets on the panel; hence through settings editor, you can customize calendar, panel, themes extensions, icons, applets, and desktop effects as well. Its several features are similar to Gnome shell.
To get the Cinnamon Desktop on Ubuntu, visit the official site of Cinnamon Desktop.
LXQT Desktop:
The LXQT Desktop is the default desktop of the Lubuntu operating system, and the good thing about this environment is that it is less resource-intensive. It is the most light-weighted desktop with a simple interface based on Qt. It is developed for the folks who like to stay with Qt apps and don’t want to go with KDE Plasma or any other desktop. Another good feature of the LXQT desktop is that it is modular; it doesn’t allow the desktop to let things own.
The layout of LXQT is similar to the Windows operating system; the app launcher is set at the bottom of the screen. You can configure themes, icons, desktops, and apps.
To get the LXQT desktop on the Ubuntu system, visit the official site LXQT Project. You will get all the releases and packages of the LXQT desktop environment.
Gnome Flashback Desktop:
Gnome Flashback was once called Gnome Fallback mode. It is a shell for Gnome 3, but the technologies and layout are quite similar to Gnome 2.
While using Gnome Flashback Desktop, you will notice that its performance is really outstanding, and it consumes less CPU than the Gnome shell. Gnome Flashback offers the settings like Gnome desktop, which makes it quite easier to modify if you are already an Ubuntu user.
XFCE Desktop:
The XFCE is the lightweight default desktop environment for Xubuntu distribution which is a flavor of Ubuntu. As compared to other desktops, Xubuntu consumes less memory and CPU usage. It is pretty simple with the two basic panels on the screen and one vertical line of icons. Its file management tool is simple, and you can configure it easily. The default file manager of XFCE is known as Thunar, is famous for its fast performance. The interface is easy to understand; devices can be mounted and unmounted anytime.
You can customize the XFCE desktop just like the way you want; it is very stable. The best attribute people like about it is its minimalist design. Most people like a simple desktop, and for them, it is the best approach. Also, you will get many individual configuration applications according to need and preference.
To get the XFCE desktop environment on Ubuntu, open the XFCE.org and download it.
MATE Desktop:
The MATE desktop environment gives the same feel as if someone is using the Windows operating system. MATE is the reliable, attractive, and tested desktop; it comes with Gnome 2, the default desktop environment of most Linux and UNIX operating systems.
Some many pre-packaged wallpapers and themes help to customize the Mate desktop quickly. MATE desktop gives you the option to use GTK-2.X and GTK-3.X that allows the user to pick from hundreds of available themes. The file manager of the MATE environment is known as Caja, which has a decent look and is as famous as Dolphin (KDE file manager). All the specific pre-installed tools of the MATE desktop are designed to be lightweight and simple.
The default theme of MATE is Ambiant-MATE which is definitely not the one and only. Suppose you want to customize the default look such as icons, wallpapers, panels, and many other environmental attributes. You can do so through the Appearance application. If you want to change the theme to get a different look on your system, switch to the desktop environment.
To learn more about the MATE desktop environment, visit the official site.
Budgie Desktop:
Budgie desktop is also based on the Gnome desktop environment and is the same as macOS and Chrome OS. One of the Budgie desktop’s unique aspects is that it has a sidebar; some of the tabs like calendar, notifications, and audio settings are extremely accessible.
Gnome technologies like GTK are used by Budgie desktop to manage the system’s settings. Some of the specific Budgie tools can configure settings like themes, icons, and windows settings. Furthermore, you can change the panel set on the screen and can add more applets that aren’t available by default.
By enabling the Dock mode in the settings, you can remove extra stuff from the bottom dock or move them to the top panel.
Deepin DE:
The latest release of Deepin comes with a brand new and beautiful look of the environment and applications. The Deepin Desktop environment is not designed explicitly for the Deepin distribution; it is built on QT and can install on various Linux distributions such as Ubuntu, Fedora, and Arch Linux systems.
The Deepin Desktop Environment offers you multiple modes, such as Fashion mode or Efficient mode. The fashion mode in the dock tray has a hide-and-show button; that helps free up space on the screen when you want to hide icons. In the Efficient mode, the right corner of the screen is free to show the desktop.
The Control Center has adaptive features to enhance efficiency. The file manager has a dark theme making the window elegant. The new “Recent” attribute is added to the file manager to help the quick access to the recently opened files.
Also, many more impressive features that couldn’t be described here can be learned by visiting the Deepin DE Official site. If you want to move from the default desktop environment to the Deepin desktop, you will find the downloaded link from the site as mentioned above.
Pantheon Desktop:
Like other desktop environments, KDE, Cinnamon, etc., the pantheon is also one of the team’s widely known desktops developed by the team who developed elementary OS. Users like it because of its well-polished look. Still, it offers minor customization facilities; most people don’t use it in Linux distributions.
The desktop has not many items in it as Elementary OS believes in a clutter-free environment. The Pantheon dock is considered one of the most highlighted features; it is fast and helps to access the most used apps quickly. Some other useful icons are displayed at the top bar of the Pantheon desktop, such as the “status indicator” icon, “music media player” icon.
Although it is one of the lightweight desktops, it is not recommended as it’s been only optimized for the elementary OS.
How We Can Customize Ubuntu Desktop Environment:
We have discussed briefly in the above section what settings need to alter when starting to customize the Ubuntu system. As I am working on Ubuntu 20.04, let’s see how we can customize Gnome 3.38, a default Ubuntu desktop environment.
Customizing the desktop not only gives you a perfect look, but you will also get a different experience. You can apply many categories of themes on Ubuntu desktop like Windows theme, macOS theme, Chromatic theme, etc.
Installing Gnome Tweak Tool:
To customize the Gnome environment, first, we need the “Gnome Tweak Tool,” and we have seen how to install it in the above section.
Using the Gnome Tweak Tool, one can change the whole appearance of the Ubuntu desktop as it is the Gnome Shell extension and helps to change the environment interface.
Open the applications and search for the “Gnome Tweak”:

Installing Theme:
Themes play a key role for any Linux operating system to change the look of the environment. There are many resources to install different themes, but it is good to get a theme from the authentic resource for better results.
One of the most useful and popular sites to install themes is Gnome-Look.Org. Click on the link, and you get a list of amazing themes; install any of them.
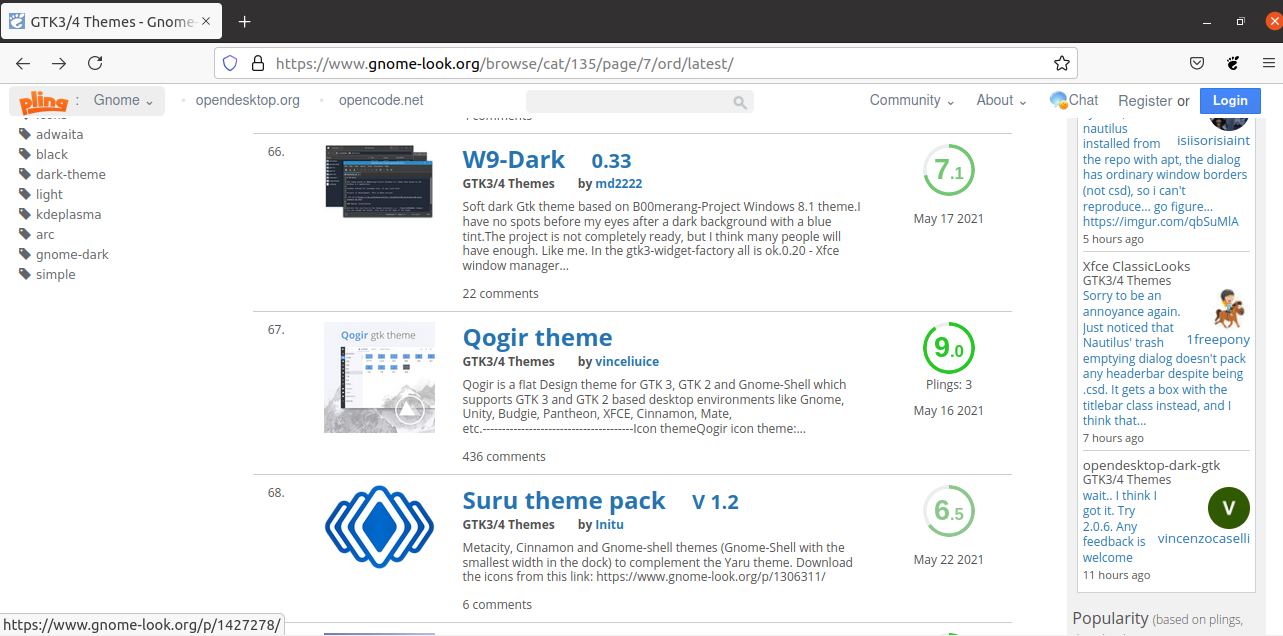
I will select “Qogir Theme,” which supports GTK-3 and GTK-2 based on different desktop environments like Gnome Cinnamon, Mate, etc.
Click on the desired theme, “Qogir Theme,” and navigate to the “Download”:
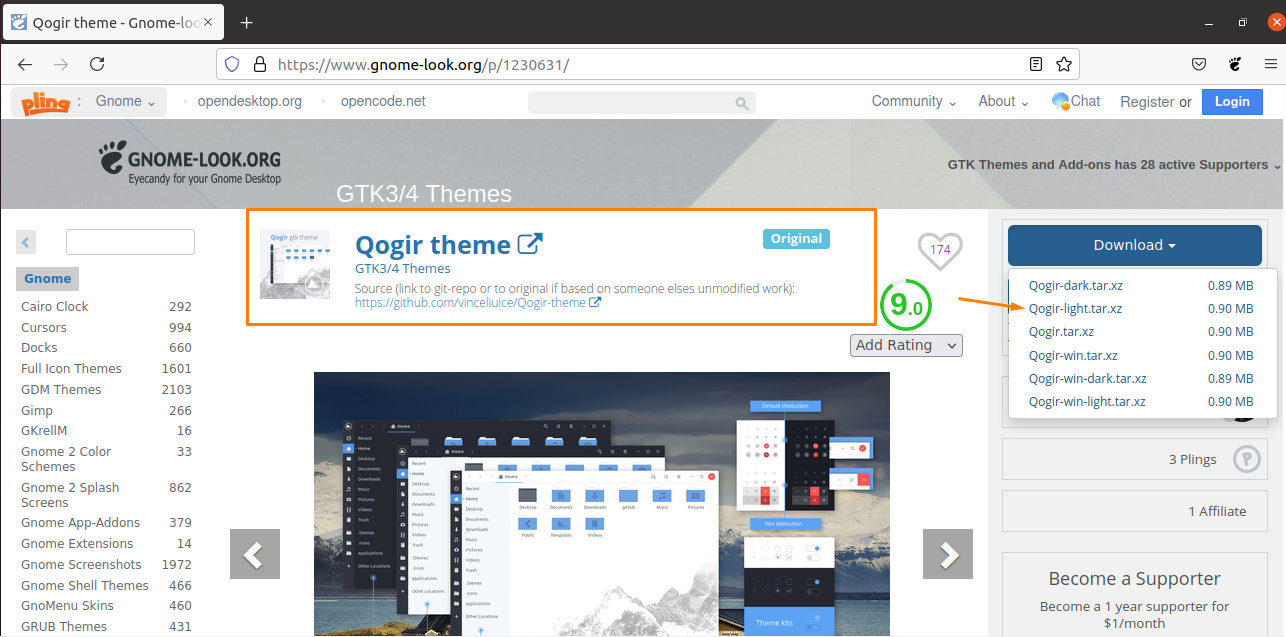
The window will come with download options, select any of the options to let downloading begin:
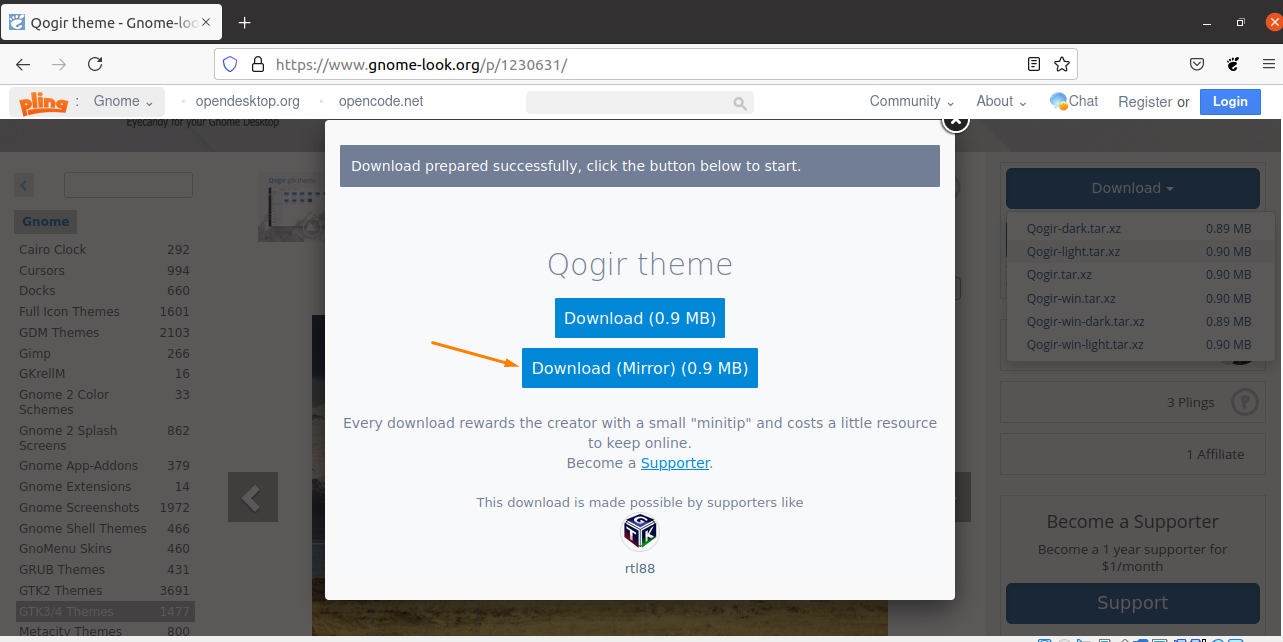
Click on the “Save File” to download the file in the system:
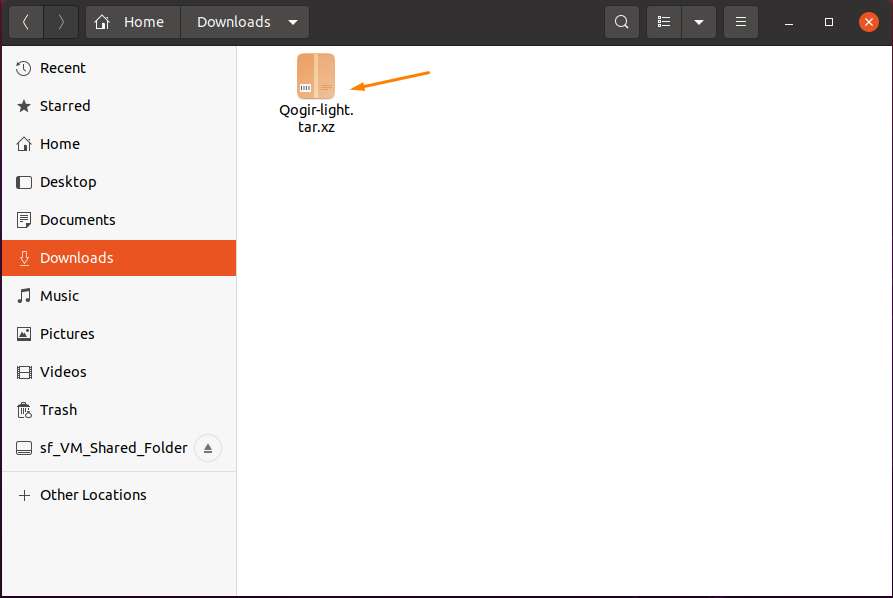
Open the Nautilus (Ubuntu File Manager) and check if the “Qogir theme” is downloaded successfully in the “Download” folder:
Unzip the theme file by right-clicking on the downloading theme and navigating to the “Extract Here” option in the context menu:

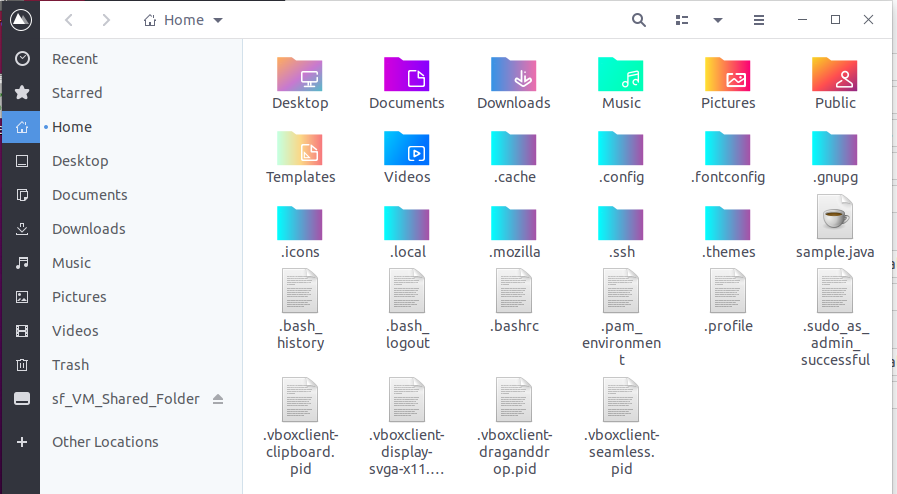
Go to the Home directory and press “Ctrl+h” to unhide the hidden folders and search for the “.theme” folder. If you don’t find it there, then create it by yourself:
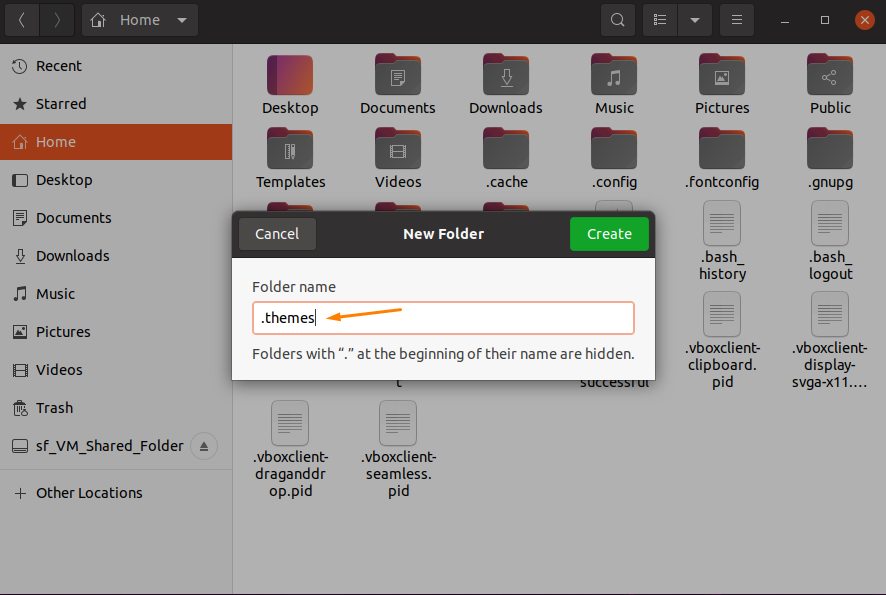
Click on the “Create” button to create it:
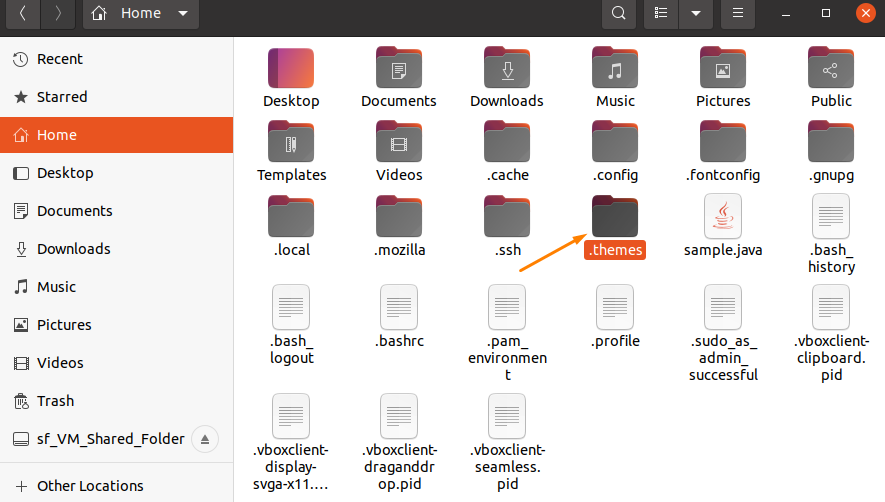
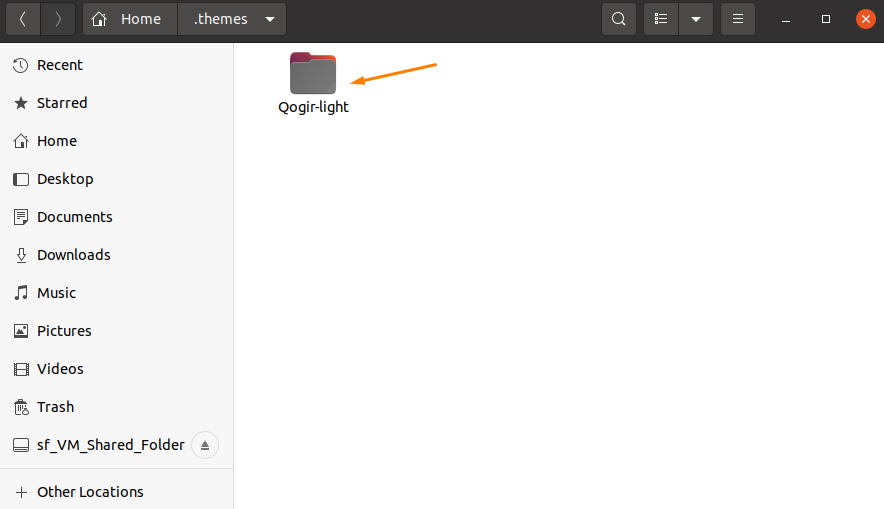
Move the extracted “Qogir-light” theme file in the “.themes” folder:
Customize the Dock Panel:
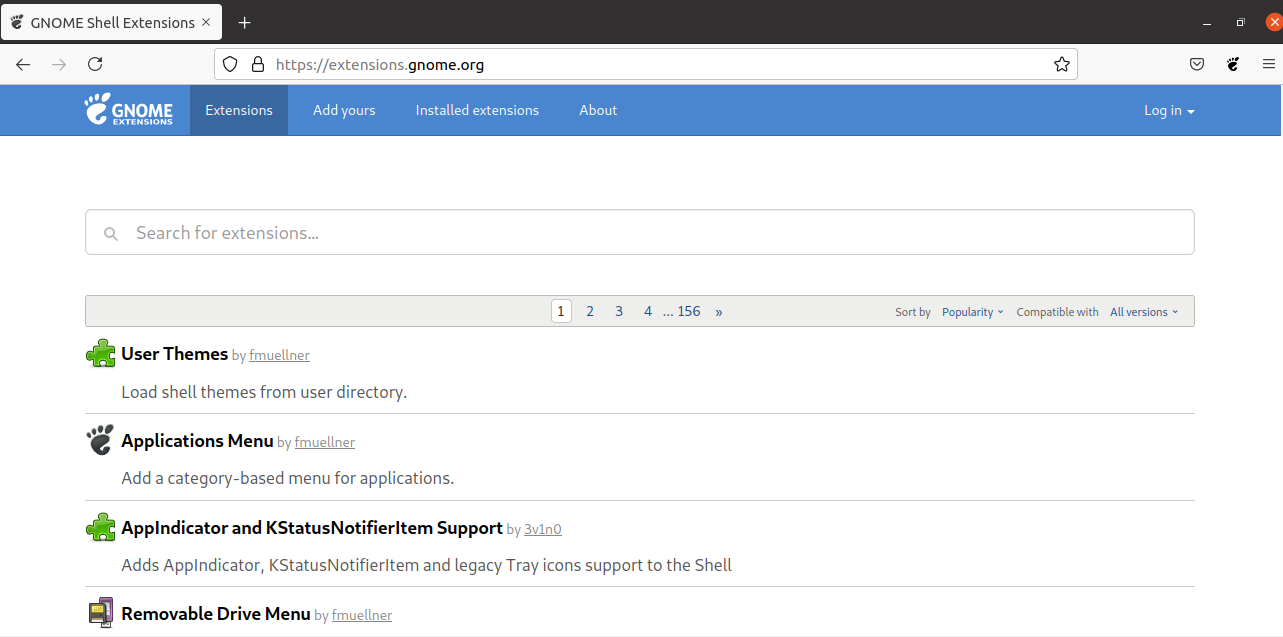
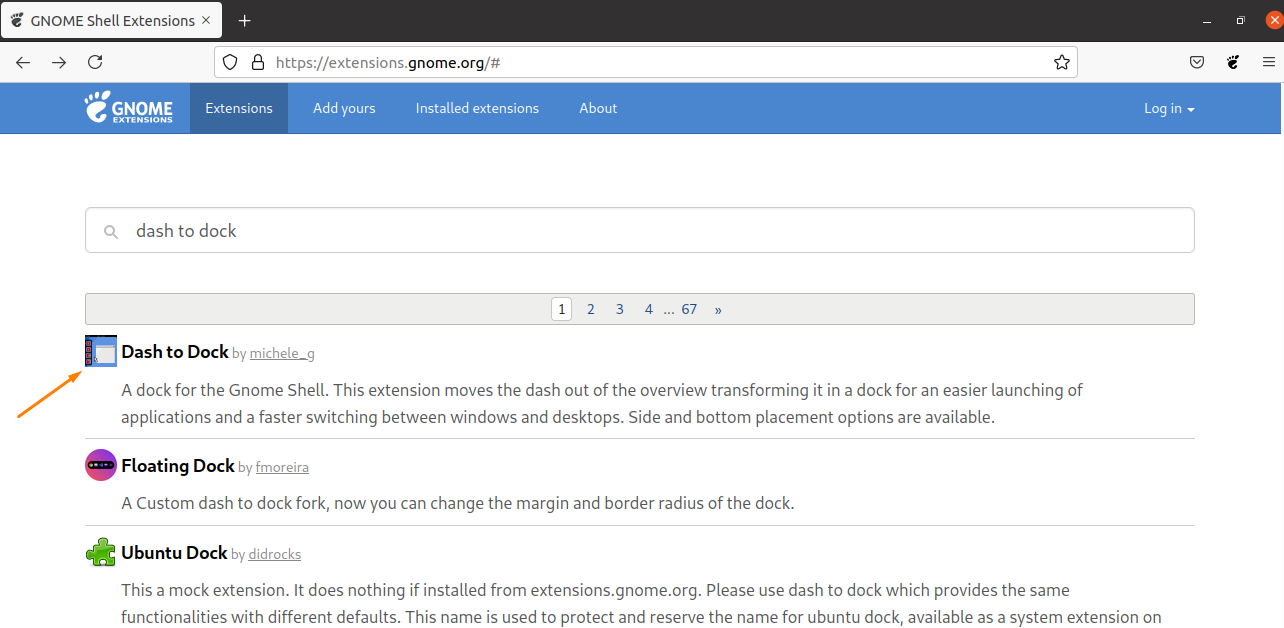
Let’s add the dock to the Ubuntu system, which plays an important role in customizing the screen. For this, visit the Gnome Extension Site to install dock extension:
Here, search for the “dash to dock” to find the dock extension. You will get at the top of search items; select it:
Click on it and enable the extension:

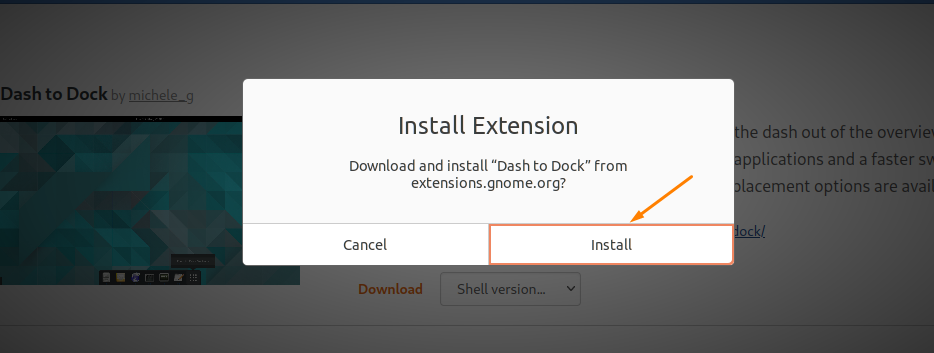
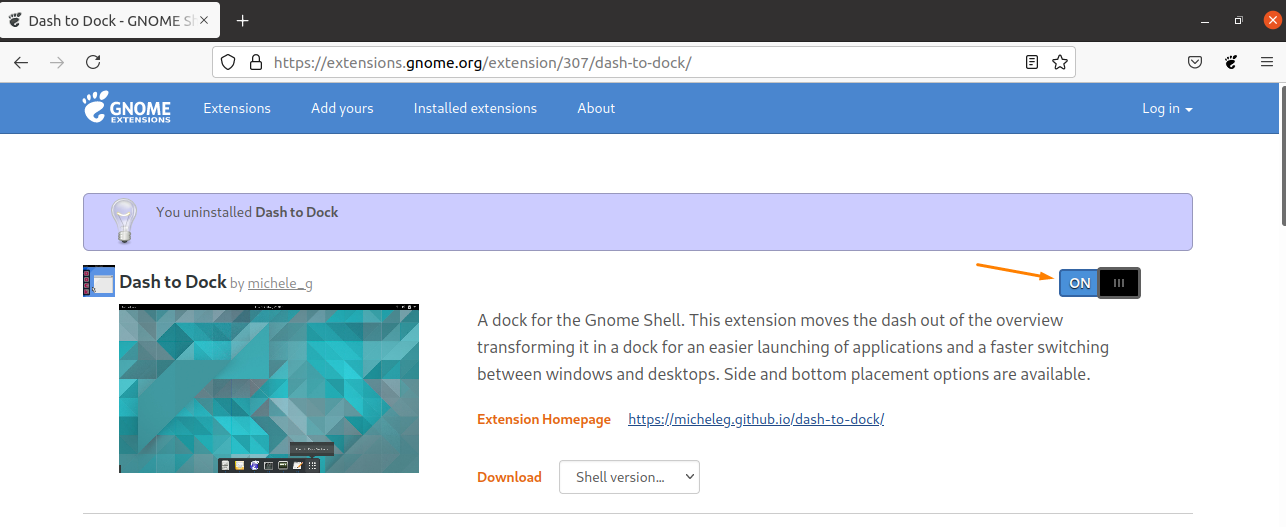
Once you clicked, a dialogue box appears to ask you to install the “Dash to Dock” extension; click on “Install” to let the installation begin:
It will be enabled after you clicked on the “Install” button:
Installing Icons set:
To get the icons set for the Ubuntu system, again visit the “Gnome-look-org” and search “Icons” in the search bar:
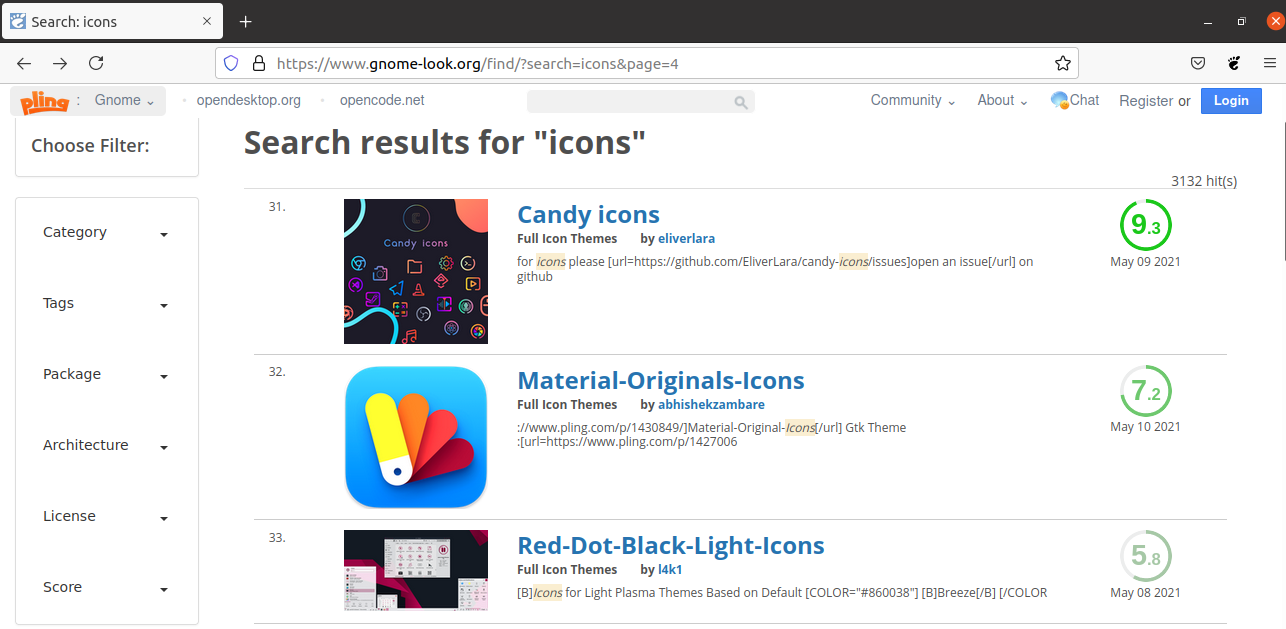
Select any icons set according to the choice; I will go with “Candy Icons,” which seems interesting. Select it and navigate to the “Download” button:
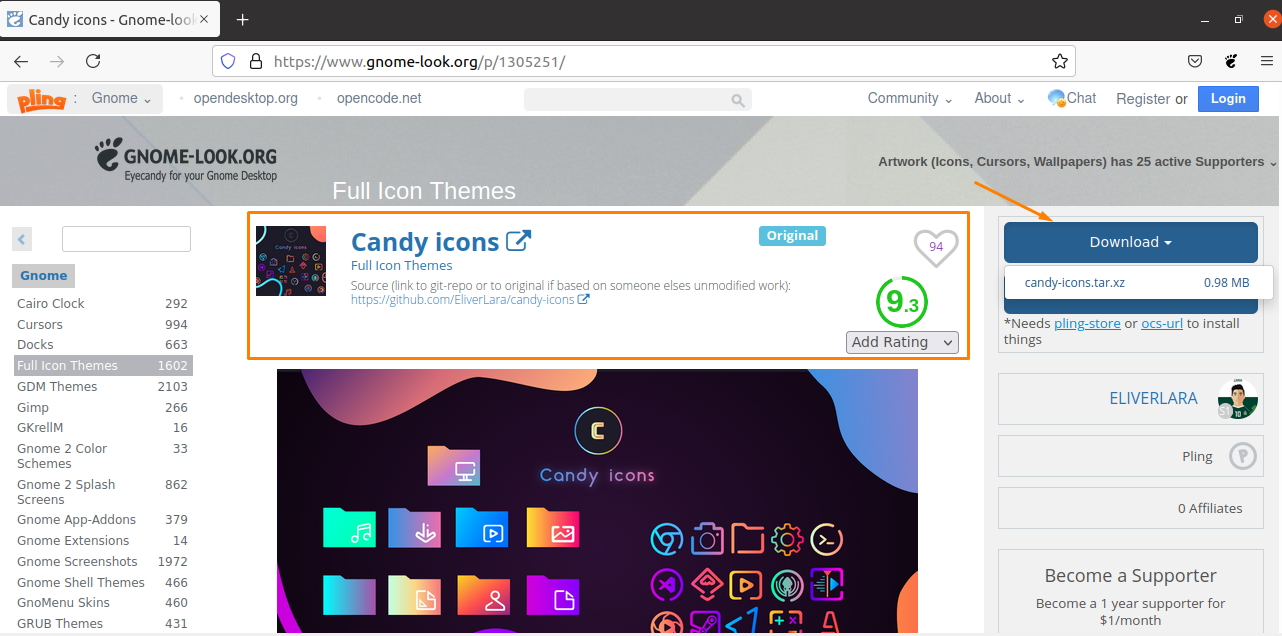
When you click on the Download button, the window will appear to ask if you want to download the candy icons set and select any options. I am selecting the “Download (mirror)”:
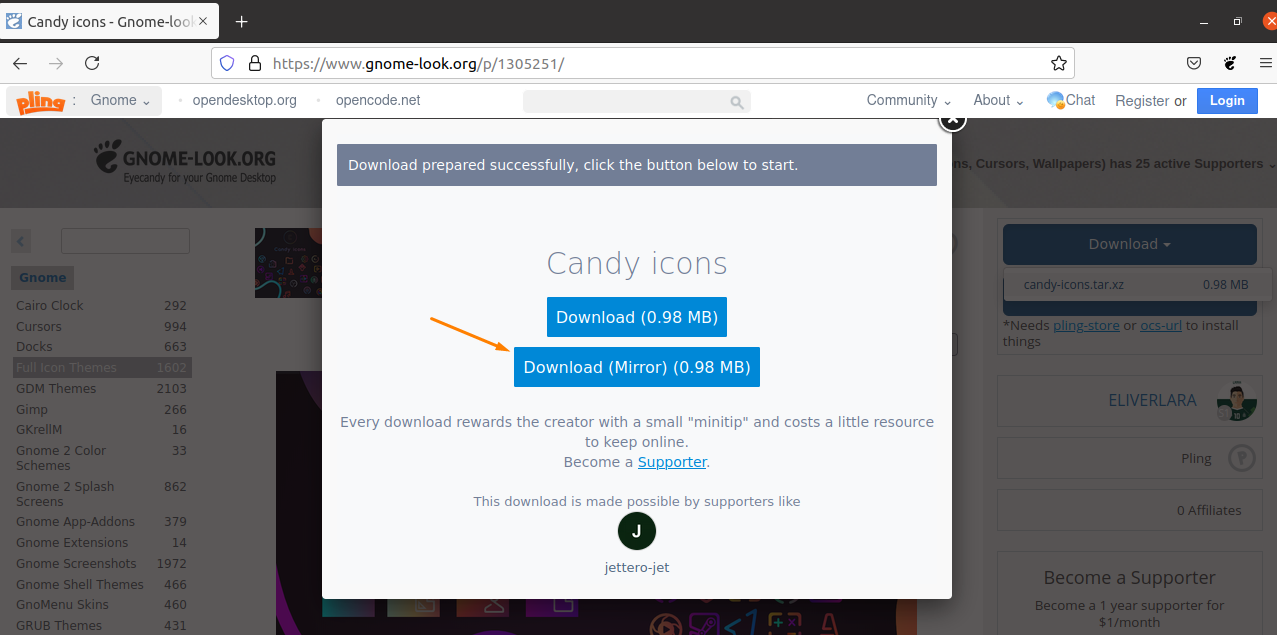
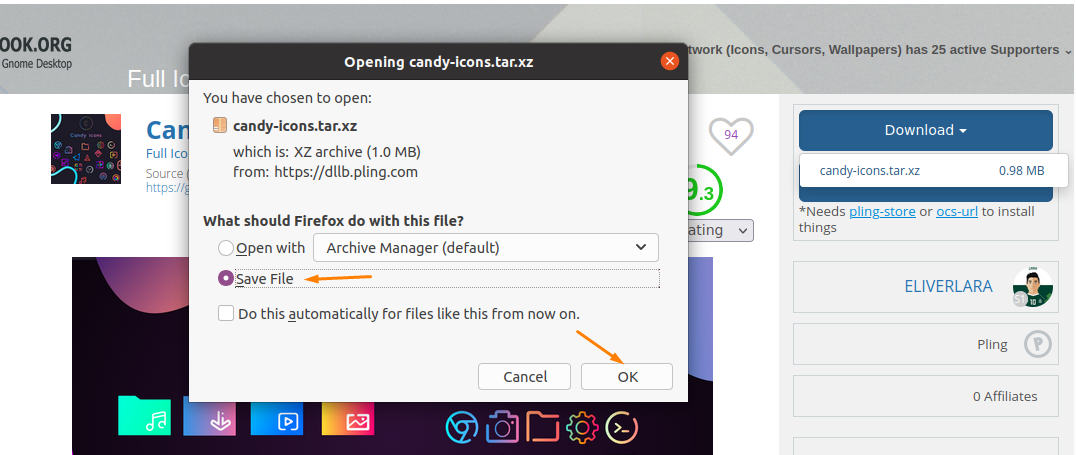
Click on “Save File” to install candy icons set of downloads directory and click on “Ok”:
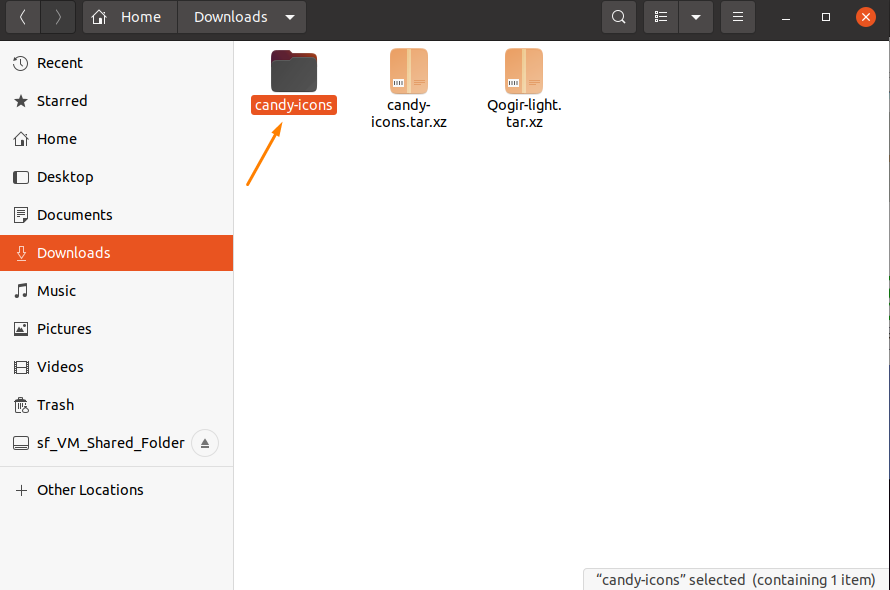
So, the icons will be downloaded on the “Downloads” directory; the further procedure is quite the same as we did in the “Themes” section:
Go to the downloads directory extract the downloaded file there:
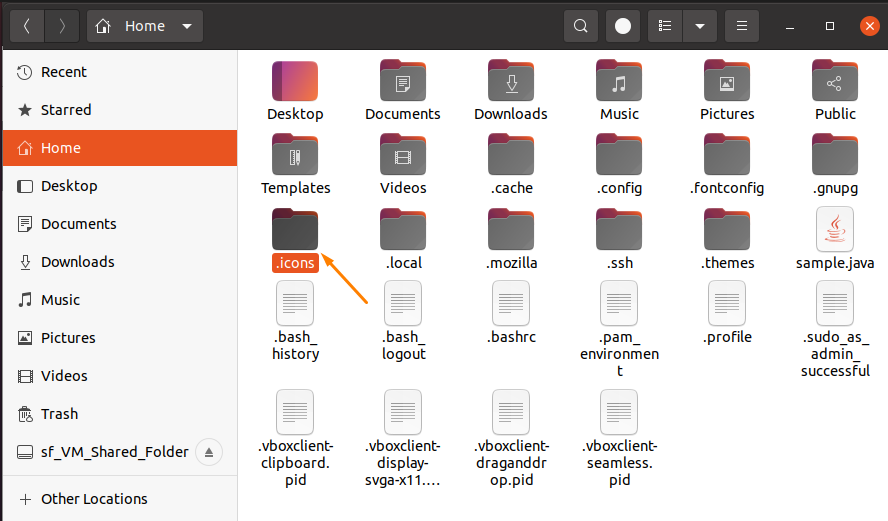
Move towards the Home directory and search “.icons” in the hidden files; if you don’t find it, then create a new folder and name it “.icons”:
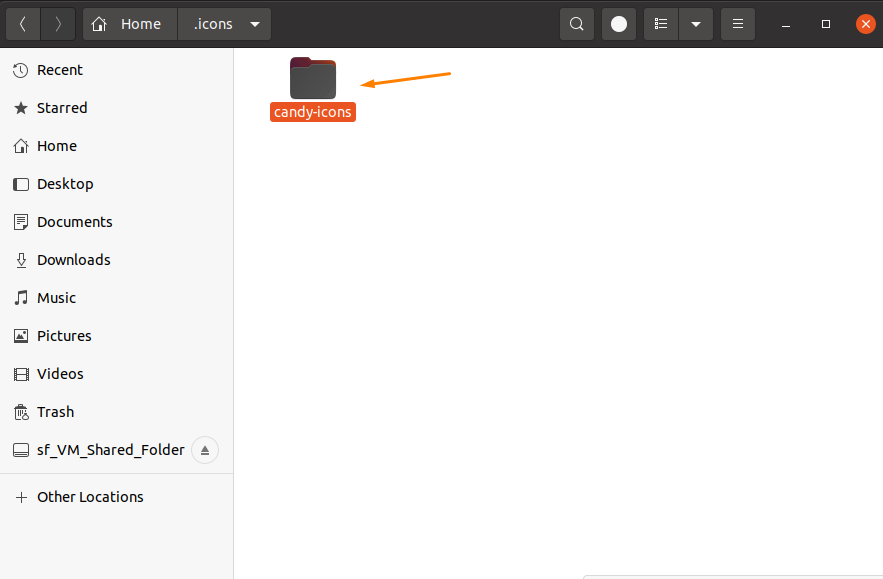
Move the extracted candy icons set to the “.icons” directory:
As we have done with all the necessary installation, we need to enable Gnome-shell as well, and we already mentioned a step-by-step procedure on how we can enable it in the above section.
Now, open the “Gnome Tweak Tool” to apply modifications; let’s give Ubuntu a new look using the tweak tool. In the Gnome Tweak Tool, go to the “Appearance” section. You will see all settings are set to the “Yaru” theme.
Modify the Appearance settings by following the below mentioned process:
Applications Settings:
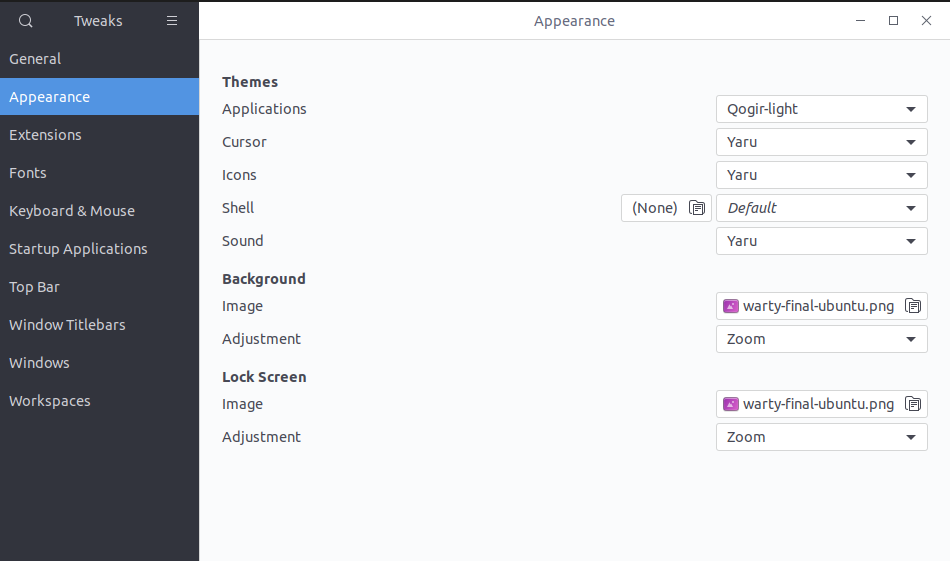
Let’s change the “Applications” theme and select “Qogir theme” we have downloaded:
To apply the “Qogir-light” theme, select it; and the theme will be applied as you can see in the image:
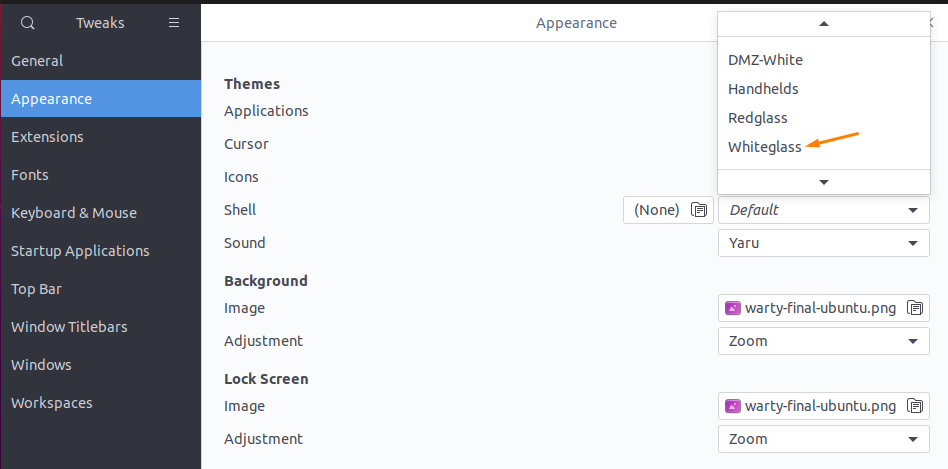
Cursor Settings:
Moving forward, I really want to change my cursor and give it an attractive look while using it. Let’s change it from the possible options (I am selecting “Whiteglass”; click on it to apply it:
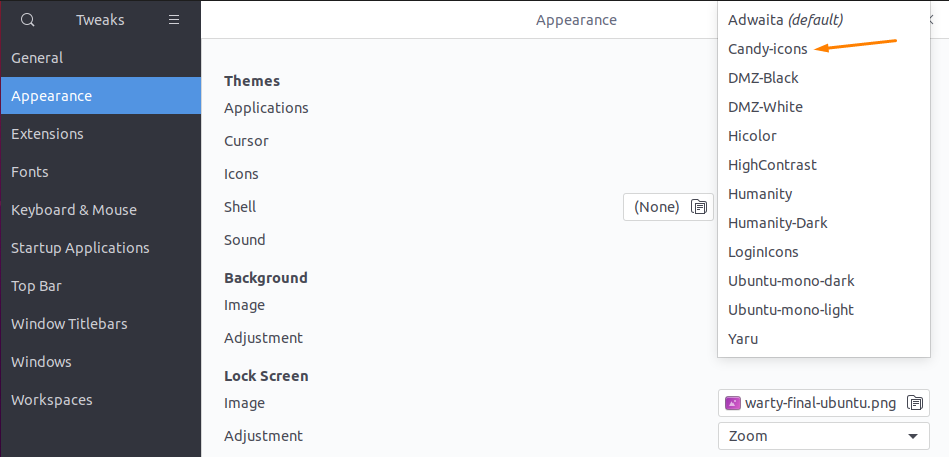
Icons Setting:
We have installed a “Candy icons set” to give our icons a beautiful look. Now, to apply them, select the icons category and you will a list of multiple icons options there; navigate to “Candy-icons” and click on it:
And how amazing icons look will be:
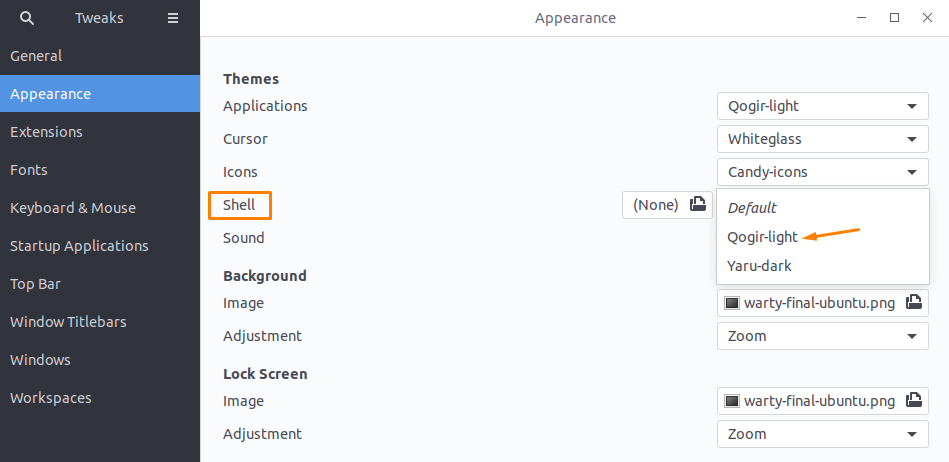
Shell Settings:
Change the shell appearance by selecting the “Qogir-light.”
Changing the Background Image:
If you customize the whole desktop environment and left with the same background image, you would notice, it will be like nothing has changed.
Just changing the background could change the whole appearance of your system. To change it, download any beautiful wallpaper that suits your desktop as a background image and save it on the system.
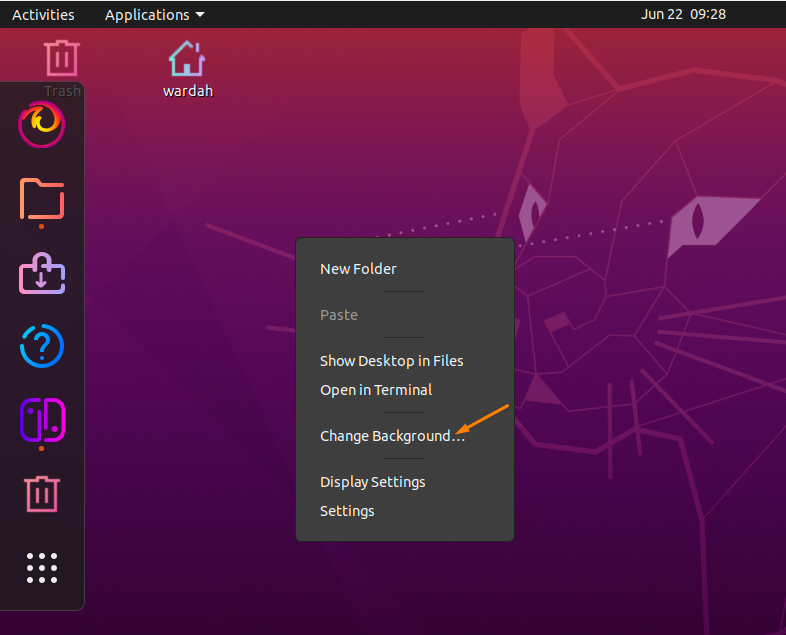
You can change it from Gnome Tweak Tool, or when you right-click on the desktop, there is an option of “Change Background”:
Open the Gnome-tweak-tool, and in the appearance, you will see the “background” category. From there, you can change not only the background image but also set adjust it just like you want to:
Navigate to “Image”; you will get a lot of images there:
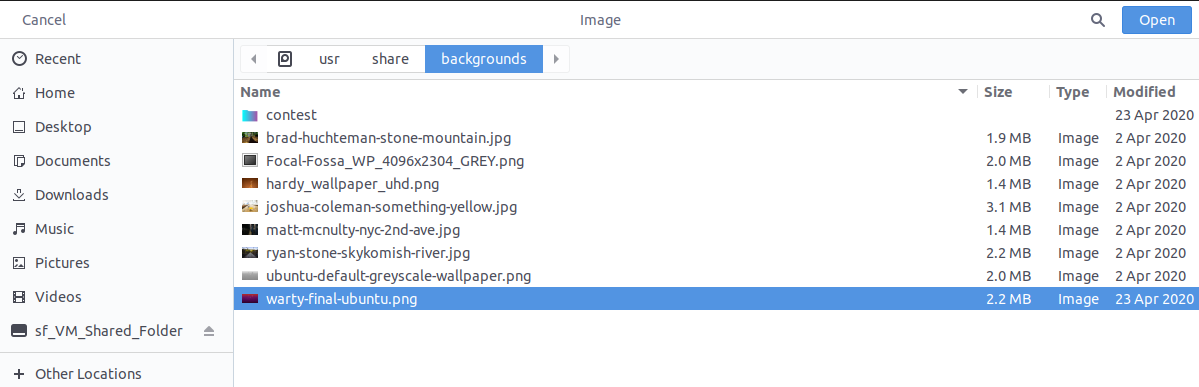
Or you can download your own wallpaper from a web browser just like I did. Select it from the location you saved and click to open:

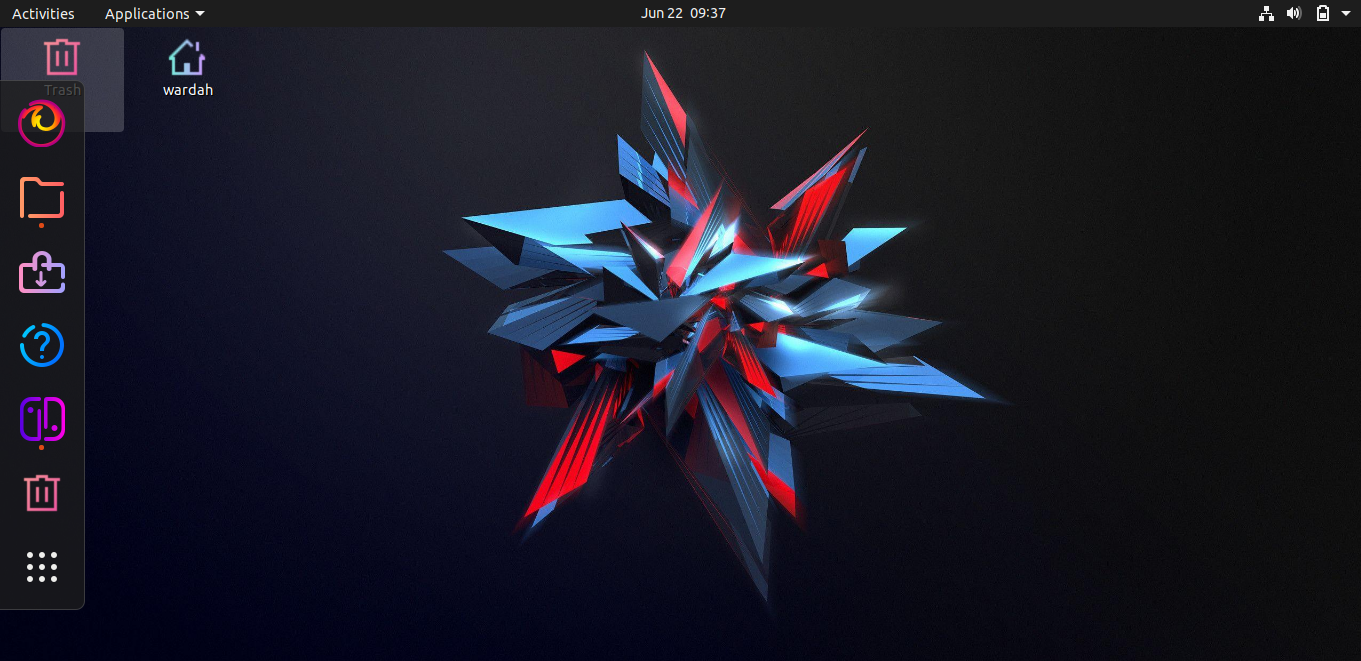
And the desktop will appear like this:
Changing the Lock Screen:
Similarly, you can change the lock screen image as well and its adjustment:
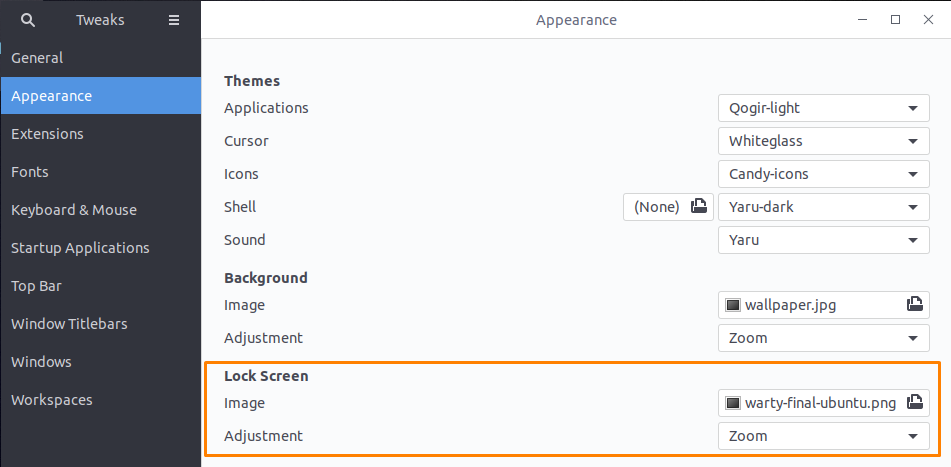
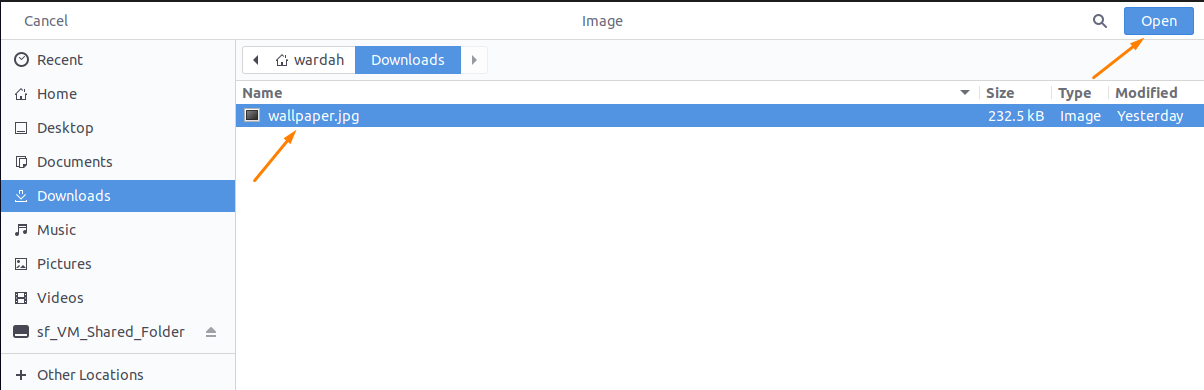
Click to the “Image” and select any from default images or download from the browser; I will apply it the same as I applied on background image:
So, select it from Downloads and hit “Open”:
Setting Applications Menu on Top Bar:
If you want to add Applications menu on the desktop; in the Gnome-tweak-tool, open the “Extensions” tab and enable the “Applications menu” there;
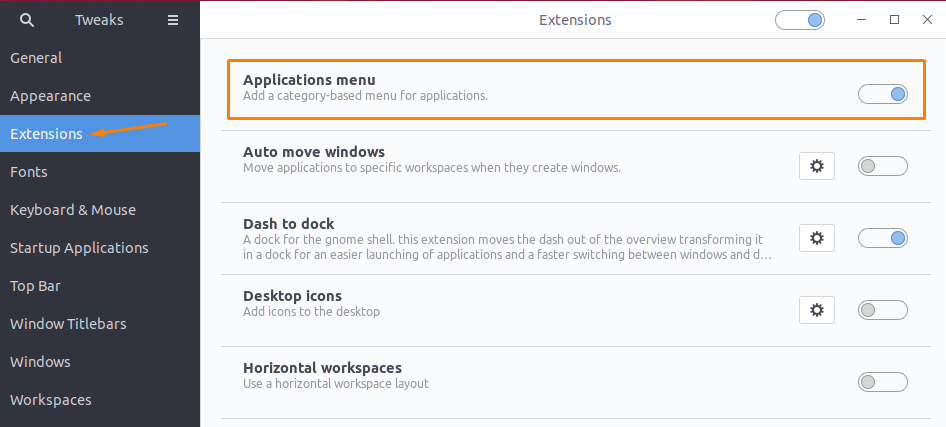
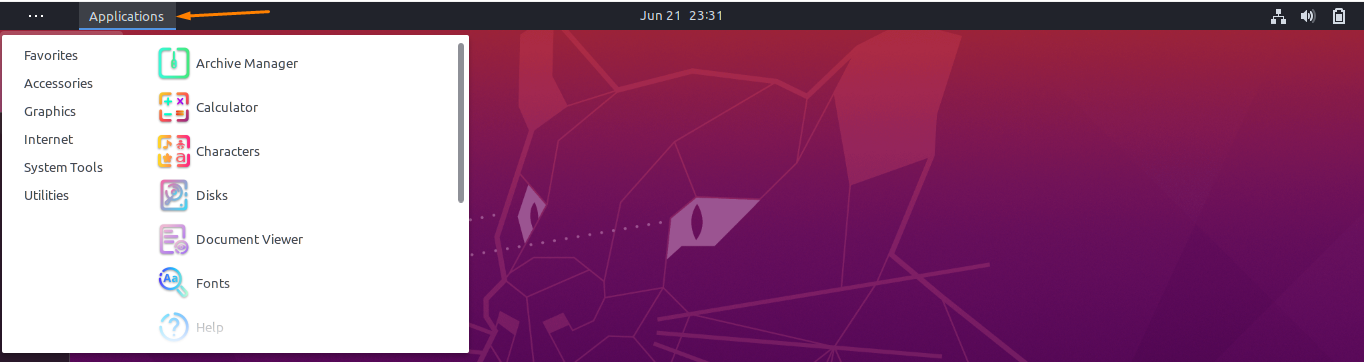
When you enable it; the “Applications” category will appear at the top bar of the Ubuntu system; you can access all the applications from there just in one click.
Dock Setting:
After installing the dock extension, we can change the dock settings quickly. You can do it through “Settings” by right-clicking on the desktop:
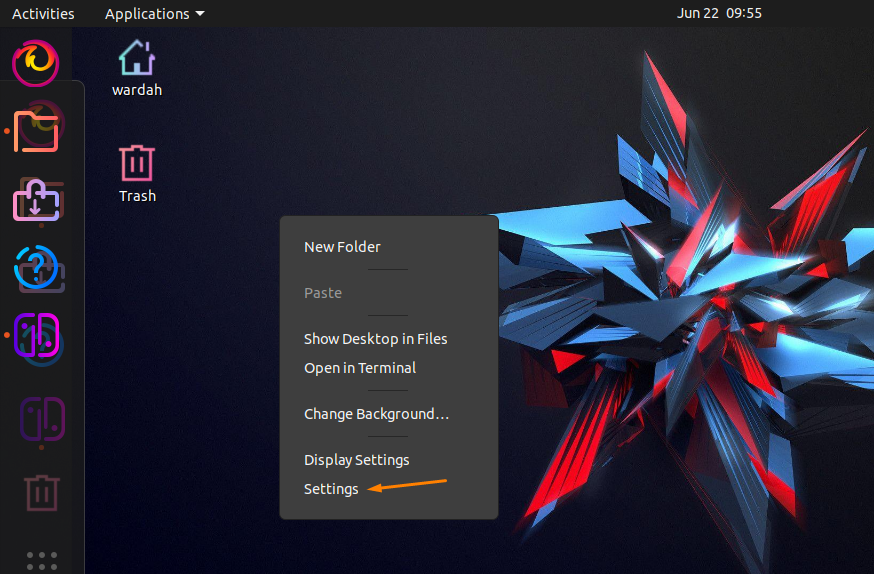
When you clicked a window will appear with several choices:

From there, you can change window colors as light, standard or dark, hide the dock or change its position and change icons size on the dock:
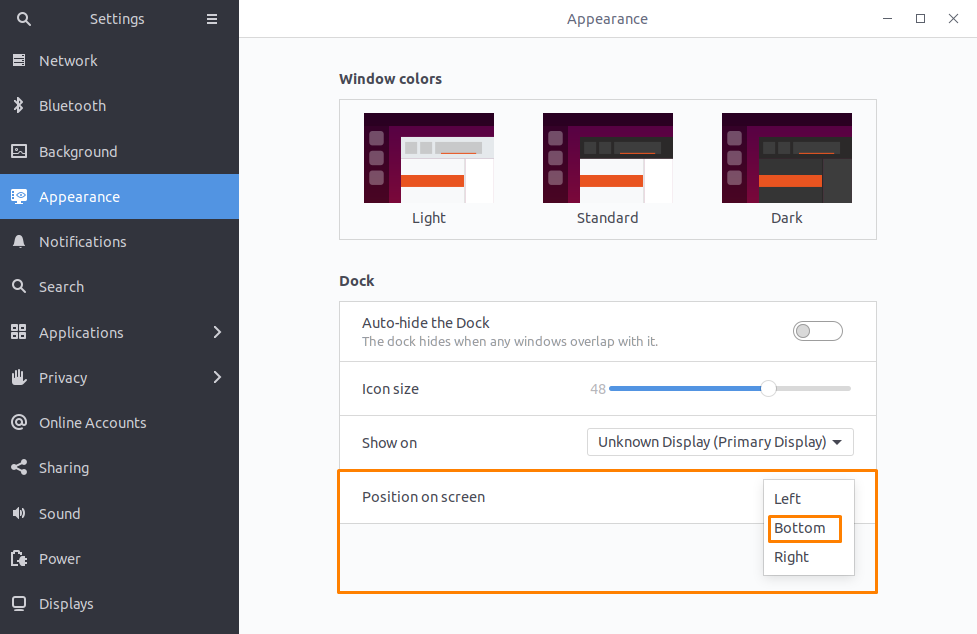
To change the dock position, move towards the last option, “Position on screen” of the “Appearance” category; it is set on the left side by default. I want to set it at the bottom:
And the final look you will get is:

Conclusion:
Working all day on a system can make you frustrated; seeing the same appearance might change your mood, and you get bored. It is important to change the look of the system from time to time. This gives you an attractive and refreshing feeling every time you change the environment’s appearance.
You can set the theme according to the mood you’re using your computer for; for children, you can make the system colorful to let them take an interest in it. For game lovers, several gaming themes are available on the internet. Some change their PC themes just because they don’t want to see the same appearance repeatedly. Also, when you’re stressed during office work, the pleasing look of the desktop provides you relaxation.
In the Ubuntu system, you are not stuck with the same environment; the Linux operating system offers multiple other environments. You can change the default environment by installing another Linux environment on your system.
We have discussed all the environments with their respective well-known features you can install on the Ubuntu system. The most popular Linux environments that you could install on your Ubuntu machine are Xfce desktop, KDE Plasma Desktop, Cinnamon Desktop, LXQT Desktop, Gnome Flashback Desktop, Pantheon Desktop, Mate Desktop, Budgie Desktop, and Deepin DE. However, Gnome desktop is the default desktop environment for Ubuntu systems.
In this guide, we have learned how to customize the Gnome desktop environment on Ubuntu 20.04; the tutorial is really helpful for beginners who want to change the system look but don’t find a way to do it.
To customize the Ubuntu operating system, we need to change everything that can help us make the desktop look beautiful and elegant; for example, we can change themes, icons, shell appearance, dock setting, fonts, background image, and many other settings.
To customize the Gnome desktop, there is a tool called “Gnome-tweak-tool” that has the power to change the look of your desktop environment completely. To get it, we have to download it using the command-line tool. Once it’s done, you will be able to apply changes through the Tweaks interface. You can also install the shell and dock extensions to add many other extensions on the Tweaks tool.
So, follow the guide, and almost everything you need to know about Ubuntu customization is mentioned here.