In this article, we will elaborate on how to remove or delete a repository in GitHub.
How to Delete a Repository in GitHub?
To delete a repository in GitHub, first, open up your favorite browser and log into your GitHub account. Next, select the repository which needs to be deleted and open its settings. Then, click on the “Delete this repository” option inside the “Danger Zone” and verify the deleting process by specifying the repository name.
Now, let’s move toward the next section to perform the above operation!
Step 1: Open GitHub
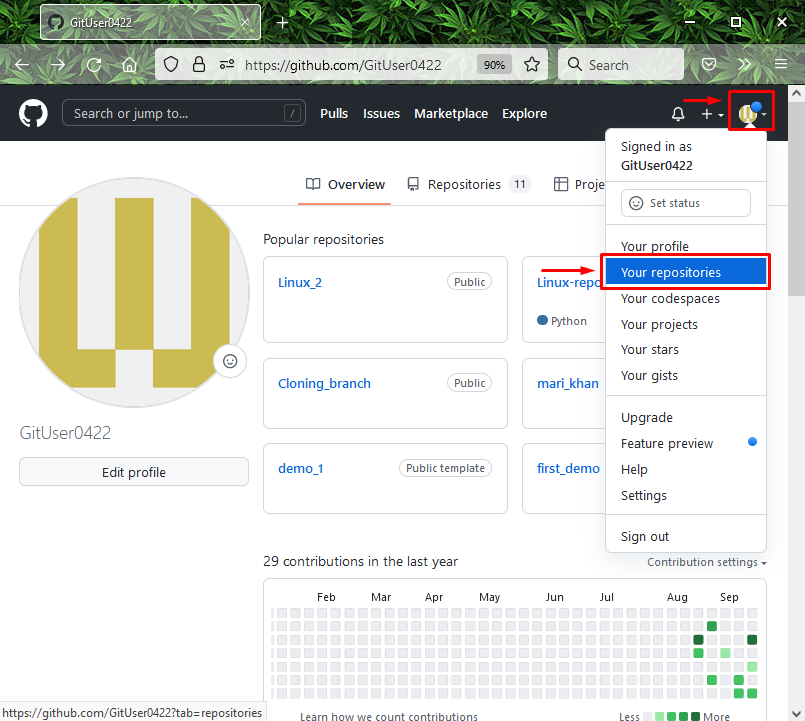
First, open your GitHub account. Click on the profile picture icon and select the “Your repositories” option from the opened drop-down menu:
Step 2: Select Repository
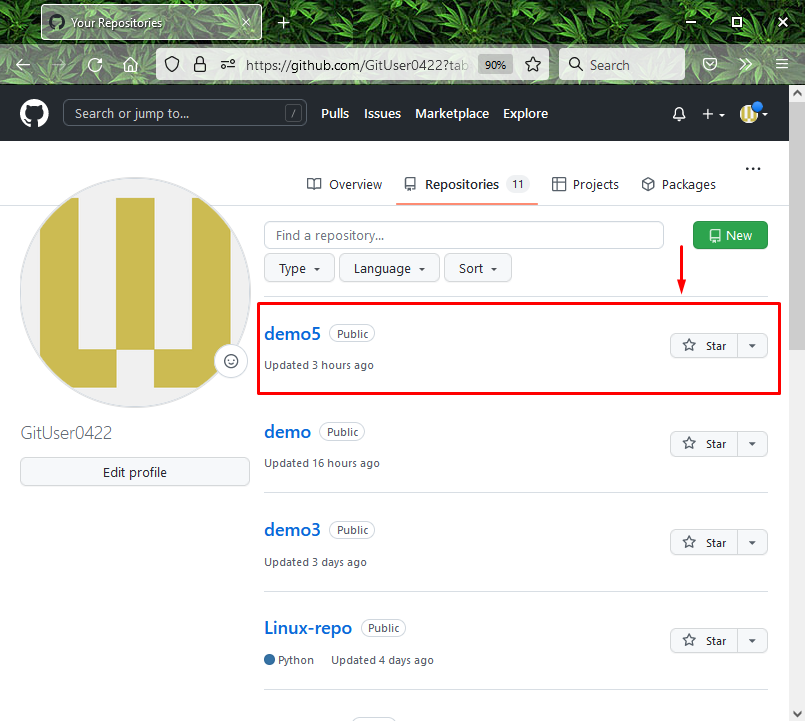
Next, click on the Git remote repository which you want to delete:
Step 3: Open Repository Settings
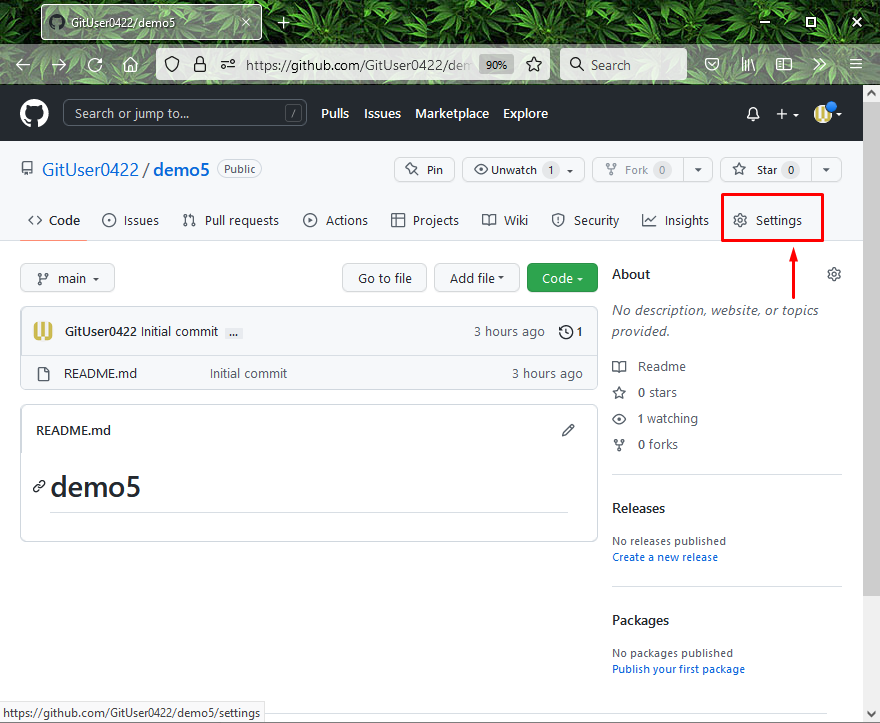
Now, hit the “Settings” button to launch the remote repository settings:
Step 4: Delete Repository
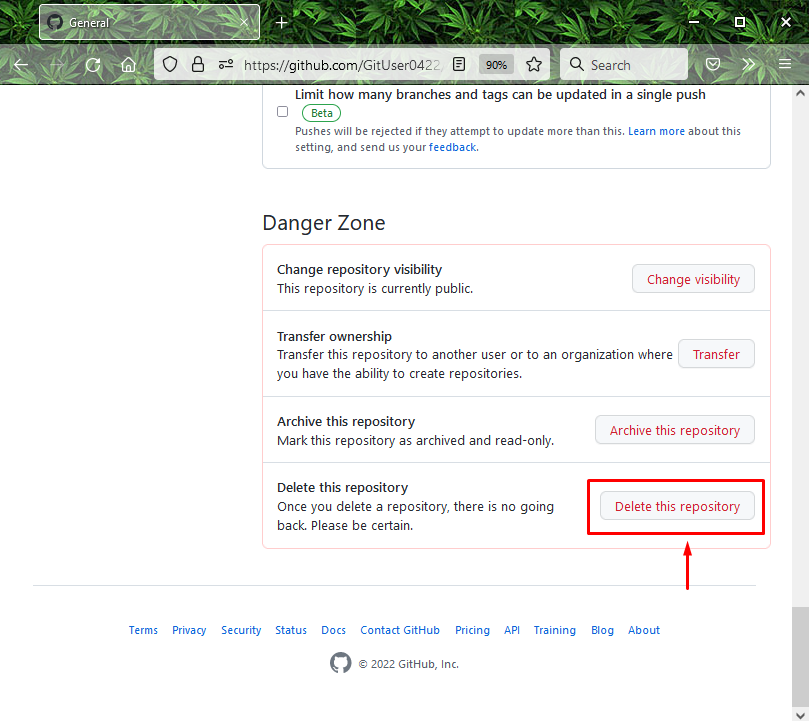
Scroll down to the settings tab and click on the “Delete this repository” option underneath “Danger Zone”:
Step 5: Verify Deleting Process
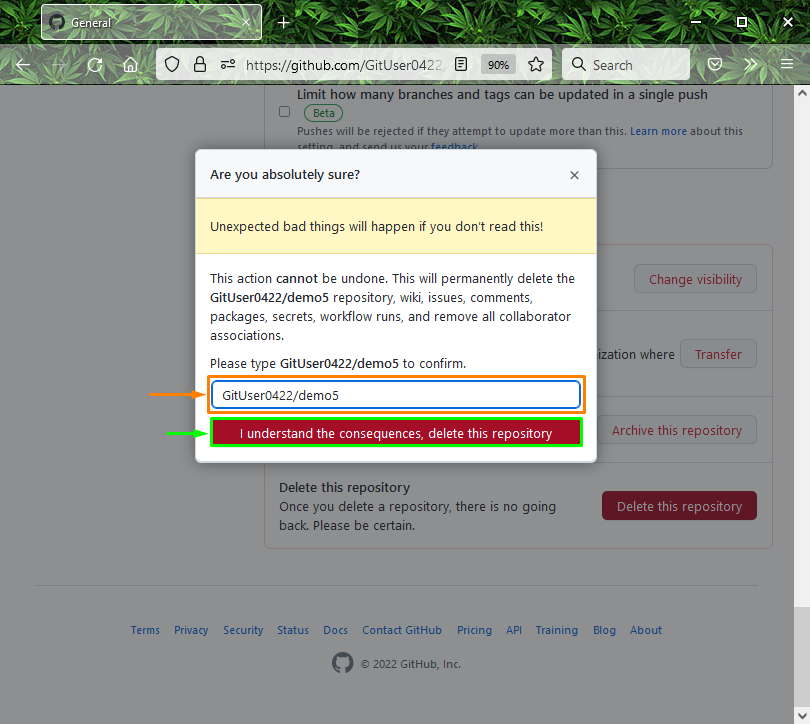
Lastly, specify the repository name which needs to be deleted and then click on the “I Understand the Consequences, delete this repository” button to verify the deleting process. Here, we have specified the “GitUser0422/demo5” as the repository name:
That’s it! We have provided the easiest process of deleting a repository in GitHub.
Conclusion
To delete a repository in GitHub, first, open up your GitHub account and then click on the profile icon. Next, click on the “Your repositories” option from the opened drop-down menu. Then, select the repository which needs to be deleted. After that, go to the repository settings, click on the “Delete this repository” option underneath “Danger Zone”, and verify the deleting process. This article provided the method to remove or delete a repository in GitHub.

