In this guide, we discuss the procedure of deleting a project on GitLab.
How to Delete a Project on GitLab?
To permanently remove the project on GitLab, check out the following step-by-step instructions:
- Sign in to the GitLab account.
- Select the GitLab project which you want to delete.
- Access its settings and choose the “General” option.
- From the “Advanced” section, locate the “Delete this project” section.
- Click on the “Delete project” button and confirm it by completing the fields.
Step 1: Select GitLab Project
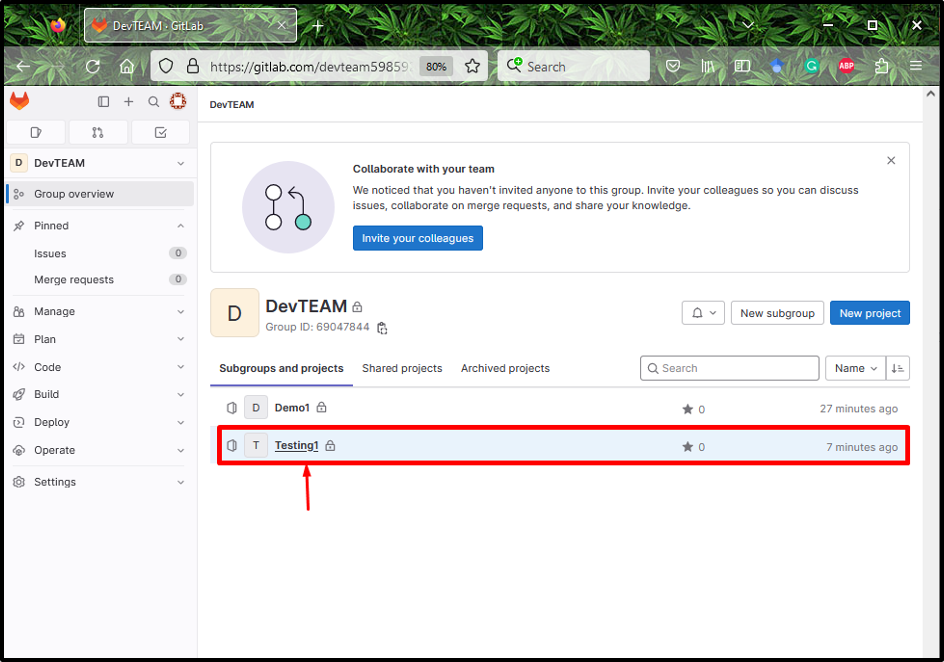
First of all, move to your GitLab account and choose the particular project which you need to delete. Here, we have selected the “Testing1” project:
Step 2: Access Project Settings
On the left sidebar, click on the “Settings” and then choose the “General” option:
Step 3: Expand the Advanced Section
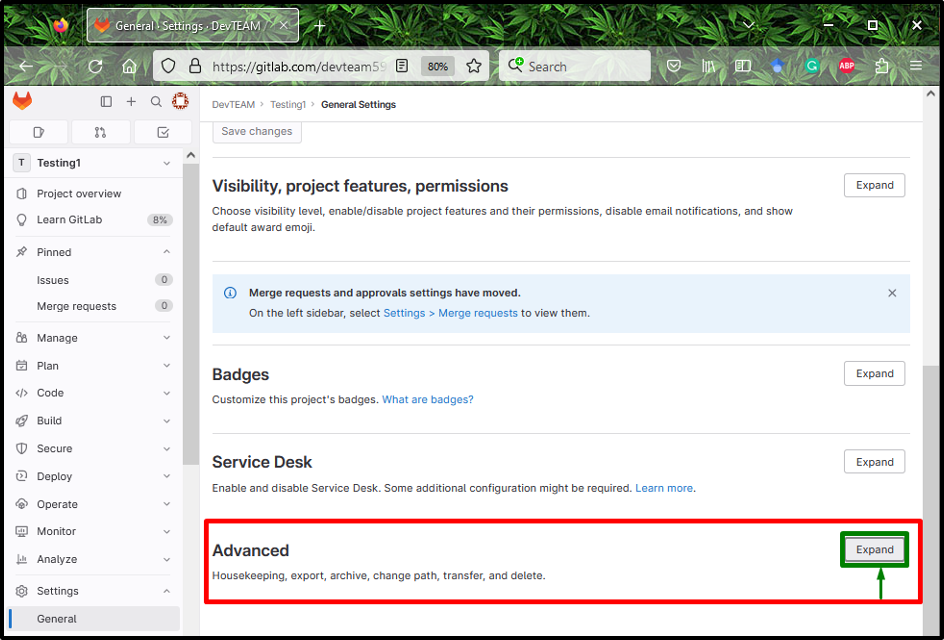
Next, locate the “Advanced“ section and click on the “Expand” button:
Step 4: Delete the Project
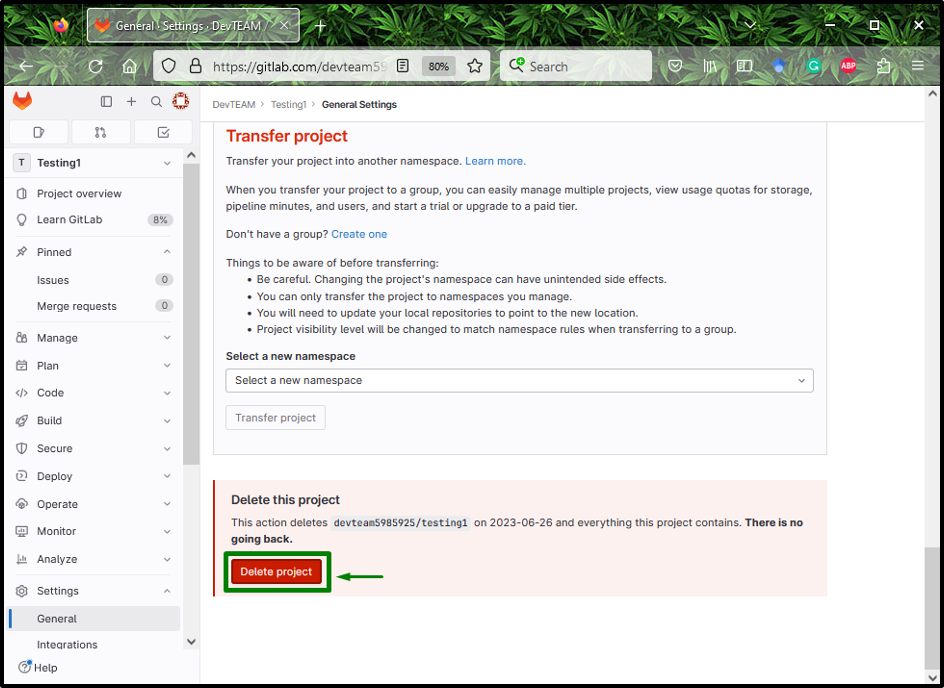
Now, inside the “Advanced”, search for the “Delete this project” section and click on the “Delete project” button:
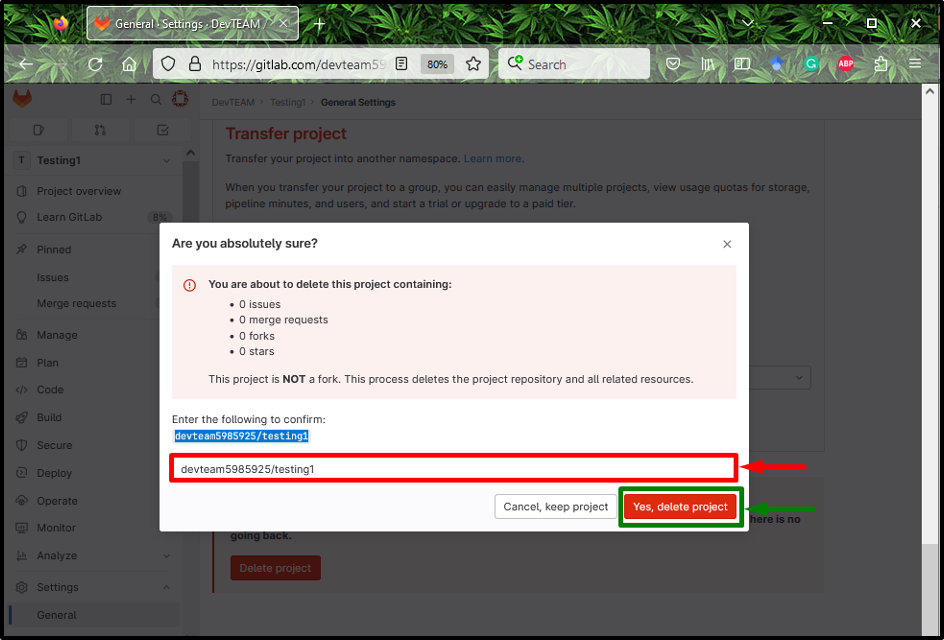
To confirm the project deleting operation, enter the full project name inside the required fields and hit the “Yes, delete project” button:
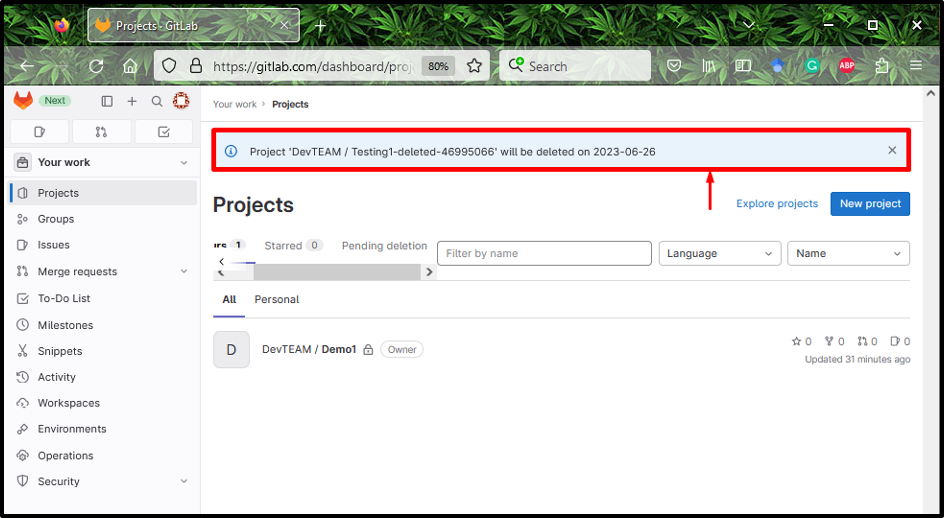
According to the below-highlighted message, the GitLab “Testing1” project has been deleted successfully:
That’s all! We have provided the procedure for removing the project on GitLab.
Conclusion
First, sign in to the GitLab account and select the GitLab project to remove the project on GitLab. Then, access its settings, and choose the “General” option. Next, expand the “Advanced” section and scroll down to the “Delete this project” section, and hit the “Delete project” button. Lastly, confirm this action by completing the fields. This tutorial illustrated the permanently removing project on GitLab.

