In this blog, we will demonstrate the method to delete the Git branch locally.
How to Delete Git Branch Locally?
To delete the Git branch locally, users can utilize the “git –delete” or “git -d” commands. For the specified purpose, check out the below-provided steps.
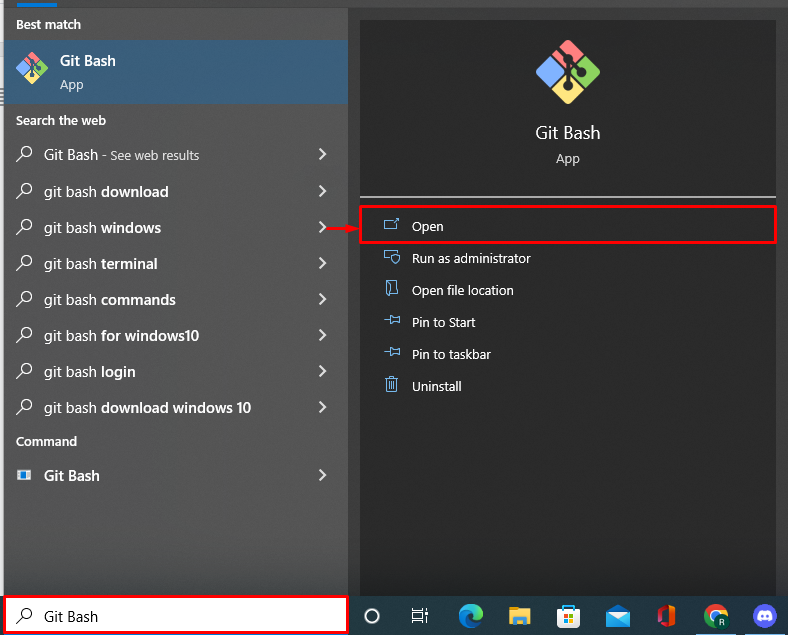
Step 1: Open Git Bash Terminal
First, type “Git Bash” in the Start menu and launch the Git Bash terminal:
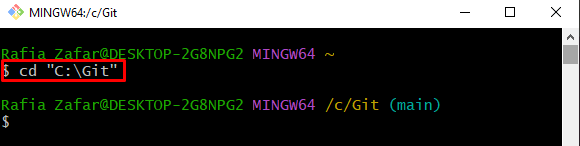
Step 2: Move to Git Local Repository
By utilizing the “cd” command, move to the required Git local repository:
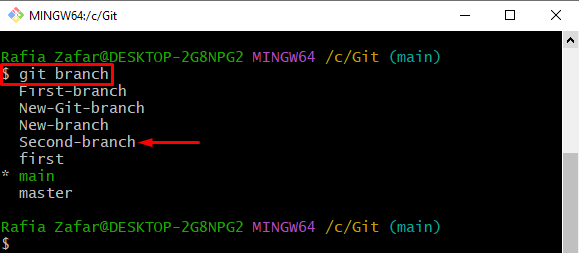
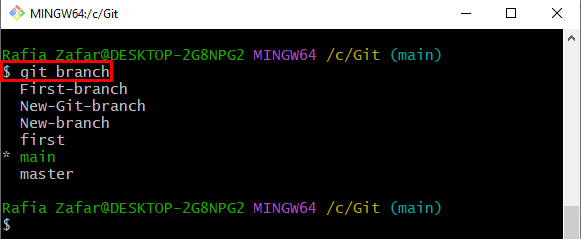
Step 3: List Down Git Local Branches
To view all local branches, check out the provided command:

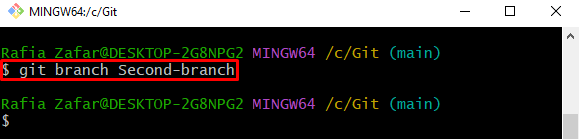
Step 4: Create New Branch
Create a new Git branch through the “$ git branch” command also provide the branch name:
Again, list down the local branches to verify whether the new branch is created or not:
Here, you can see that the “Second-branch” is created successfully:
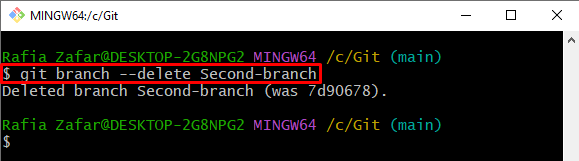
Step 5: Delete Branch
To delete the Git branch again, utilize the “git branch” command with the “–delete” option:
Step 6: Verify Branch Deletion
Next, verify whether the branch is deleted or not by listing down all local branches:
The below output indicates that the “Second-branch” is successfully deleted:
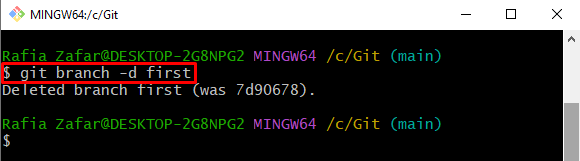
Alternatively, the user can utilize the “-d” option instead of the “–delete” option:
We have taught you how to delete a Git branch locally.
Conclusion
To delete the Git branches locally, first launch the Git Bash terminal and move to the Git repository. List down all local branches using the “$ git branch” command. Then, delete the unused or extra branch using the “$ git branch –delete” command in the terminal and again list down branches to check if the selected branch is deleted or not. This post has elaborated on the method for deleting a Git branch locally.