This tutorial will discuss how you can work with HTTP headers using cURL.
What is an HTTP Header?
An HTTP header refers to a field in the HTTP request or response to enable the passing of additional information, such as metadata about the request or response.
HTTP headers allow a client and server to exchange additional information within a specific request or response. The header is comprised of a case-sensitive name, a colon, and the value.
Its syntax is as shown:
"accept": "*/*",
"host": "echo.hoppscotch.io",
"user-agent": "-o",
"x-country": "US",
"x-forwarded-for": "41.90.68.25, 100.64.0.127",
"x-forwarded-proto": "https",
"x-nf-client-connection-ip": "172.122.12.122",
"x-nf-request-id": "01G48DEPNS1QZF8BZ7YS27HZ93"
Let us learn how we can work with HTTP headers using cURL.
Installing cURL
You will often find curl installed on most systems. However, if not, you can install it via your system’s package manager.
Debian
$ sudo apt-get install curl
REHL
$ sudo yum install curl
Manjaro/Arch
$ sudo pacman -S curl
cURL Display Raw Message
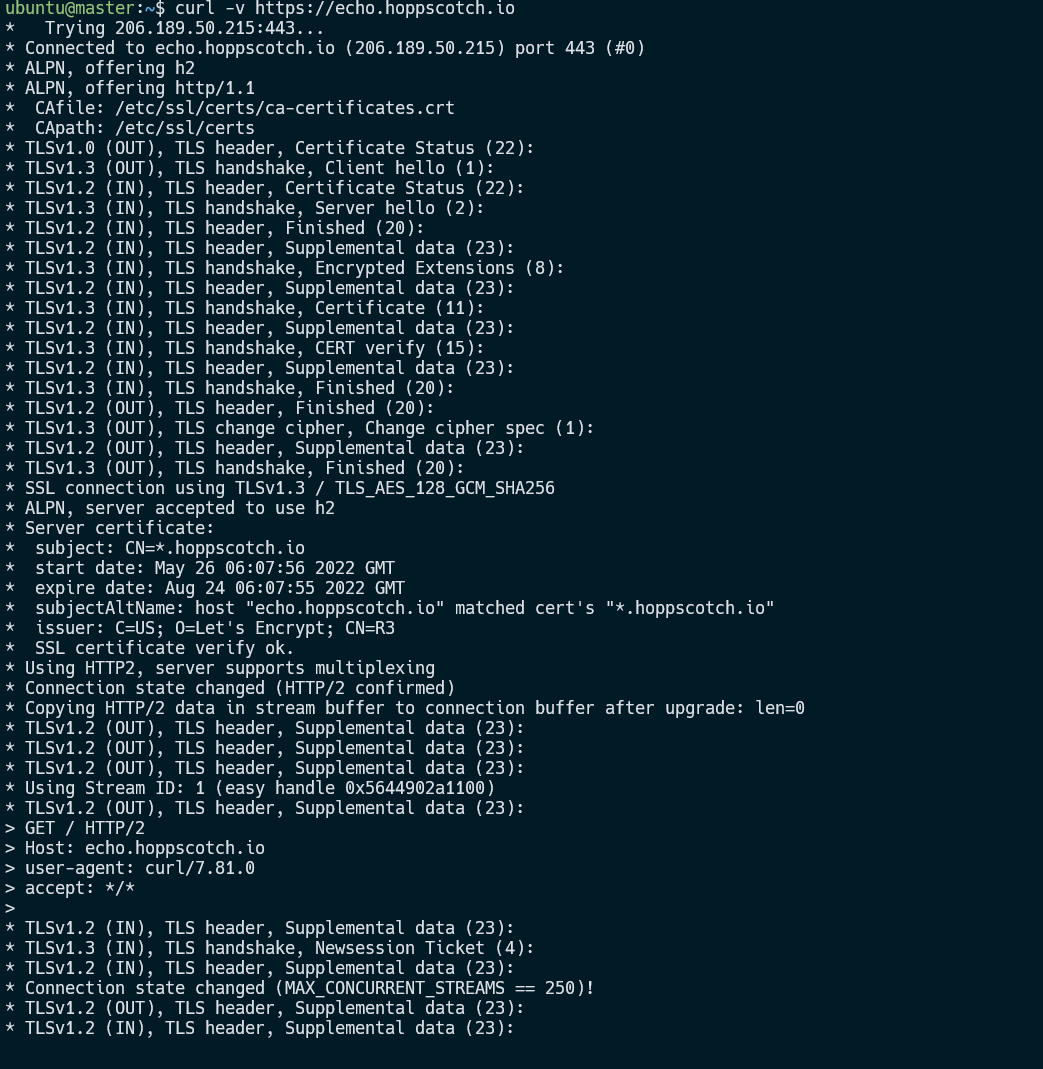
To display a raw message in a cURL request, we use the -v flag or –verbose. The option allows us to show detailed information about the request, including the handshake process.
Trying 18.192.76.182:443...
* Connected to echo.hoppscotch.io (18.192.76.182) port 443 (#0)
* ALPN, offering h2
* ALPN, offering http/1.1
* CAfile: /etc/ssl/certs/ca-certificates.crt
* CApath: /etc/ssl/certs
* SSL connection using TLSv1.3 / TLS_AES_128_GCM_SHA256
* ALPN, server accepted to use h2
* Server certificate:
* subject: CN=*.hoppscotch.io
* start date: May 26 06:07:56 2022 GMT
* expire date: Aug 24 06:07:55 2022 GMT
* subjectAltName: host "echo.hoppscotch.io" matched cert's "*.hoppscotch.io"
* issuer: C=US; O=Let's Encrypt; CN=R3
* SSL certificate verify ok.
* Using HTTP2, server supports multiplexing
* Connection state changed (HTTP/2 confirmed)
* Copying HTTP/2 data in stream buffer to connection buffer after upgrade: len=0
* Using Stream ID: 1 (easy handle 0x55b037e12100)
> GET / HTTP/2
> Host: echo.hoppscotch.io
> user-agent: curl/7.81.0
> accept: */*
>
* Connection state changed (MAX_CONCURRENT_STREAMS == 250)!
< HTTP/2 200
< access-control-allow-credentials: true
< access-control-allow-headers: Origin, X-Requested-With, Content-Type, Accept
< access-control-allow-methods: GET, POST, PUT, PATCH, DELETE, OPTIONS, HEAD
< access-control-allow-origin: *
< age: 0
< cache-control: no-cache
< content-type: application/json
< date: Mon, 30 May 2022 20:52:52 GMT
< server: Netlify
< x-nf-request-id: 01G4BBWCR3VP8TV4HEJD0QG375
< content-length: 409
<
* TLSv1.2 (IN), TLS header, Supplemental data (23):
{
"method": "GET",
"args": {},
"data": "",
"headers": {
"accept": "*/*",
"host": "echo.hoppscotch.io",
"user-agent": "curl/7.81.0",
"x-country": "KE",
"x-forwarded-for": "41.90.68.25, 100.64.0.210",
"x-forwarded-proto": "https",
"x-nf-client-connection-ip": "41.90.68.25",
"x-nf-request-id": "01G4BBWCR3VP8TV4HEJD0QG375"
},
"path": "/",
"isBase64Encoded": false
* Connection #0 to host echo.hoppscotch.io left intact
}
From the above output, we can see how the request is processed by the server, starting with the server handshake.
Verbose mode is advantageous when debugging or finding any misconfigurations in the server.
cURL Show Headers Only
To suppress all the output and show only the headers, we can use the — head flag as shown:
HTTP/2 200
access-control-allow-credentials: true
access-control-allow-headers: Origin, X-Requested-With, Content-Type, Accept
access-control-allow-methods: GET, POST, PUT, PATCH, DELETE, OPTIONS, HEAD
access-control-allow-origin: *
age: 0
cache-control: no-cache
content-type: application/json
date: Mon, 30 May 2022 20:56:26 GMT
server: Netlify
x-nf-request-id: 01G4BC2XH5PBYM2CW57PJV2R1X
content-length: 408
The command should only return the response headers, as shown in the output above.
You can also add the -o followed by the target path to dump the output. For example, if your link returns a bunch of HTML, you can redirect the output to dev/null as shown:
The command should redirect the output to /dev/null.
cURL Pass Custom Headers
If you make an HTTP request, you may need to pass custom headers using cURL. You can use the -H flag followed by the Header and value.
Consider the syntax shown below:
For example:
{
"method": "GET",
"args": {},
"data": "",
"headers": {
"accept": "*/*",
"accepted-language": "en-US",
"host": "echo.hoppscotch.io",
"user-agent": "curl/7.81.0",
"x-country": "KE",
"x-forwarded-for": "41.90.68.25, 100.64.0.210",
"x-forwarded-proto": "https",
"x-nf-client-connection-ip": "41.90.68.25",
"x-nf-request-id": "01G4BCGJYJ46YT05MVE7WTAYZT"
},
"path": "/",
"isBase64Encoded": false
We pass the Accepted-Language header with the value en-US to the target URL in the request above.
cURL Add Multiple Headers
To pass multiple headers, you can give the -H flag various times, as shown in the syntax below:
For example:
You can verify the set value in the resulting headers as shown:
cURL Pass Empty Header
You can pass an empty header using the syntax below:
For example:
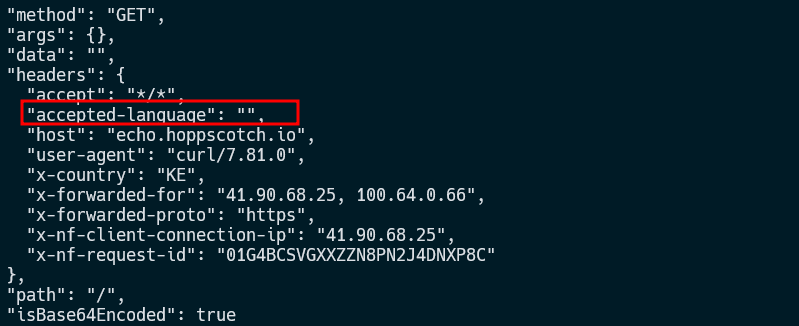
The resulting output is as shown:
Note the value for the specified header is empty.
Conclusion
This article discussed various methods and techniques of using headers in cURL. Using this tutorial, you understand how to view headers in a request, send single or multiple headers, and finally, send empty headers.


