The job of a print server is to accept print requests from multiple machines, process those requests, and then send them to the specified printer for serving those requests. CUPS is a utility designed for Linux operating systems that can turn a regular computer system into a print server. This article provides a method for setting up the CUPS print server in Ubuntu 20.04.
Method for Setting up CUPS Print Server in Ubuntu 20.04
To set up the CUPS print server in Ubuntu 20.04, follow the steps listed below:
Step 1: Install CUPS Print Server
To install the CUPS print server, you will need to give the installation command via the terminal. Launch the terminal, as shown in the following image:
Once the terminal has been launched, you can install the CUPS print server by running the command listed below:
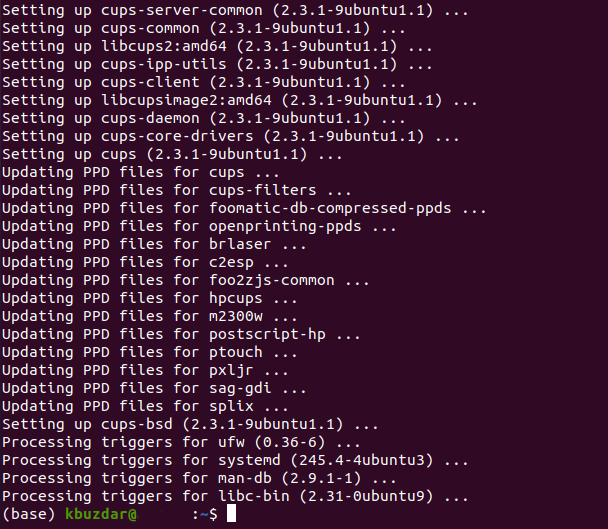
The installation of the CUPS print server will take around two to three minutes with moderate Internet speed. Once the installation process is complete, you should see the following output in the terminal:
Step 2: Start CUPS Print Service
After installing the CUPS print server, start the CUPS print service in the following manner:
Running the above command in your terminal will immediately start the CUPS print service.
Step 3: Enable CUPS Print Service
The next step is to enable the CUPS print service that you have just started, which can be done by executing the command shown below in the terminal:
Once your system has successfully started the CUPS print service, it will signal your terminal to display the following output:
Step 4: Configure CUPS Print Server
To configure the CUPS print server, open its configuration file with any text editor of your choice (preferably the nano editor, since it is the default text editor of Linux). Then, configure the CUPS print server by running the following command in the terminal:
The configuration file of the CUPS print server is shown in the image below:
Scroll down and find the “Show shared printers on the local network” section. Here, you will find an entry titled, “Browsing Off.” Change this to “Browsing On,” as shown in the following image:
Next, find the “Only listen for connections from the local machine” section. Here, there will be an entry titled, “Listen localhost:631.” Change this to “Port 631,” as shown in the image below:
Now, find the “Restrict access to the server” section and add the line “Allow @LOCAL” after the line “Order allow, deny,” as shown in the following image:
Finally, find the “Restrict access to the admin pages” section and make the necessary modifications in this section, as shown in the image below:
Finally, save the CUPS print server’s configuration file and exit from the text editor by pressing Ctrl + X.
Step 5: Restart CUPS Print Service
After making these changes in the configuration file, restart the CUPS print service that you previously started by running the following command:
Running this command will restart the CUPS print service with the new configurations in place.
Step 6: Verify Successful Setup of CUPS Print Server
To verify whether the CUPS print server has been set up successfully on your Ubuntu 20.04 system, type “printer” in the Activities search bar, and then select the “Printer Settings” option from the results, as highlighted in the image below:
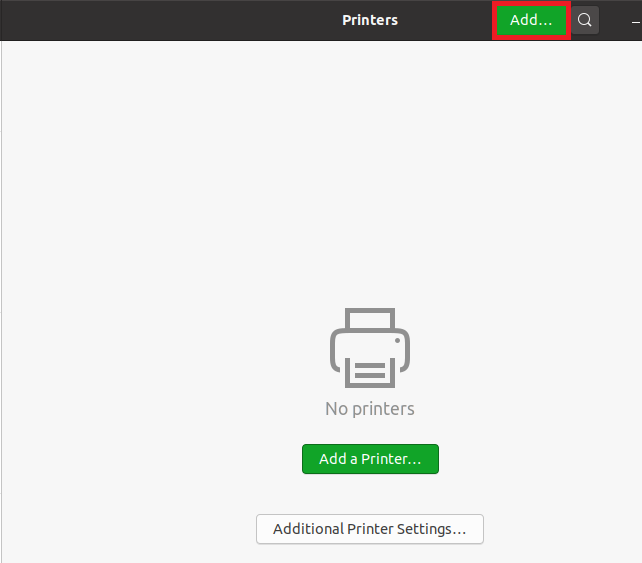
Click on the “Add” button in the “Printer Settings” window, as highlighted in the following image:
You should be able to see the CUPS Printer in the entries if you do not have any other printer attached to your system. This will be an indication that the CUPS print server has been successfully installed on your system, as shown in the image below:
Conclusion
This article explained the step-by-step procedure of setting up a CUPS print server in Ubuntu 20.04. After following these steps, your Ubuntu 20.04 system will be all set to act as a full-fledged print server.


