Types of AWS RDS
Amazon has different types of DB instances or database instances for running RDS. As mentioned earlier, the RDS database running on these DB instances is backed by database engines, such as PostgreSQL, MySQL, and MariaDB. One can use the AWS Management Console, an Amazon RDS APIs or AWS CLI version to create an RDS instance. We will be using the command-line approach for creating an RDS instance.
What Will We Explore Here?
In this guide we will show you how to create a MySQL RDS DB instance using AWS CLI. We will use an IAM user account with limited privileges. Let us now move forward with the AWS IAM user.
Creating an IAM User
Cloud service providers usually offer an IAM or Identity and Access Management feature to give a user root account extra security. In a work environment, giving each user access to a root account or managing services directly from the root account makes it vulnerable to security threats. Instead, we can create users with specific permissions to avoid privilege escalation problems. This is similar to creating users in Linux with limited access to system files and other resources. So, in this hands-on lab, we will create an IAM user with minimal access rights required for performing only the RDS database creation operations.
Note: This IAM user will not be able to perform the following operations due to the least privilege policy:
- Delete database
- Start database
- Stop database
To create the previous IAM user, follow the instructions below:
Step 1. Go to the AWS IAM console and click the “Add Users” button:
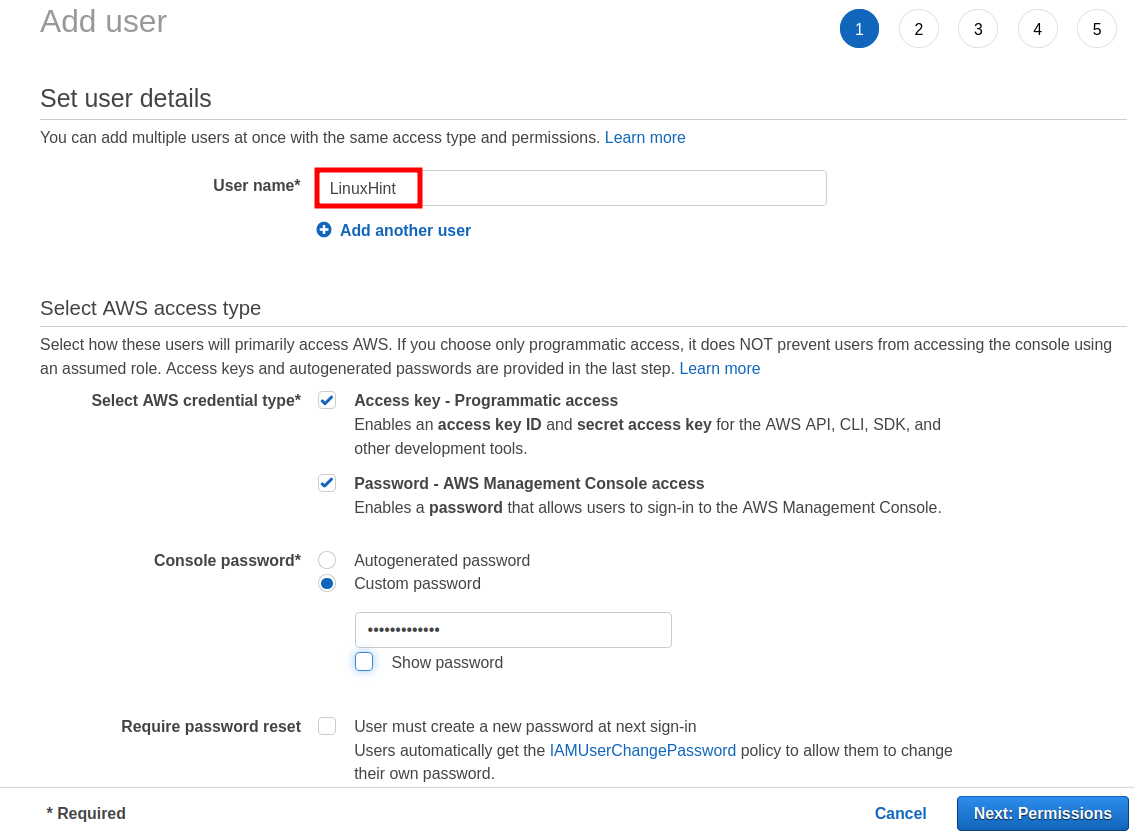
Step 2. Give a suitable name to your user and assign a password. Since we are interacting with the user using AWS CLI, we have checked the “Access Key” tick box. Additionally, we have also given management console access to this user:
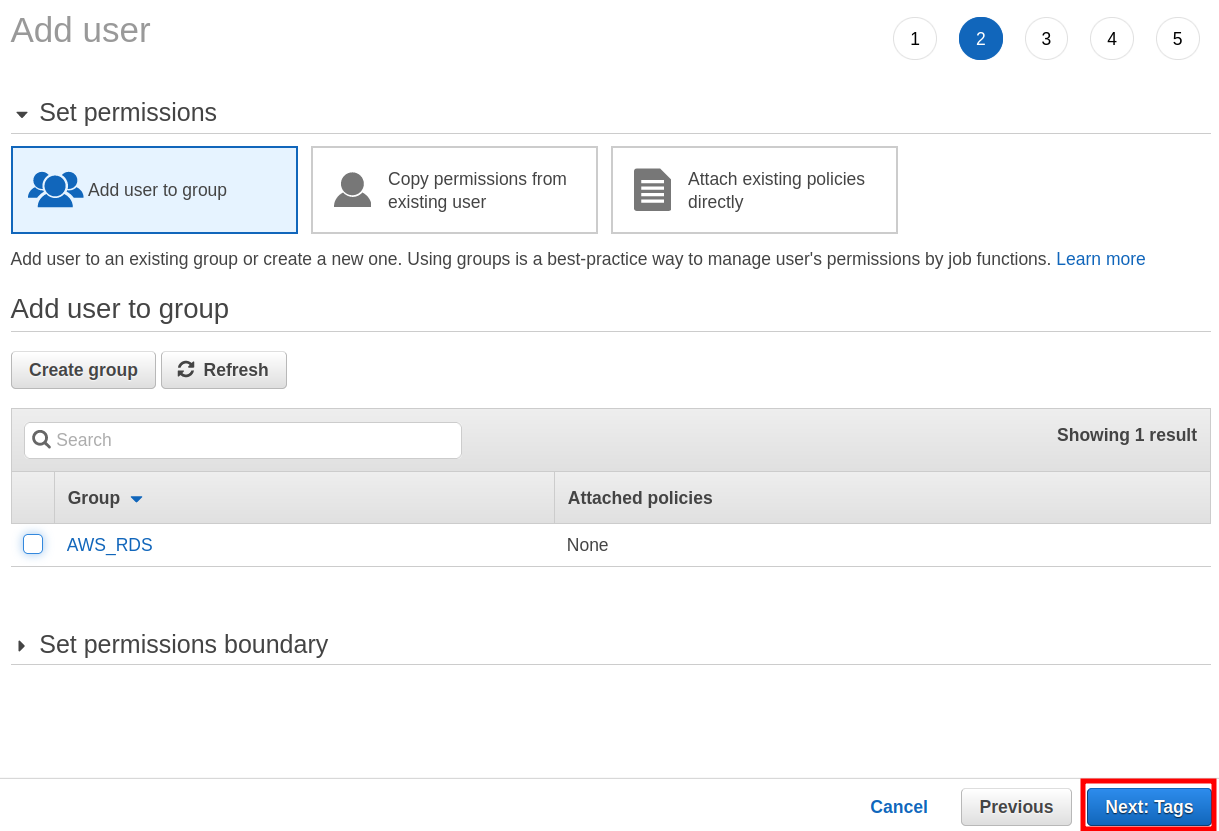
Step 3. We can also add this user to a group, but we have skipped this. Now, click “Next:Tags” to continue:
Step 4. (Optional) we can add tags (Key-value pair) to organize our users:
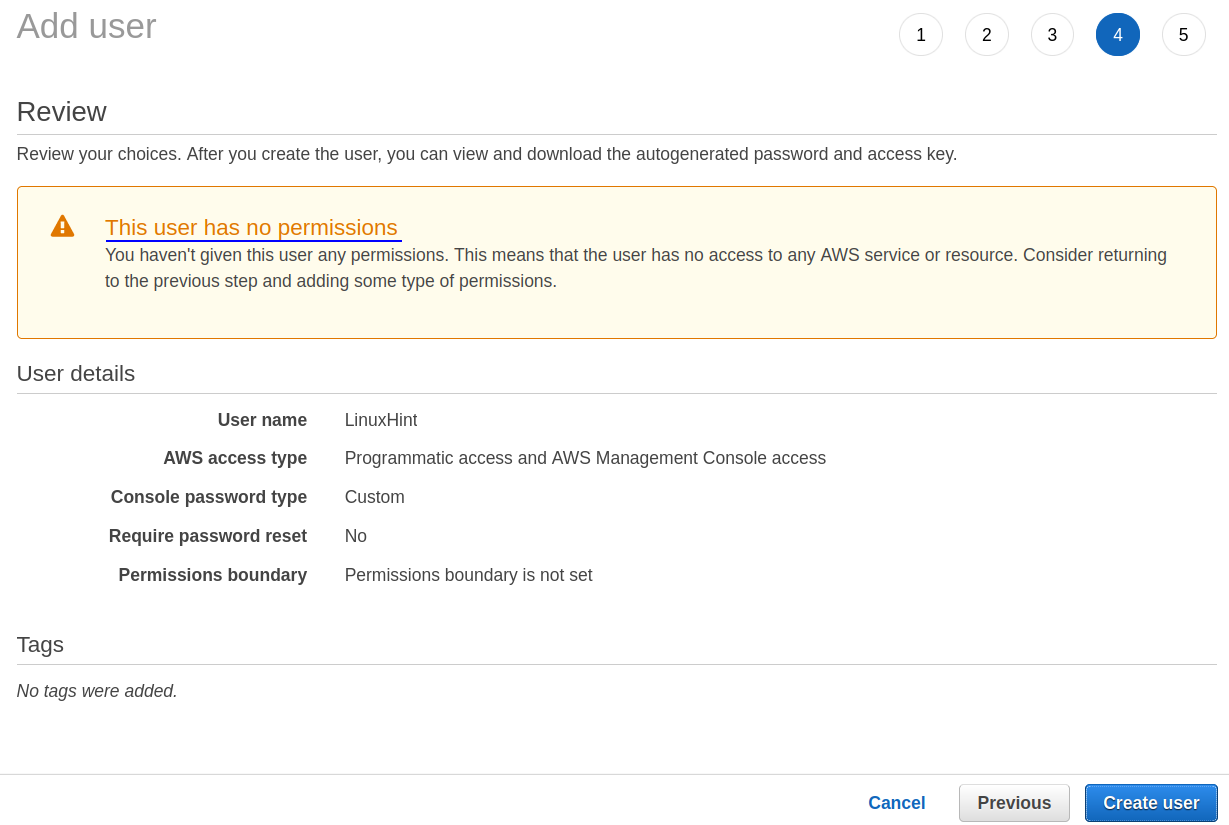
Step 5. On the next screen, review the settings for your user:
Step 6. When you click the “Create user” button, you will be asked to download your access keys. Keep these keys secret and put them in a safe place as they are available to download only once. Your user will now be available in the IAM users’ section:
Step 7. Now, we will add an inline policy for this user to perform the above-specified database operation. In the IAM users’ section, click on your user name. Click the “Add inline policy” label under the “Permissions” tab on the new screen:
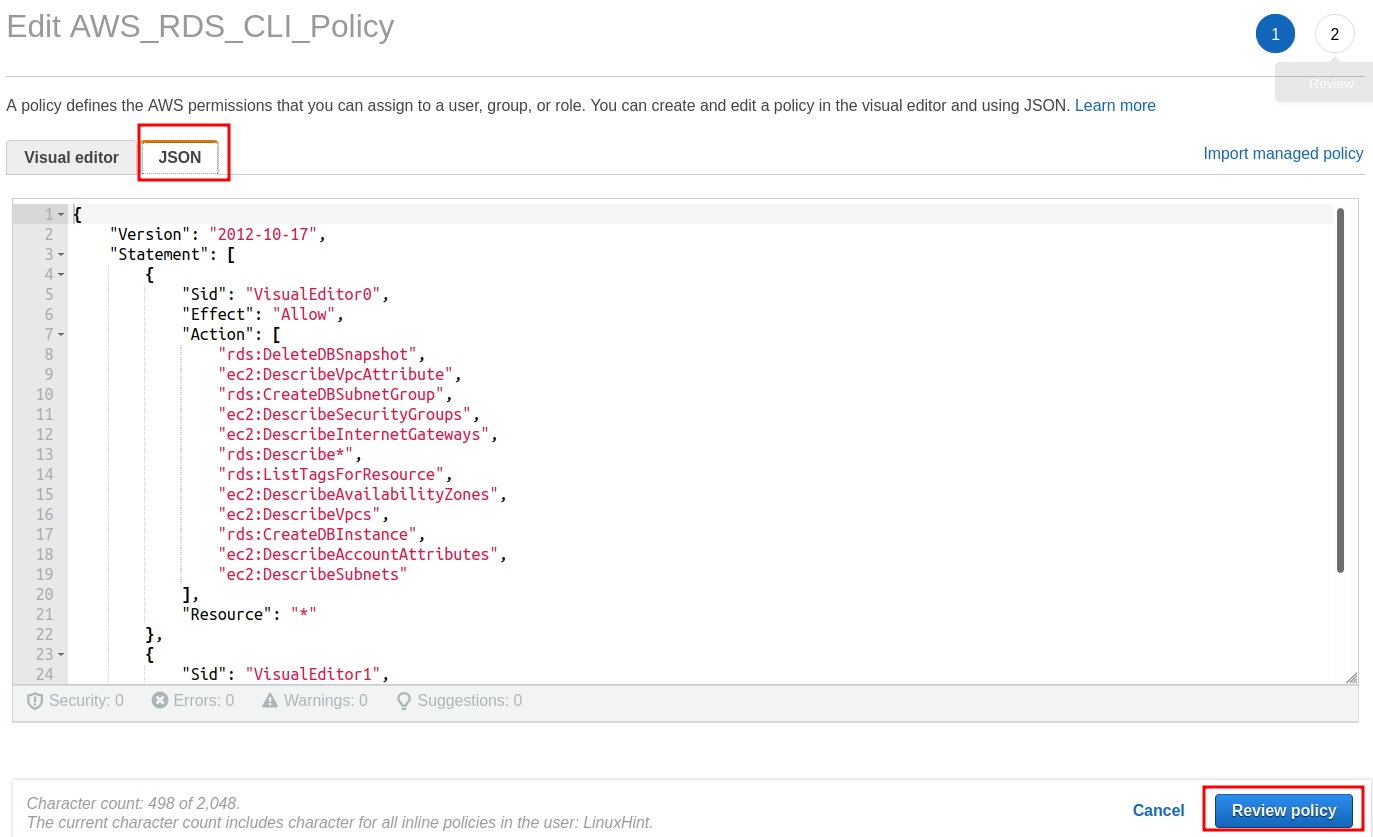
A new wizard named “Create policy” will appear where you have to select the JSON tab and paste the following code there:
"Version": "2012-10-17",
"Statement": [
{
"Sid": "VisualEditor0",
"Effect": "Allow",
"Action": [
"ec2:DescribeVpcAttribute",
"ec2:DescribeSecurityGroups",
"ec2:DescribeInternetGateways",
"ec2:DescribeAvailabilityZones",
"ec2:DescribeVpcs",
"ec2:DescribeAccountAttributes",
"ec2:DescribeSubnets",
"rds:Describe*",
"rds:ListTagsForResource",
"rds:CreateDBInstance",
"rds:CreateDBSubnetGroup"
],
"Resource": "*"
}
]
}
Note: You can modify this policy to allow the user to perform other RDS-based operations.
Step 8. Now, click the “Review policy” button at the bottom:
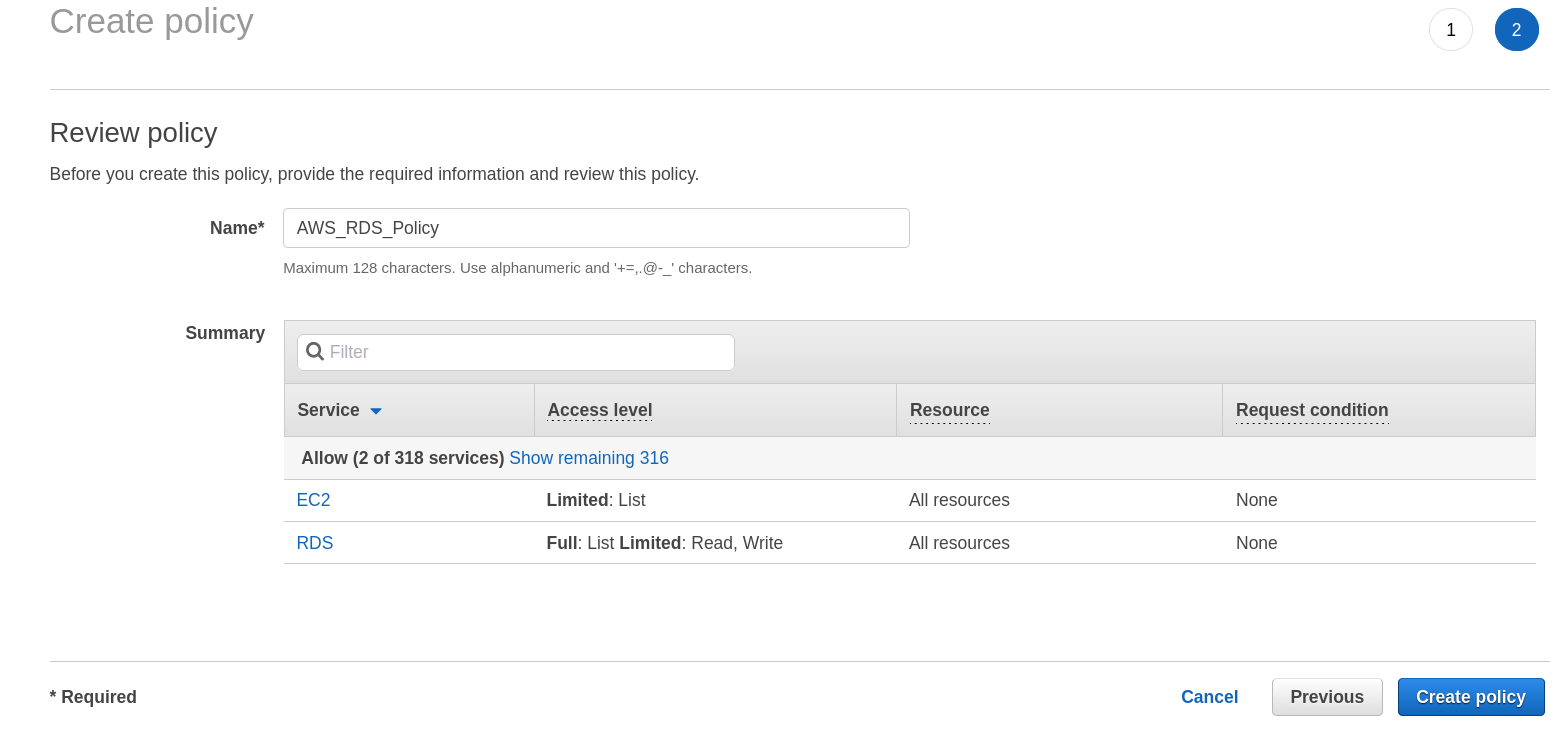
Step 9. Give a suitable name to your policy, and click the “Create policy” button:
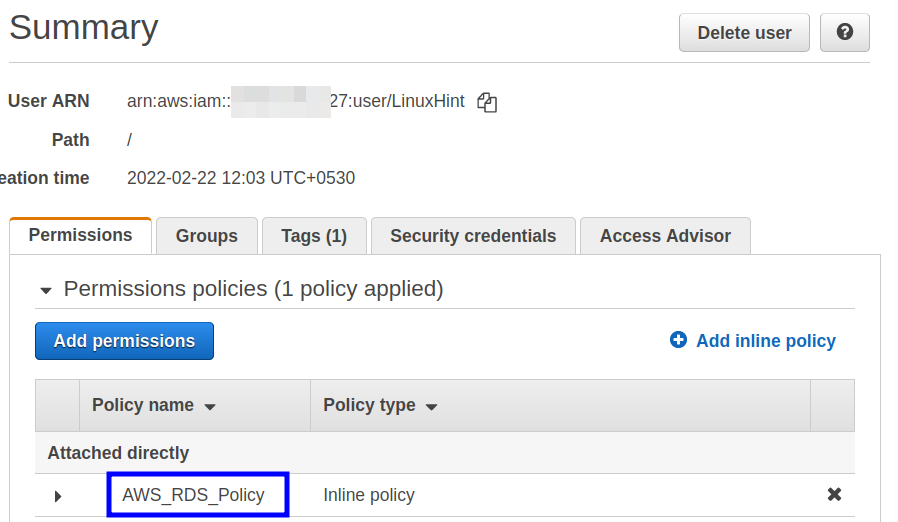
The previous inline policy can now be seen on the previous IAM user console:
Getting Started With AWS CLI
Now that we have created an IAM user, we can continue with the AWS CLI. The AWS CLI interface can be installed on your local computer. We have installed AWS CLI on our Ubuntu 20.04 machine. We will now connect to our AWS IAM account using the user credentials we downloaded earlier while creating the user. The credentials file, named as “new_user_credentials.csv”, contains the “Access key ID”, “Secret access key”, “Console login link” as shown below:
Now, we will configure our local machine terminal for using it with AWS. Open a new terminal and type:
It will ask for the access key ID, secret access key, name of your preferred region, and the output format (JSON, YAML, text or table). Enter your credentials and preferences here. In the picture below, you can see what values we have selected for these parameters:
That’s the process to configure AWS CLI for our IAM user.
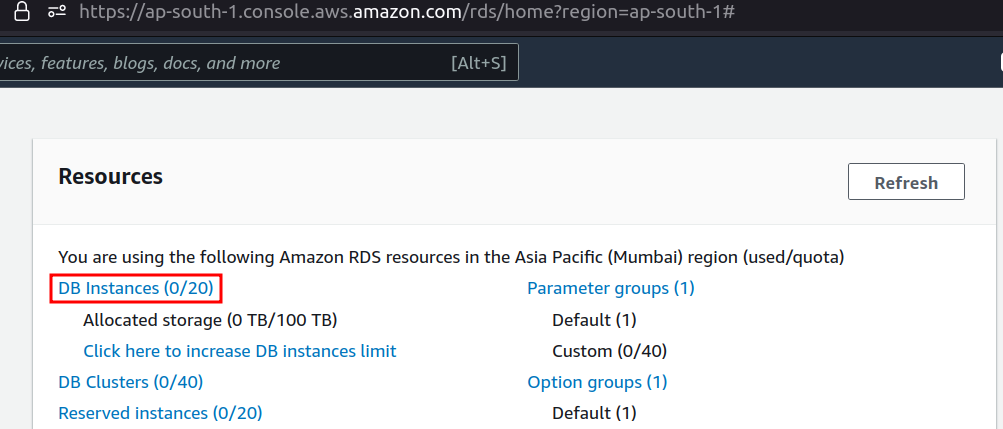
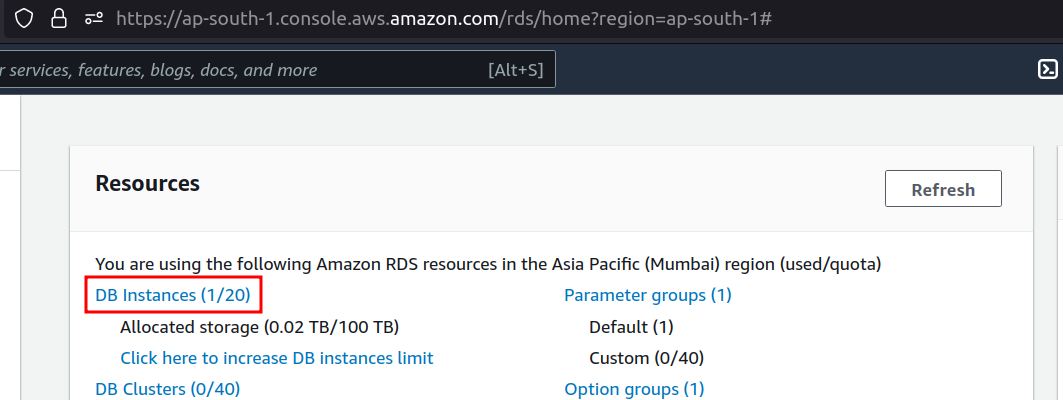
You can see from the following screenshot of the IAM user’s management console that we have not created any database instance so far:
Okay, before attempting to create a new RDS DB instance, we need to know our requirements. For example, which database engine to use, what should be the CPU, storage capacity and memory size, which template to use, and so on. All these mentioned characteristics are gained with their specific commands. The AWS document has a complete list of parameters you can use. For this guide, we will use the following parameters:
–db-instance-identifier: Specify the name to use for the DB instance.
–db-instance-class: Specify the configuration of the DB instance in terms of memory. Number of vCPUs, I/O capacity, etc.
–engine: Specify the database engine to use with the DB instance.
–master-username: Specify the name of the master user for your DB cluster.
–master-user-password: Specify the password for the master user.
–allocated-storage: Specify the storage capacity in gibibytes (GiB) for the DB instance.
–backup-retention-period: Specify the time (in the number of days) for which the automatic DB instance backup will be retained.
Now that we know all the parameters that we want to use with our RDS DB instance creation, let us create an RDS DB instance with the following configuration:
engine= mysql
db-instance-identifier= db-linuxhint
db-instance-class= db.t2.micro
allocated-storage= 20
master-username= demo
master-user-password= 12345678
backup-retention-period= 0
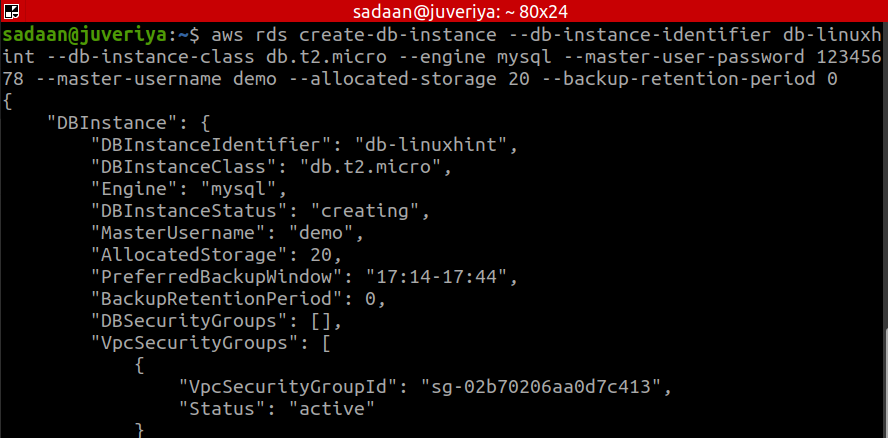
After that, we have created an IAM user, attached it with the necessary policy, configured the AWS CLI, and selected our database parameters. Now, it’s time to create our RDS DB instance. On your local machine terminal, enter the following command:
When we enter the previous command, a JSON format output will start to appear on the terminal:
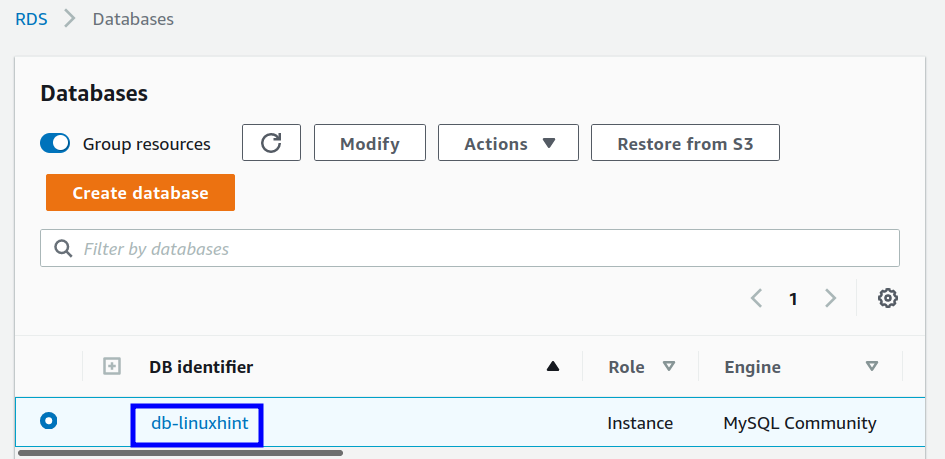
On your user’s Amazon RDS console, you can see a new DB instance has been added:
It will take approximately 1–2 min for the DB instance to be fully created. When you click the “DB Instances” label, you can see the created DB. Perform stop, reboot, and delete operation from here:
Final Note: Do not forget to clean up the resources not in use to avoid unexpected charges.
Conclusion
Congratulations, we have successfully created a MySQL RDS BD instance using the AWS CLI. Many people and tutorials online use the root user account for managing the AWS resources like RDS, EC2, etc. But we have not used the root account. Instead, we have used an IAM user account to launch this DB instance which is a fairly good practice from a security point of view. Additionally, we have provided this IAM user with the minimum permission required for a user to create an RDS DB instance. We hope you found this article helpful. Check the other Linux Hint articles for more tips and information.


