If you are a Mac user and are searching to install Ubuntu OS onto a MacBook or iMac, you should follow this article for a detailed guide on how you can create a bootable USB stick on macOS.
Create an Ubuntu Bootable USB Stick on macOS
Step 1: First, download the Ubuntu .iso file on your mac from here.
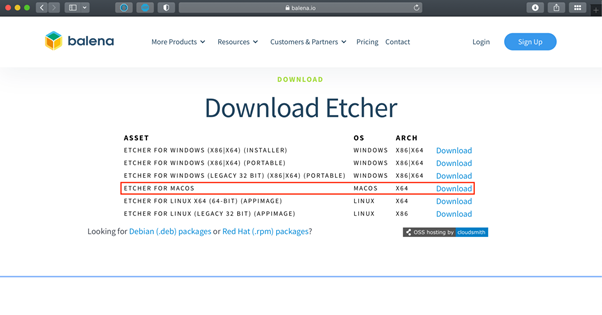
Step 2: You will need an application to make your USB bootable. Here, I am going with the balenaEtcher application, which you can download on mac from here.
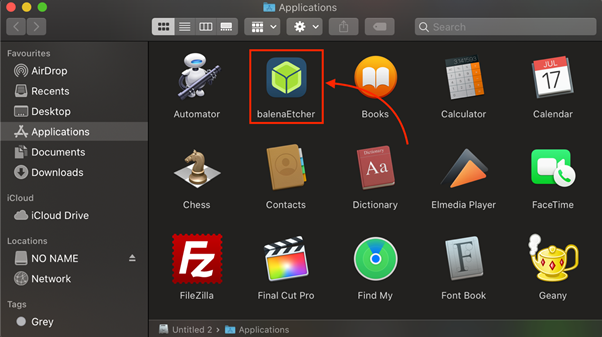
Step 3: Insert the USB Stick into the Mac and open balenaEtcher application:
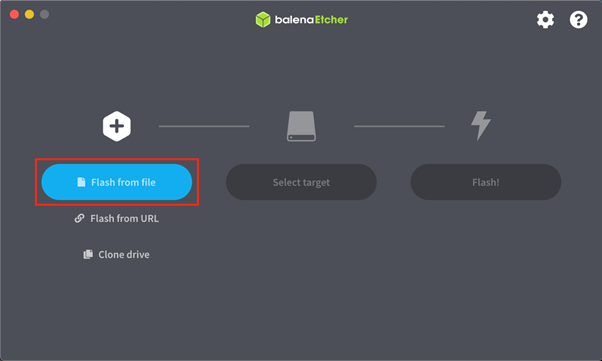
Step 4: To boot the Ubuntu image, first select the “Flash from file” option and a window will open.
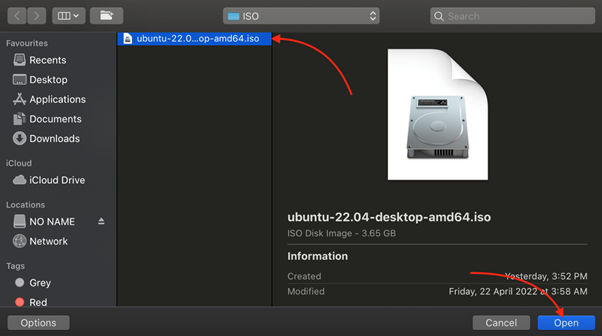
Step 5: Load the Ubuntu iso image and click the “Open” button.
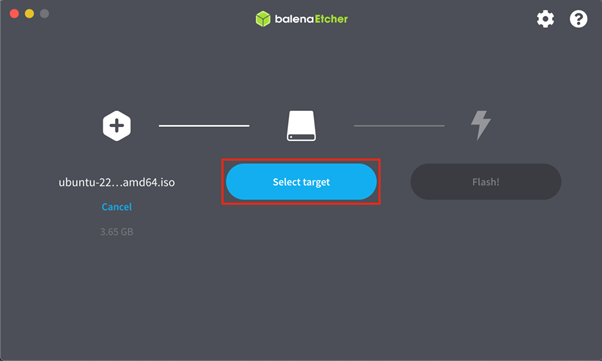
Step 6: Now choose the “Select target” option for the desired storage.
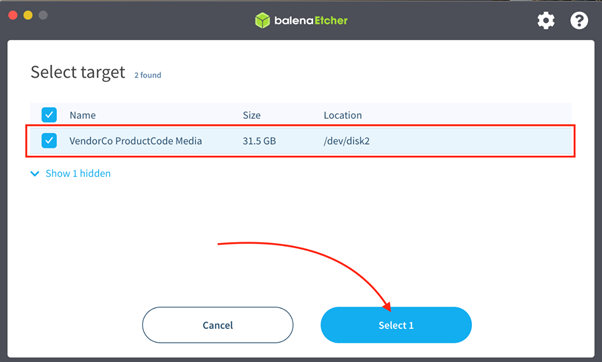
Step 7: Since we are using a USB stick on Mac, select the desired USB stick and click on the “Select” button.
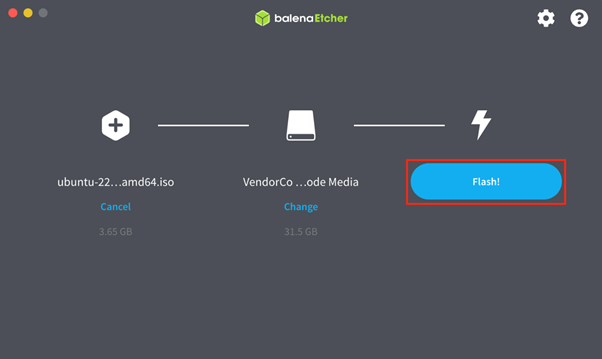
Step 8: In the final step, select the “Flash!” button to create an Ubuntu image on the USB stick.
After completing the flash operation, your USB stick will become bootable and you can use this stick on any laptop or PC and install the Ubuntu system there.
Note: You must select the USB option from the Boot Menu on your laptop or PC to boot the USB drive. The reason is laptop or PC, by default, uses the hard drive boot.
Conclusion
Creating a bootable USB stick on macOS is simple. The users just need to download the Ubuntu iso file and the balenaEtcher application. After that, they must insert the USB stick into the mac and use the balenaEtcher application to create a bootable USB stick. Once the booting operation is done, the users can then use the bootable USB stick on any laptop and install the Ubuntu operating system with ease.

