How to Create a Static IP on Alpine Linux
There are many reasons to set up the static IPs on Alpine Linux, such as configuring a KVM server or DHCP server to host multiple VMs. To create a static IP in Alpine Linux, you have to follow these steps as follows:
Step 1: Check the Current IP Address
Alpine Linux obtains an IP address via DHCP from the router (DHCP server). Verify the current IP configuration before configuring a static IP address.
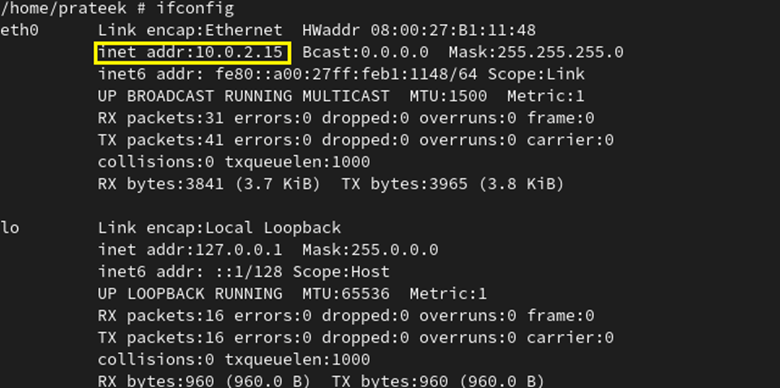
First, run the following command to check the IP on the active network interface:
The previous output shows an active interface named “eth0” and an assigned IP address of 10.0.2.15. After getting the current IP address, we can create a static IP address.
Step 2: Configure the Static IP Address
The /etc/network/interfaces file defines the static network or DHCP configuration. You can check the configuration file through the following command:
Note: The first configuration in the previous configuration file should be the loopback interface. In the second entry, DHCP is the default IP configuration for the active network interface.
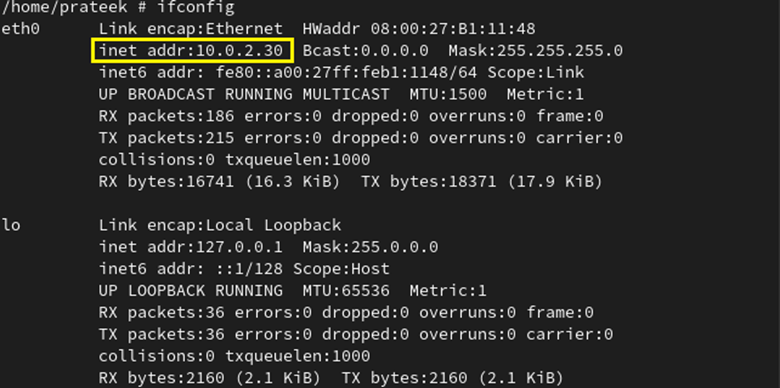
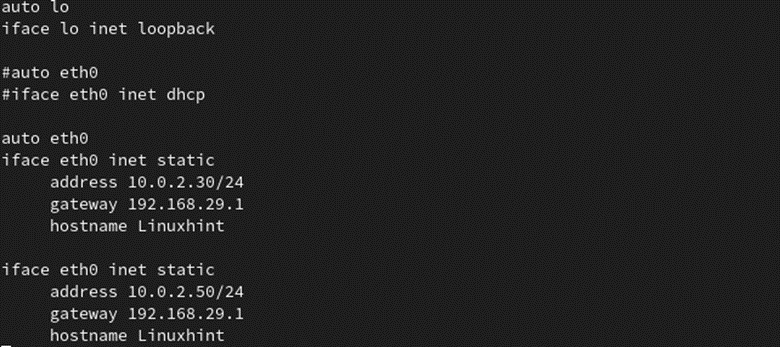
Now, we configure the static IP of “10.0.2.30” with the router’s IP address of “192.168.29.1”. We disable the DHCP addressing from the second block by applying a hash symbol (#) to the eth0 interface.
Paste the following lines and set the gateway and IPv4 address to match the environment’s IP subnet:
Once you are done with the changes, please restart the networking daemon using the following commands for these changes to take effect:
/etc/init.d/networking restart
Now, verify the new static IP which is configured on your network interface by running the following command:
Bonus Tips:
1. Similarly, you can create a static IP for IPv6. Here are the lines that you need to paste:
2. Similarly, you can create multiple IP addresses for a single network interface. For instance, let’s assign an additional IP 10.0.2.50 to the eth0 interface.
To save the changes, restart the networking service as usual.
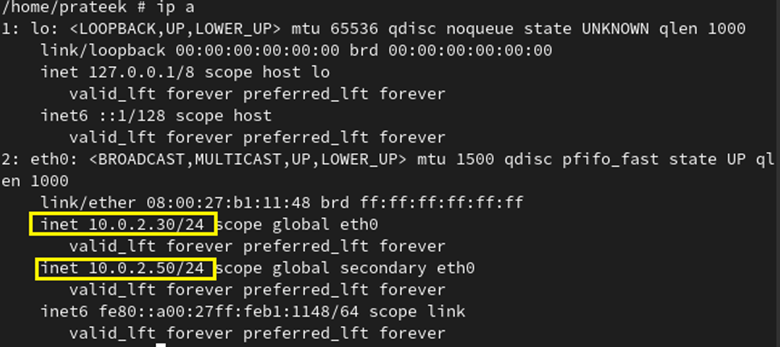
Run the following command to confirm the IP configuration:
As you can see in the previous output, our interface is now connected to two IP addresses.
Step 3: Configure the DNS or Nameserver IP
The information that is related to your nameserver/DNS server is in the /etc/resolv.conf file. These entries do not need to be changed if the DHCP configuration is already in use. Just verify the entries as shown in the following:
The router’s IP address is mostly the DNS server’s IP address. In our case, the router’s IP is the DNS server. Once the changes to the /etc/resolv.conf file is made, restart networking for them to take effect.
If you want to switch back to DHCP for some reason, enable the DHCP address by putting a hash (#) in the second block of the /etc/network/interfaces file as follows:
Lastly, restart the networking service using the following command:
Conclusion
IP addresses are assigned dynamically by the DHCP servers on the cloud or in the home environment. You can easily work with HTTPS servers, firewalling, and address port forwarding through the static IP. Here, we covered how to create a static IP in Alpine Linux. We hope you can create a static IP in Alpine Linux by following this guide.


