Terraform by Hashicorp is an Infrastructure and a code tool that can be used to manage the various services of AWS. It is similar to AWS CloudFormation service with more features and benefits. With Terraform, we can plan the changes to be applied before they are actually applied.
What Do We Cover?
In this guide, we will utilize the features of Terraform to create Security Groups. In this SG, we will allow only the HTTP traffic and SSH traffic for instance. We will then attach this security group to an AWS instance running a web server and then check if the attached SGs are working as expected.
What Do We Require?
To perform this guide, you should have an AWS account and access to AWS credentials on your local system from where you are running the Terraform. You should also have the Terraform installed on your system. You can refer to the Terraform official guide to learn about how to install the Terraform.
Bits About Security Groups
Security Groups are a very important part of the EC2 service. What they do is simply control the traffic coming in and out of the resources they are associated with. For example, after creating an instance and attaching a security group to it, the inbound rule decides what type of traffic can reach to the instance. Similarly, an outbound rule decides what type of traffic is allowed to come out from the instance.
There is a default security group that comes with every newly created VPC (Virtual Private Cloud). We can then further create new SGs (Short for Security Groups) but these SGs can only be attached with the resources that belong to this VPC.
One can attach one or multiple security groups at the time of launching an instance. Multiple rules can be attached to a security group which can also be modified later.
Creating a Security Group
In this section, we will create a security group that allows only the “http” outbound traffic (outgress), i.e. traffic going from the instance, and allow all the inbound traffic (ingress) i.e. traffic coming to the instance.
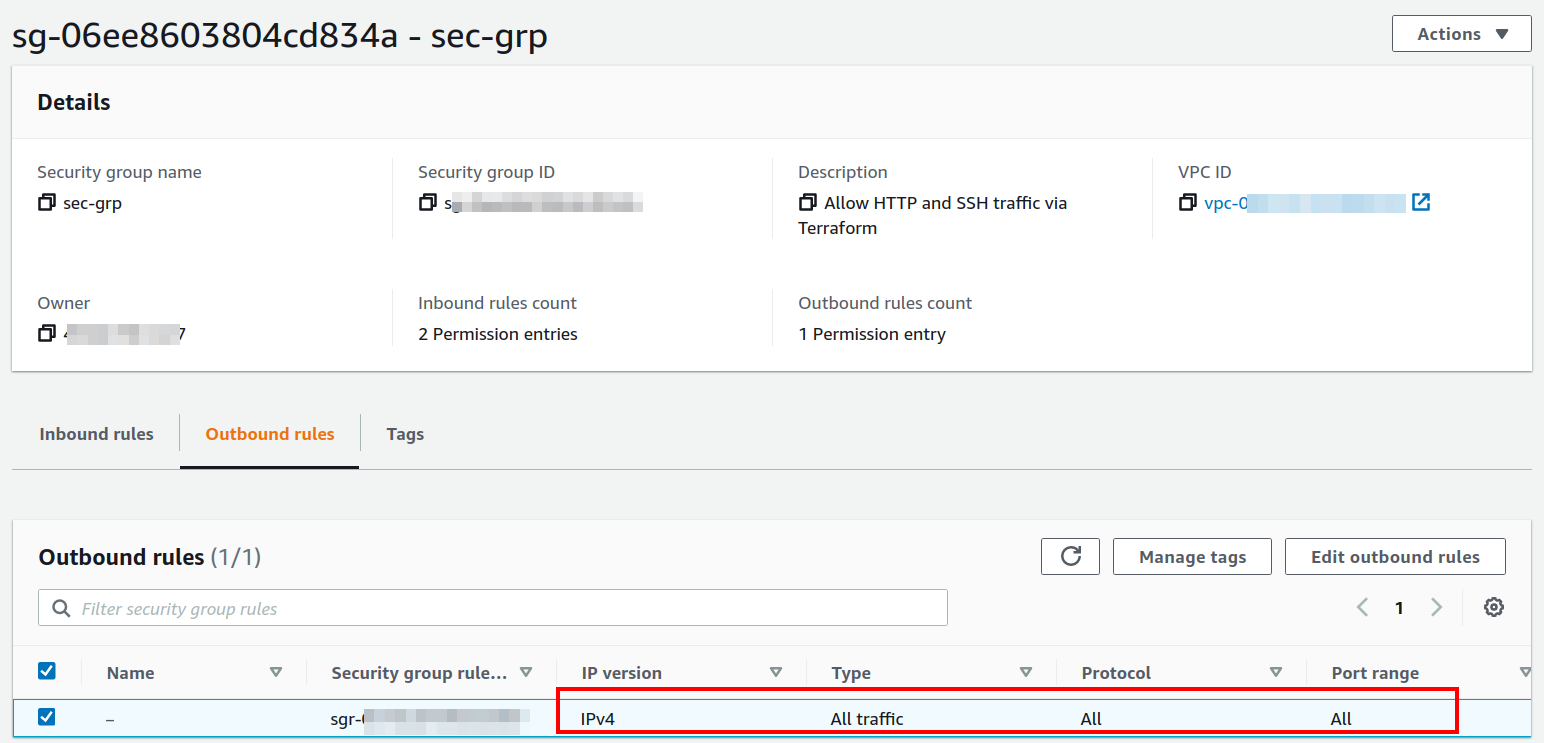
Note: When a new security group is created in a VPC, it has an “Allow All” egress rule by default. When a new security group is created in a VPC, this default rule is wiped off by the Terraform, but you can set up this rule again if needed.
Now, we create a working directory for our Terraform project that will hold all our subsequent files. Open a text editor and create the following file:
Put the following code inside this file and save it:
name = “sec-grp”
description = "Allow HTTP and SSH traffic via Terraform"
ingress {
from_port = 80
to_port = 80
protocol = "tcp"
cidr_blocks = ["0.0.0.0/0"]
}
ingress {
from_port = 22
to_port = 22
protocol = "tcp"
cidr_blocks = ["0.0.0.0/0"]
}
egress {
from_port = 0
to_port = 0
protocol = "-1"
cidr_blocks = ["0.0.0.0/0"]
}
}
The two ingress blocks defined above allow the HTTP and SSH protocols from anywhere IPv4.
The egress allows all the outbound traffic.
Description of some of the previously used arguments:
egress: The block containing the configuration for egress rules.
ingress: The block containing the configuration for ingress rules.
description: Describes the title of the security group. It is optional and the default value is “Managed by Terraform”.
from_port: Denotes the start port number.
to_port: Denotes the end port.
protocol: The protocol specification. If this field value is “-1”, the from_port and to_port values should be “0”.
Deploying the Security Group
Now that we created a security group, we will check if it is actually working. For this, we create an EC2 instance and install a simple web server with the message “LinuxHint Terraform Tutorials”. Open a text editor and create a file “webserver.tf”.
Now, put the following code inside it:
region = "us-east-1"
access_key = "your-access-key"
secret_key = "your-secret-key"
}
resource "aws_instance" "webserver" {
ami = "ami-09d56f8956ab235b3"
instance_type = “t2.micro”
key_name = "Your-keyPair-Name"
vpc_security_group_ids = [aws_security_group.demo-sg.id]
associate_public_ip_address = true
root_block_device {
volume_type = "gp2"
volume_size = "8"
delete_on_termination = true
}
user_data = "${file(“userdata.sh”)}"
tags = {
Name = "ExampleEC2WebServer"
}
}
Replace the ‘Your-keyPair-Name’, ‘your-secret-key’, ‘your-access-key’ with the values in your case. After this, create a file “userdata.sh” for the web server deployment code.
Paste the following content in it:
sudo apt-get update
sudo apt-get upgrade -y
sudo apt-get install apache2 -y
sudo systemctl restart apache2
sudo chmod 777 -R /var/www/html/
cd /var/www/html/
sudo echo "<h1>LinuxHint Terraform Tutorials.</h1>" > index.html
Running the Web Server
It’s now the time to initialize the Terraform directory using the following command:
Also, it is a good thing to check the syntax of our project files by running the following command:
Now, we build the infrastructure using the “terraform apply” command:
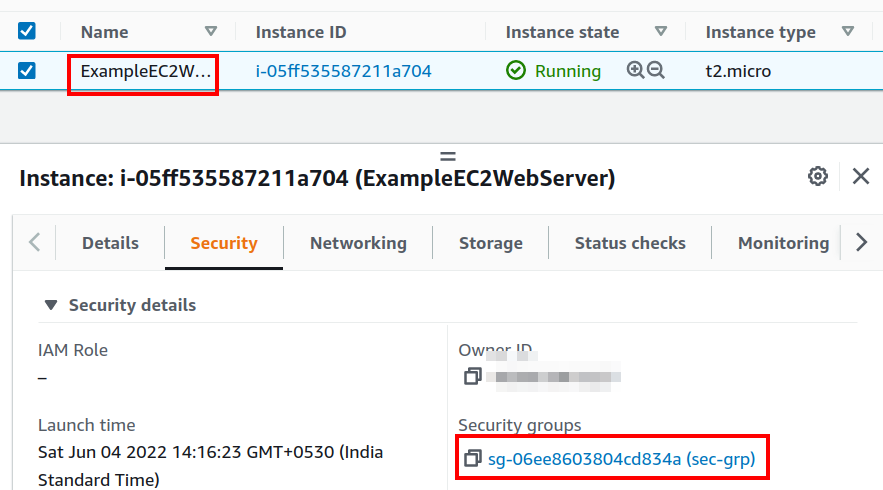
Optionally, we can preview the changes using the “terraform plan” command. When the apply command is finished, check your EC2 console to verify the EC2 instance and its security group.
To check the web server status, open a web browser and paste the DNS name of the instance.
Similarly, try the SSH into the instance to see if we are able to login with our private key.
Conclusion
In this guide, we have seen the process of creating a security group. We also attached it to an EC2 instance to see if it is working as expected. Both the SSH and HTTP protocol are working properly.


