An HTTP server is a software which is developed to listen and respond to the clients’ HTTP requests such as web browsers, and serve the requested resource.
When a client requests a resource from an HTTP server, the server responds with the requested resource, typically in the form of an HTML document or other types of files such as images, videos, or documents.
In the real world, a wide range of popular web servers are Apache HTTP Server, Nginx, Microsoft IIS, etc.
As programmers, expanding our knowledge by building projects that enhance our capabilities is a good practice. When you are just starting, one of the most common and valuable projects that you can create is a simple HTTP Server.
Why Do I need to Create an HTTP Server?
You may be asking, why would I need to build an HTTP server when tons of well-polished and production-ready servers exist?
In simple terms, you do not need to. It is also not recommended to build a custom web server for production. Instead, it is good to opt for web servers such as Nginx and Apache which have had years of development and have been polished to handle an extensive range of applications.
However, learning how to build a simple and custom web server can benefit you as a developer. It allows you to understand how complex the web servers work. It also improves your networking knowledge which gives you an excellent foundation for web development, networking, and server administration.
With that out of the way, let us get to the core of this tutorial. This post explores how to set up a basic HTTP server in the Rust programming language and external crates.
By the end of this tutorial, you will have a great understanding of HTTP requests, how to listen for incoming requests, and how to respond to them using the Rust programming language.
NOTE: It is worth keeping in mind that there are various ways of creating an HTTP server in Rust, each with its strengths and weaknesses. However, for this tutorial, we will use a popular Rust crate called “hyper” which provides a fast and flexible HTTP library for Rust.
Step 1: Project Setup
The first step is to setup our Rust project. For this, we use the cargo which allows us to install the external packages and dependency management.
Run the following command:
The previous command creates a new Rust project named “rust-http-server”. This should create a directory with the same name in the current working directory.
You can then navigate to the created directory with the “cd” command and edit the “main.rs” file in the src directory with your favorite text editor.
Step 2: Adding the Required Dependencies
We use the hyper crate to set up a basic HTTP server in Rust. To add the crate as a dependency for our project, run the following command:
This should download the required dependencies and add “hyper” as a required package in the “cargo.toml” file.
Your “cargo.toml” file should look like this:
[dependencies]
tokio = { version = "1", features = ["full"] }
Step 3: Write the HTTP Server Code
Once we added the hyper crate as a dependency, we can start writing our HTTP server code. First, open the “src/main.rs” file in the project directory and add the server source code as shown in the following:
use std::net::SocketAddr;
use hyper::{Body, Request, Response, Server};
use hyper::service::{make_service_fn, service_fn};
async fn hello_world(_req: Request<Body>) -> Result<Response<Body>, Infallible> {
Ok(Response::new("Hello, World".into()))
}
#[tokio::main]
async fn main() {
// bind address: 127.0.0.1:7000
let addr = SocketAddr::from(([127, 0, 0, 1], 7000));
// service from hello world func
let make_svc = make_service_fn(|_conn| async {
// service_fn converts function into a `Service`
Ok::<_, Infallible>(service_fn(hello_world))
});
let server = Server::bind(&addr).serve(make_svc);
// Run server
if let Err(e) = server.await {
eprintln!("server error: {}", e);
}
}
Let us walk through the given code step by step:
- The first step is importing the necessary modules. We start with the std::convert::Infallible module which allows us to represent a value that can never occur such as the error type.
- The std::net::SocketAddr module allows us to define a socket address including an IP address and port number.
- The next part is the hyper::{Body, Request, Response, Server} modules. This allows us to import the necessary modules from the hyper package. This allows us to handle the HTTP requests and responses.
- Finally, the hyper:service::{make_service_fn, service_fn} provides high-level abstractions to set up an HTTP server and define the service to handle the incoming HTTP requests.
- In the next step, we define a function called “hello_world” that takes an HTTP request object and return an “Ok” result with an HTTP response object with the “Hello, World!” string. Since the _req parameter is unused, we use an underscore to discard it.
- The next part is the main function. Since it’s a web server, we define the main function as an asynchronous function using the async keyword.
- Next, we create a SocketAddr object which specifies the address and the port that we wish to listen to. In this case, we use the localhost and port 7000.
- In the next stage, we create a closure that returns a make_service_fn which takes a “Connection” object and returns a future that resolves to a “Service” object. Calling the make_service_fn function with the closure returns a “Future” that resolves to the “Service” object.
- As you can see, the closure that we provide in the make_service_fn function with the _conn parameter denotes the TCP connection. This returns an “Ok” with a service_fn object wrapping the hello_world function that we defined earlier.
- Then, we create a “Server” object, bind the address that we created earlier, and call the serve function. This function takes a “Service” object and returns a “Future” that listens for incoming requests and sends them to the specified service which, in this case, is the hello_world function.
- Finally, we call the await method on the “Server” object. This starts the server and listens for incoming requests. The function prints the errors to the console if any error occurs.
Step 4: Running the Server
Once we configured the server code and the required dependencies, we run the server with the following cargo command:
The command compiles and runs the Rust project which should start the HTTP server.
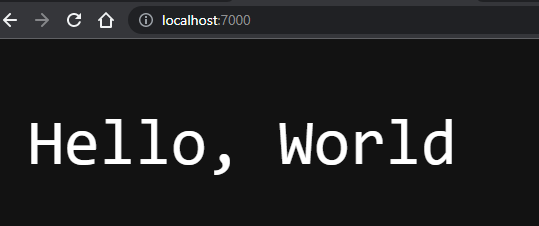
Step 5: Testing the Server
Once the server is running, we can test it by opening the browser and navigating to the http://127.0.0.1:7000 server address.
This should print the “Hello, world!” string.
Conclusion
We successfully set up a simple HTTP server in the Rust programming language. This is a basic tutorial that guides you on how you can configure a web server in Rust using the hyper crate.