The zip is a file format that compresses the file, and this file format serves various purposes, such as combining multiple files into a single file to make it easy to transfer.
Like most of the tasks on Linux can be carried out using CLI and GUI, similarly, a password protected zip file can also be created using both ways. This article provides the command line and graphical method to create an encrypted zip file on linux.
How to create a password protected zip file using CLI
The following steps would lead you to creating a password protected zip file on Linux.
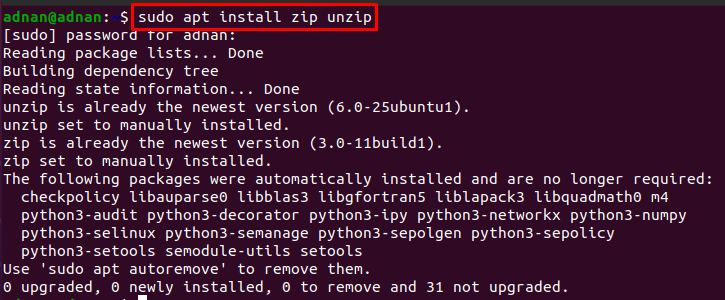
Step 1: First open the terminal and write the following command to install the zip, and unzip command line tools (if not installed).
Step 2: The “-e and –encrypt” parameters would assist you to set a password for your zip file. For instance, the command provided below will create a zip file named linuxhint that contains two files (linux.txt and debian.txt).
Note: The command in step 2 would create a password protected zip file in the current working directory and the files contained by it also lie inside the present directory.
To include the files from other than the current directory, you have to give the complete path of the files as we did in the following command.
Note that all the files and directories from the specified target folder are added to the zip file named info.zip.
Step 3 (Optional): You can unzip the .zip files as we did in the below-mentioned command.
The output shows that the zipped file was protected, and the extraction is performed after entering the password set for that file.
Note: If in case you have entered the wrong password, you would not be able to extract files as can be seen in the following image.
How to create a password protected zip file using GUI
To create the password encrypted zip file using a graphical interface, the following steps are recommended to follow.
Step 1: Click on the “Show Applications” icon placed on the dock or press “Super Key + A” to open the applications menu.
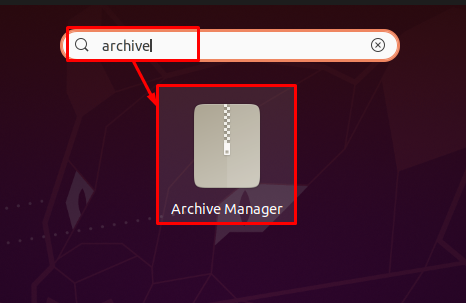
Step 2: Search here for “Archive Manager” and click on it to open:
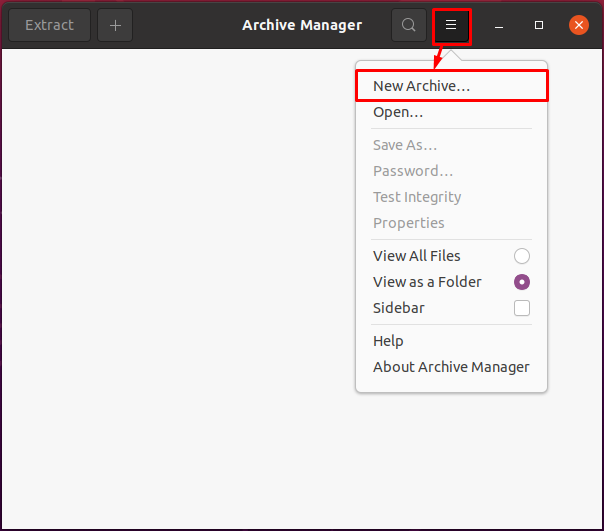
Step 3: Click on the three lines placed on the menu bar of the “Archive Manager” and click on “New Archive…“.
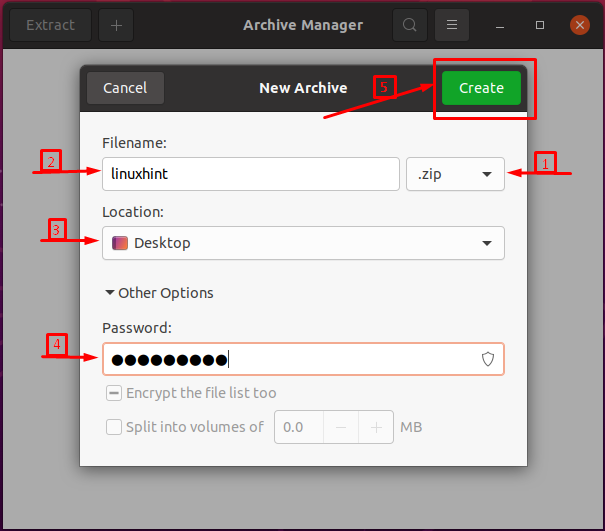
After doing so, the following box will appear, where you have to ensure the following content.
– extension must be set to “.zip”
– set a Filename, Location and Password for that zip file
At the end, click on “Create” to accomplish the process.
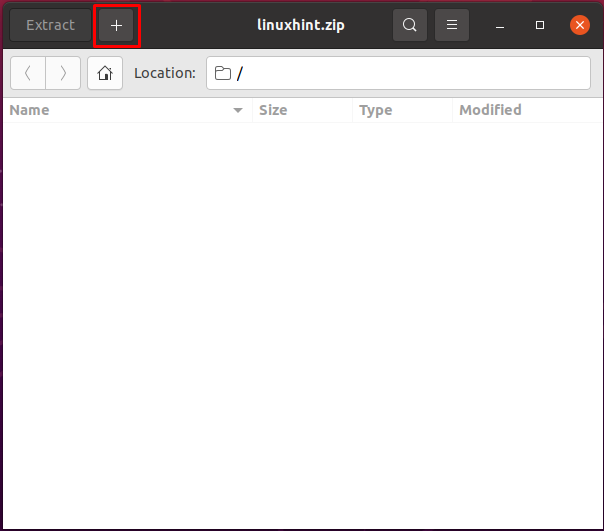
Step 4: Once the file is created, click on the “+” icon to add files in the zip file.
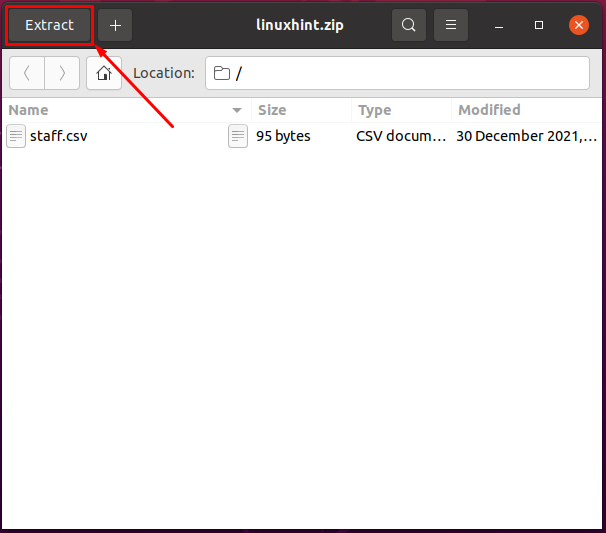
After adding files, click on the “Extract” button placed on the menu bar.
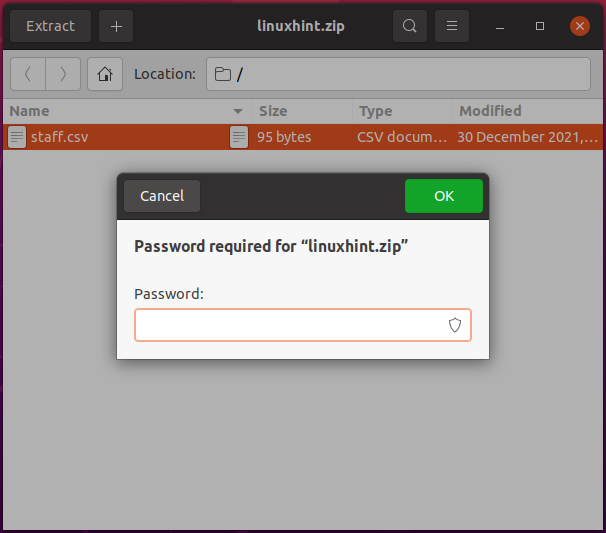
The time you click on the “Extract” button, you have to choose the extraction location. After doing so, a dialogue box will appear which requires a password for completing the extraction process as shown in the following image.
As shown in the output, the password dialogue shows that the file is now protected with some password.
Conclusion
The password protected zip file can be created using the zip and unzip command line tool. Moreover, the graphical interface of Linux can also be exercised to create a password protected zip file. This guide outlines the methods and steps that are recommended for the creation of a password protected zip file. A terminal enthusiast may prefer the CLI method over GUI as it is fast and easy to adopt. However, a novel Linux user may adopt a GUI method to do the same process.


