C++ provides us the facility to create the object of the class. We only create the object when we have declared a class in our code. In a C++ class, the data and data manipulation methods are combined into one entity. Class is a collection of related items. Moreover, classes define an object’s form. An object is a creation that occurs during runtime. It is a class instance. With the aid of the object, all of the class’s members are accessible. Here, we will create the class’s object and then access its members through its object in this guide.
Example 1:
We include the functions of the “iostream” header file in our code to utilize them. After this, we add the “string” header file since we have to work with the “string” in this code. We then use the “std” namespace to access its classes without calling it. After this, we create the ” MyFirstClass” class and place the “class” keyword with it.
Below this, we place the “public” which is the access specifier here and declare the attributes of this class which are “a” and “str_a”. The data type of “a” is “int” and the data type of “str_a” is “string”. We then call the “main()”. Underneath this “main()”, we create the object of the “MyFirstClass” with the name, “myFirstObj”.
Then, in the next line, we access the class attributes with the class object’s help and assign them with values. We place the object name, put a dot, and then type the attribute name to assign the value. We type “myFirstObj.a” and assign “40” to this “a” attribute. In the same way, we assign the string data to the “str_a” attribute. The string that we assign to this variable is “The string is here”.
After this, we utilize the “cout” and add these attributes along with the class object by placing a dot between them. Now, both attributes, along with their values, will be rendered.
Code 1:
#include <string>
using namespace std;
class MyFirstClass {
public:
int a;
string str_a;
};
int main() {
MyFirstClass myFirstObj;
myFirstObj.a = 40;
myFirstObj.str_a = "The string is here";
cout << "The integer number is " << myFirstObj.a << endl;
cout << myFirstObj.str_a;
return 0;
}
Output:
We access both class attributes with the aid of the object class. The attributes, along with their values, are displayed in the following:

Example 2:
The class that we create here is the “Doctor” class. Then, we declare some public variables by placing the “public” keyword. The attributes of this “Doctor” class are “dr_id” and “dr_name” of the “int” and “string” data types, respectively.
Now, we invoke the “main()” function. Then, we create the object of the “Doctor” class. The name of the class object is “d1”. After this, we assign the values to these attributes with the help of the “d1” object. We assign “123” to the “dr_id” by placing the “d1” object with this attribute’s name. After this, we assign “Peter Samuel” to the “dr_name” attribute by placing the “d1” object with this.
Now, we simply render both attributes along with the values that we previously assigned using “cout” and inserting “d1.dr_id” and “d1.dr_name” in it.
Code 2:
using namespace std;
class Doctor {
public:
int dr_id;
string dr_name;
};
int main() {
Doctor d1;
d1.dr_id = 123;
d1.dr_name = "Peter Samuel";
cout<< "The doctor id is " << d1.dr_id << endl;
cout<< "The doctor name is " << d1.dr_name << endl;
return 0;
}
Output:
The “name” and “id” of the doctor are now displayed here. We also assign this “name” and “id” after creating the object and assigning the value with the help of the object of the class.

Example 3:
The “Client” class is the one that we built here. We declared a few public variables using the “public” keyword. The “clientId” and “clientName” of the “int” and “string” data types, respectively, are declared here as the attributes of the “Client” class.
After this, we place the “insert()” function and pass two parameters, “c_id” and “c_name”, into it with their data types which are “int” and “string”, respectively. Then, we assign “c_id” to the “clientId” and “c_name” to the “clientName” attribute. Below this, we utilize another function named “display()” and use the “cout” which aids in displaying the “clientId” and “clientName”. Here, we call the “main()” function and generate a “Client” class object. The class objects are called “c1”, “c2”, and “c3”. The class objects are created by placing the class name with the object name that we want to create here.
Now, we insert the values in these attributes by utilizing the “insert()” function with the object names “c1”, “c2”, and “c3”. We want to display all three object values, so we place the “display()” function with all these class objects.
Code 3:
using namespace std;
class Client {
public:
int clientId;
string clientName;
void insert(int c_id, string c_name)
{
clientId = c_id;
clientName = c_name;
}
void display()
{
cout<<clientId<<" "<<clientName<<endl;
}
};
int main(void) {
Client c1;
Client c2;
Client c3;
c1.insert(111, "James");
c2.insert(112, "Mary");
c3.insert(113, "George");
c1.display();
c2.display();
c3.display();
return 0;
}
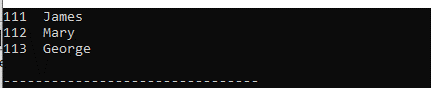
Output:
We created three objects in the previous code and added the values by utilizing these objects. We also rendered all the values.
Example 4:
We create the “studentClass” and then declare the “public” attributes. We declare four attributes of this “studentClass” which are “s_name”, “s_class”, “s_rollNo”, and “s_subject”. The data types of these attributes which are “string” for the “s_name”, “int” for the “s_class”, “int” for the “s_rollNo”, and “string” for the “s_subject” are placed here. Now, we invoke the “main()” and the object of the “studentClass” is created. The object of “studentClass” is “stdObj1”. This is created by placing the class name and then the object name after the “main()”.
After this, we assign the values to all these attributes by placing the object name and the attribute name here. First, we place the “stdObj1.s_name” and assign “John”. Then, we place “stdObj1.s_s_class” and assign “9” to this attribute. Below this, we assign “143” to the “s_rollNo” attribute after placing the object name with the dot. Then, we put the object name again with the dot and assign “Computer” to the “s_subject” attribute.
In the same way, we assign “William”, “8”, “211”, and “Chemistry” to all four attributes by placing the object name with the attribute names. After this, we render all these values of the attributes by placing them in the “cout”. For rendering, we also place the attribute and object names with all these attributes.
Code 4:
#include <string>
using namespace std;
class studentClass {
public:
string s_name;
int s_class;
int s_rollNo;
string s_subject;
};
int main() {
studentClass stdObj1;
stdObj1.s_name = "John";
stdObj1.s_class = 9;
stdObj1.s_rollNo = 143;
stdObj1.s_subject = "Computer";
studentClass stdObj2;
stdObj2.s_name = "William";
stdObj2.s_class = 8;
stdObj2.s_rollNo = 211;
stdObj2.s_subject = "Chemistry";
cout << stdObj1.s_name << " " << stdObj1.s_class << " " << stdObj1.s_rollNo << " " << stdObj1.s_subject << endl ;
cout << stdObj2.s_name << " " << stdObj2.s_class << " " << stdObj2.s_rollNo << " " << stdObj2.s_subject << endl ;
return 0;
}
Output:
All values that we assign to the class’s attributes after creating the class object are rendered in this output.

Conclusion
We studied how to create an object in C++ in this guide in detail. We created one object and multiple objects of the class in our code. We also assigned the values to the class’s attributes with the class objects. All the examples are explained here and the outputs are also displayed in this guide.