In GitLab, users store their source code and make changes inside the directory which is known as a project or repository. A project is a central component that enables collaborative work. Users’ added changes are tracked with the help of version control. The GitLab project can be public, private, or internal and managed by visibility level.
This study will discuss adding a new repository project on GitLab.
How to Make a New Project on GitLab?
To add a new project to the GitLab remote server, follow the provided steps:
-
- Log in to your GitLab account.
- Hit the “New project” button.
- Provide the project name, its URL, select the visibility level, and add the README file by marking the box inside the project configuration.
- Press the “Create project” button.
Step 1: Sign in to GitLab
Initially, redirect to your GitLab account and hit the “New project” button from the top-right side of the opened GitLab projects tab:
Step 2: Create GitLab Project
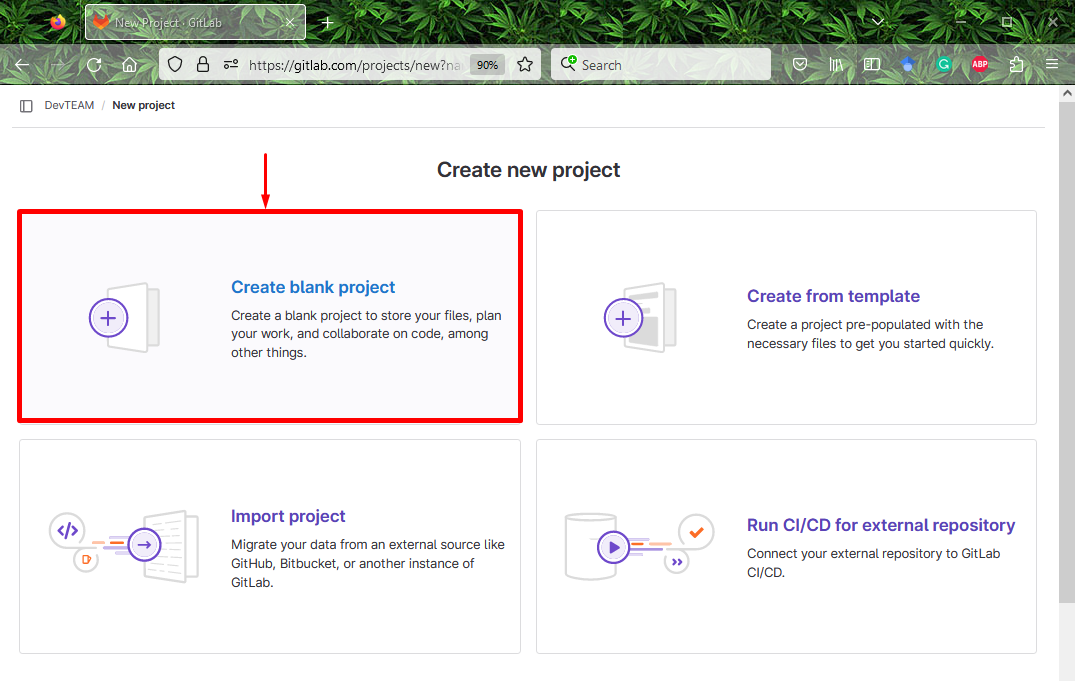
Then, the “New project” tab will appear, now chose the “Create blank project” from the given option and hit on it:
Step 3: Add Project Name and Other Required Information
Next, it will ask you to add your new project name, URL, visibility level, and project configuration. Then, click on the “Create project” button. Here, we have added “Testing1” as the project name, default project URL, visibility level as “Private” and marked the “Initialize repository with a README” box:
As you can see the below highlighted pop-up message bar that indicates that we have successfully created a new project in GitLab:
You have learned about creating a new project on GitLab.
Conclusion
To add a new project to the GitLab project, first, move to your GitLab remote server and press the “New project” button. Then, specify the project name, its URL, choose the visibility level, and add the README file by marking the box inside the project configuration. Lastly, click on the “Create project” button. In this tutorial, we have provided the procedure for creating a new project on GitLab.


