Users can create a backup of their current installation in an ISO file format. The ISO file can also be used as an external drive, or you can make a bootable USB. if you have an ISO file, then you can create the installation disc by burning the image to a CD or USB.
This article shows you how to create an ISO file from a currently installed Ubuntu 20.04 system. You can create an ISO file from the current installation of Ubuntu 20.04 using any of the following methods.
Create an ISO File Using the Brasero Utility
The Brasero utility does not come preinstalled on Ubuntu 20.04, so you will need to install this utility manually. Open the ‘Terminal’ window by pressing the ‘Ctrl+Alt+T’ shortcut keys together. Install the Brasero utility using the following command:
Once the installation has been completed, open the Brasero application. To open this application, click the menu icon displayed in the bottom-left corner of your desktop in Ubuntu 20.04.
Now, type ‘Brasero’ in the search bar to search the Brasero application. The Brasero application icon should appear in the search results. Click the icon to open this application.
The following Brasero application window will display on your system. Select the ‘Data project’ option from the menu on the left side of the window.
Add the files to the new data project by clicking the ‘+’ icon.
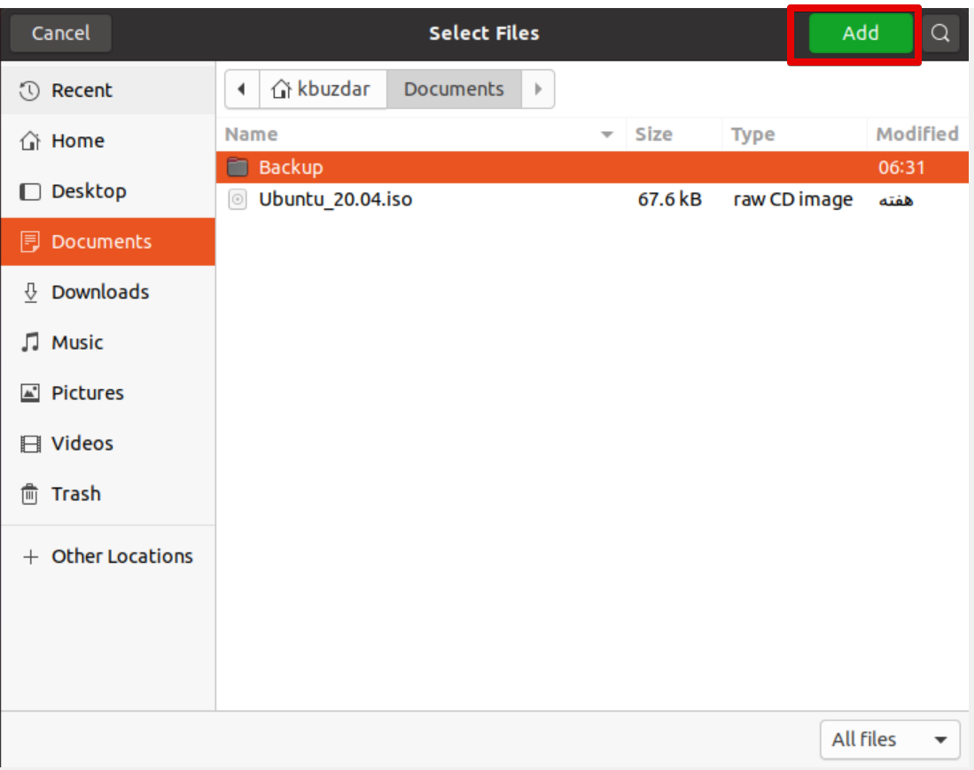
Now, select the individual backup directories and click the ‘Add’ button.
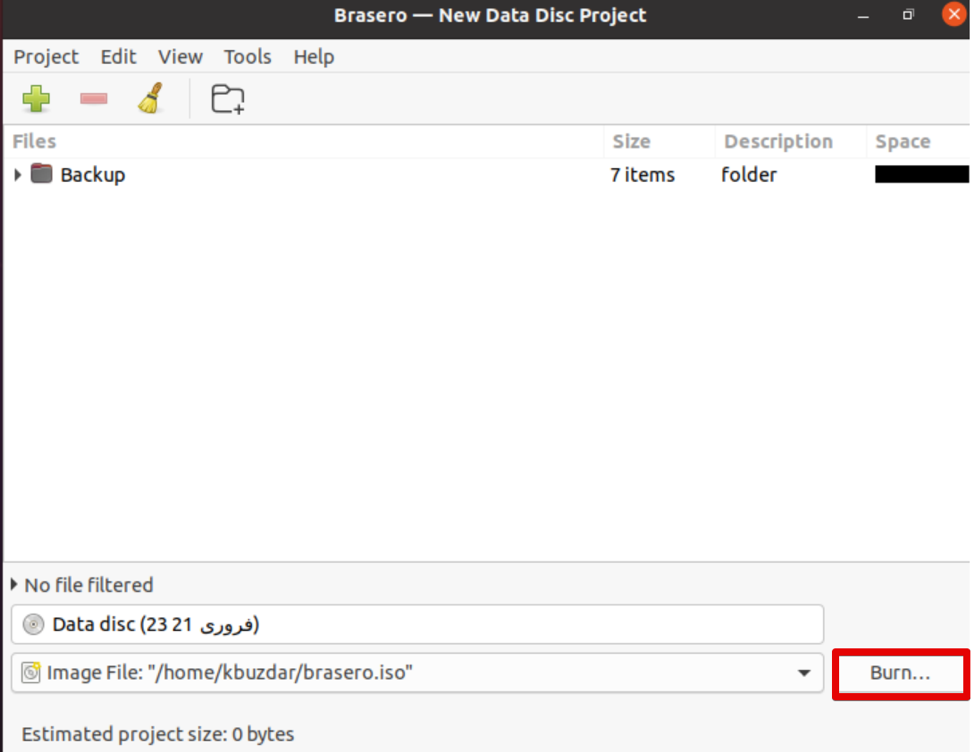
When all files are included in this project, click ‘Burn.’
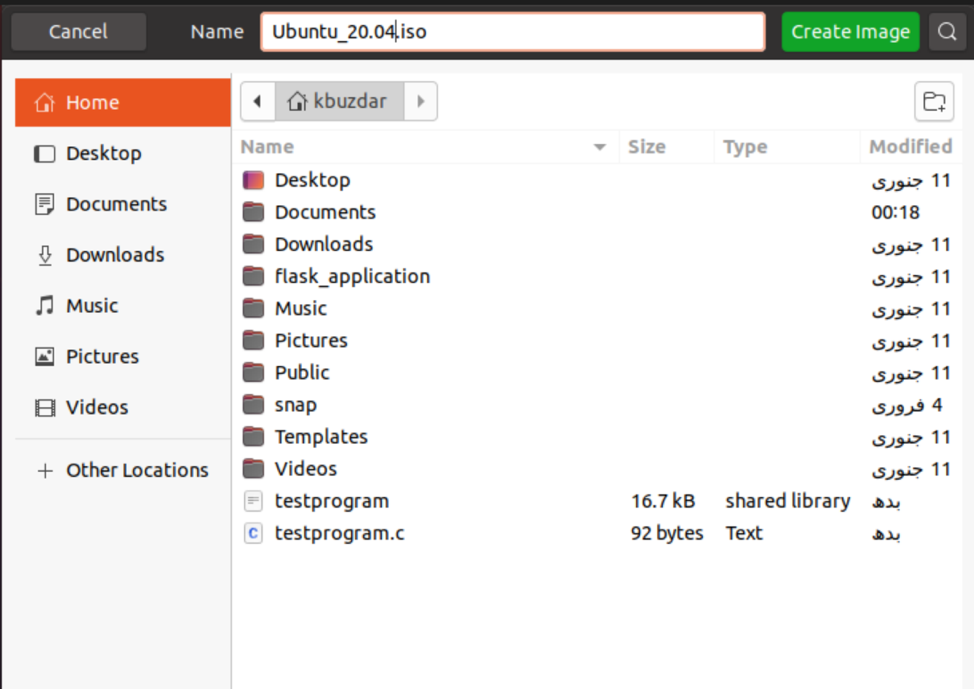
Choose the desired location in which you will store the ISO file. Give a suitable name with an .iso extension to your ISO file and click ‘Create Image.’
Once the above process has been completed, you will be notified with an ‘image successfully created’ message, as follows:
Create an ISO File Using the Genisoimage Utility
You can create an ISO file from a backup of your Ubuntu 20.04 system using the Genisoimage utility. The basic syntax is given below:
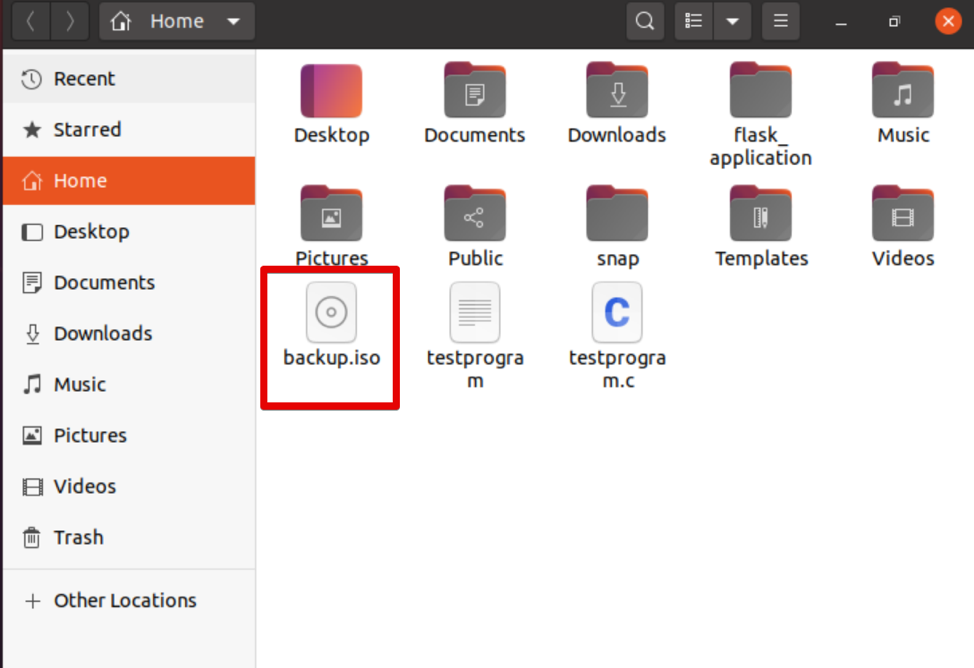
Here, we are creating an ISO file with the name ‘backup.iso’ from the backup directory /home/kbuzdar/Documents/Backup. Use the following command to do so:
The above command creates the ISO file ‘backup.iso’ in the current home directory.
Using the Systemback Utility
You can create a backup of the system’s file and all configurations using the Systemback utility. In this section, you will create a live image of your system, then convert it into an ISO file format.
First, import the signing key of GPG for PPA using the following command:
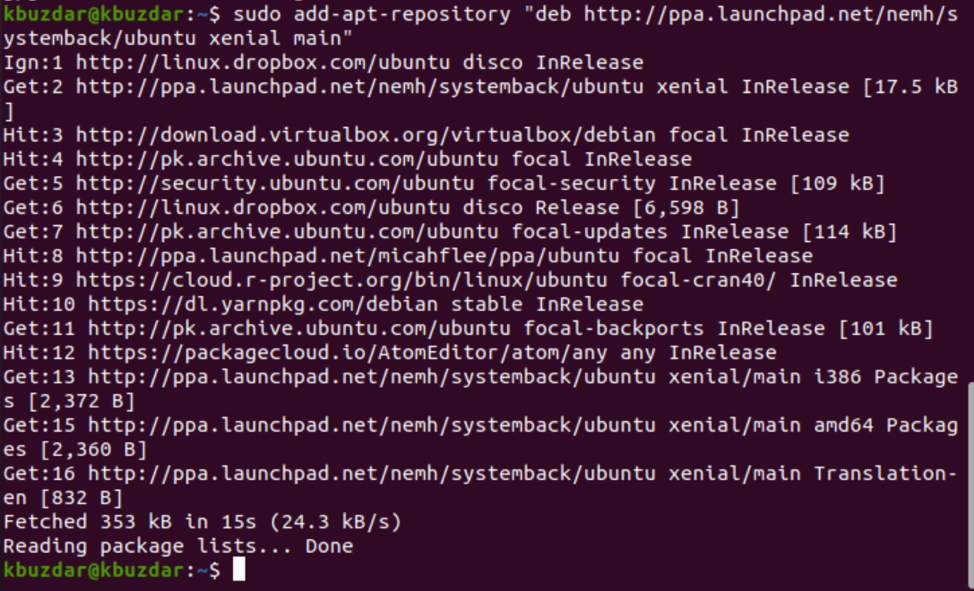
Now, add PPA to Ubuntu 20.04 by executing the command provided below:
Once the above task has been completed, update the package list and install the Systemback utility, as follows:
$ sudo apt install systemback
Once this application has been installed, search for the app in the search bar, and click on the displaying icon to open the app, as follows:
Here, you will be prompted to enter a password for the admin user.
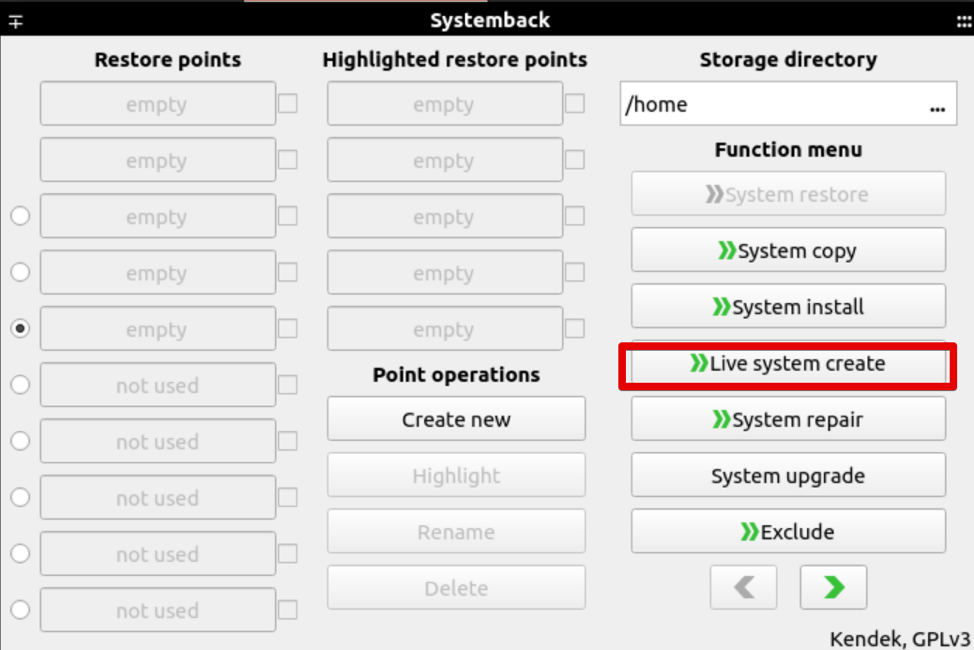
After that, the following window will display on your system. You can create the system’s restore points, create a copy of the system to another partition, create a live system, and more. Click the ‘Live system create’ option to create a new live system.
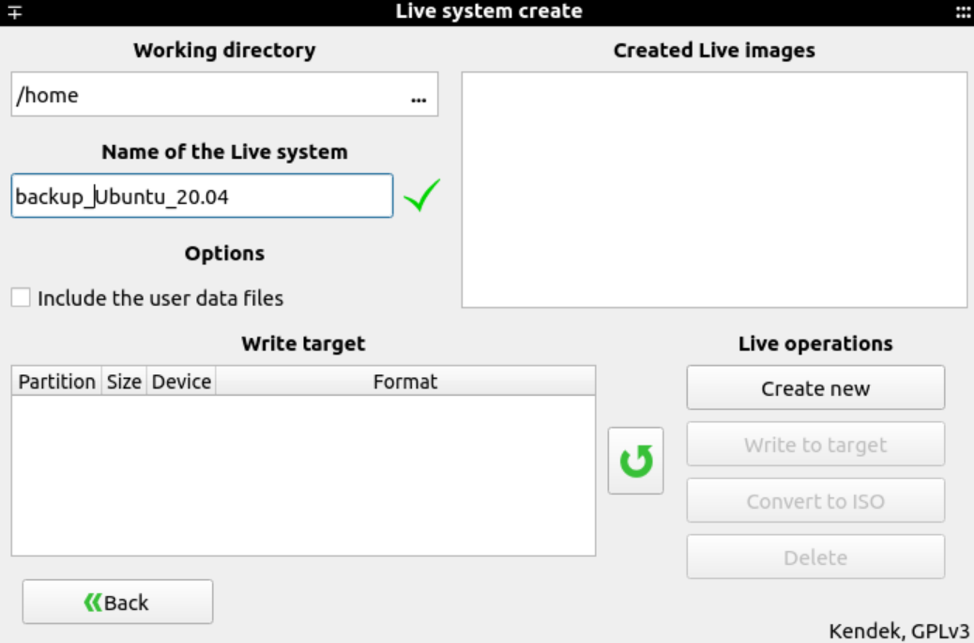
Specify the name of your live system and click the ‘Create New’ button, as follows:
It will take time to create a live system. Once the system has been created, you can generate the ISO file using the ‘convert into ISO’ option.
Conclusion
This article showed you three different methods for creating ISO files from your current system. First, you must create a backup of your Ubuntu 20.04 system, then create the ISO file using the above utilities.


