How to Make a Personal Access Token on GitLab?
Follow the provided instruction to create GitLab personal access token:
- Redirect to your GitLab account.
- Access the user’s profile settings.
- Select the “Access token” option.
- Specify the preferred token name and the expiry date for the token.
- Mark the required scopes and press the “Create personal access token” button.
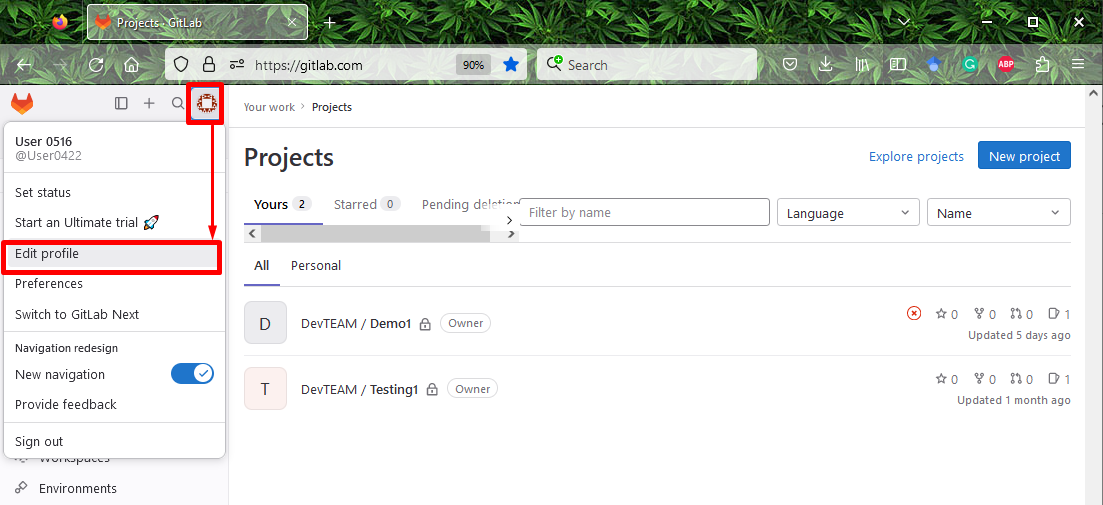
Step 1: Access Profile Settings
Initially, log in with your GitLab account. Then, click on the profile icon and select the “Edit profile” option from the opened drop-down menu:
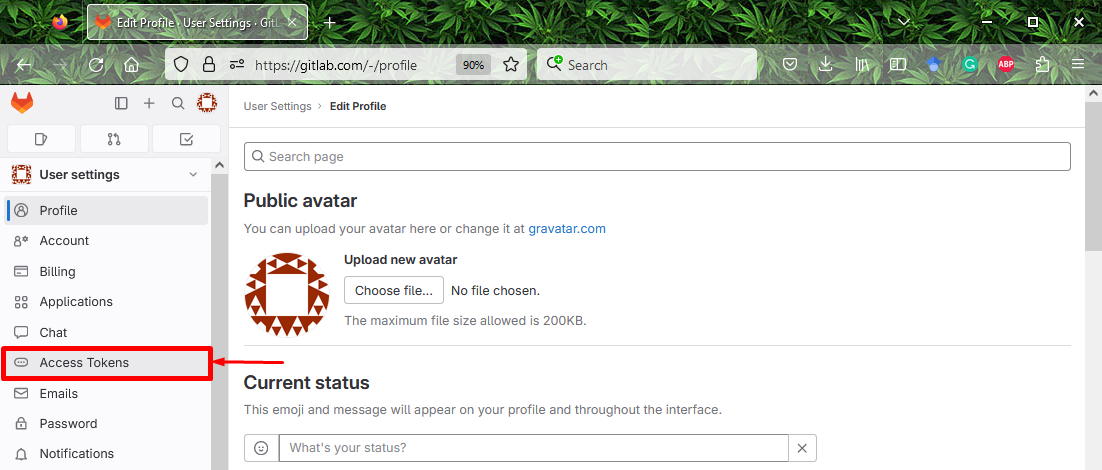
Step 2: Locate the Access Token Option
Next, scroll to the “Access Tokens” option and click on it:
Step 3: Specify Token Name and Expiry Date
Now, add the token name according to your desire and select the expiry date for the token. In our case, we have specified the “test_gitlab_token” as the token name and “2023-08-27” as the expiry date:
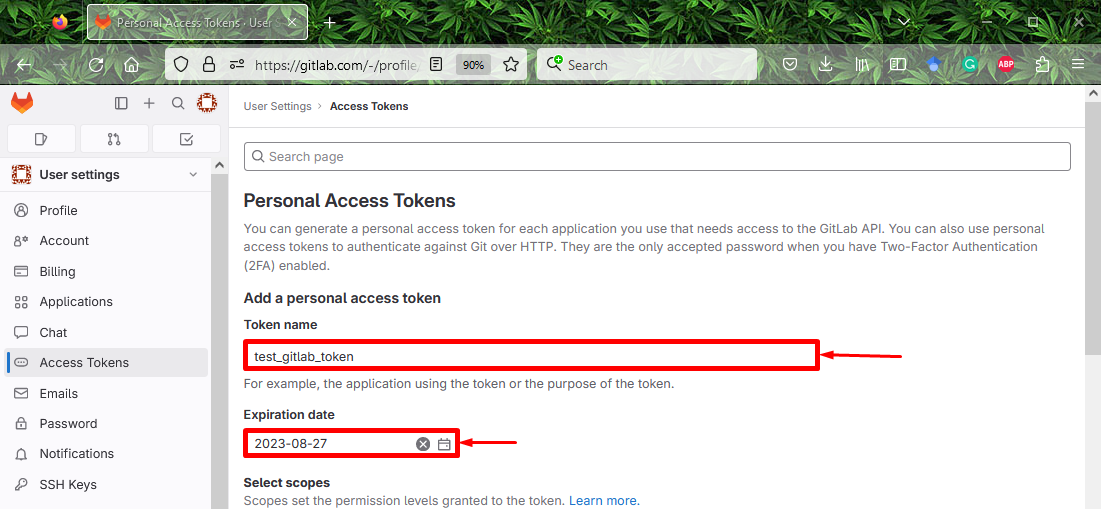
Note: If users don’t specify an expiry date for the token, then it will automatically be set to 365 days later after the creation of the current date.
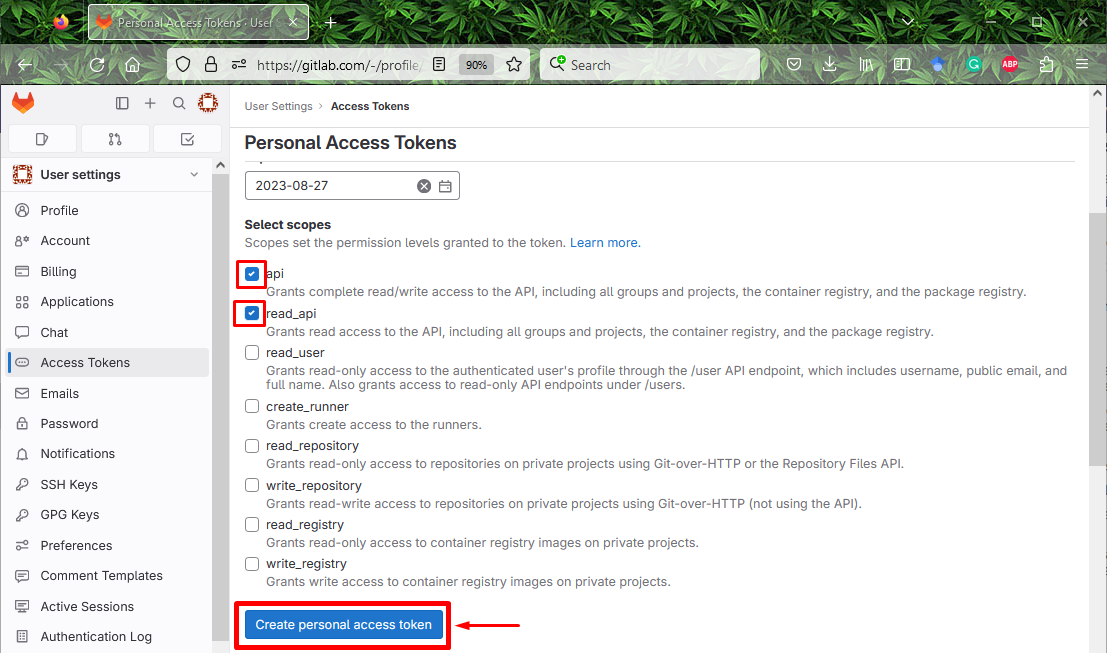
Step 4: Choose the Token’s Scope
After that, select your preferred scopes for the token and mark their checkboxes. Then, click on the below-highlighted button. For instance, we have marked the “api” and “read_api” scopes for the token:
As you can see, new personal token access for GitLab has been created successfully:
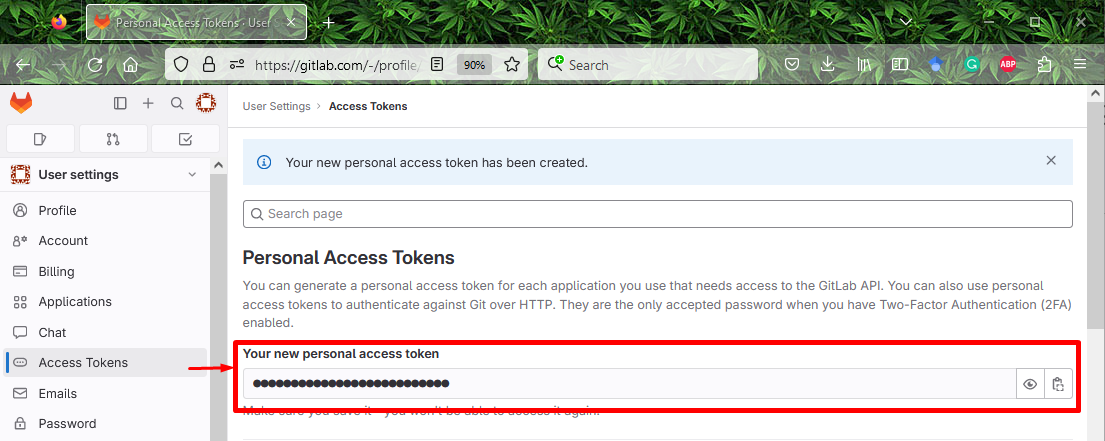
Note: After creating the personal access token, save it somewhere. Because you will not be allowed to access it again once you refresh or leave the page.
That’s all! We have compiled the easiest steps for creating a new GitLab personal access token.
Conclusion
To make a personal access token on GitLab, first, redirect to your GitLab account and move to the user’s profile settings. Next, locate the “Access token” option, select the token name, and specify the token expiry date. After that, choose the preferred scopes and hit the provided button to create it. In this tutorial, we have explained the way for making a personal access token on GitLab.