Let’s start with bucket creation.
Create a Bucket in AWS S3
Open the S3 console, to create a bucket in AWS S3 for that, you need to perform the following steps:
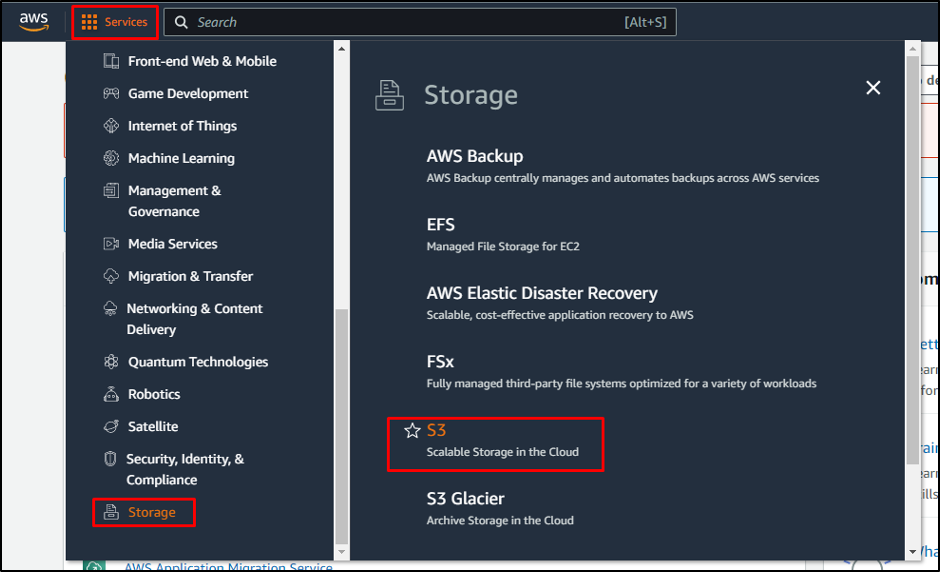
- You need to visit and log in to AWS Management Console
- Select the “Services” section
- Click on the “Storage” button
- From that, Click on the “S3” button:

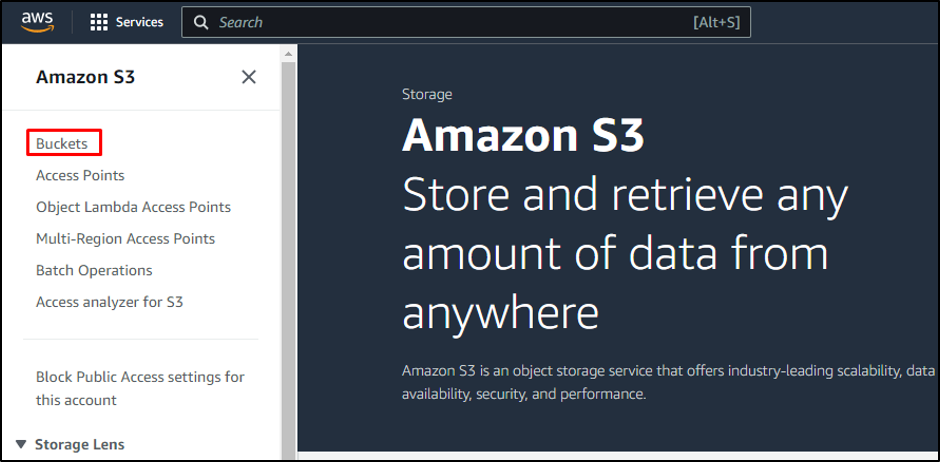
It will direct you to the S3 dashboard, and from the Amazon S3 page, click on the “Buckets” section:
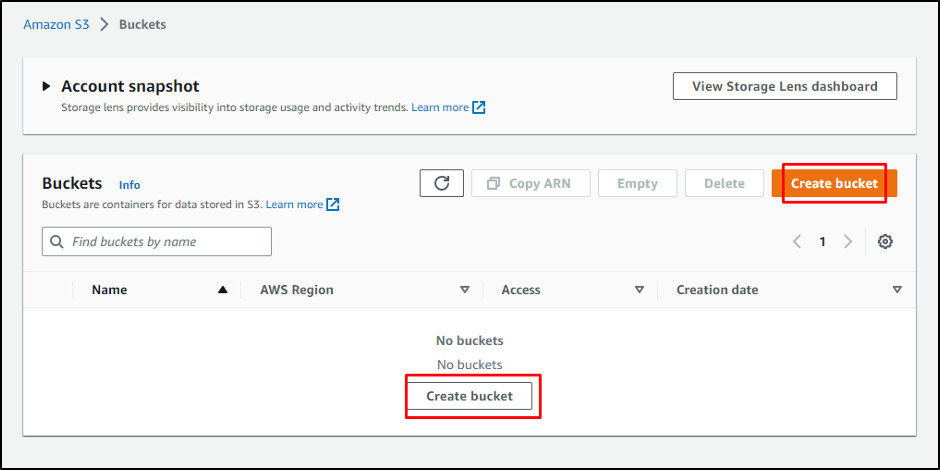
After that, you will be redirected to the bucket’s dashboard. On this page, you can click on the “Create bucket” buttons highlighted in the screenshot below:
After clicking on the “Create bucket” button, you will be directed to the configuration page. Here, you have to write the bucket’s name and specify the region where the data will be stored. Then scroll down the page for further settings:
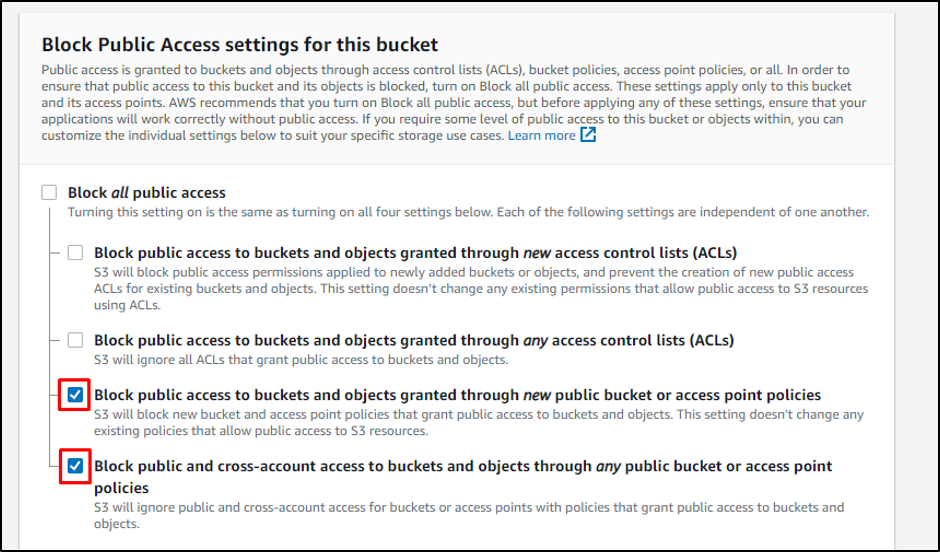
In the next section, you need to set the public access for the bucket. You can block all public access, or you can uncheck some options to grant a few public accesses:
And then, scroll down and select the server-side encryption. After you have completed the configuration of the bucket, just click on the “Create bucket” button:
On the bucket dashboard page, you will see that you have created a bucket. It also displays a success message on the bucket creation:
Your AWS S3 bucket is successfully created.
Conclusion
AWS S3 provides its services in the form of building blocks, which are used to store and retrieve data. To create a bucket in AWS S3, you need to click on the “Buckets” section in the S3 console and then click on the “Create bucket” button. After that, you need to configure the settings of the bucket. After the completion of the configurations, your bucket is created successfully. You have been taught the process of creating a bucket in AWS S3.


