In this article, we will show you how to create a bootable USB thumb drive of Chrome OS Flex on Windows so that you can try and install Chrome OS Flex on your computer.
Topic of Contents:
- Installing Chromebook Recovery Utility Extension on Google Chrome
- Opening the Chromebook Recovery Utility Extension
- Creating a Bootable USB Thumb Drive of Chrome OS Flex
- Conclusion
- References
Installing Chromebook Recovery Utility Extension on Google Chrome
To create a bootable USB thumb drive of Chrome OS Flex on Windows, you need the Google Chrome web browser and the “Chromebook Recovery Utility” extension installed on the Google Chrome web browser.
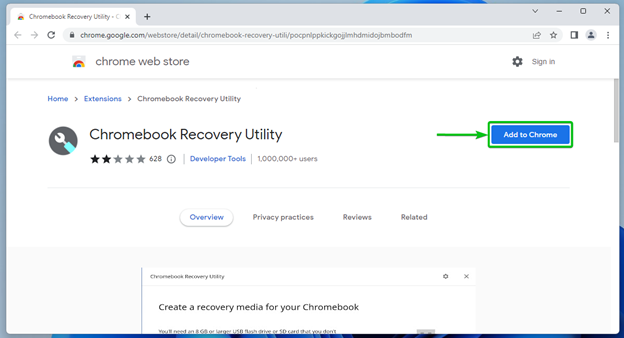
To install the “Chromebook Recovery Utility” extension on Google Chrome, visit the Chromebook Recovery Utility page on Chrome Web Store from Google Chrome.
Once the page loads, click on “Add to Chrome”.
Click on “Add extension”.
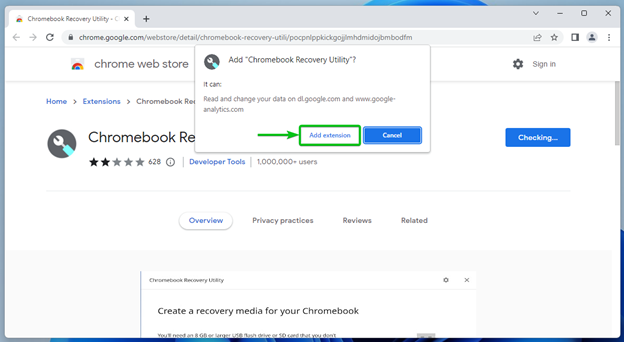
The “Chromebook Recovery Utility” extension should be installed on the Google Chrome web browser.

Opening the Chromebook Recovery Utility Extension
To open the “Chromebook Recovery Utility” extension, click on ![]() from the top-right corner of Google Chrome and click on “Chromebook Recovery Utility”.
from the top-right corner of Google Chrome and click on “Chromebook Recovery Utility”.
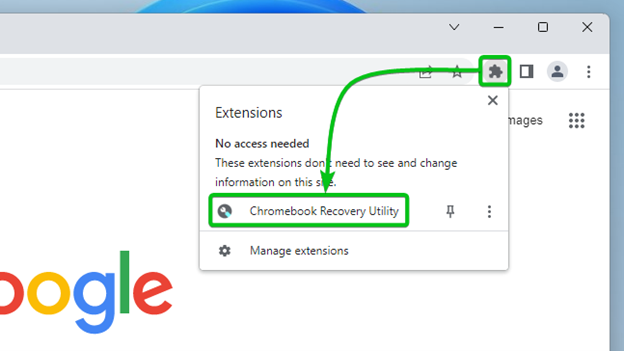
The “Chromebook Recovery Utility” extension should be opened.

Creating a Bootable USB Thumb Drive of Chrome OS Flex
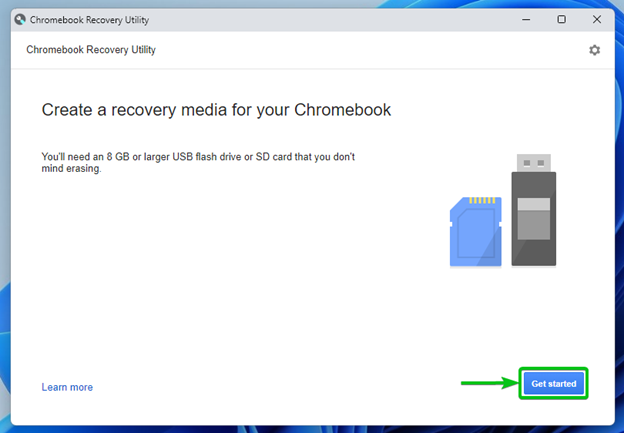
Insert a USB thumb drive into your computer and click on “Get started”.
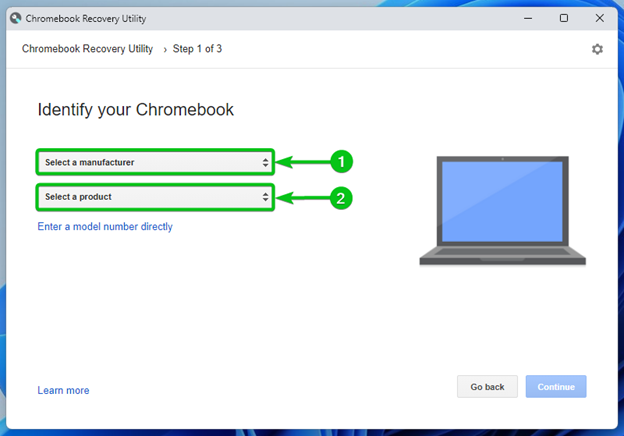
If you already own a Chromebook, you can type in the model number of your Chromebook here[1].
You can also click on “Select a model from a list” to select your Chromebook model from a predefined list[2].

If you decide to manually select your Chromebook model, select the manufacturer of your Chromebook from the “Select a manufacturer” dropdown menu[1] and select your Chromebook model from the “Select a product” dropdown menu[2].
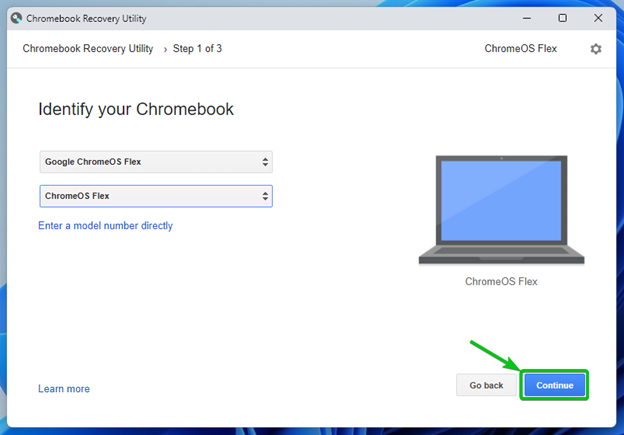
In this example, we selected Google ChromeOS Flex as the manufacturer and ChromeOS Flex as the product model from the dropdown menus. These are generic Chrome OS Flex images for most desktops/laptops. These are the ones you should select if your product model is not listed.
Once you’re done, click on “Continue”.
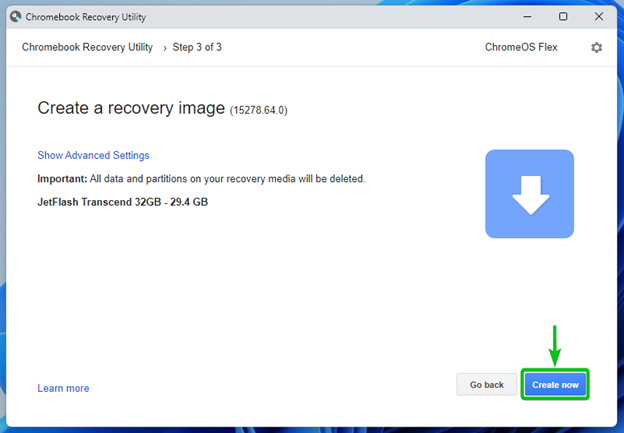
Select your USB thumb drive from the dropdown menu[1] and click on “Continue”[2].

Click on “Create now”.
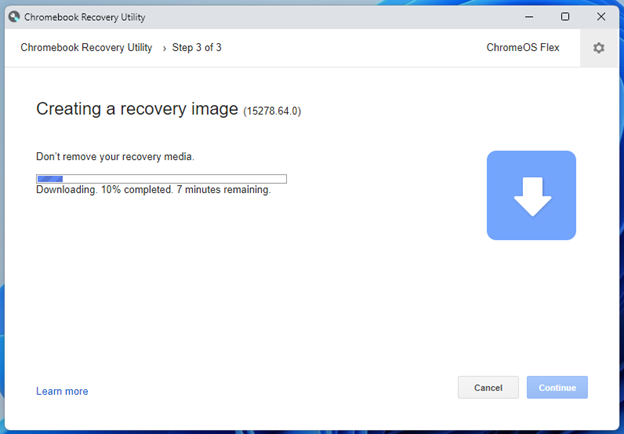
Chrome OS Flex image is being downloaded. It takes a while to complete.
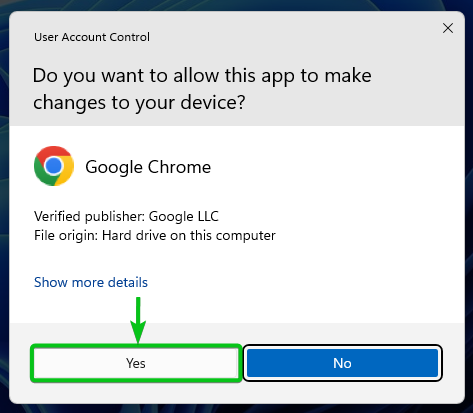
Once the Chrome OS Flex image is downloaded, you will see the following prompt:
Click on “Yes”.
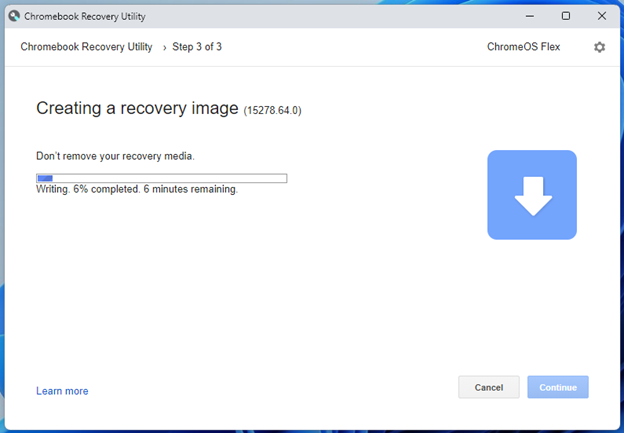
The Chromebook Recovery Utility should start writing the Chrome OS Flex image to your USB thumb drive.
Once the Chrome OS Flex image is written to the USB thumb drive, click on “Done”.
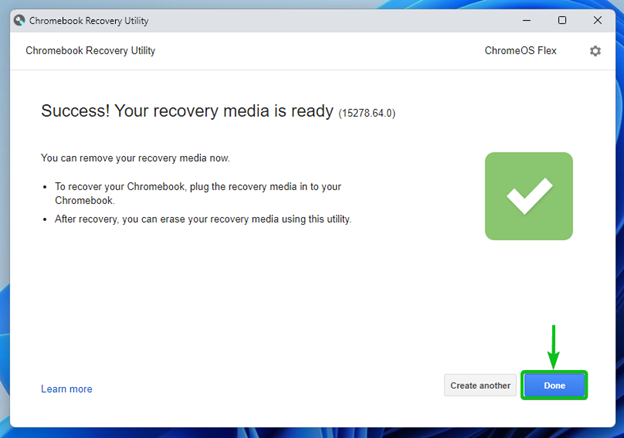
Now, you can use the USB thumb drive to install Chrome OS Flex on your desktop/laptop computers.
Conclusion
In this article, we showed you how to install the Chromebook Recovery Utility extension on the Google Chrome web browser. We also showed you how to use the Chromebook Recovery Utility extension to create a bootable USB thumb drive of Chrome OS Flex.