Those days were gone when you purchased a CD or DVD for installing an operating system. Because if you have a USB stick and an operating system, you can quickly create a bootable USB stick for installing an operating system. For Ubuntu users, creating a bootable USB stick is simple and quick because you only need a .iso file of an operating system and a tool for creating the bootable image on the USB stick.
Follow this article’s guidelines to create a bootable USB stick on Ubuntu.
Create a Bootable USB Stick on Ubuntu
Creating a Bootable USB stick on the Ubuntu system is simple and can be done through:
Method 1: Creating a Bootable USB stick on the Ubuntu Through GUI
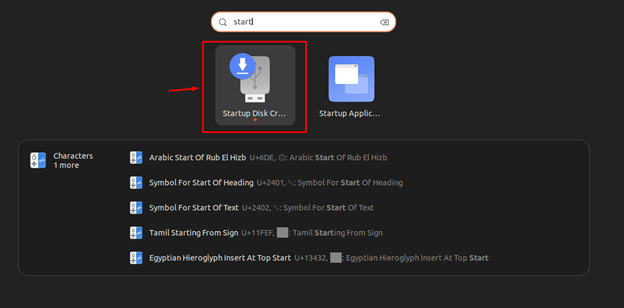
On the Ubuntu system, there is a GUI tool called “Startup Disk Creator” that is used especially for creating the Bootable USB stick on the system. By default, this tool is installed on the Ubuntu system, making it easier to open it from the Application menu and perform the required operation.
You can create a bootable USB Stick on the Ubuntu through GUI using the below-given steps:
Step 1: Insert a fully formatted USB Stick into the Ubuntu system.
Step 2: Then open “Startup Disk Creator” on the Ubuntu system, which is preinstalled, and you can open it from the Application menu.
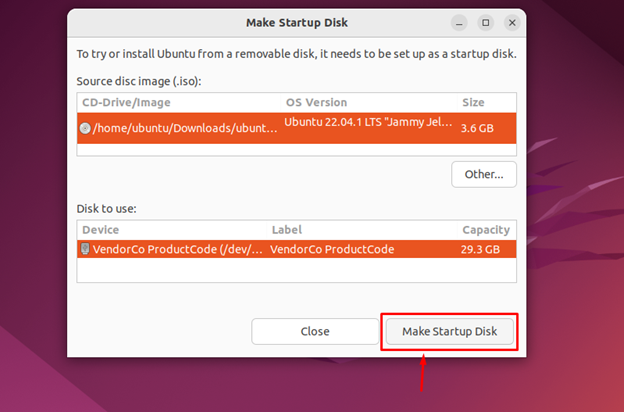
Step 3: You must have a .iso file downloaded on the Ubuntu system and once it’s done, you can click on the “Make Startup Disk” option.
Note: Here, I am creating an Ubuntu bootable USB disk.
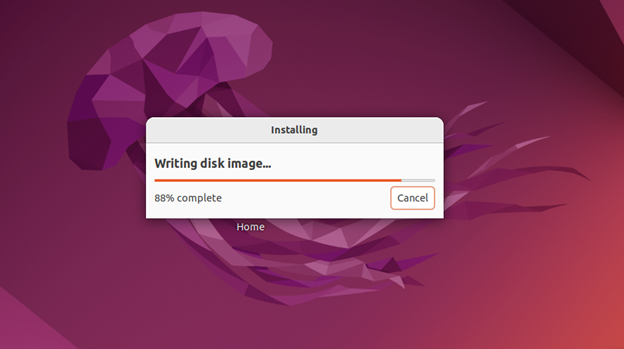
This will start writing the disk image on the Ubuntu disk.
The disk writing image will take some time and you have to wait till it finishes the image installation on the Ubuntu system.
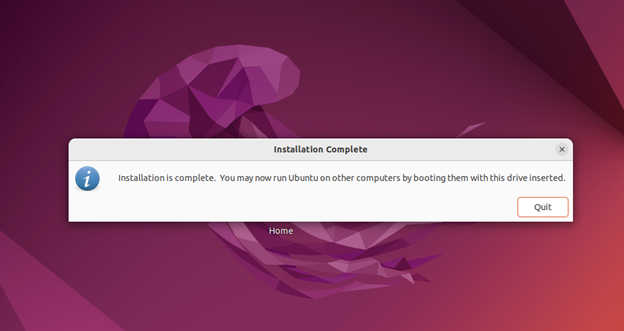
Once the writing is complete, you can remove the USB stick from the Ubuntu system and plug it into the laptop or PC where you want to install an operating system from the bootable USB stick.
Note: You must use the F12 menu from your laptop to enter the boot option and then select the USB drive to boot it. I am leaving the remaining installation steps to your choice because the above steps will create a bootable USB stick on the Ubuntu system.
Method 2: Creating a Bootable USB stick on the Ubuntu Through the Terminal
Ubuntu users can also use the command-line terminal to create a bootable USB Stick and for that, they must follow the below-given steps:
Step 1: First, ensure the USB Stick is attached to the Ubuntu system and for this purpose, the users must apply the following command:
Step 2: Then umount the mounted USB stick on Ubuntu system from the following command:
Note: The USB stick drive location may be different in your case, which can be confirmed from the “df -h” command.
Step 3: Now, to begin creating the bootable USB stick on Ubuntu, follow the below-given syntax:
Leave the above command the same while changing the location of the iso file and USB stick drive.
Once you finish the above command, the process will create a bootable USB stick on the Ubuntu terminal.
Conclusion
Creating a bootable USB stick on the Ubuntu system is simple with the help of a preinstalled tool called “Startup Disk Creator”. Plug the USB stick into the Ubuntu system and start the “Startup Disk Creator” to begin writing the image of an iso file onto the USB stick. Ubuntu users can also use the command-line method to create a bootable disk on the Ubuntu system whose details are already provided in the above-mentioned guidelines. Once the process is completed through any method, you can remove the USB stick and plug it into a laptop or PC and perform the operating system installation.


