TypeScript comes with the “decorators” that help in the addition of metadata, to the created classes, properties, and methods. They execute the specified logic defined in its body section when its associated content/element is accessed. It is considered the best method to modify the behavior of the class without making changes in itself. They can be created easily in the format of a function as per requirement.
This guide elaborates on the complete procedure to create a custom decorator in TypeScript.
How to Create a Custom “Decorator” in TypeScript?
TypeScript utilizes five types of decorators such as “class”, “method”, “property”, “accessor”, and “parameter”.
This section carries out the essential steps to create a custom class decorator by following the given steps.
Step 1: Check Prerequisites
Make sure that the “TypeScript” is installed in your project set-up or not. To perform this task, run the following command to check the TypeScript version:

Here, it can be seen that TypeScript is installed in the current project set-up having the “5.1.3” version.
Step 2: Enable the Decorator
Now, enable the “decorator” support in the project set-up. It can be done in two ways:
Method 1: Command Line
Use the “tsc” compiler with the “–experimentalDecorators” flag to enable the “decorator” support through the command line:

The execution of the above command enables the “decorator” support.
Method 2: Edit the “tsconfig.json” File
Open the “tsconfig.json” file from your project setup and navigate to the “compilerOptions” section. Search “experimentalDecorators” and uncomment it by removing the forward slashes:
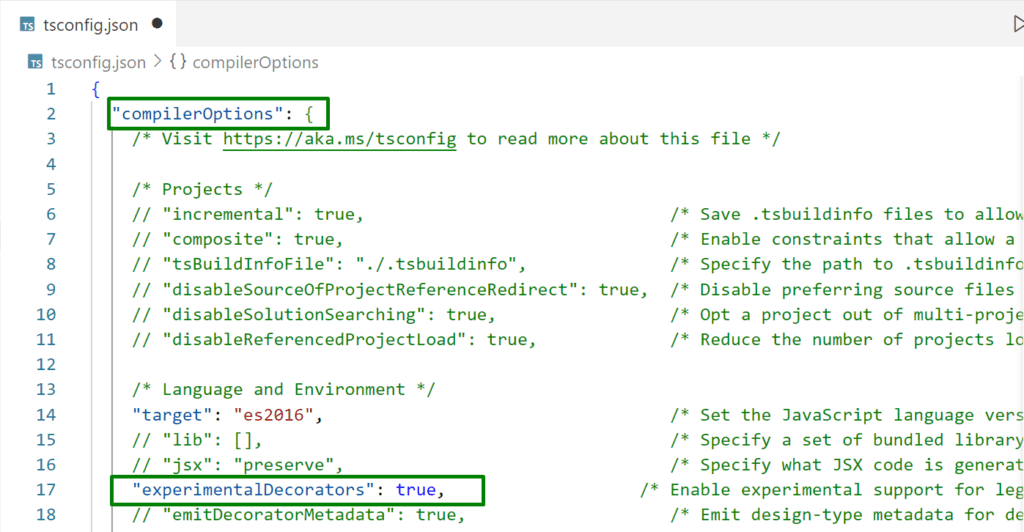
Now, press “Ctrl+S” to save the new changes in the file.
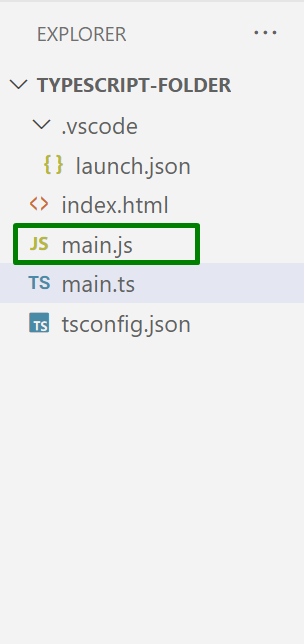
File Structure
After enabling the “experimentalDecorators” support, the new compiled “.js” file will be automatically created having the same name as the “.ts”. The project file structure will look like this:
Step 3: Create a Custom Decorator
Now, create/open the file with the “.ts” extension and add the following lines of code in it to create a custom “class” decorator:
console.log("MyDecorator Runs Successfully!")
}
@myDecorator
class User{
name: string;
email: string;
constructor(n:string, e:string) {
this.name= n;
this.email=e;
}
}
const user= new User('Areej', '[email protected]')
In the above lines of code:
-
- The function “MyDecorartor()” declares the class decorator that is applied to the targeted class “constructor” with the type “Function” as its parameter.
- After that, specify the class decorator with the “@” special character before the targeted class.
- Next, create a class named “User” having two properties with the type “string”.
- The “User” class further includes the method called “constructor” to initialize the class object properties.
- Lastly, create an object “user” with the “new” keyword having the value of the “User” class initialized properties as its constructor argument.
Step 4: Output
Now, run the compiled “main.js” file by specifying its name with the “node”:

Here, it can be seen that the output shows the successful execution of the created custom class decorator named “myDecorator”.
Conclusion
In TypeScript, to create a “custom decorator”, the user needs to define it as a function and then use it with the “@” keyword. The user can create any type of custom decorator based on its type. By default, the decorator support is not enabled, so first enable it via using the “command line” or the “tsconfig.json” file. This guide deeply explained the complete procedure to create a custom decorator in TypeScript.