Main Features of Cpupower-gui
Cpupower-gui can manage frequencies for both single core and multi-core CPUs where you can specify maximum and minimum frequencies for each core. In case of multi-core CPUs, it can set frequencies for individual CPU cores separately or collectively. You can also use it to make certain cores completely offline to reduce power usage. Cpupower-gui can save settings into multiple profiles so that you can apply a particular set of settings in one click and keep each set independent from others. It can also change the current CPU governor and comes with a few governor presets that can be used to control performance or power consumption of your Linux system.
Installing Cpupower-gui in Linux
You can install Cpupower-gui in Ubuntu using the command mentioned below:
Note that while testing the app, I found the repository version to be quite behind the latest version available on GitHub. To install the newest version on Ubuntu, you can add the official PPA repository provided by the developers. Follow instructions available here to do so.
Alternatively, you can download the latest “.deb” package directly from the repository and run the following two commands to install Cpupower-gui in Ubuntu:
$ sudo apt show ./cpupower-gui_1.0.0-1_all.deb
Cpupower-gui may be available in default repositories of other Linux distributions, so you can search for it in the package manager. Additional installation instructions and distribution specific packages are available here.
Using Cpupower-gui in Linux
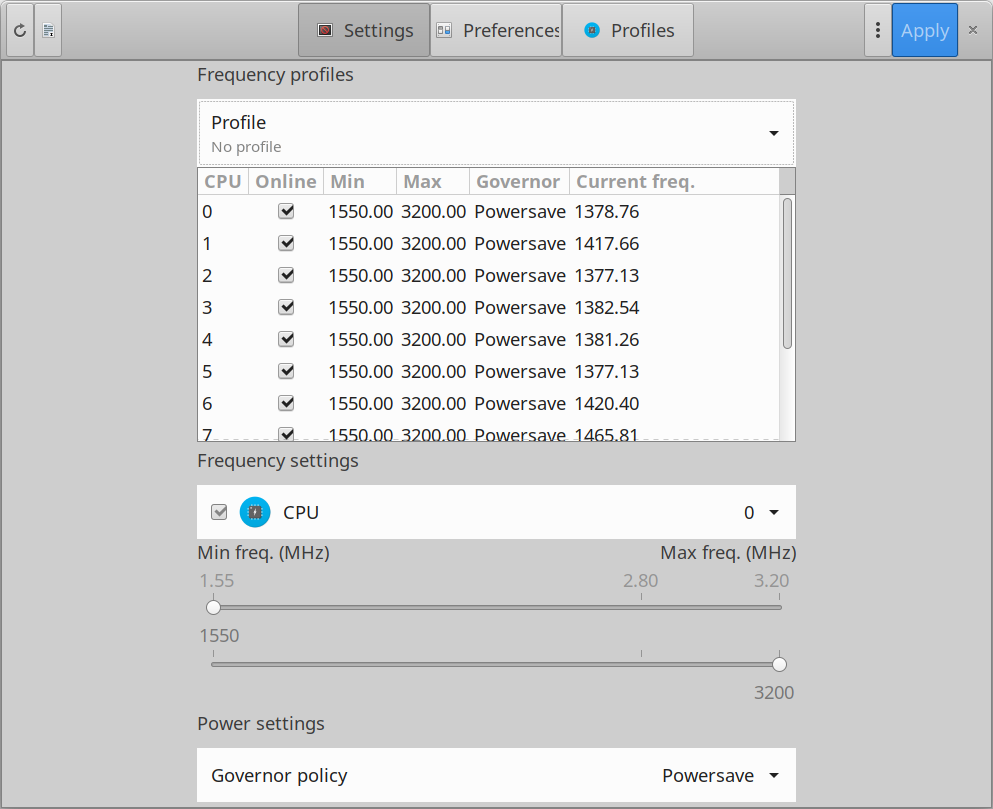
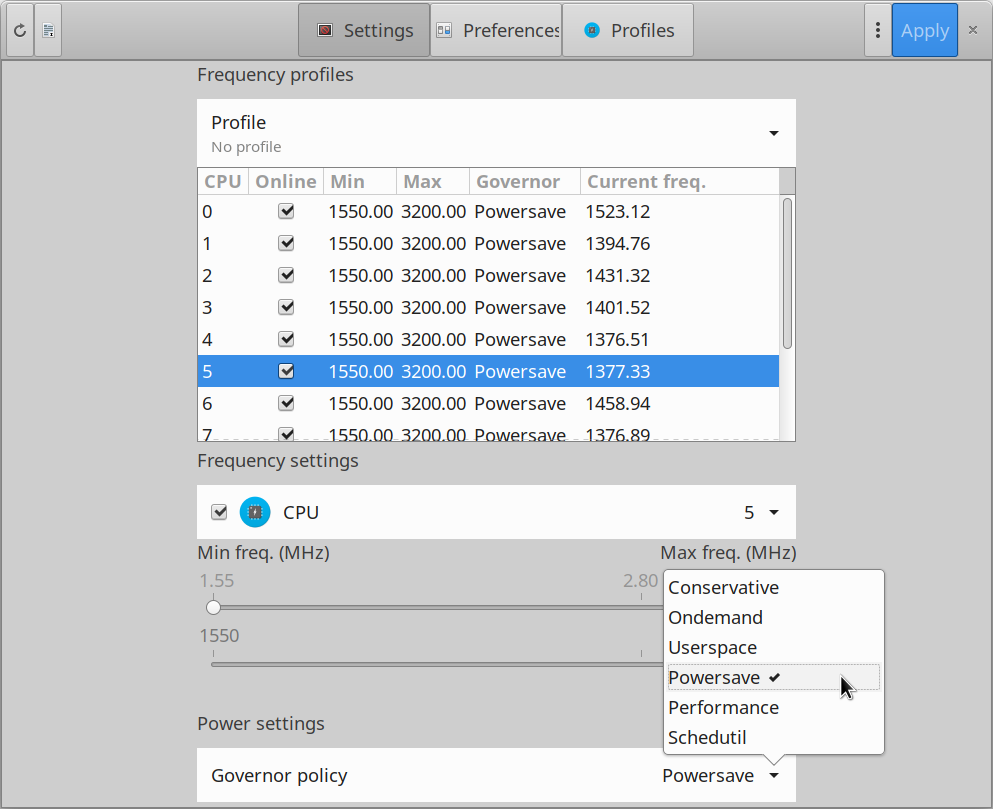
Launch Cpupower-gui from the main application menu available in your Linux distribution. Depending on CPU installed in your Linux system, you should be greeted with a window similar to this:
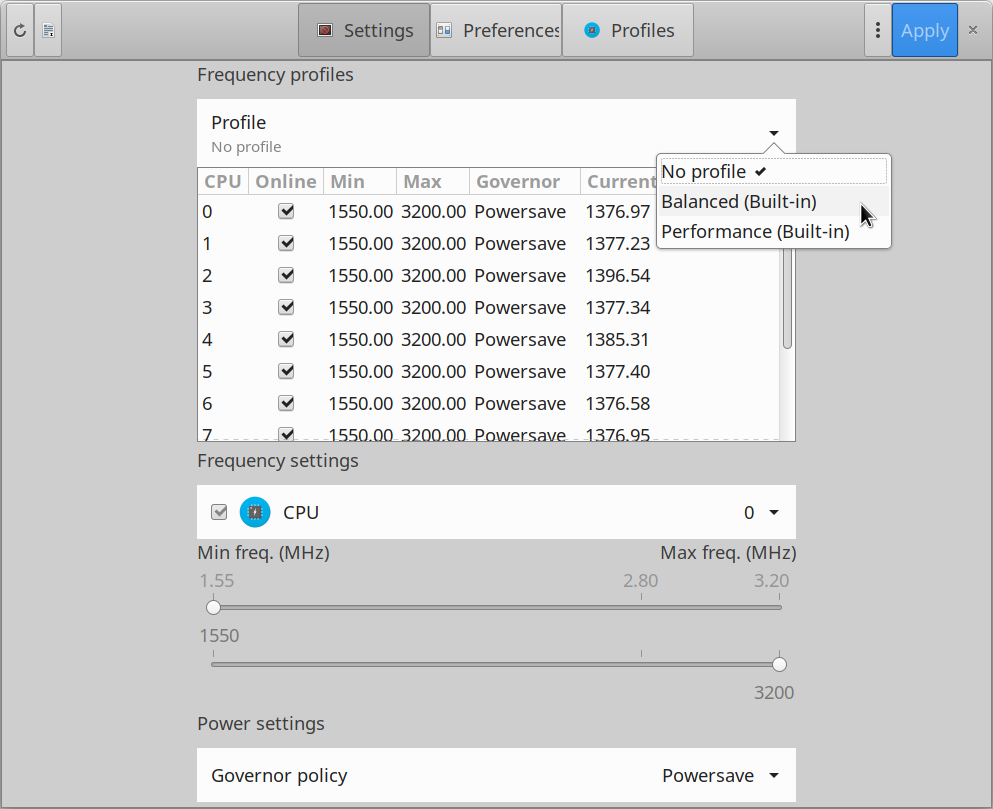
In the first dropdown menu called “Profile”, you will be able to choose built-in CPU performance profiles available in your Linux system. These profiles will automatically set CPU frequencies to increase performance or reduce power consumption.
Once you have made the changes, click on the “Apply” button located on the top right corner to apply the changes system wide. Note that you will have to do this every time after making changes to any field in the app.
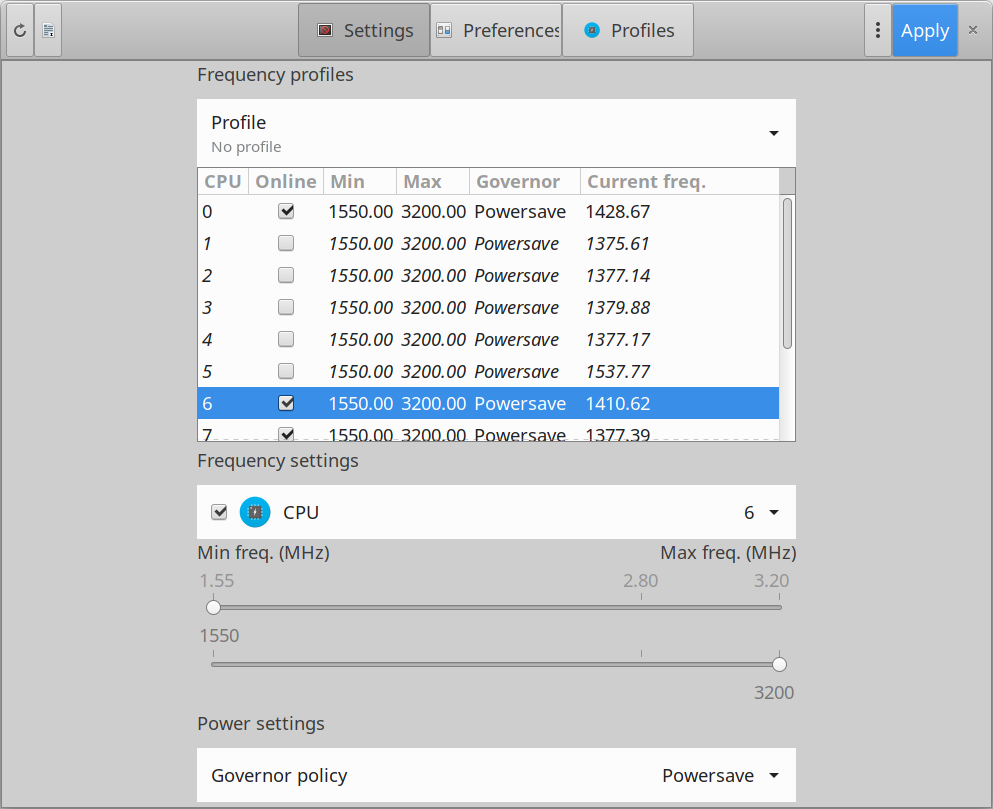
Just under the “Profile” drop down menu, you will see tabular data showing current frequencies set for various CPU cores. Here you can make certain cores offline by clicking on their respective checkboxes.
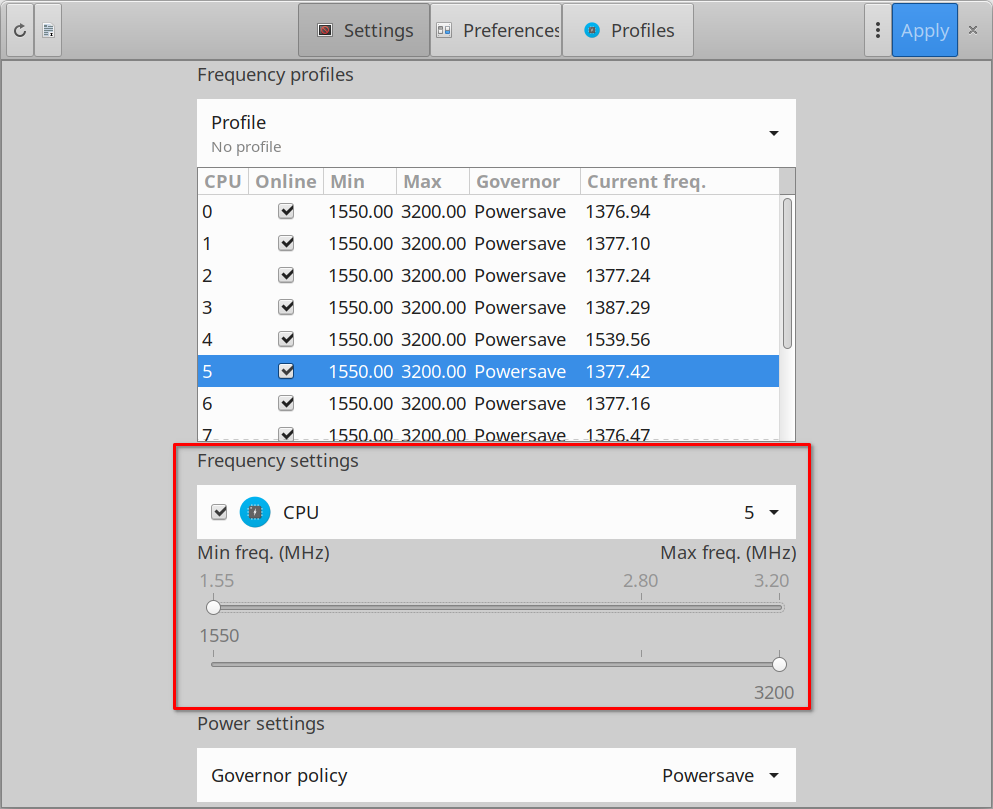
Under the “Frequency settings” heading, you can select a specific CPU core, make it online or offline, and change its minimum and maximum frequency using the two sliders located just under the entry with checkbox and drop down menu.
Next, under “Power settings” you will be able to change CPU governor policy. A CPU governor scales CPU frequencies using some predetermined algorithms and policy rules. It can increase frequencies to improve performance when heavy calculations are being performed and it can reduce frequencies when only basic tasks are being carried out on a Linux PC. This results in lower power consumption. Some CPU governors run CPU cores at highest frequencies all the time, thereby giving maximum performance boost. However they are less efficient in reducing power consumption. You can read more about all major CPU governors from here.
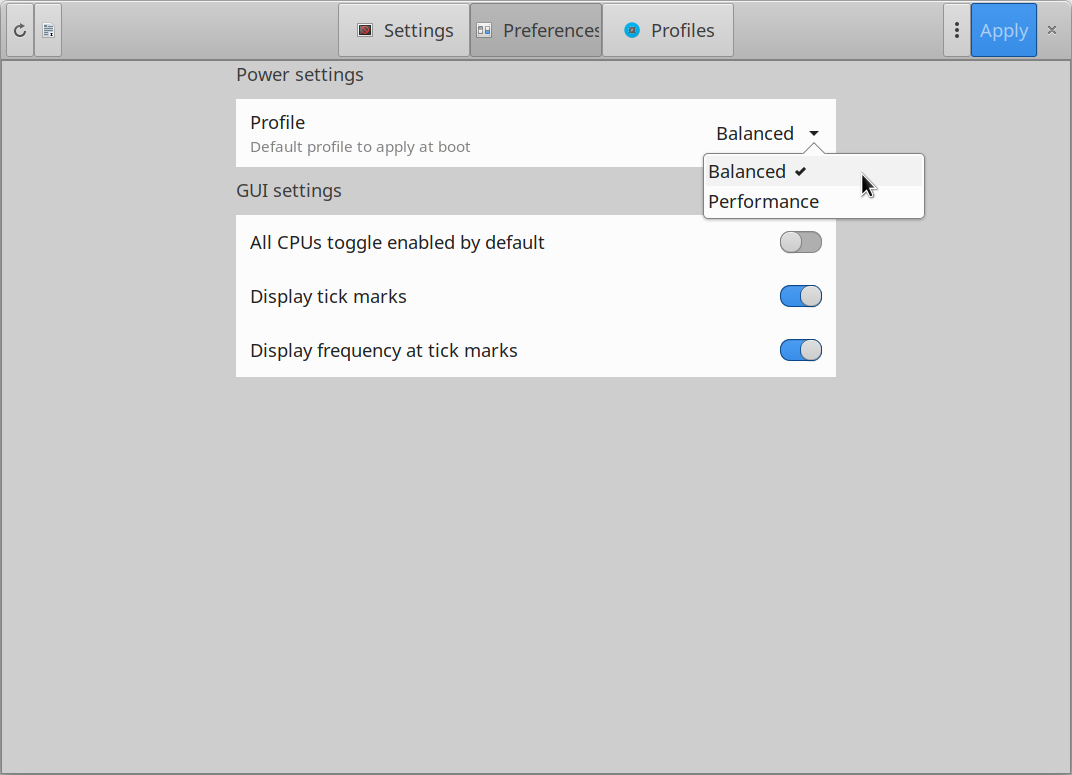
Under the “Preferences” tab located on the top toolbar, you will be able to change the profile that will be automatically applied on every boot.
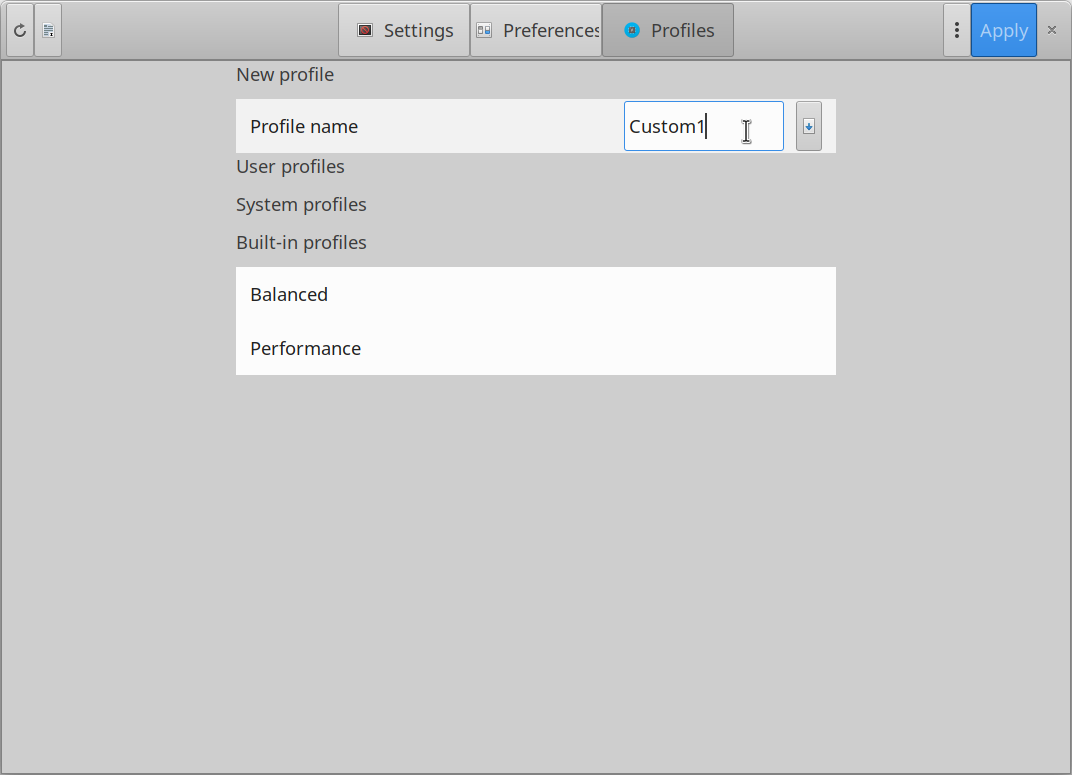
To save your settings to a custom profile, click on the “Profiles” button on top toolbar and create a new profile by entering a name in the input box (as shown in the screenshot below).
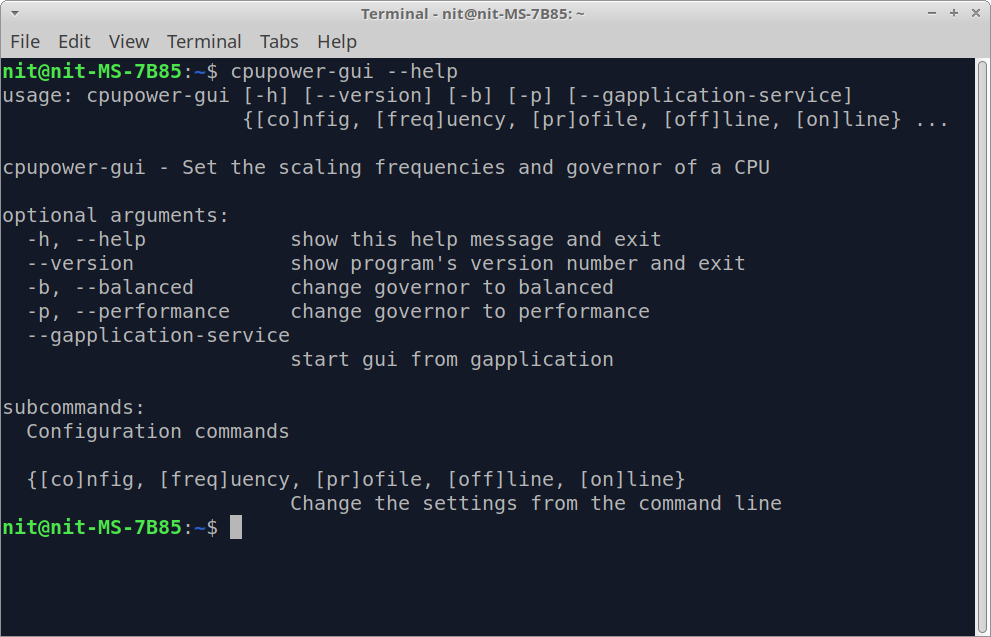
You can also use the command line interface of Cpupower-gui to control CPU frequencies and governors. To know more about these command line options, run the following commands:
$ cpupower-gui config --help
$ cpupower-gui frequency --help
$ cpupower-gui profile --help
$ cpupower-gui online --help
$ cpupower-gui offline --help
For instance, to change governor to balanced mode from command line, you will need to run the following command:
To set minimum and maximum frequencies of CPU cores 1, 2, 3, 4, and 5, you will need to run a command in the following format:
More command line examples and detailed documentation can be found here.
Conclusion
Cpupower-gui provides a nice graphical interface that can be used to tweak CPU performance on your Linux system. Since it comes with support for profiles and governors, you can switch to low performance mode when running less CPU intensive apps to reduce power consumption. On the other hand, you can switch to performance mode when running CPU intensive applications like 3D games to get a performance boost.

