Example 1:
The “iostream” is included here which is the header file that aids in utilizing the functions to input or output the data. Underneath this, we utilize the standard namespace “std” and invoke “main()”. Now, in “main()”, we declare a byte array of the name “mybyteArray[]” with the “unsigned char” data type and also initialize it with five elements.
Then, we utilize “cout” which helps render the desired data and place the “for” loop. This “for” loop aids in getting the elements of the byte array, and “cout” aids in rendering the elements of this byte array along with their hexadecimal numbers as we place the “My byteArray[” << i << “]” and “hex” in cout.
Code 1:
using namespace std;
int main() {
unsigned char mybyteArray[] = { 0x31, 0x32, 0x33, 0x34, 0x35 };
cout << "The elements of the byte array is:" << endl;
for (int i = 0; i < sizeof(mybyteArray); i++) {
cout << "My byteArray[" << i << "] = " << hex << (int)mybyteArray[i] << endl;
}
return 0;
}
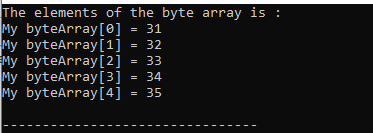
Output:
The outcome of the code is rendered here and the byte array that we created in the previous code is now displayed.
Example 2:
This code includes the “iostream” header file which facilitates the input or output data using the functions. Below this, we call the “main()” function and use the “std” standard namespace. We then declare and initialize a byte array with the “byteA[]” name and the “unsigned char” data type. We assigne six elements to this byte array and then utilize the “for” loop to access each element. We utilize the “cout” so the hexadecimal numbers of the items in this byte array are displayed below as we include both “hex” and ” byteArray[” << a << “]” in it.
Now, we change the elements of this byte array by assigning “0x11” to “byteA[0]”. Then, we assign “0x46” and “0x77” to “byteA[2]” and “byteA[4]”, respectively. Then, these values are modified from the byte array that we created. After this, we utilize the “for” loop again to access all the elements of the byte array and the added “cout” below. Now, the modified values are rendered here along with their hexadecimal numbers.
Code 2:
using namespace std;
int main() {
unsigned char byteA[] = { 0x21, 0x22, 0x23, 0x24, 0x25, 0x26 };
cout << "Accessing elements of byte array" << endl;
for (int a = 0; a < sizeof(byteA); a++) {
cout << "The byteArray[" << a << "] = " << hex << (int)byteA[a] << endl;
}
cout << "\nChanging elements of the byte array:" << endl;
byteA[0] = 0x11;
byteA[2] = 0x46;
byteA[4] = 0x77;
for (int a = 0; a < sizeof(byteA); a++) {
cout << "The byteArray[" << a << "] = " << hex << (int)byteA[a] << endl;
}
return 0;
}
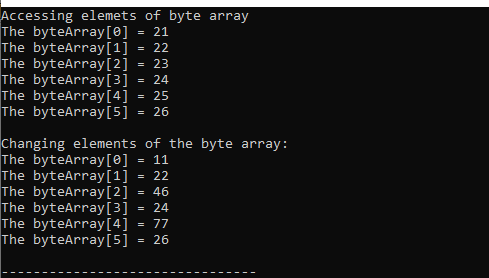
Output:
The byte array that we created and the modified array are rendered. We modified the values of this byte array in our code which is also rendered in this outcome.
Example 3:
Here, we utilize the “transform()” method to convert our string data into the byte array in this code. The “iostream”, “cstddef”, and “algorithm” header files are included in this code. These header files are imported so that we can easily utilize the functions that are defined in them. Underneath this, we place the “std” namespace and call the “main()” method. Then, we initialize the “myString” variable of the “string” data type with “Hello World”.
Now, we add “cout” to display the given statement. Below this, we create the byte array of the same size as the “myString.length()”. After this, we utilize the “transform()” function which iterates over the string characters and place the “const char& character” and “return byte(character)” that converts the element of the string into the bytes and copy them to the byte array.
After this, we use the “for” loop where we add the “const byte& byt: byteArray” which iterates over the byte array. Then, we add the “cout” which displays all the elements that are converted into the byte array.
Code 3:
#include <cstddef>
#include <algorithm>
using namespace std;
int main()
{
string myString = "Hello World";
cout << "The string is " << myString << endl << endl;
cout << "The converted string to ByteArray is " << endl;
byte byteArray[myString.length()];
transform(
myString.begin(),
myString.end(),
byteArray,
[](const char& character) {
return byte(character);
});
for (const byte& byt: byteArray)
{
cout << to_integer<int>(byt) << ", ";
}
cout<<endl;
return 0;
}
Output:
The string and converted string into the byte array are now rendered in this outcome. We converted this string into the byte array using the “transform()” method in our code.

Example 4:
Let’s turn our string data into a byte array using the “memcpy()” method in this code. Now, this code includes the “iostream”, “cstddef”, and “algorithm” header files. We import these header files so that we can use the functions that are described in them with ease. We position the “std” namespace underneath this and invoke the “main()” function from this location.
Next, we initialize the “Byte Array” in the “stringData” variable. To show the provided statement, we now include the “cout” command. Underneath that, a byte array with the same size as “stringData.length()” is constructed. We utilize the “memcpy()” method and pass three parameters in this function which are “ArrayOfBytes”, “stringData.data()”, and “stringData.length()”, respectively. This function aids in copying the memory of the string’s character to the byte array that we declared.
Following this, we use the “for” loop in which we add “const byte& my_byte: ArrayOfBytes” to traverse over the byte array. Then, we add the “cout” function which shows every element that has been transformed into the byte array.
Code 4:
#include <cstddef>
#include <cstring>
using namespace std;
int main()
{
string stringData = "Byte Array";
cout << "The string data is " << stringData << endl << endl;
cout << "The string converted into the ByteArray here which is " << endl;
byte ArrayOfBytes[stringData.length()];
memcpy(ArrayOfBytes, stringData.data(), stringData.length());
for (const byte& my_byte: ArrayOfBytes)
{
cout << to_integer<int>(my_byte) << ", ";
}
return 0;
}
Output:
This result renders the original string and the string that is transformed into a byte array. We use our code’s “memcpy()” method to transform this string to the byte array.

Conclusion
We learned that byte arrays in C++ offer a low-level approach to working with binary data efficiently. We explored that they provide us control over the memory and a foundation for tasks like serialization, networking, and low-level data processing. In this article, we explored the concept of declaring and initializing the byte array in C++ as well as the conversion of the string into the byte array along with their codes.