Often, you may need to convert or add the images to the PDF files, especially if you have an application and you want the users to download the images as PDF files.
There are different online tools that convert the images to PDF. But security is always a concern, and you can’t trust these online sites with your data. The best method is to convert the images on your machine. Linux offers various command-line utilities to aid you with that. The two common tools are Img2PDF and ImageMagick.
1. ImageMagick
ImageMagick stands out for the image conversion to PDF for its fast speed. The open-source Linux tool utilizes the multiple CPU threads to keep the conversion process fast. Whether converting one image or multiple images, ImageMagick gets the job done.
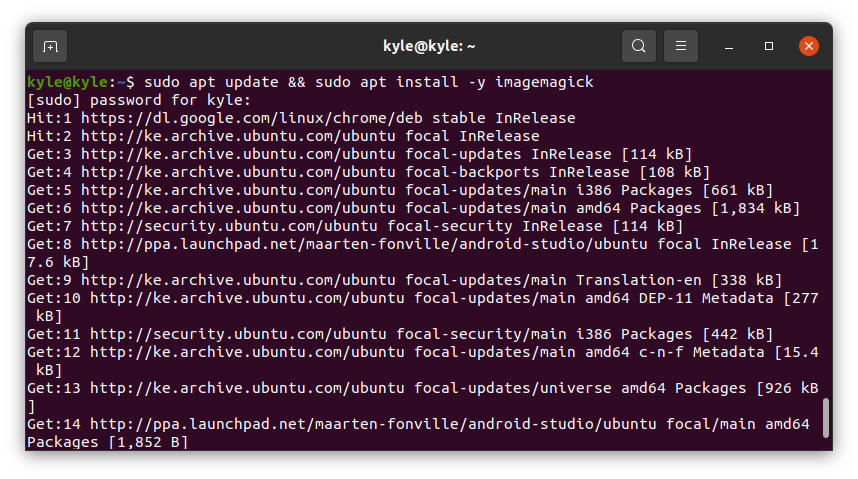
Let’s first install ImageMagick using the following command:
1 2 3 | $ sudo apt update $ sudo apt install -y imagemagick |
For Fedora users, the command is as follows:
1 | $ sudo dnf install imagemagick |
With the ImageMagick already installed, navigate to the directory containing your pictures. We have different images in our example. We will see how we can convert them one by one and how to convert them all at once.
The syntax for conversion is as following:
1 | $ convert image demo.pdf |
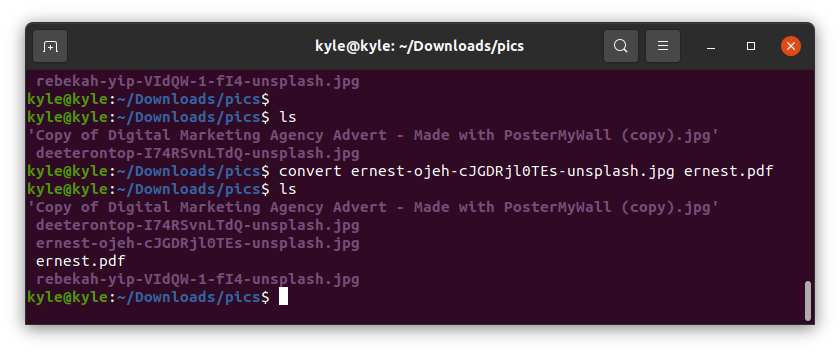
Note that we are using convert, a utility for ImageMagick. Let’s start by converting one image.
If you run the previous convert command, it should work fine. However, you may end up with an error message like the one reflected in the following image:
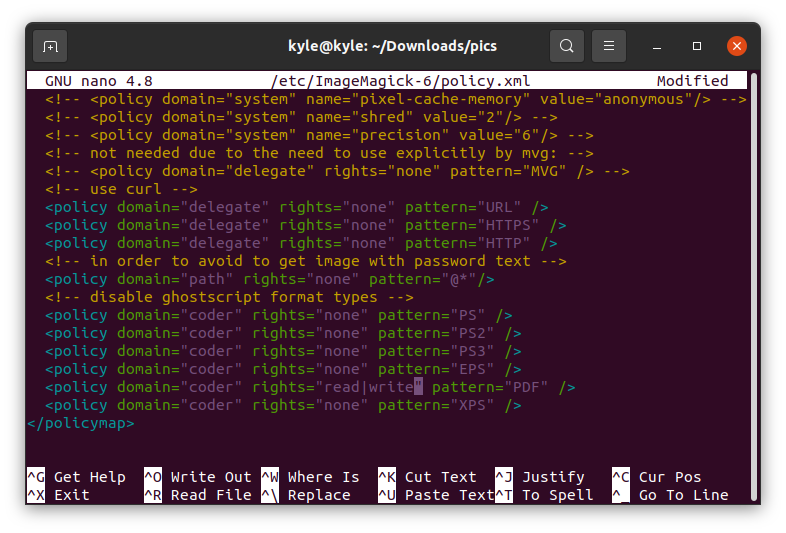
In that case, all you need is to edit the policy.xml file using an editor like nano.
1 | $ sudo nano /etc/ImageMagick-6/policy.xml |
Look for the line in the following example:
1 | <policy domain="coder" rights="none" pattern="PDF" /> |
To fix the error, replace the rights from “none” to “read|write”
Save the file and rerun the command. You will now have a PDF file of the converted image.
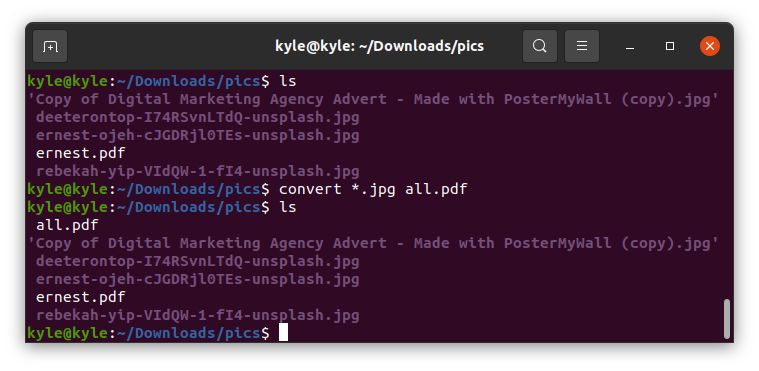
To convert all the images in the current directory to PDF, you can add their names one by one or select the image format if they are the same. In our case, the image formats are in “.jpg”. In this case, our command is as follows:
1 | $ convert *.jpg all.pdf |
That’s it! You now have all your images converted into one PDF.
ImageMagick is a great tool for converting the images to PDF on the command line. The only bad side of it is that the resolution for the images changes and the PDF file doesn’t have the full resolution, reducing the image quality.
 2. Img2PDF
The ImageMagick converts the images to PDF, but the quality of the images reduces. The alternative is to use the Img2PDF to convert the same photos without losing the image quality. Besides, Img2PDF allows the specification of the image size when converting.
Start by installing Img2PDF using the following command:
1 | $ sudo apt install img2pdf |
You can verify the installation by checking the version.
Img2PDF can also be installed using pip in other distributions:
1 | $ pip install img2pdf |
With the tool installed, let’s proceed to convert our images. We use the same pictures as we did with ImageMagick. First, navigate to the directory that contains your images. To convert a single file, use the following syntax:
1 | $ img2pdf img -o converted.pdf |
We now have a PDF version of the image. If you want to convert multiple images, you can list them all. Or if they have the same format, use the * shorthand like in the following example:
To specify the page size or the image size for the output, use the –imgsize or –pagesize.
For instance, to specify the image size to 30cm by 45cm, the command is:
1 | $ img2pdf <image> --imgsize 30cmx45cm -o output.pdf |
Conclusion
Converting the images of different formats to PDF shouldn’t trouble you when using Linux. There are command-line utilities at your disposal, and the syntax is easy. This guide has presented two utilities, Img2PDF and ImageMagick, that you can use to convert either one or multiple images to PDF.


 2. Img2PDF


