Installing FontForge in Linux
FontForge is a free and open source command line and graphical font editor that can be used to create new fonts, edit existing fonts and convert fonts to different file formats. You can install FontForge in Ubuntu using the command mentioned below:
FontForge is available in default repositories of many Linux distributions, so you can install it from the package manager. More download options, including a universal AppImage file, are available on the official FontForge website.
Converting a TTF to OTF and an OTF to TTF File using FontForge Command Line Utility
Once FontForge has been installed, you can use its built in scripting system to convert a font from command line. Here is an example that converts a TTF file to an OTF file using custom scripting system available in FontForge:
To convert a TTF file to an OTF file using this command, replace “font.ttf” with input TTF file and replace “font.otf” with the desired name you want for the converted OTF file. This command uses the “-c” switch to run FontForge specific scripting language from the command line. The “-lang” switch tells fontforge command to use its own scripting language and not any other programming language supported by it (FontForge supports Python scripts as well).
You can use the same command for converting an OTF file to TTF file as well. The arguments need to be supplied to the command in order, where the argument for the input file comes first, followed by the desired name for the converted output file. So, in order to convert an OTF file to TTF file, you will need to run the same command in the following format:
Note that it is important to specify the correct file extension for both input and output font files. FontForge automatically identifies the file types using file extension names and uses them to convert and generate new fonts in the correct type.
Sometimes fontforge may output some warnings regarding layout, structure and geometry of glyphs during conversion. These warnings are due to validation rules of FontForge and you can safely ignore them as long as they are warnings and not errors.
Converting a TTF to OTF and an OTF to TTF File using FontForge Graphical Client
If you do not prefer the command line version and want to use a graphical interface to convert fonts to TTF and OTF file formats, you can use FontForge GUI installed with the FontForge package.
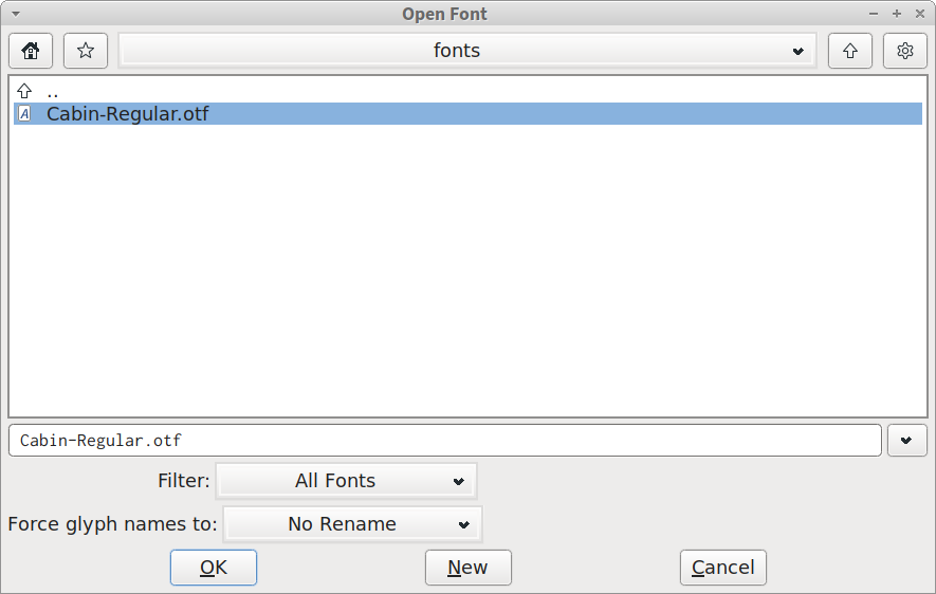
To do so, launch the FontForge app from the main application menu of your Linux distribution and choose an input font, as shown in the window below.
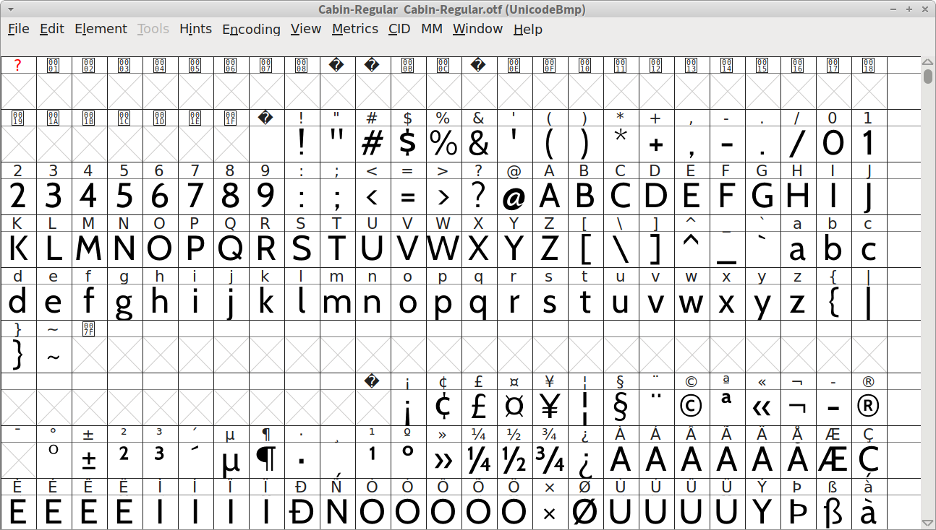
You will get a new window where you can see font characters in a grid-like layout.
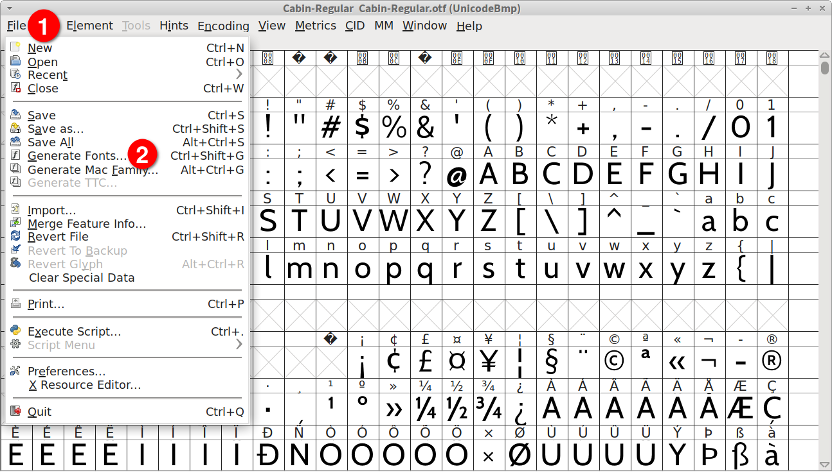
Next, click on the “File” menu located at the top left corner and then click on “Generate Fonts” menu entry visible in the dropdown menu, as shown in the screenshot below:
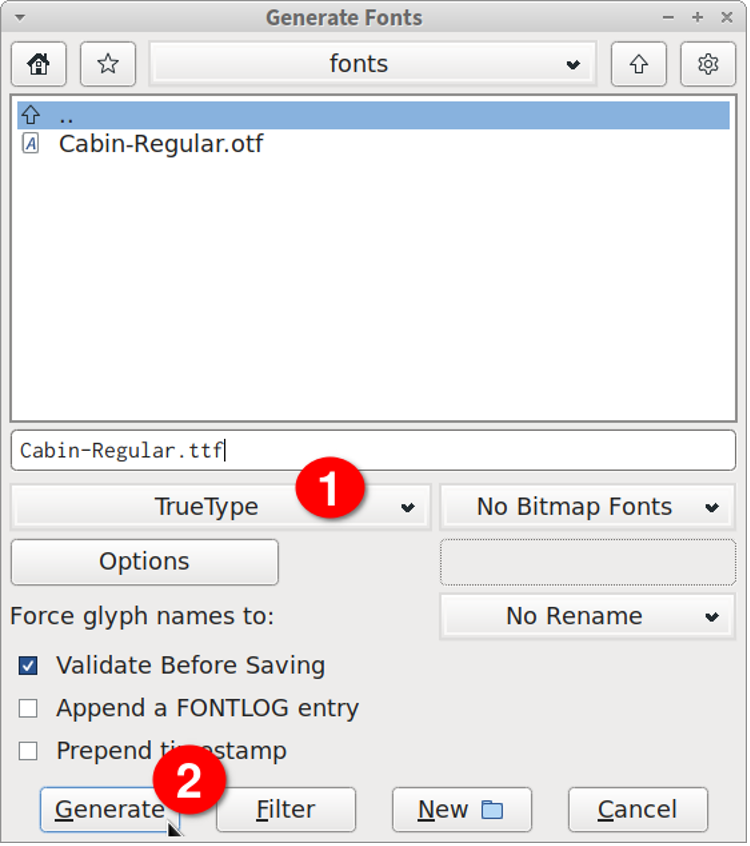
You will be presented with a new window where you can change settings before generating / converting fonts. In the font type dropdown box, choose “TrueType” or “OpenType” according to your requirement. Next, enter an appropriate filename for the output file, choose a folder where you want to save the converted file and click on the “Generate” button. Wait for the process to finish to get the converted font.
Note that just like the FontForge command line tool, the graphical client may also prompt you with some warnings as the conversion process will go through the built-in validation system. You can ignore them and proceed with conversion if they are just warnings and not errors.
Conclusion
TTF and OTF fonts are most popular and widely used. Depending on the nature of your software or project, you may need to use a specific type of font file format and may have to choose between one of them. In such a case, you can use the command line utility and graphical client of FontForge to convert fonts easily into different formats.


