There are two ways of connecting to your EC2 instance. The two ways are as:
The SSH connection is mostly made with the EC2 instance when it is running a Linux-based operating system like Ubuntu. Whereas the RDP connection is made with the EC2 virtual machine when it is running a Windows-based operating system like Windows Server.
Connect AWS EC2 Instance using SSH Client
SSH is a protocol that stands for secure shell or secure socket shell, it is used to secure your publicly transported interactions. Generally, to establish the SSH connection, the “SSH” command is used in either the command prompt or the power shell.
To connect the AWS EC2 instance using SSH Client, follow these steps:
Step 1: Visit the Connection Page
To connect to an instance, first, click on the instance that you want to connect to inside the AWS EC2 management console and then click on the “Connect” button on the top right of the page.

Step 2: Copy the SSH Command
After clicking on the connect button, you would be brought to this page:

On this page, you need to click on the “SSH Client” tab. In this tab, at the bottom, you will see the SSH command that you can use to connect to the instance:
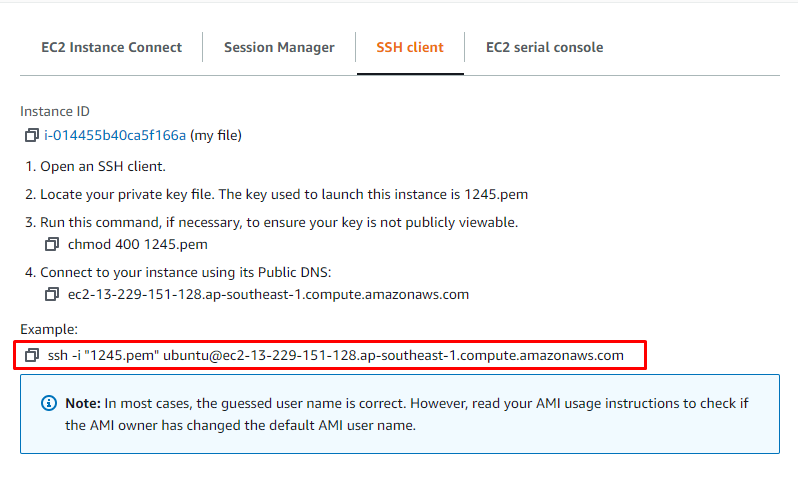
Copy this command, so that we can use it, later on, to connect to our EC2 instance.
Side Information: Generally, the SSH command has the following Syntax:
The “ssh” is the keyword, and after that, we have the “-i” flag to include the identity file, after that, we have to enter the path of our key-pay or identity file then the username and at the end IP address of the instance.
Step 3: Establish the SSH Connection
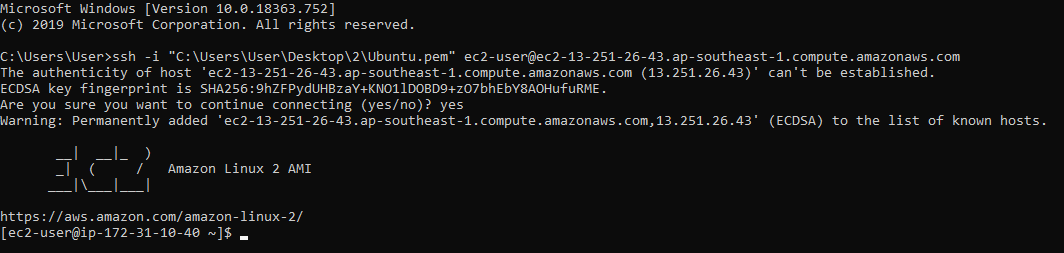
After you have copied the SSH command from the previous step. Either open up a command prompt or a power shell and then paste in the command. After that, you have to replace the “1245.pem” with the complete path of the key-pair file on your PC. Once you have done that, it would look something like this:

After that, hit enter and you would be prompted to confirm your connection with the EC2 instance. So, type “yes” and hit enter once more. Just like shown in the above snippet.
Step 4: Verification
After you confirm your connection with the EC2 instance, it will take a moment or two to establish a connection and to head inside the SSH of your instance. After that, you will be inside the SSH shell of the Ubuntu inside the EC2 instance just like this:
That was the first method of SSH connection with the instance. Now let’s talk about the second method of establishing an RDP connection with our EC2 instance.
Connect AWS EC2 Instance using RDP Client
RDP simply stands for remote desktop protocol, and in this connection type, we get the GUI of the operating system installed in our EC2 instance. To create the RDP connection with the EC2 instance, you need the login credentials of the windows installed in the Instance along with the IP address of your instance.
To connect the AWS EC2 instance using SSH Client, follow these steps:
Step 1: Visit the Connect Page
We have created an instance with the name AWSEC2, and we have to select that instance and then click on the connect button:

Step 2: Get Information for RDP
On this page, we have to select the “RDP Client” tab:

After that, as you can clearly see in the Screenshot above, we are provided with the Username of the account of the operating system inside the EC2 instance along with the address of the EC2 instance. But we do not have the password. To get the password simply click on the option that says “get password”:
After that, you will be brought to this page:
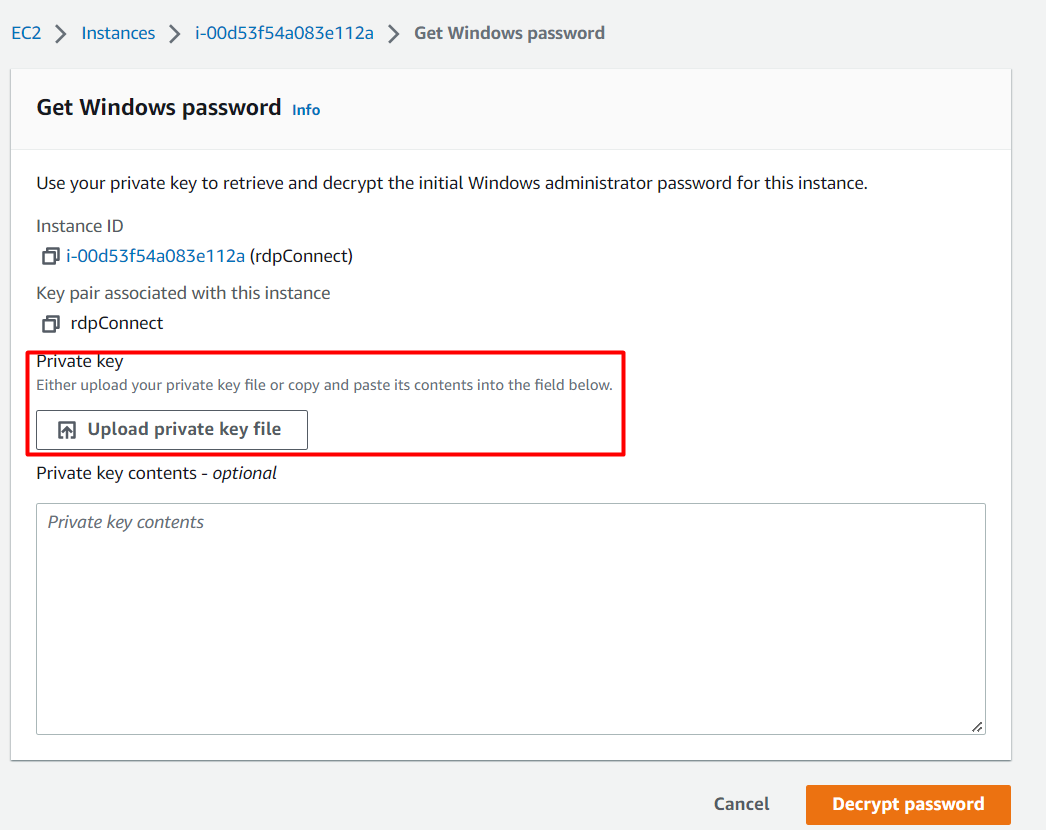
From this page, you need to either upload your key-pair or copy-paste the contents of the key-pair to decrypt and create a password for your session. Click on upload key-pair and locate your key pair within your PC.
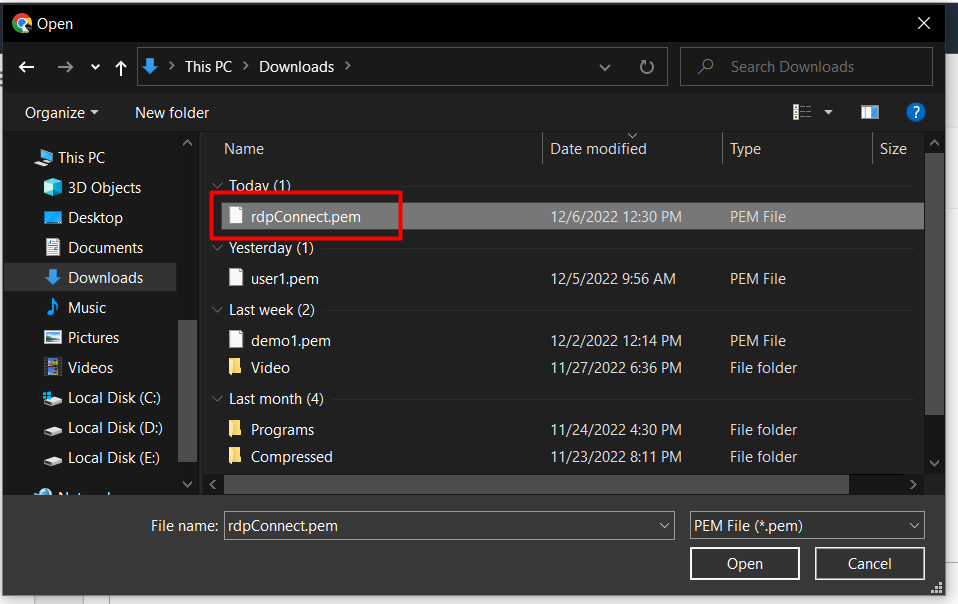
After that, simply click on the button that says “decrypt password”:

And then you would be brought back to the RDP client tab, but this time around you have a password for your RDP session:

Step 3: Establish the RDP Connection
On your PC open up an RDC (Remote Desktop Connection) application, and fill in the details as:
- Computer: Address of the EC2 Instance
- Username: Username of the Account inside the operating system of the EC2 instance
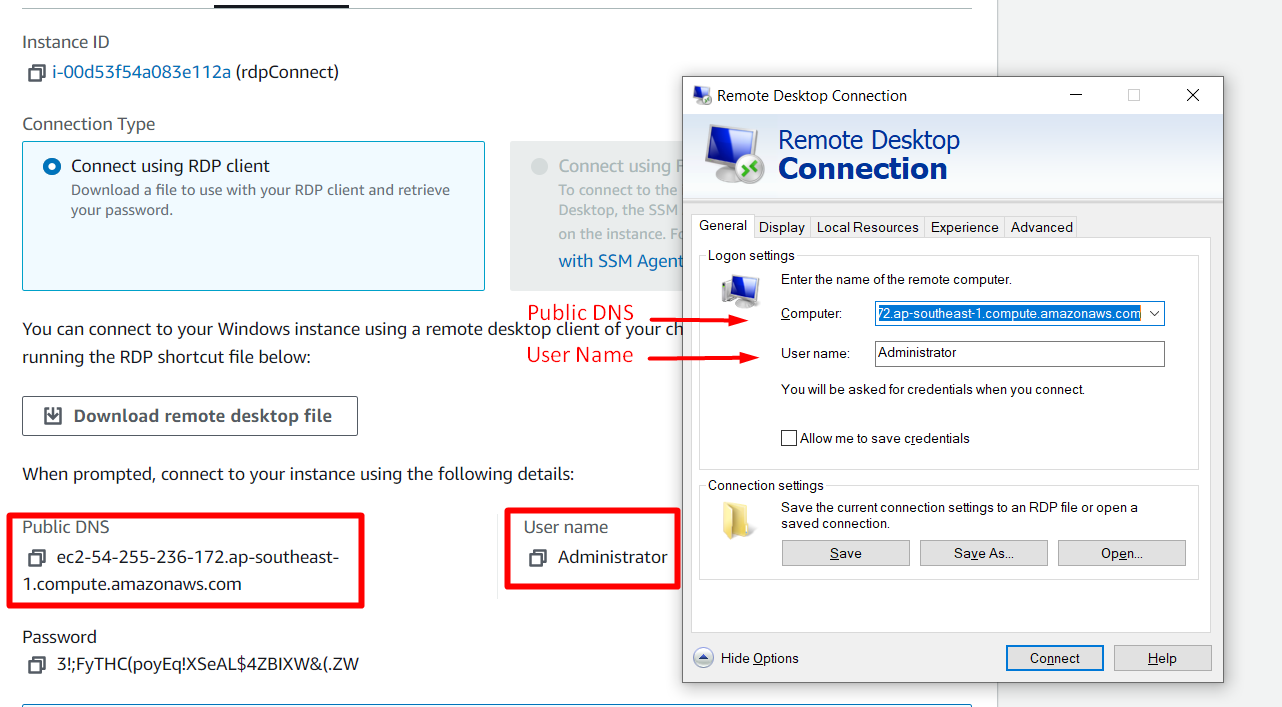
After that, click on connect, and after a moment you would be prompted to type in the password.
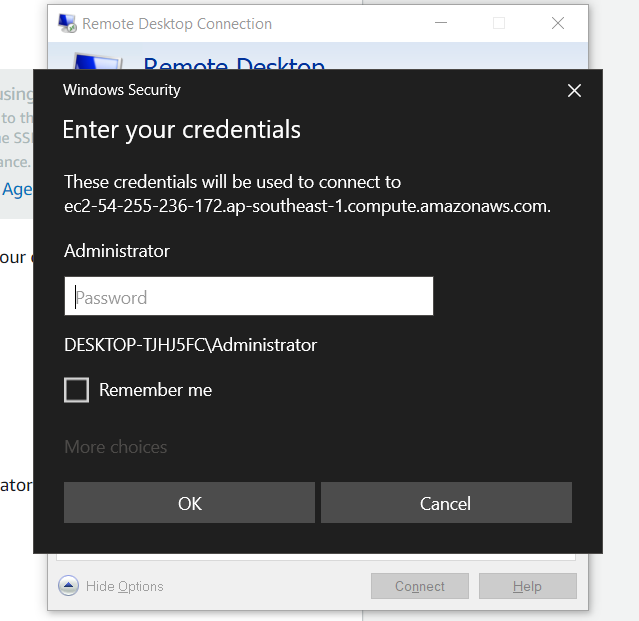
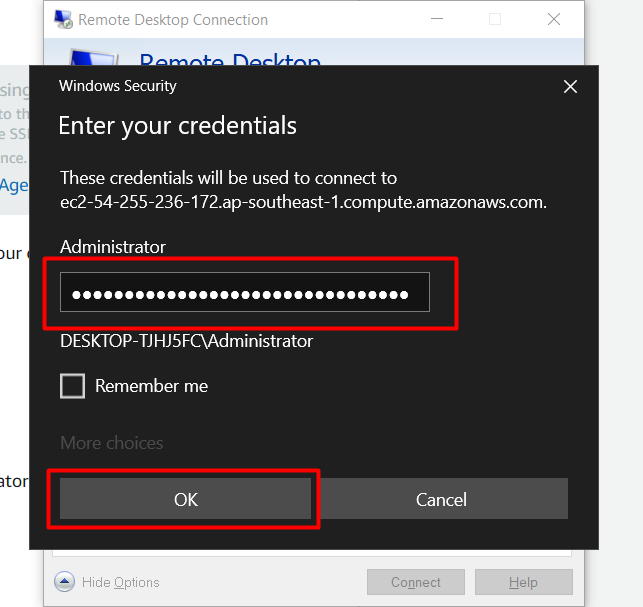
Now, copy the password from the RDP Client Tab and paste it inside this dialogue box and click on “OK”:
After that, it is going to show you one last prompt, simply click on yes to continue to the established RDP connection:
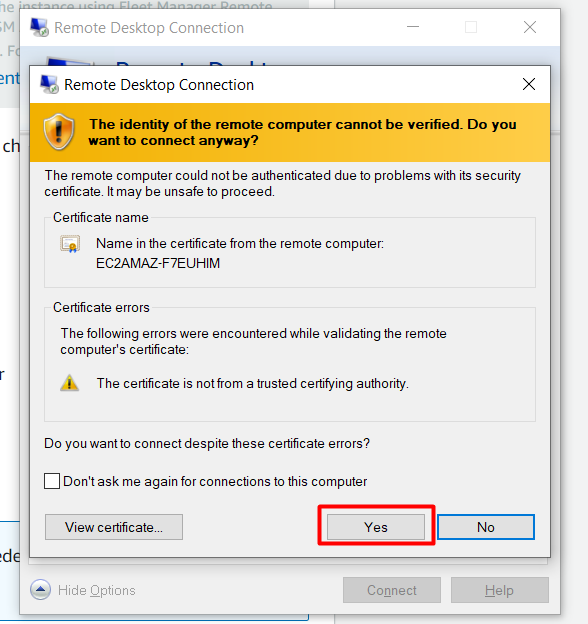
Once, that is done, you would be inside the RDP connection with your EC2 instance:

And you have successfully connected with your EC2 instance through an RDP connection.
Conclusion
To connect the AWS EC2 instance we can use SSH and RDP for both CLI and GUI, respectively. We connected our AWS instance using an SSH client with a command written on the command prompt. We can also connect to the EC2 Instance through an RDP Connection, which is mostly done with instances running Windows-based operating systems. This post has covered both ways of connecting to an EC2 instance.