Unfortunately, memory (RAM) is very costly. So, ZFS also allows you to use fast SSDs for caching data as well. Caching data on the memory is called Level 1 or L1 cache and caching data on the SSD is called Level 2 or L2 cache.
ZFS does 2 types of read caching
1. ARC (Adaptive Replacement Cache):
ZFS caches the most recently and most frequently accessed files in the RAM. Once a file is cached on the memory, the next time you access the same file, it will be served from the cache instead of your slow hard drive. Access to these cached files will be many times faster than if they had to be accessed from hard drives.
2. L2ARC (Level 2 Adaptive Replacement Cache):
ARC cache is stored in the memory of your computer. When the memory is full, the oldest data is removed from the ARC cache and new data is cached. If you don’t want ZFS to throw away the cached data permanently, you can configure a fast SSD as an L2ARC cache for your ZFS pool.
Once you configure an L2ARC cache for your ZFS pool, ZFS will store data removed from the ARC cache in the L2ARC cache. So, more data can be kept in the cache for faster access.
ZFS does 2 types of write caching
1. ZIL (ZFS Intent Log):
ZFS allocates a small portion of the pool for storing write caches by default. It is called ZIL or ZFS Intent Log. Before data is written to the physical hard drives, it is stored in ZIL. To minimize the number of write operations and reduce data fragmentation, data is grouped in the ZIL and flushed to the physical hard drive once a certain threshold is met. It is more like a write buffer than cache. You can think of it that way.
2. SLOG (Secondary Log):
As ZFS uses a small portion of the pool for storing ZIL, it shares the bandwidth of the ZFS pool. This may have a negative impact on the performance of the ZFS pool.
To resolve this problem, you can use a fast SSD as a SLOG device. If a SLOG device exists on a ZFS pool, then ZIL is moved to the SLOG device. ZFS won’t store ZIL data on the pool anymore. So, no pool bandwidth is wasted on ZIL.
There are other benefits as well. If an application writes to the ZFS pool over the network (i.e. VMware ESXi, NFS), ZFS can quickly write the data to SLOG and send an acknowledgment to the application that the data is written to the disk. Then, it can write the data to slower hard drives as usual. This will make these applications more responsive.
Note that normally, ZFS does not read from the SLOG. ZFS only reads data from the SLOG in the event of power loss or write failure. Acknowledged writes are only stored there temporarily until they are flushed to the slower hard drives. It is only there to ensure that in the event of power loss or write failure, acknowledged writes are not lost and they are flushed to the permanent storage devices as quickly as possible.
Also note that in the absence of a SLOG device, ZIL will be used for the same purpose.
Now that you know all about ZFS read and write caches, let’s see how to configure them on your ZFS pool.
Table of Contents
- Configuring Max Memory Limit for ARC
- Adding an L2ARC Cache Device
- Adding a SLOG Device
- Conclusion
- References
Configuring Max Memory Limit for ARC
On Linux, ZFS uses 50% of the installed memory for ARC caching by default. So, if you have 8 GB of memory installed on your computer, ZFS will use 4 GB of memory for ARC caching at max.
If you need, you can increase or decrease the maximum amount of memory ZFS can use for ARC caching. To set the maximum amount of memory that ZFS can use for ARC caching, you can use the zfs_arc_max kernel parameter.
You can find a lot of ARC cache usage information with the arc_summary command as follows:
In the ARC size (current) section, you can find the max size that the ARC cache can grow (Max size (high water)), the size of the current ARC cache (Target size (adaptive)), and other ARC cache usage information as you can see in the screenshot below.
Notice that, the max ARC cache size on my computer is 3.9 GB as I have 8 GB of memory installed on my computer. That’s around 50% of the total available memory as I have mentioned earlier.
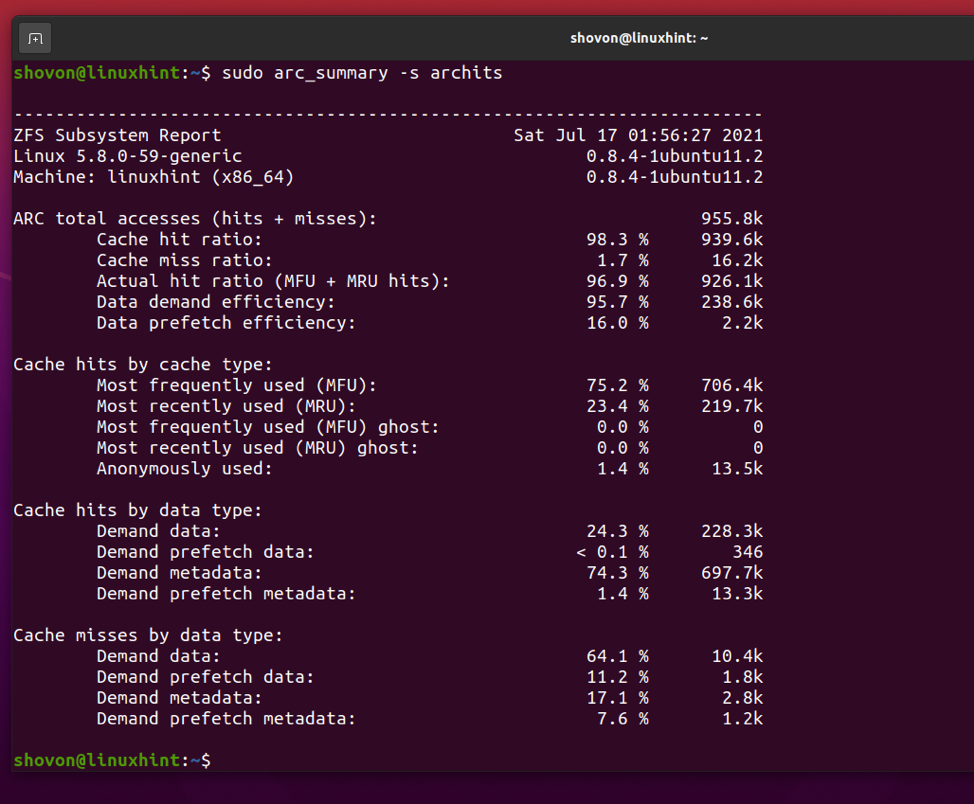
You can see how much data hits the ARC cache and how much data misses the ARC cache as well. This can help you determine how effectively the ARC cache is working in your scenario.
To print a summary of the ARC cache hits/misses, run the following command:
A summary of ARC cache hits and misses should be displayed as you can see in the screenshot below.
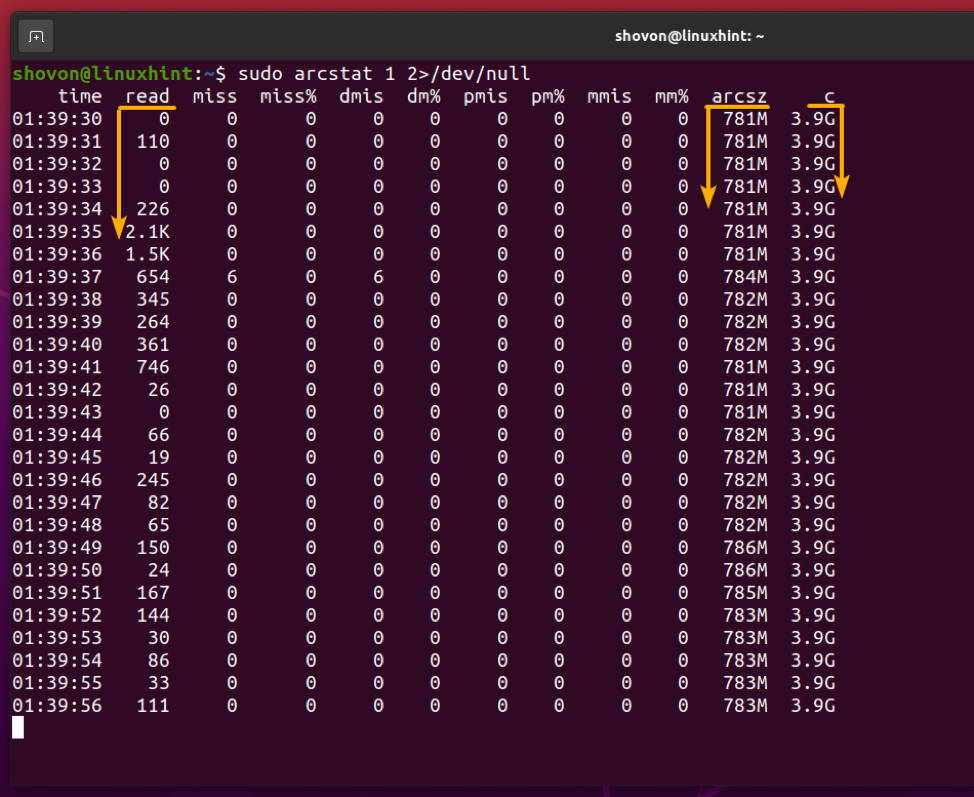
You can monitor the memory usage of the ZFS ARC cache with the following command:
As you can see, the maximum ARC cache memory (c), the current ARC cache size (arcsz), data read from the ARC cache(read) and other information is displayed.
Now, let’s see how to set a custom memory limit for the ZFS ARC cache.
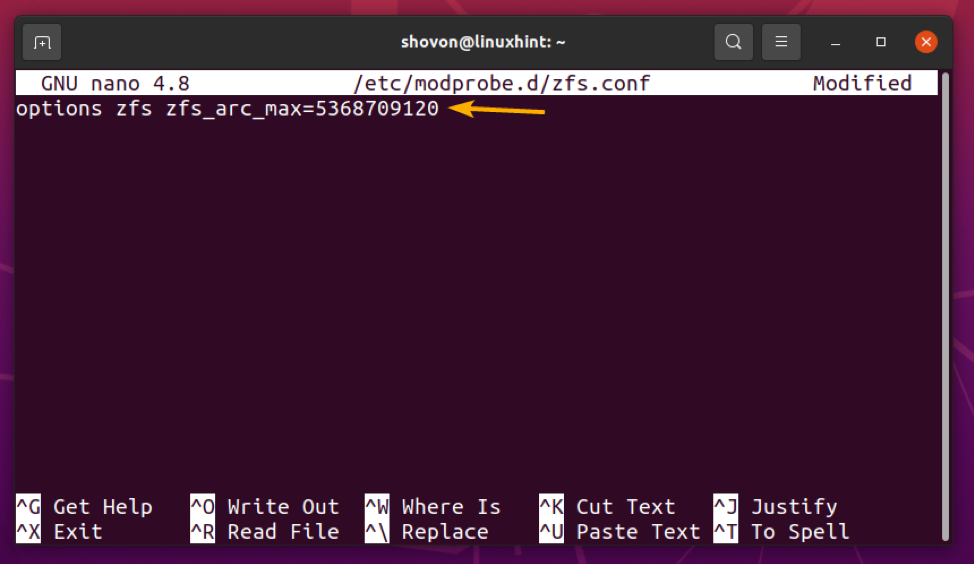
To set a custom max memory limit for the ZFS ARC cache, create a new file zfs.conf in the /etc/modprobe.d/ directory as follows:
Type in the following line in the zfs.conf file:
Replace, <memory_size_in_bytes> with your desired max memory limit for the ZFS ARC cache in bytes.
Let’s say, you want to use 5 GB of memory for the ZFS ARC cache. To convert 5 GB to bytes, you can use the following command:
As you can see, 5 GB is equal to 5368709120 bytes.
You can do the same thing with the Python 3 interpreter as follows:
Once you’ve set the ZFS ARC cache max memory limit, press <Ctrl> + X followed by Y and <Enter> to save the zfs.conf file.
Now, update the initramfs image of your current kernel with the following command:
The initramfs image should be updated.
For the changes to take effect, restart your computer with the following command:
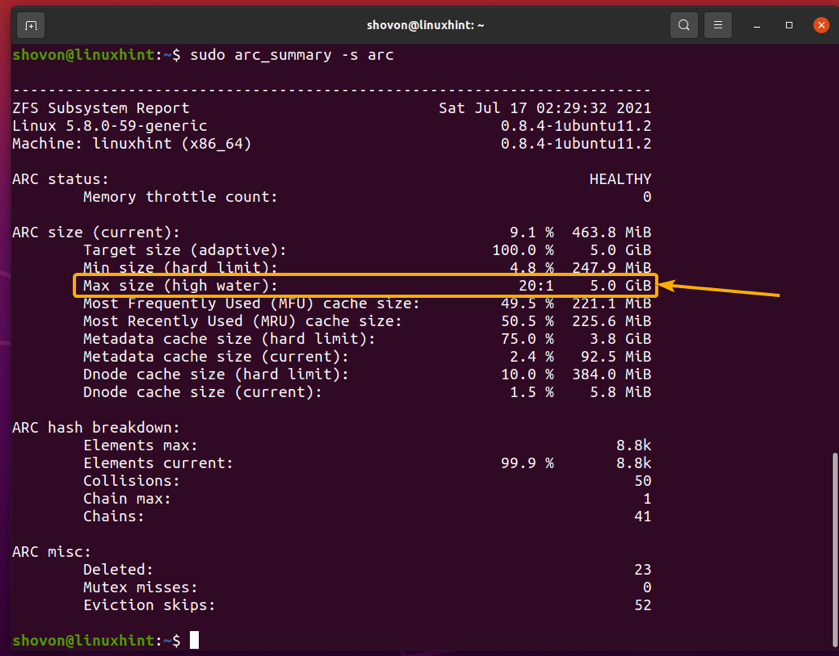
The next time you boot your computer, the max memory limit of your ZFS ARC cache should be set to your desired size (5 GB in my case) as you can see in the screenshot below.
Adding an L2ARC Cache Device
If an L2ARC cache device (an SSD or NVME SSD) is added to your ZFS pool, ZFS will offload (move) ARC caches to the L2ARC device when the memory is full (or reached the max ARC limit). So, more data can be kept in the cache for faster access to the ZFS pool.
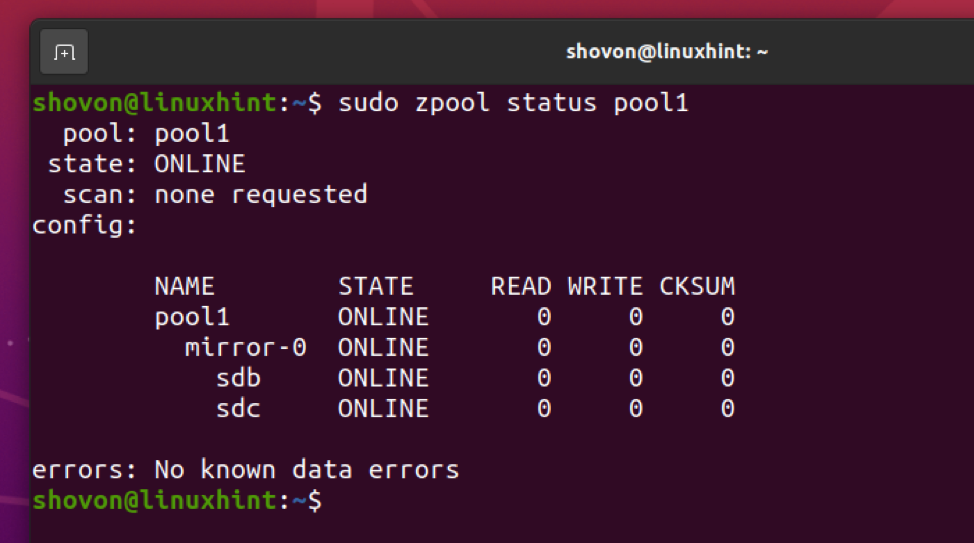
To follow along with the examples, create a test ZFS pool pool1 with /dev/sdb and /dev/sdc hard drives in the mirrored configuration as follows:
A ZFS pool pool1 should be created with the /dev/sdb and /dev/sdc hard drives in mirror mode as you can see in the screenshot below.
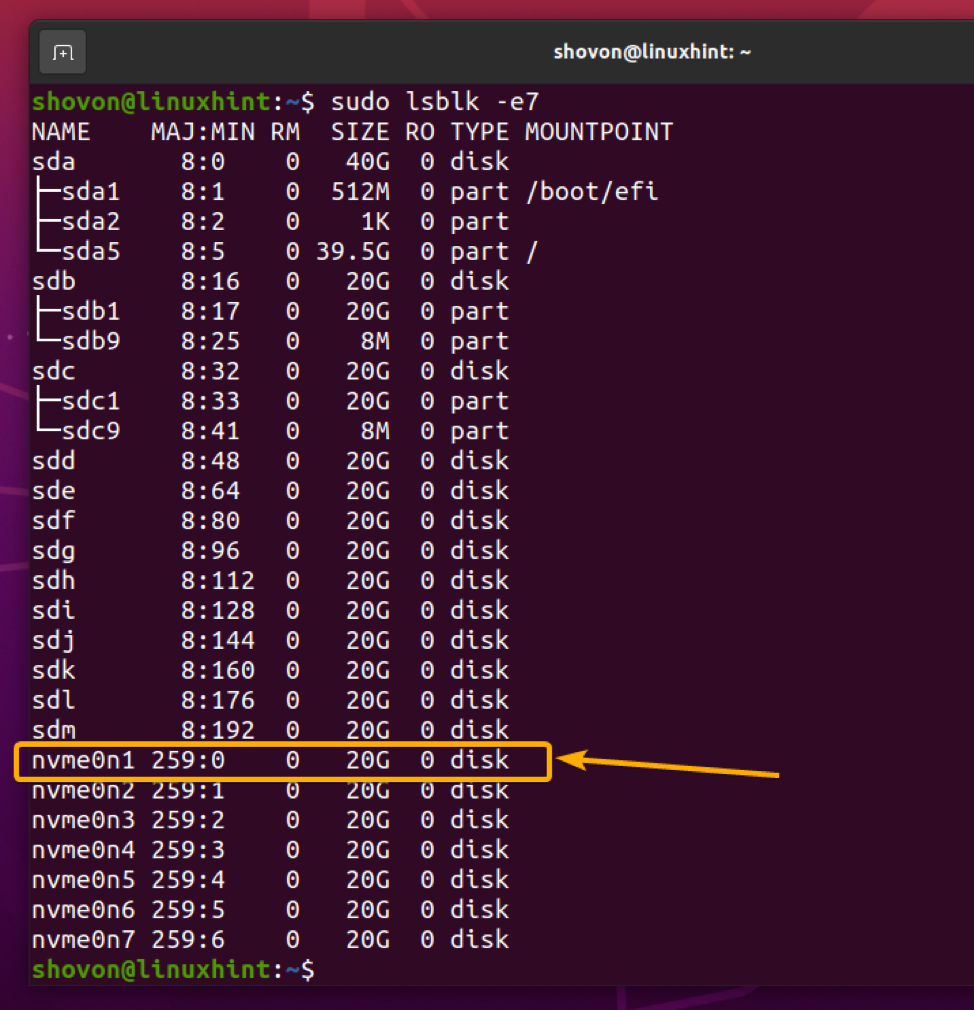
Now, let’s say, you want to add the NVME SSD nvme0n1 as an L2ARC cache device for the ZFS pool pool1.
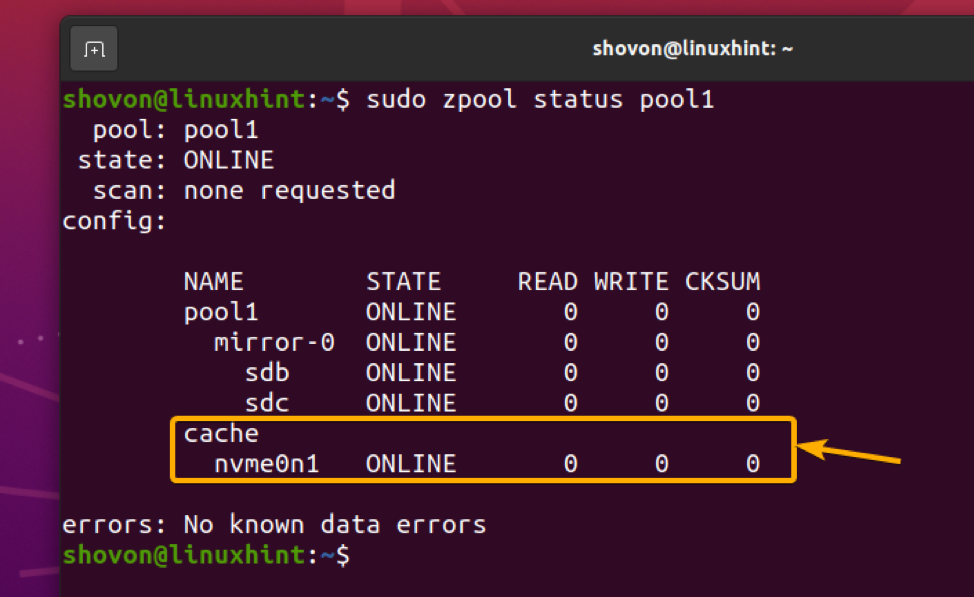
To add the NVME SSD nvme0n1 to the ZFS pool pool1 as an L2ARC cache device, run the following command:
The NVME SSD nvme0n1 should be added to the ZFS pool pool1 as an L2ARC cache device as you can see in the screenshot below.
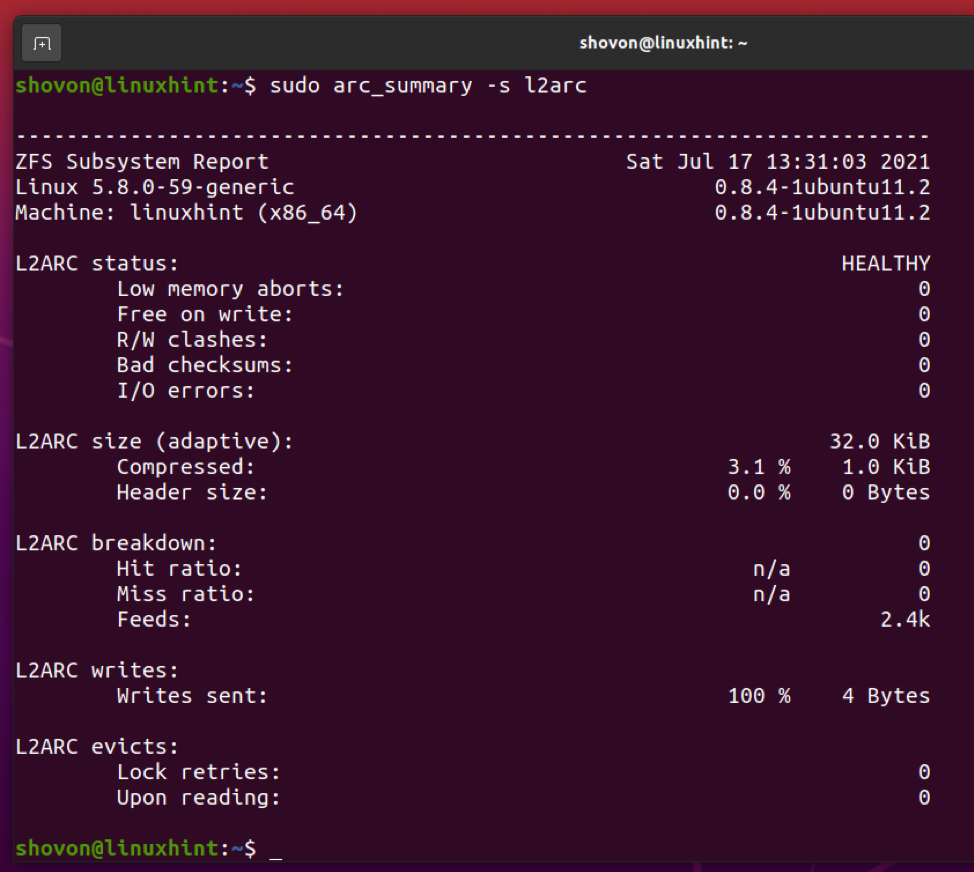
Once you’ve added an L2ARC cache device to your ZFS pool, you can display the L2ARC cache statistics using the arc_summary command as follows:
The L2ARC cache statistics should be displayed as you can see in the screenshot below.
Adding a SLOG Device
You can add one or more SSDs/NVME SSDs on your ZFS pool as a SLOG (Secondary Log) device to store the ZFS Intent Log (ZIL) of your ZFS pool there.
Usually adding one SSD is enough. But as SLOG is used to make sure writes are not lost in the case of a power failure and other write issues, it is recommended to use 2 SSDs in a mirrored configuration. This will give you a bit more protection and make sure that no writes are lost.
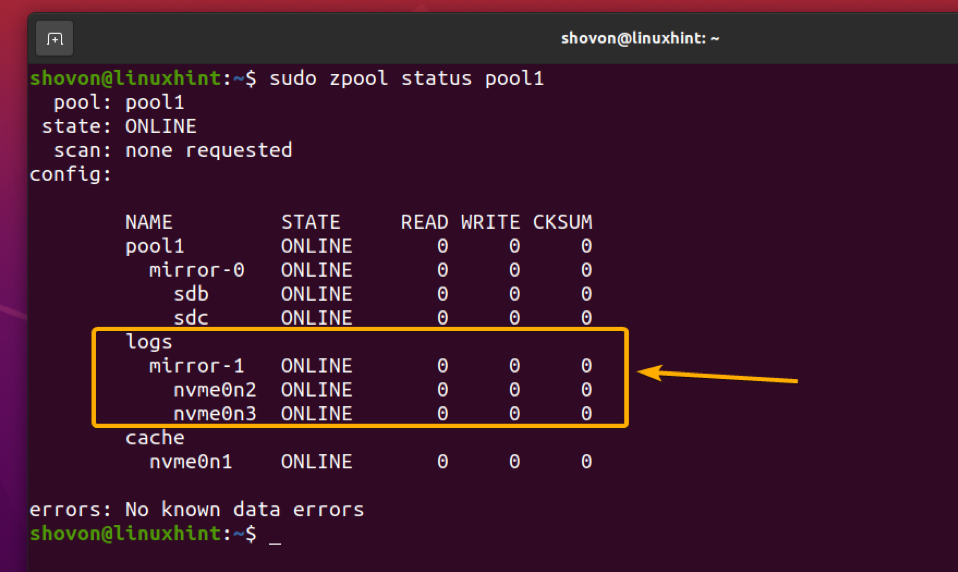
Let’s say, you want to add the NVME SSDs nvme0n2 and nvme0n3 as a SLOG device on your ZFS pool pool1 in a mirrored configuration.
To add the NVME SSDs nvme0n2 and nvme0n3 as a SLOG device on your ZFS pool pool1 in a mirrored configuration, run the following command:
If you want to add a single NVME SSD nvme0n2 as a SLOG device on your ZFS pool pool1, you can run the following command instead:
The NVME SSDs nvme0n2 and nvme0n3 should be added to your ZFS pool pool1 as a SLOG device in mirror mode as you can see in the screenshot below.
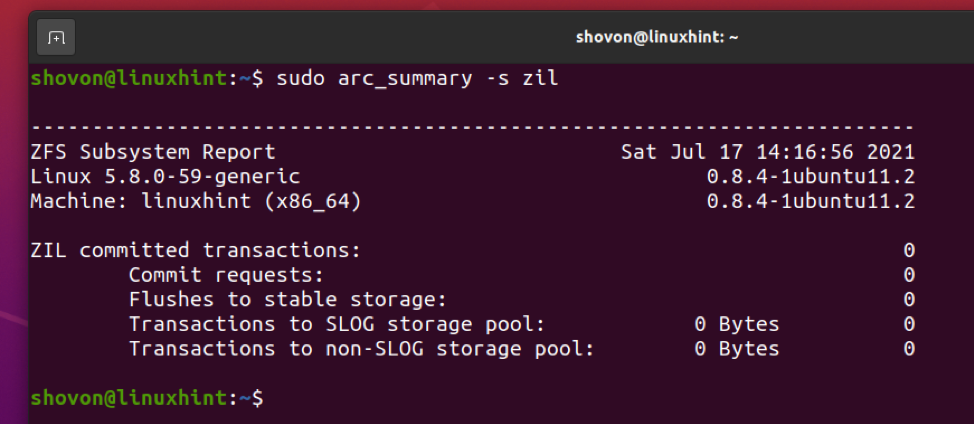
You can find ZIL and SLOG transaction information using the arc_summary command as follows:
ZIL and SLOG transaction information should be displayed as you can see in the screenshot below.
Conclusion
In this article, I have discussed different types of read and write caching features of the ZFS filesystem. I have also shown you how to configure the memory limit for the ARC cache. I have shown you how to add an L2ARC cache device and a SLOG device to your ZFS pool as well.
References
[1] ZFS – Wikipedia
[2] ELI5: ZFS Caching (2019) – YouTube
[3] Introducing ZFS on Linux – Damian Wojstaw
[4] Ubuntu Manpage: zfs-module-parameters – ZFS module parameters
[5] ram – Is ZFS on Ubuntu 20.04 using a ton of memory? – Ask Ubuntu


