These logs can be used to monitor performance, retrace failure points, enhance security, analyze cost and many other purposes. Initially, the logs are generated in text format, but we can run data analysis over it using different tools and software to get the required information out of them.
AWS allows you to enable access logs for S3 buckets, providing you with the details regarding the operations and actions performed on that S3 bucket. You just need to enable logging on the bucket and provide a location where these logs will be stored, usually another S3 bucket. The process is not real-time, as these logs get updated in one or two hours.
In this article, we will see how we can easily enable server access logs for S3 buckets in our AWS accounts.
Creating S3 Bucket
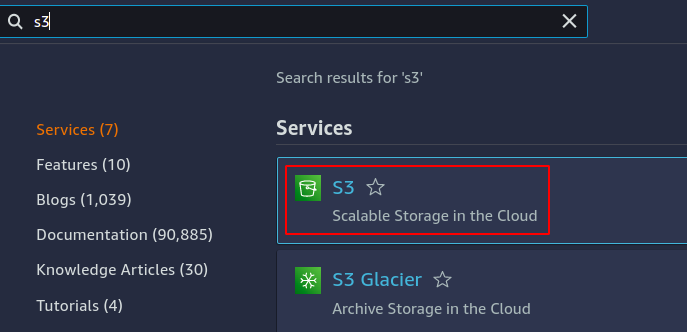
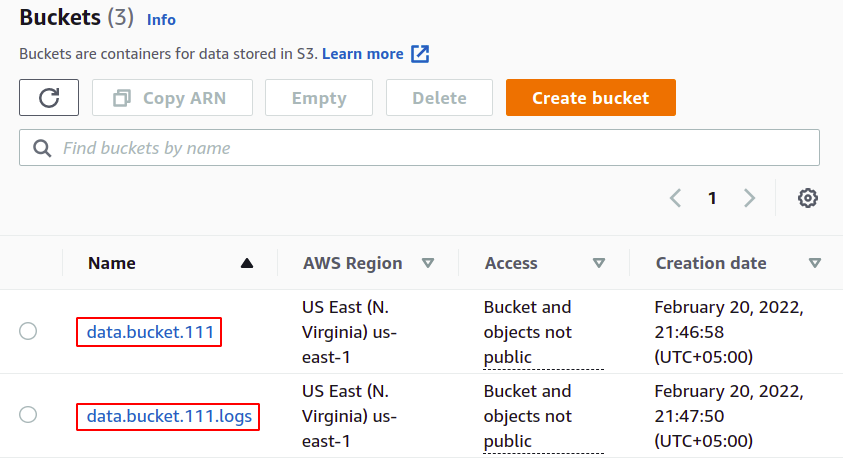
To start up with, we need to create two S3 buckets; one will be the actual bucket we want to use for our data, and the other will be used to store the logs of our data bucket. So simply login to your AWS account and search for S3 service using the search bar available at the top of your management console.
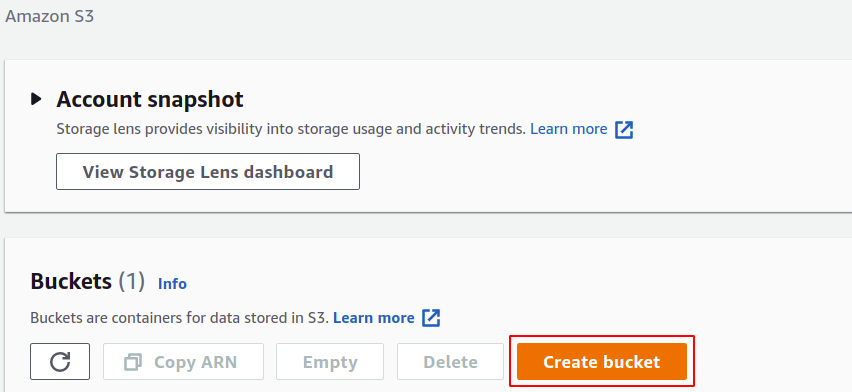
Now in the S3 console, click on create bucket.
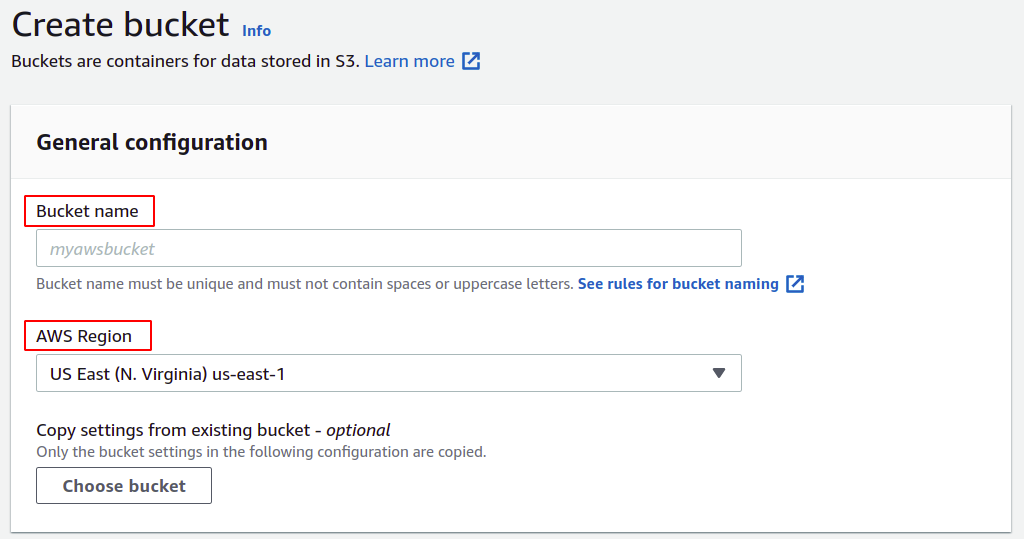
In the bucket creation section, you need to provide a bucket name; the bucket name must be universally unique and must not exist in any other AWS account. Next, you need to specify the AWS region where you want your S3 bucket to be placed; although S3 is a global service, meaning it can be accessible in any region, you still need to define in which region your data will be stored. You can manage many other settings like versioning, encryption, public access, etc., but you can simply leave them as default.
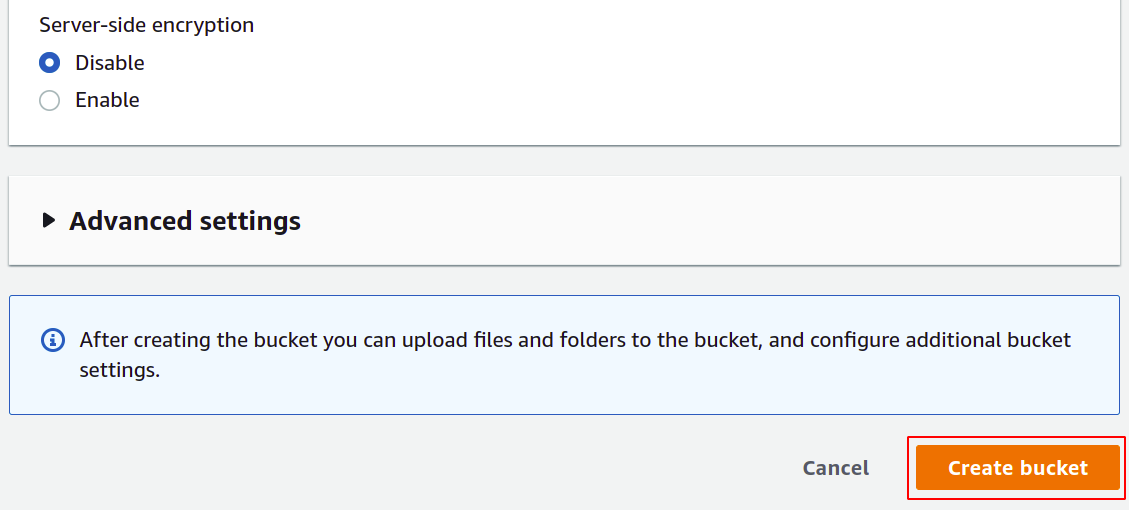
Now scroll down and click on the create bucket in the bottom right corner to finish the bucket creation process.
Similarly, create another S3 bucket as the destination bucket for the server access logs.
So we have successfully created our S3 buckets for uploading data and storing logs.
Enabling Access Logs Using AWS Console
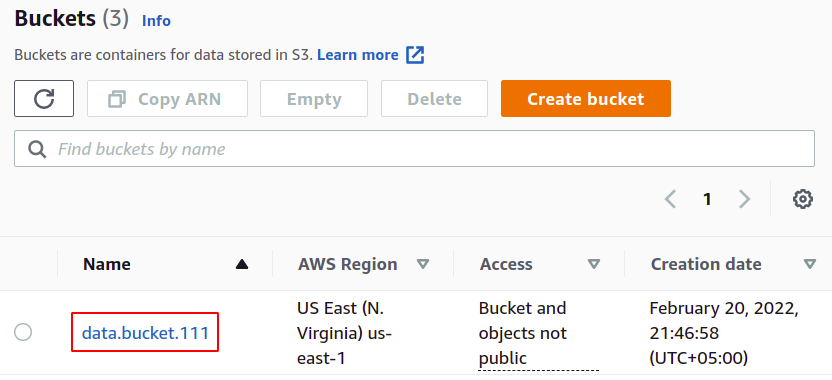
Now from the S3 bucket list, select the bucket for which you want to enable the server access logs.
Go to the properties tab from the top menu bar.
In the properties section of S3, scroll down to the server access logging section and click on the edit option.
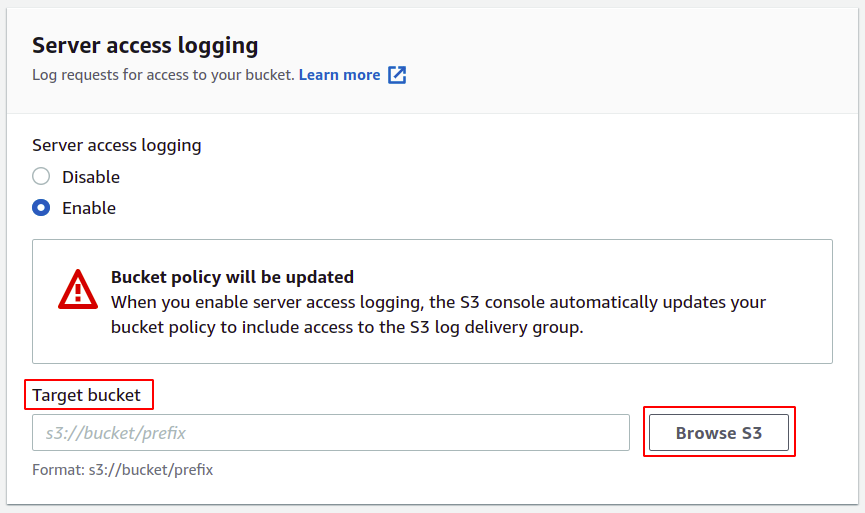
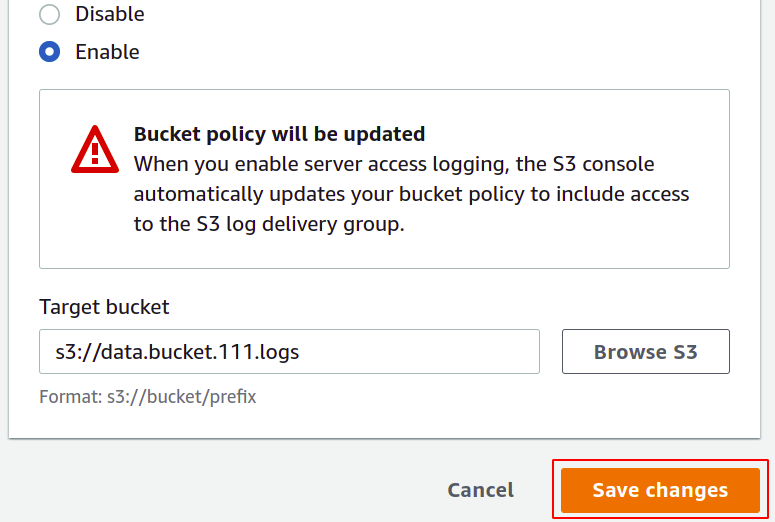
Here select the enable option; this will automatically update the access control list (ACL) of your S3 bucket, so you don’t require to manage the permissions yourself.
Now you need to provide the target bucket where your logs will be stored; simply click on browse S3.
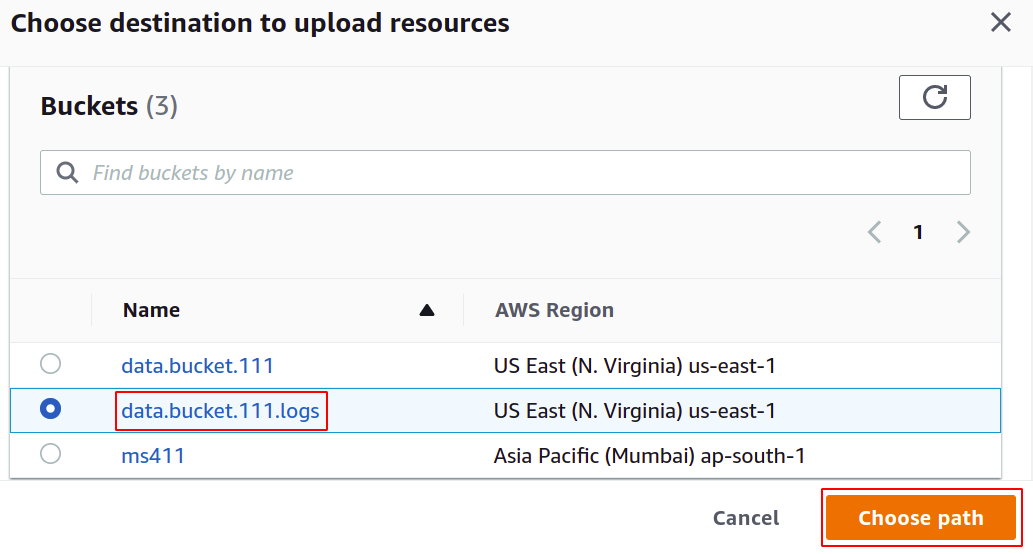
Select the bucket you want to configure for access logs and click on choose path button.
NOTE: Never use the same bucket for saving server access logs as each log, when added in the bucket will trigger another log, and it will generate an infinite logging loop which will cause the S3 bucket size to increase forever, and you will end up with a huge amount of bill on your AWS account.
Once the target bucket is chosen, click on save changes in the bottom right corner to complete the process.
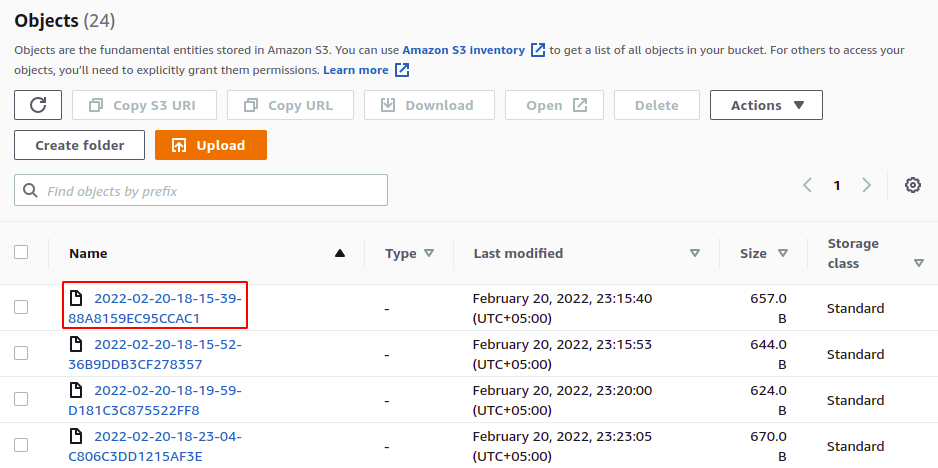
The access logs are now enabled, and we can view them in the bucket we have configured as the destination bucket. You can download and view these logs files in text format.
So we have successfully enabled server access logs on our S3 bucket. Now, whenever an operation is performed in the bucket, it will get logged in the destination S3 bucket.
Enabling Access Logs Using CLI
We were dealing with AWS management console to perform our task until now. We have done it successfully, but AWS also provides the users another way to manage services and resources in the account using the command line interface. Some people who have little experience of using CLI may find it a bit tricky and complex, but once you get on with it, you will prefer it over the management console, just like most professionals do. The AWS command-line interface can be set up for any environment, either windows, Mac or Linux, and you can also simply just open the AWS cloud shell in your browser.
The first step is to simply create the buckets in our AWS account, for which we simply need to use the following command.
One bucket will be our actual data bucket where we will put our files, and we need to enable logs on this bucket.
Next, we need another bucket where server access logs will get stored.
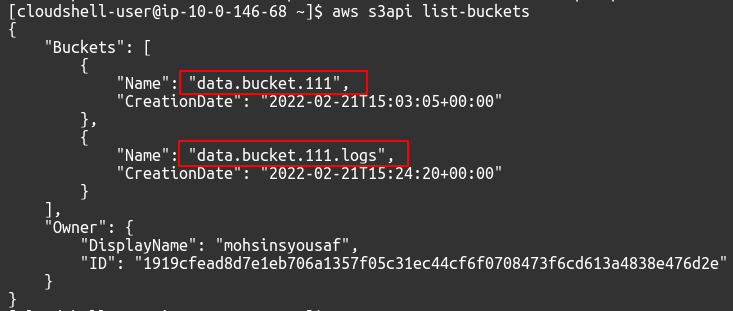
To view the available S3 buckets in your account, you can use the following command.
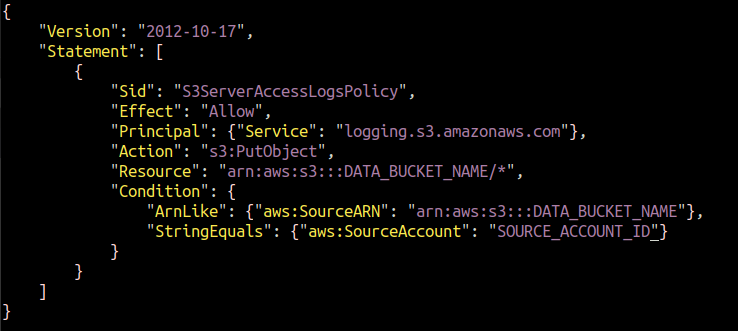
When we enable logging using the console, AWS itself assigns permission to the logging mechanism to put objects in the target bucket. But for CLI, you need to attach the policy yourself. We need to create a JSON file and add the following policy to it.
Replace the DATA_BUCKET_NAME and SOURCE_ACCOUNT_ID with the S3 bucket name for which server access logs are being configured and AWS account ID in which source S3 bucket exists.
"Version": "2012-10-17",
"Statement": [
{
"Sid": "S3ServerAccessLogsPolicy",
"Effect": "Allow",
"Principal": {"Service": "logging.s3.amazonaws.com"},
"Action": "s3:PutObject",
"Resource": "arn:aws:s3:::DATA_BUCKET_NAME/*",
"Condition": {
"ArnLike": {"aws:SourceARN": "arn:aws:s3:::DATA_BUCKET_NAME"},
"StringEquals": {"aws:SourceAccount": "SOURCE_ACCOUNT_ID"}
}
}
]
}
We need to attach this policy to our target S3 bucket in which the server access logs will be saved. Run the following AWS CLI command to configure the policy with the destination S3 bucket.
Our policy is attached to the target bucket, allowing the data bucket to put server access logs.
After attaching the policy to the destination S3 bucket, now enable the server access logs on the source (data) S3 bucket. For this, first, create a JSON file with the following content.
"LoggingEnabled": {
"TargetBucket": "TARGET_S3_BUCKET",
"TargetPrefix": "TARGET_PREFIX"
}
}
Finally, to enable S3 server access logging for our original bucket, simply run the following command.
So we have successfully enabled server access logs on our S3 bucket using the AWS command-line interface.
Conclusion
AWS provides you the facility to easily enable server access logs in your S3 buckets. The logs provide the user IP who initiated that particular operation request, the date and time of the request, the type of operation performed and whether that request was successful. The data output is in raw form in the text file, but you can also run analysis over it using advanced tools like AWS Athena to get more mature results of this data.

