What Is DNS?
DNS or Domain Name System is the system that translates the name of a domain into its corresponding IP address. For instance, when you type www.example.com in your browser, it maps to a particular web server’s IP address on the internet. This makes it easy for people to remember servers, applications, or any other devices connected to the internet without having to memorize their IP addresses.
DNS is a hierarchical distributed database system. It has a tree-like structure with nodes that are arranged in layers called domains. Each domain points to the node of some level lower than itself. In DNS, these domains are defined as subdomains, and each one resides on its own DNS server, either Master DNS or Primary DNS, which contains the records for all the IP addresses and hostnames within its domain zone.
There can be multiple Secondary DNS servers that contain an up-to-date copy of the information contained in their corresponding Master DNS servers. In addition to resolving queries using this mirrored data, secondary DNS servers also provide fault tolerance in case the primary master goes down by answering queries themselves while waiting for answers from the primary master.
The queries are processed by the Recursive DNS servers based on the information in its cache combined with the recursive name server details specified in /etc/resolv.conf file. The Domain Name System is a critical element of the Internet architecture, and it’s essential for networking computers together into what we call today “the internet”.
DNS configuration parameters can be edited using the “dig” tool or editing the zone files directly. Editing zone files is not advisable since an error could result in the website being inaccessible, though this would be a rare occurrence. If you’re unsure about what you’re doing, then use dig instead whenever possible. Some BIND or Berkeley Internet Name Domain packages come with “dnsutils” and “host”, which are used to query DNS servers and print the results. There’s also nslookup utility available in most UNIX systems that can be used for similar purposes. However, “dig” is usually more reliable than both of these tools.
How Does DNS Work?
DNS works as a hierarchical system, starting at the root of the Domain. For example, if you type www.example.com in your browser, it asks your local DNS server for this information. When it doesn’t have it since it’s not authoritative for that domain, it forwards the query to one of its upstream recursive DNS servers. These servers will check their cache first before contacting all the authoritative name servers directly responsible for the “example” domain till they find out which DNS has this data and send it back to the client computer with an IP address for that domain.
As you can see, each domain or subdomain has its own authoritative name server, and it’s responsible for resolving queries only for that subdomain. Therefore a DNS server should have all the information to answer any query about a particular domain. So if “example.com” is not the primary domain of your local DNS servers, then it won’t be able to resolve queries for www.example.com without forwarding it upstream first.
Note: Whenever possible, configure different nameservers for each subdomain since each requires separate maintenance and administrative procedures. In fact, this is how DNS was designed in the beginning when TCP/IP protocols were released in 1983 before the invention of the Domain Name System. This was made later after the creation of InterNIC registration services in 1992. Subdomains were introduced as an extension to DNS protocol, and it was intended for administrative purposes only.
Whenever a DNS server receives a query from a client, it checks the cache first to see if all the necessary records are present in it. If there’s no record found or they’re not fresh enough, then it does the following recursive queries:
If it’s an Internet (IN) query, then it resolves hostnames starting at the root of the domain and working downward through each parent domain until reaching the authoritative servers for that zone. This is called “starting at the top“, and it is usually done first since name servers responsible for TLDs (.com, .net, etc.) have faster connection speeds with greater bandwidth than those for second-level domains, e.g., “example”. While doing so, your local DNS server takes into account whether or not it can trust the response of its upstream DNS servers. If you don’t have access to /etc/hosts or /etc/resolv.conf file and DNS servers used by your ISP are caching their responses, then chances are most of your network traffic is being logged. Thus, this might pose a security threat, and if not, it will ask recursive servers directly for that data. This is called “starting at the bottom” since name servers responsible for second-level domains have slower connection speeds with smaller bandwidth than those for Top Level Domains.
This whole process is repeated iteratively until either:
- A non-authoritative name server responds to an IN query, saying it doesn’t know the requested information.
- A name server finds what it thinks is an authoritative answer for the query and sends it back to the client computer.
- The number of iterations preconfigured in the resolver’s name cache expires.
This tutorial will walk you through how to set up your own internal DNS server on Debian. We use the BIND name server software (BIND9) to do it.
What Is BIND9?
BIND (Berkeley Internet Name Domain) is an implementation of the DNS protocol. In BIND 9, several number of major enhancements have been made, including IPv6 support, much more flexible configuration and control, improved caching performance, EDNS0 support for larger UDP responses, and better management over dynamically assigned IP addresses.
BIND is the most widely used name server software on the Internet. It supports a number of different domain name service protocols, including BIND4 (the original Berkeley Internet Name Domain, version 4), BIND8 (the historical successor to BIND4), and DNS services for IPv6 through two separate implementations: one based upon the daemon, and another called lwres (light-weight resolver).
BIND 9.5 is the current stable version of BIND, and it’s available for download in both source and binary form from the Internet Software Consortium.
Prerequisites
Before we start with the installation process of the DNS server on Debian, you have to ask yourself, “Do I really need a DNS server?”
This article focuses on IPv4 only, so if you’re interested in using DNS for IPv6, more work has to be done. This guide will no longer help you in topics, such as adding AAAA records manually, etc.
A fresh Debian server installation is needed for testing the steps in this guide. Some of the commands used here might be different for your case, and those differences will be pointed out where appropriate.
This guide assumes you have a working IPv4 network and knowledge to properly configure static IP addresses on client computers.
A sudo user and a firewall should already be configured on your system.
Getting Started
Updating Your System
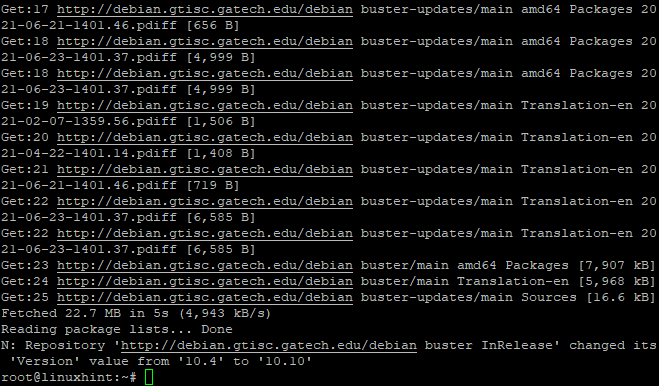
The installation process is quite straightforward, but let’s see it in detail. First, you need to make sure your system has all the needed packages installed and up to date, using the following command:
The -y flag will automatically answer yes to all confirmations that might be asked.
The apt-get update command will update the server’s package lists. By using the apt-get upgrade command, all the packages installed on it will be upgraded.
This will take some time depending on your network connection speed and amount of updates to be installed.
Sample Output:
Installing BIND9
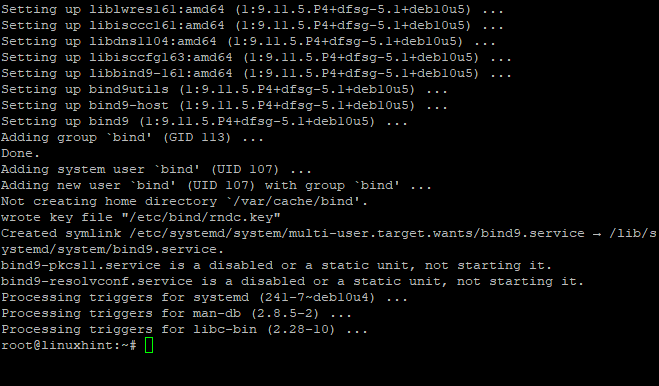
Now that your system is up to date, you can proceed with the installation of a DNS server – BIND. This will be done by installing several new packages:
The command above will install BIND9 and the two auxiliary packages that contain the required files for the proper functioning of the DNS server.
The BIND9 is the DNS server software.
The bind9utils are utilities for managing BIND configuration and are named the command used to control BIND from the command line.
Note: bind9-doc is a documentation package for BIND software.
Sample Output:
Installing DNS Server
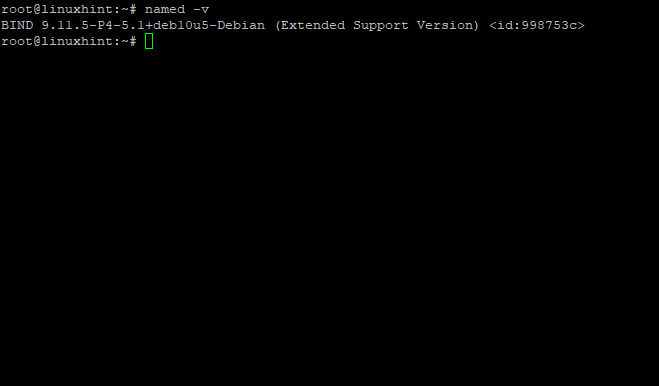
After installation is complete, you can check to make sure that all the packages have been successfully installed by running the following command:
The command above will show the installed version of BIND and its dependencies.
Sample Output:
BIND starts automatically when you install it. You check its status with the systemctl command, as follows:
The command above will give you a more detailed view of the BIND functions on your server, such as active time, number of zones, etc.
You’ll get something similar to the following output:
Sample Output:

If you ever want to start, stop, or restart BIND, simply run the commands below:
sudo service bind9 stop
sudo service bind9 restart
The BIND server will run as the bind user and group by default. This makes it reasonably secure since any changes in zone files are only allowed for this user. The BIND server listens by default on port 53 for DNS queries. You can change this port in the named.conf file if you like. Run the following command to see which port your BIND server is listening on:
Sample output:
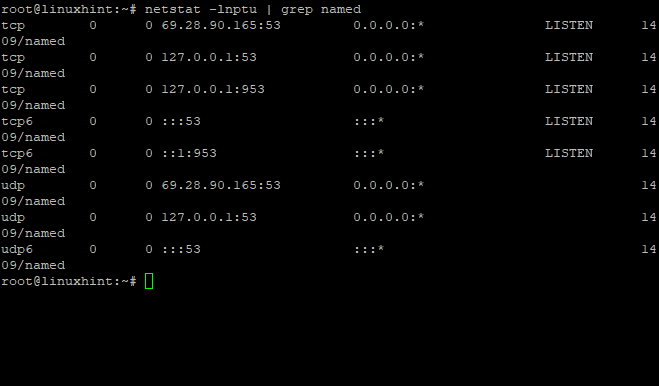
The command above shows that the named daemon is currently started and listening on port 53 UDP. Use this information to verify whether you are using the correct port number.
If your server is not using port 53, you can fix this by editing /etc/bind/ named.conf.local and changing the port number to whatever you want. You can also change the name of the server log file by editing /etc/bind/ named.conf.default-zones and adding logging statements under the options directive.
Configuring BIND9
Now that you have BIND9 installed on your server, it’s time to start configuring it.
The configuration directory for BIND is located under /etc/bind. There are some important files in this directory:
The file named ‘named.conf‘ is the main configuration file, which has a lot of comments to clarify each section.
The next configuration file we will edit is located at /etc/bind/named.conf.local. This file contains all your network information regarding the server and zones you want to resolve locally (from nameservers).
The named.conf.default-zones is located at /etc/bind/named.conf.default-zones. This file contains server information for zones used by BIND when it’s not explicitly told to use a different zone. In other words, zones that are enabled.
So, let’s go ahead and start with some basic configuration.
Sample Output:

By default, BIND is configured to serve the localhost only. This means that any request that comes from outside your server will be rejected by BIND itself unless you have it properly configured.
If you were trying to access a website hosted on, for example, the “154.54.55.56” IP address, what would happen? The answer is simple: all requests would go unanswered because no configuration was specified for the “154.54.55.56” IP address in BIND9, and the “named” daemon refused to service any DNS requests from outside of its network interface.
First, we will set the DNS server to listen to all IP addresses to send requests to the DNS server from various places: From the server, from a different network, or when you are using the Internet.
Let do it by editing the named.conf.options configuration file:
sudo nano named.conf.options
Let's replace listen-on {127.0.0.1;};
by
listen-on {any;};
listen-on-v6 { any; }
Save and close the file when you are done. Then restart the BIND9 daemon with the command below:
Now, we have enabled BIND9 to listen on all interfaces.
Sample Output:

Creating Forward Lookup Zones (domain -> IP)
Forward lookup zones are the most common kind of zone files. They map a domain name to an IP address and are used in resolving domain names to IP addresses for email, web pages, etc. The next step is to create a forward lookup zone file.
We will edit the “/etc/bind/named.conf.local” file to declare a forward zone. For the sole purpose of this tutorial, we will declare a domain called “linuxhint.com” and point it to the server’s public IP address which is used explicitly for hosting external-facing websites on the linuxhint.com domain.
Note: A valid internet-accessible IP address must be set on your server if you plan to resolve external domains from within your network.
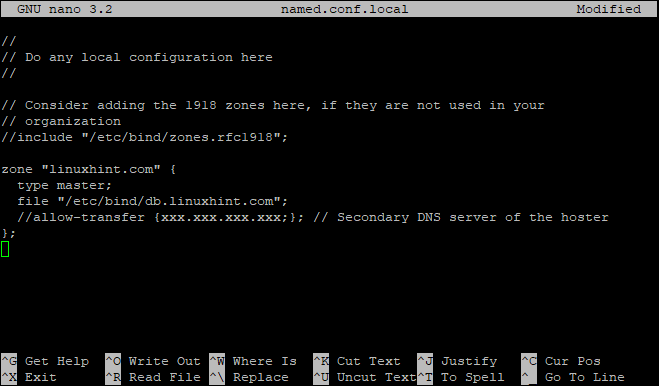
Now, we will edit the “/etc/bind/named.conf.local” file to declare a forward lookup zone:
Add the following to the end of the file:
type master;
file "/etc/bind/db.linuxhint.com";
//allow-transfer {xxx.xxx.xxx.xxx;}; // Secondary DNS server of the hoster
};
In this context:
Type “master”. This is a master domain zone file. The type parameter can be set to “slave” if you are hosting an authoritative-only forward or reverse zone and do not want to allow dynamic updates.
The “/etc/bind/db.domaine.com” is a file that contains the records for domain “linuxhint.com” with a full path.
allow-transfer {xxx.xxx.xxx.xxx;}. It is required to allow zone transfer to the secondary DNS server of the hoster because if your hosting provider doesn’t allow you to do so, you cannot update it online with the command “rndc reload” on localhost. xxx.xxx.xxx.xxx; IP address of the secondary DNS server (Name Servers) which is hosted by your hosting provider.
Save and close the file when you are done.
Sample Output:
Now, we are going to create a file for each zone declared above:
Populate the file with the following:
; BIND data file for local loopback interface
;
$TTL 604800
@ IN SOA ns1.linuxhint.local. root.linuxhint.local. (
2 ; Serial
604800 ; Refresh
86400 ; Retry
2419200 ; Expire
604800 ) ; Negative Cache TTL
;
; Commentout below three lines
;@ IN NS localhost.
;@ IN A 127.0.0.1
;@ IN AAAA ::1
;Name Server Information
@ IN NS ns1.linuxhint.local.
;IP address of Name Server
ns1 IN A 192.168.0.10
;Mail Exchanger
linuxhint.local. IN MX 10 mail.linuxhint.local.
;A – Record HostName To IP Address
www IN A 192.168.0.100
mail IN A 192.168.0.150
;CNAME record
ftp IN CNAME <a href="http://www.linuxhint.local">www.linuxhint.local</a>.
In this file, replace the values linuxhint with your domain name, followed by a dot (.) This is necessary, and this is NOT an error.
Replace “192.168.0” with your public IP address, followed by a dot (.) This is required to make the server accessible from the internet.
Remember to save and close the file when you are done.
Creating Reverse Lookup Zones (IP -> domain)
Reverse lookup zones are used to map an IP address into a domain name and are generally required for sending e-mail. The next step is to create a reverse zone file.
The reverse zone name consists of the network ID (reversed) followed by “.in-addr.arpa”.
For example:
If the server has an IP address “20.30.40.50“, its network ID will be “20.30.40“, and the reverse zone name will be “40.30.20.in-addr.arpa“.
If the server has an IP address “191.169.10.50“, its network ID will be “191.169.10“, and the reverse zone name will be “10.169.191.in-addr.arpa“.
Now, we will edit the “/etc/bind/named.conf.local” file to declare a reverse zone:
Then, add the following to the file:
type master;
notify no;
file "/etc/bind/db.10";
};
Then, we will create a file for the zone declared above:
Then populate the file with the following:
; BIND reverse data file for local loopback interface
;
$TTL 604800
@ IN SOA linuxhint.local. root.linuxhint.local. (
2 ; Serial
604800 ; Refresh
86400 ; Retry
2419200 ; Expire
604800 ) ; Negative Cache TTL
;
;@ IN NS localhost.
;1.0.0 IN PTR localhost.
;Name Server Information
@ IN NS ns1.linuxhint.local.
;Reverse lookup for Name Server
10 IN PTR ns1.linuxhint.local.
;PTR Record IP address to HostName
100 IN PTR www.linuxhint.local.
150 IN PTR mail.linuxhint.local.
# End of file
Checking BIND Configuration Syntax
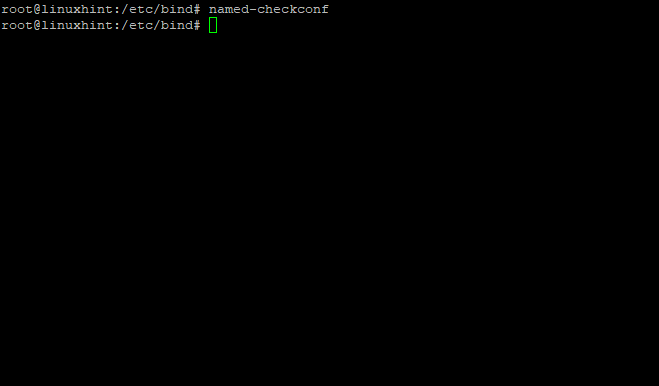
Now, we will check the configuration syntax in each file for errors. To do this, we will have a query named with the following command:
If there are no errors, this command will return to the blank shell:
Sample Output:
Conclusion
DNS is one of the most important services on a server. Everybody uses it. Everybody needs it, and, in the end, you don’t want your machines to get lost in the network because they can’t find each other. This article provides a guide on setting up your internal DNS server on Debian using the BIND name server software (BIND9). For more information, please check the other articles found on LinuxHint.com.