● HTTP methods
● Query parameters
● Source IP
● HTTP header
● Path
● DNS based routing (Host headers)
The request can be forwarded to a specific target by validating any one of the above mentioned parameters. In this article, we will discuss how we can route the traffic based on the above mentioned parameters using application load balancer on AWS.
Setting Up the Environment
To carry on intelligent routing, you need to set up the basic environment including instances, target group, and application load balancer.
Creating EC2 Instances
To configure the EC2 instance, simply follow the following steps:
● Select Amazon Machine Image (AMI)
● Select the instance type
● Provide configuration details (VPC, Subnet, AZ, Metadata, etc.)
● Attach storage (EBS, Instance Store)
● Manage security group
● Review and launch
The instances are now configured. Next is to create the target group.
Creating Target Group
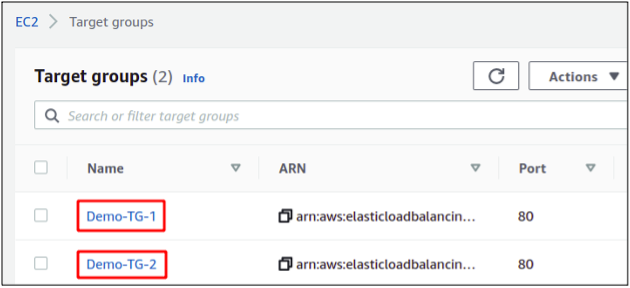
We will be needing at least two target groups to successfully demonstrate the routing methods for the application load balancer, so we are going to create two target groups by using the following steps:
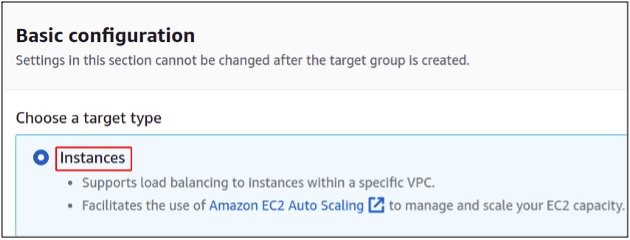
● Choose Target Type
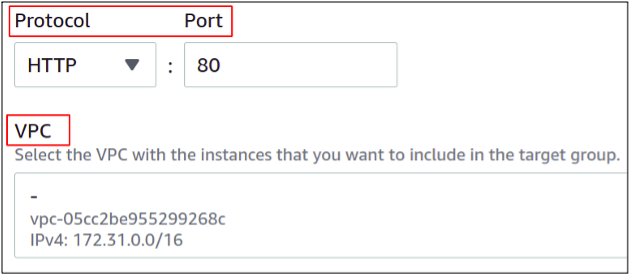
● Select Network Protocol and Port
● Select VPC
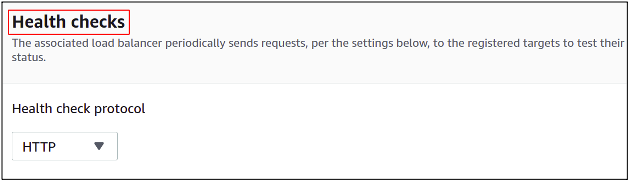
● Configure Health Checks
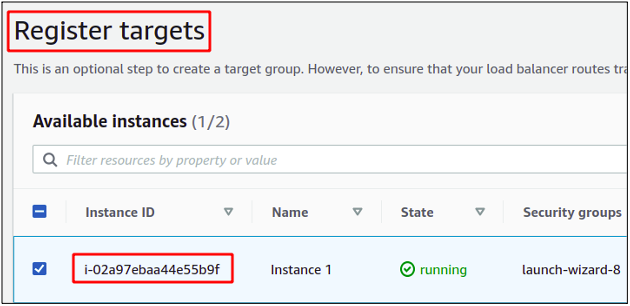
● Register Targets
First, we have to select the target type – it can either be an instance, IP address, lambda function or another application load balancer.
Select network protocol. In this case, we will select HTTP on default port 80 since this is the protocol supported by an application load balancer. You will also have to select the VPC in which your instances are running.
To configure the health check, simply select the protocol you are using for your application. Health checks help routing the traffic only to healthy targets.
Register the targets (which are EC2 instances in this case).
After registering the targets, click on the create target group and it will be created.
Creating Application Load Balancer (ALB)
Now, we are going to create the application load balancer. The procedure is defined below.
● Select Network Scheme (Public / Private)
● Select IP Address Type (IPv4 / IPV4&IPv6)
● Select VPC
● Select Availability Zones (AZ)
● Configure Security Group
● Add Listeners
You can simply visit the following article to create and configure the application load balancer on AWS.
How to Create and Configure Application Load Balancer on AWS
Managing Rules for Intelligent Routing
We have already created EC2 instances, target groups and an application load balancer. Now, we will discuss on how to create rules for an application load balancer to route traffic accordingly. Intelligent routing is an ability which allows to route and forward the network traffic and requests to a specified target based on the condition and rules you specify on the incoming requests.
To set up the rules for intelligent routing, simply open the listeners tab on your ALB and click on the view/edit rules for your listener.
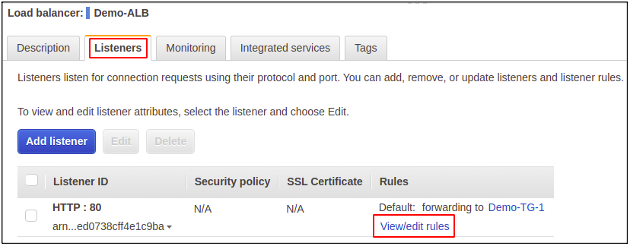
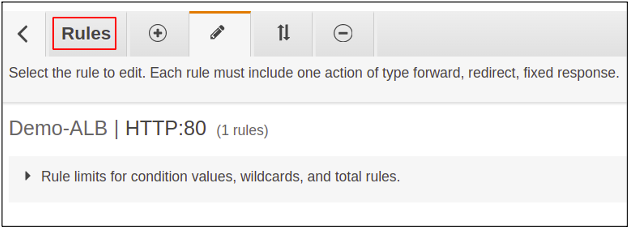
In this console, you can create and edit your routing conditions and rules.
Now, let’s get started and see in details all the methods we have listed from start.
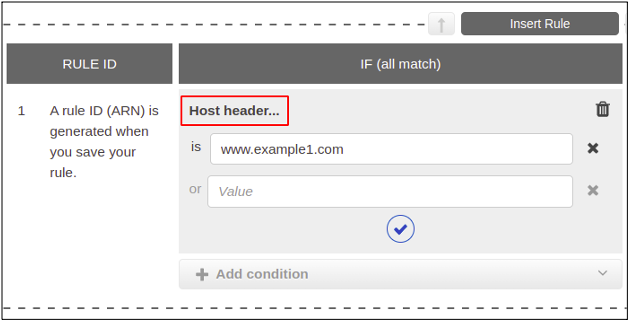
Host Header
Here, you have to specify the target based on the DNS of the received request. You can set multiple domains pointing to a single load balancer; each will have a specific target. This scheme is also known as DNS based routing.
Click on the insert rule tab and select the host header from the drop down menu.
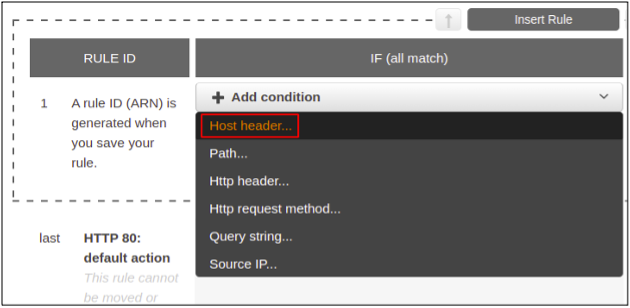
Specify the host header you want.
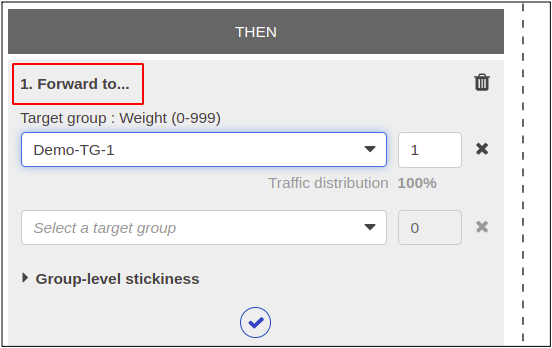
Then select the action you want to take if the request is received from the host header you specified in the previous step. You can either forward the request, redirect the request, or return a fixed response to the request. For this demo, we will forward the request to a target group.
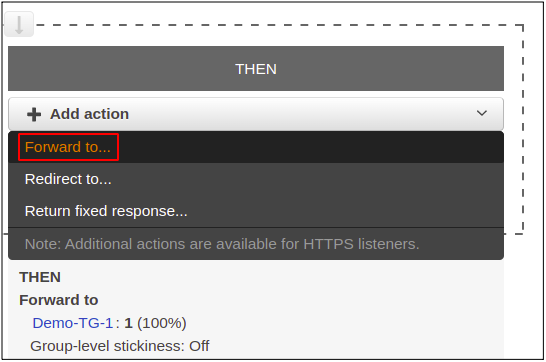
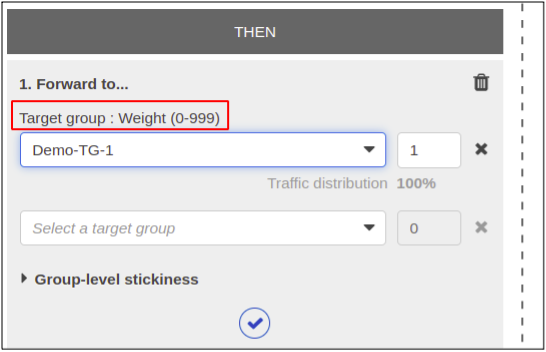
Select the target group. Now all the traffic from the DNS www.example1.com will be forwarded to the target group named Demo-TG-1.
Similarly, you can add multiple rules specifying different targets for each host header.

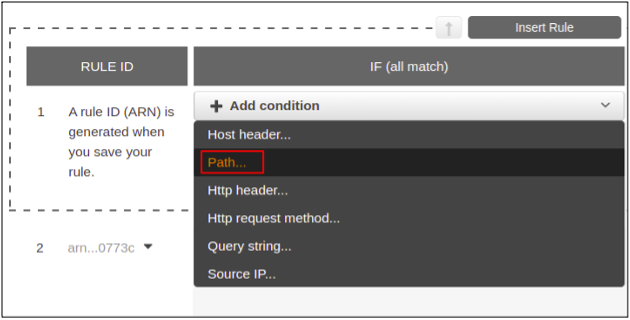
Path Based Routing
In the path based routing, we define the full DNS path in the condition of the listener rule. For example, if you have a blog section and images section in your website, you can easily route traffic for each section to a different target.
Create a new rule and select the path option.
Specify the full path of the destination.

Add the action to forward the requests to your desired target group.
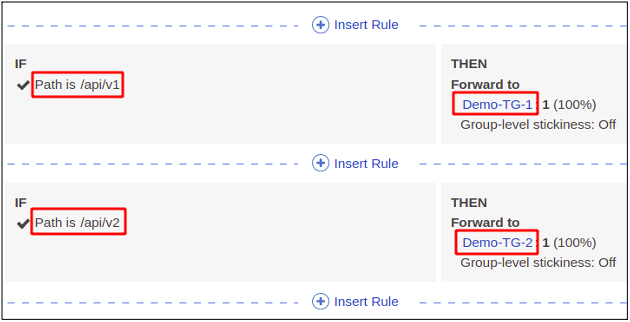
The first rule signifies that the traffic from /api/v1 will be forwarded to Demo-TG-1. The second rule signifies that the traffic from /api/v2 will be routed to Demo-TG-2.
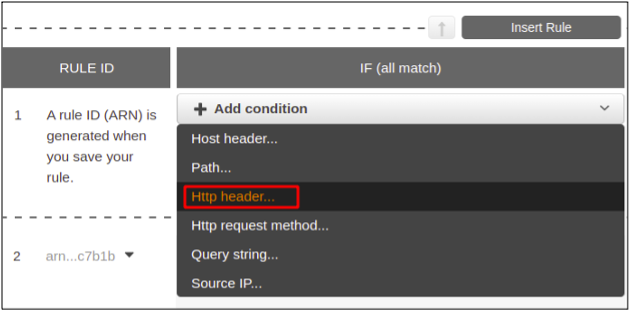
HTTP Header
When there is server and client communication through the HTTP requests, some data is passed between server and the client using the HTTP headers. These headers are of different types like request headers, response headers, general headers, and entity headers. These are in the form of key and value pairs. The network traffic on your application can also be routed to different targets depending on these HTTP headers defined in the request.
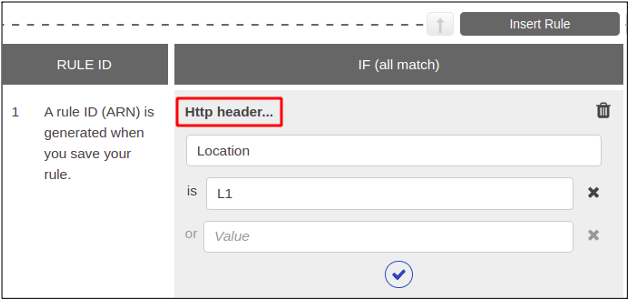
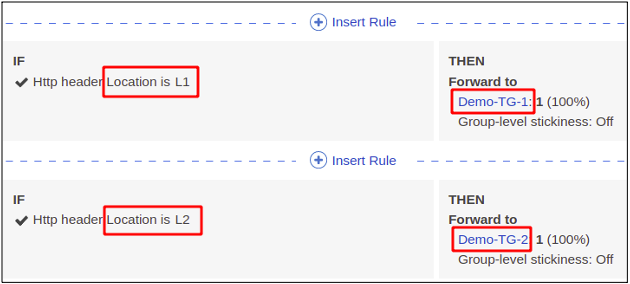
Define the HTTP header based on where you want to route the network request. For demonstration, we have taken the header as Location=L1.
After defining the HTTP header, add the target for the rule and simply create it.
This way, we can specify that the request with the Location header set to L1 will hit the target Demo-TG-1 and L2 will hit the target Demo-TG-2.
HTTP Request Method
There are multiple request methods for HTTP requests like get, post, put, delete, etc. Here, we are going to see how we can route our requests based on these requests.
To do this, create a new rule for the HTTP request method.
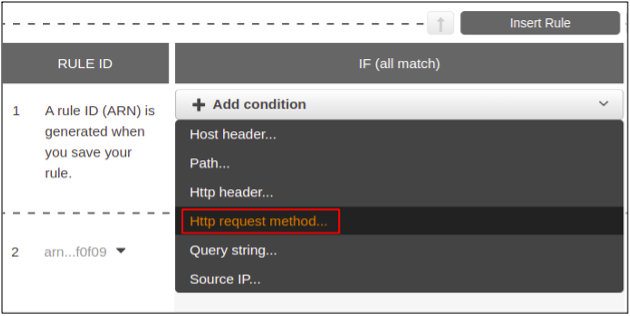
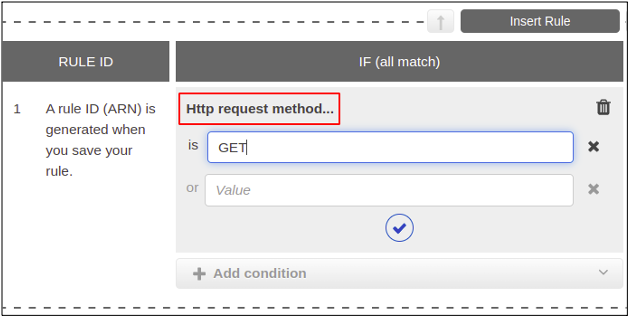
Provide the type of your HTTP request method. We will input the GET request for this demonstration.
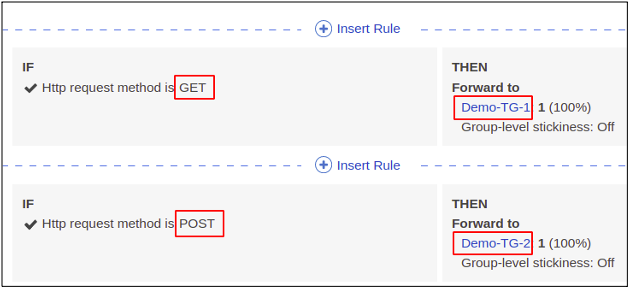
Add the target to which you want to forward all the GET requests for your web application and click on save, and your rule will become active. This way, different requests can be routed to different target groups.
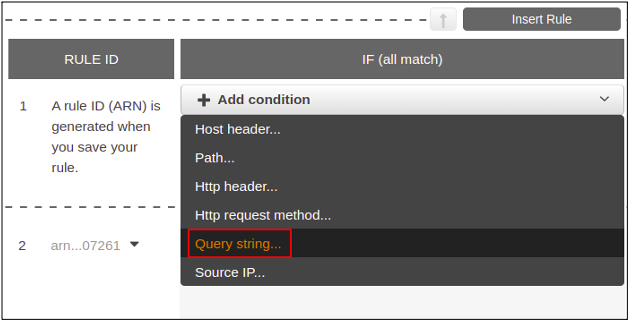
Query Parameters
This additional information is sometimes added with the HTTP requests. It is defined in the form of key value pairs. The network traffic in a load balancer can also be routed to a specific destination depending on the query string parameters given in the user’s request.
To get started, select the query string as a condition for your rule.
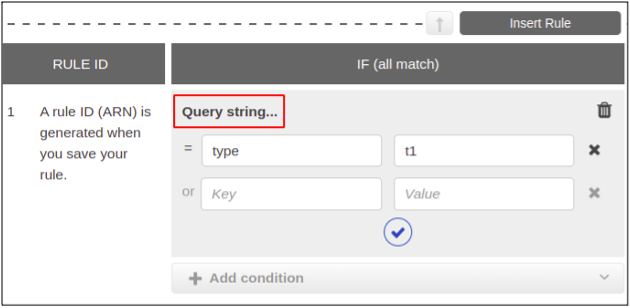
Now, define a key value pair as your query parameter.
Choose the target and finish the rule configuration.
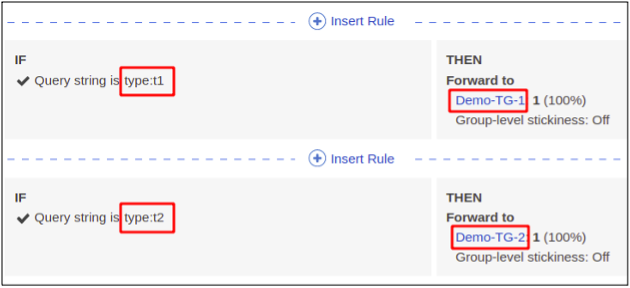
You can see below the two rules. The requests with query parameter type=t1 are forwarded to Demo-TG-1 while and the requests with query parameter type=t2 reached the target Demo-TG-2.
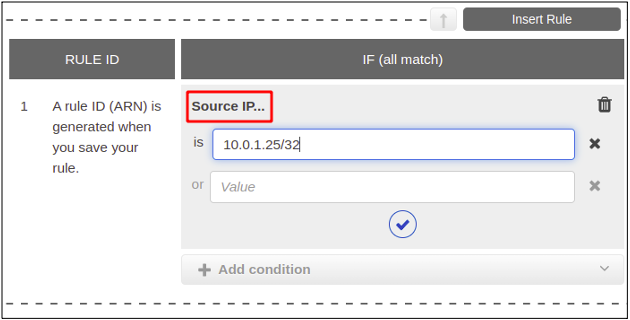
Source IP
You can also set a listener rule to forward the request to a specific target group depending upon the IP address of the user who is making the request to the load balancer.
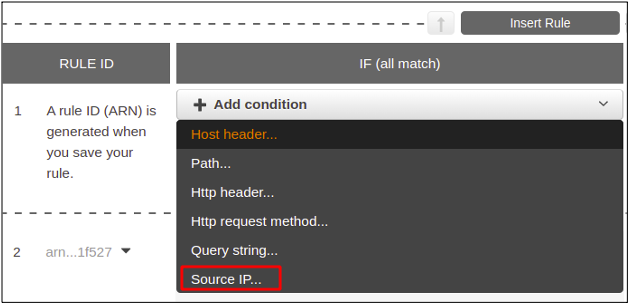
To set up the Source IP, just provide the CIDR then choose the target you want.
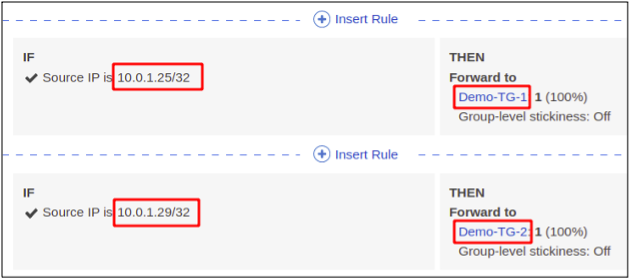
Each IP or IP address range can be specifically routed to a different target as shown below.
Conclusion
Intelligent routing is very important when it comes to designing an advanced and high level web application. Like what is demonstrated in this article, we can forward the requests to many targets using a single application load balancer based on the request parameters we get from the users. Check the other articles at Linux Hint for more tips and tutorials.