As the load balancer distributes the incoming load to multiple available resources like virtual servers, it increases the accessibility and allows your application to work uninterrupted in case of failure of any server.
Resources can be added or removed from load balancer using an auto-calling group, depending on the need, without affecting the requests to the server.
Configuring health checks enables you to monitor the usage of resources so that the requests are passed to healthy ones by the load balancer. Also, managing encryption and decryption via load balancer releases the load on resources, increasing the performance of our application.
Types of Load Balancers in AWS
In AWS, you get the following four types of load balancers. They are available under the service of Elastic Load Balancer (ELB).
- Classic Load Balancer
- Application Load Balancer
- Network Load Balancer
- Gateway Load Balancer
Classic Load Balancer (CLB)
The Classic Load Balancer is the version 1 load balancer, and it was launched in 2009. It supports TCP or layer 4, HTTP, and HTTPS, which are layer 7 traffic. The request will first be sent to the Classic Load Balancer. Then, it will be redirected internally to our EC2 instances across the availability zones configured with target groups. The Classic Load Balancer has listeners who verify the incoming requests from the clients based on the port and protocol we have configured. Also, we can configure the health check enabling the load balancer to measure the health of registered EC2 instances, so requests are only sent to healthy instances.
Creating Classic Load Balancer Using AWS Management Console
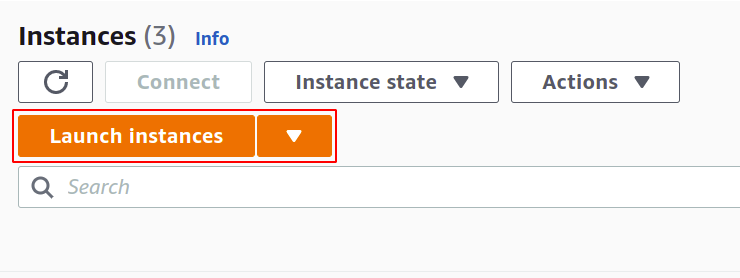
To create a Classic Load Balancer, we will first launch EC2 instances. The number of instances depends upon the expected requests on your application or website.
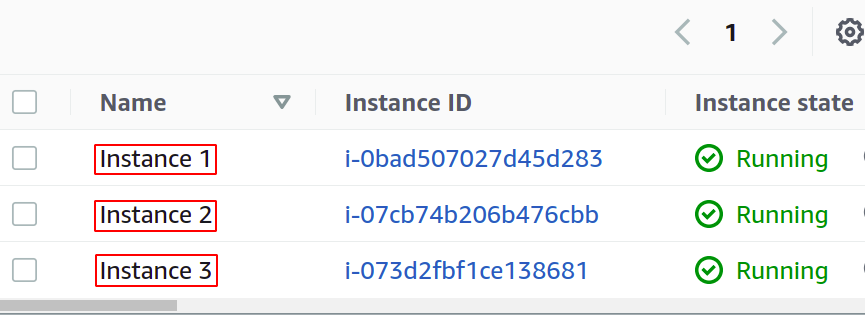
So, we have successfully launched 3 EC2 instances, and these EC2 instances have an NGINX server running on port 80.
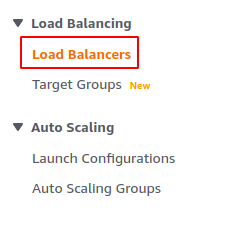
Now, we will configure our Classic Load Balancer. So, from the left side panel, click on the Load Balancer option.
Now, click on the Create Load Balancer button from the console.

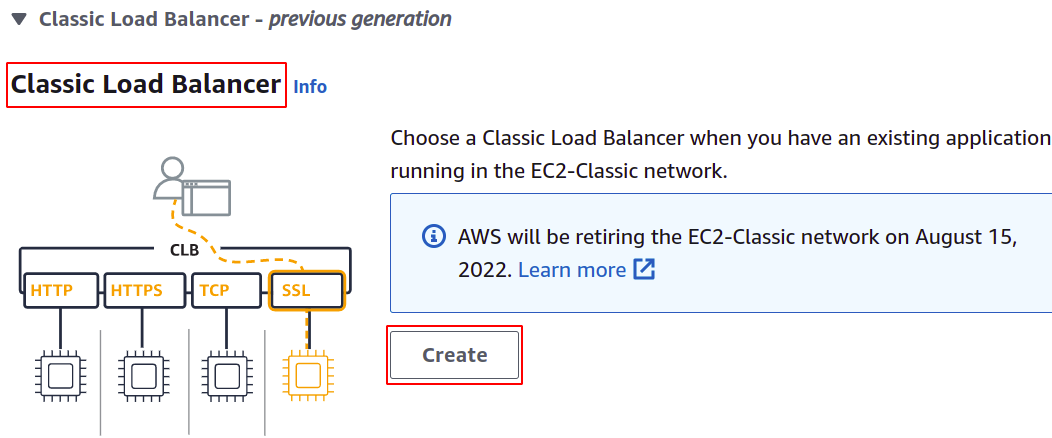
Now, it will redirect you to the window where you will choose the type of load balancer which you want to create, i.e., Classic Load Balancer in our scenario. Scroll down to the end of the page and click on the create button for Classic Load Balancer.
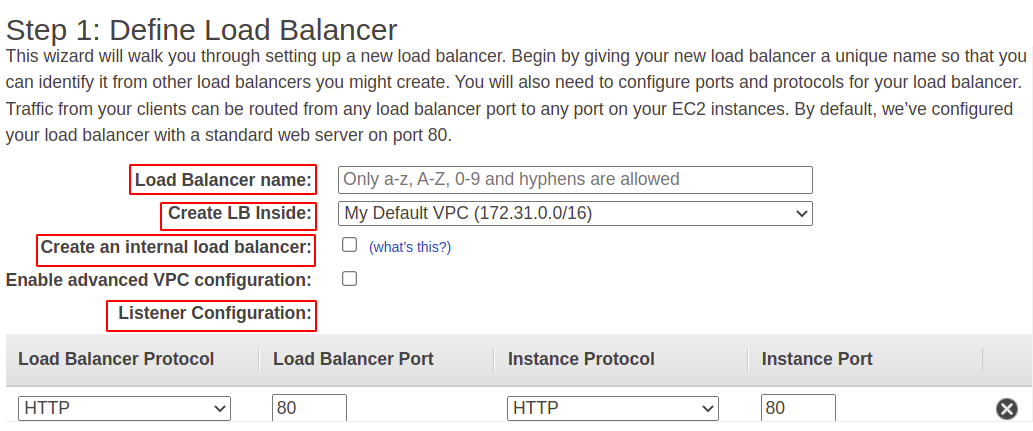
After selecting Classic Load Balancer, we will have to set the following basic configurations:
- Enter the name of the load balancer.
- Choose the VPC (Virtual Private Cloud).
- For the “Create an internal load balancer” option, we will leave it unchecked. If we check it, the load balancer will only communicate within the VPC and will not be available on the public network.
- Then, we have to configure Listeners by providing the protocol type and the port number used for forwarding requests.
- The CLB receives requests on port 80 for HTTP protocol and will forward them to our EC2 instance.
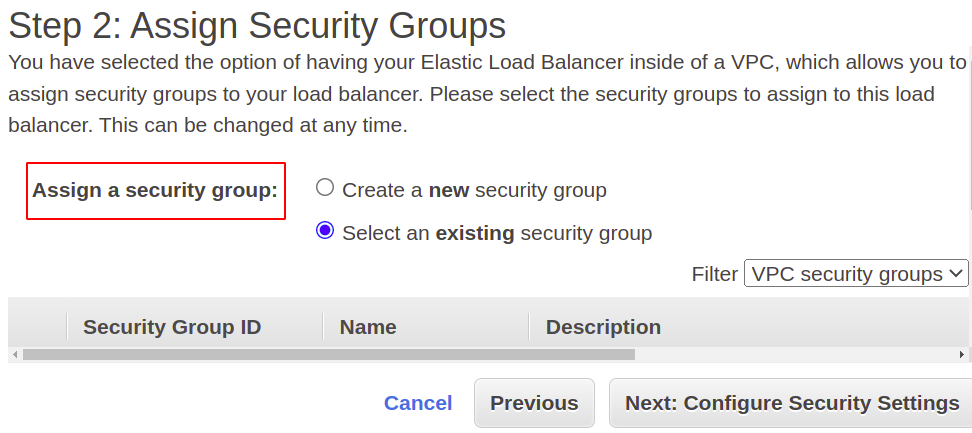
Next step is to “Assign Security Groups”. Here, you can use an existing security group or create a new security group. In this step, we will use an existing security group for our Classic Load Balancer and allow HTTP protocol on port 80.
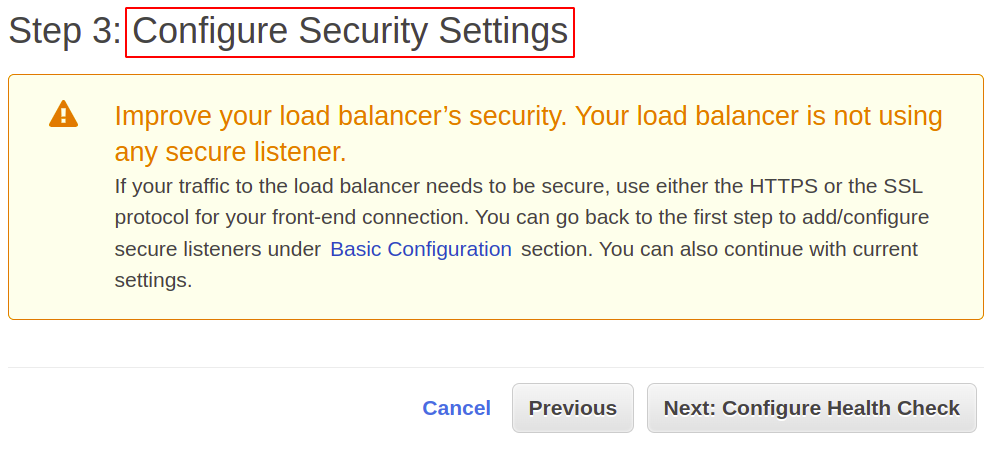
Then, you have to “Configure Security Settings”. We allowed HTTP protocol, so we don’t need any configuration. If we use HTTPS or SSL protocol, then we will have to add the SSL certificate and configure the policy for SSL.
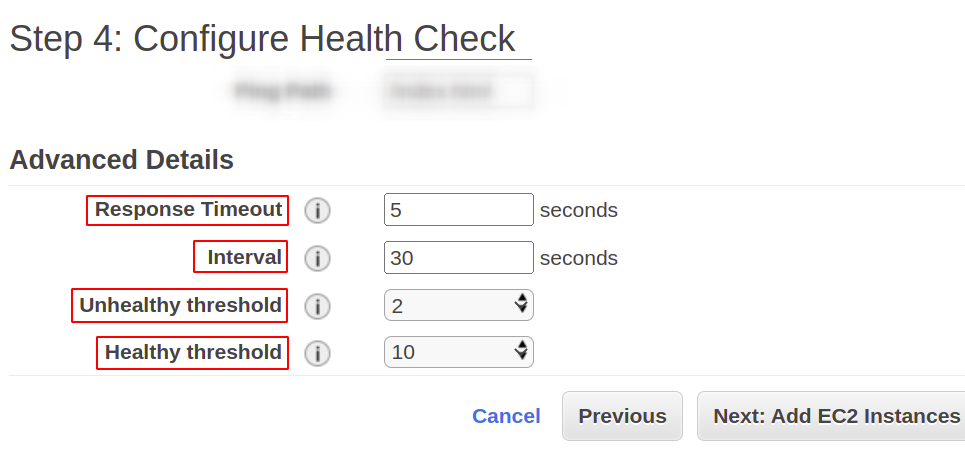
Now, we will “Configure Health Checks” in the next stage. On setting this, our load balancer will monitor the health of EC2 instances, and if it fails, the instance will be removed from the load balancer. We have to configure the ping protocol, port, and path.
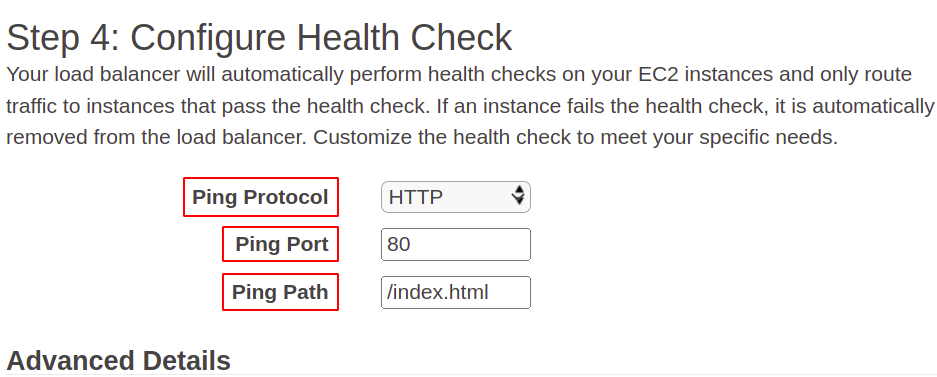
Under Advanced details, you can set the following parameters:
Response Timeout: For how much time the load balancer will wait for the response from the instance.
Interval: To configure how frequently the health checks will be performed.
Unhealthy Threshold: After how many failed health check attempts, an instance should be considered unhealthy.
Healthy Threshold: Number of consecutive health check successful attempts before verifying an EC2 instance is healthy.
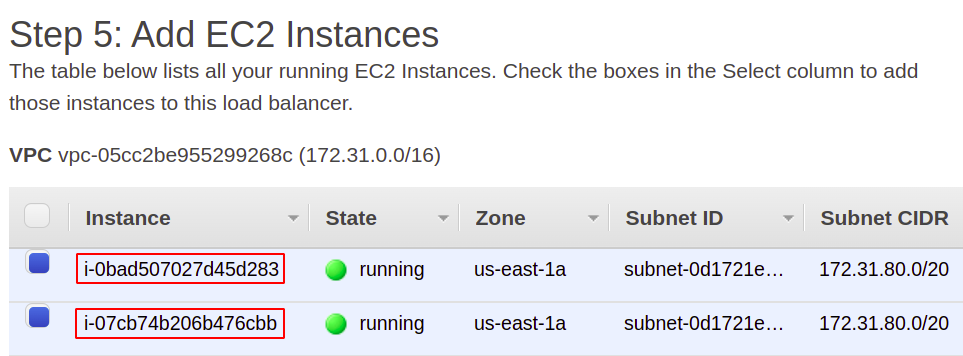
Now, we will add the EC2 instances, which are two in this case, to our load balancer to route the requests.
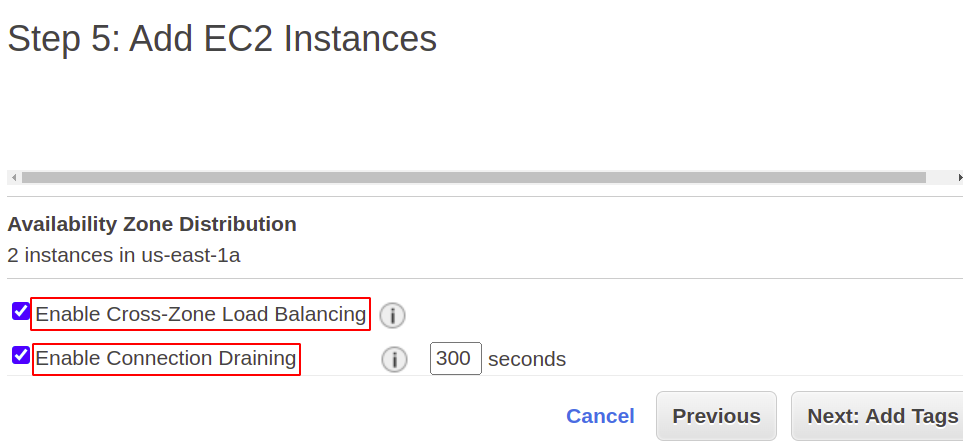
We can also select the “Enable Cross-Zone load balancing” to distribute the traffic equally across the different availability zones and set “Enable Connection draining” to default, i.e., 300 seconds. This will fulfill the received requests before taking out or shutting down the instance.
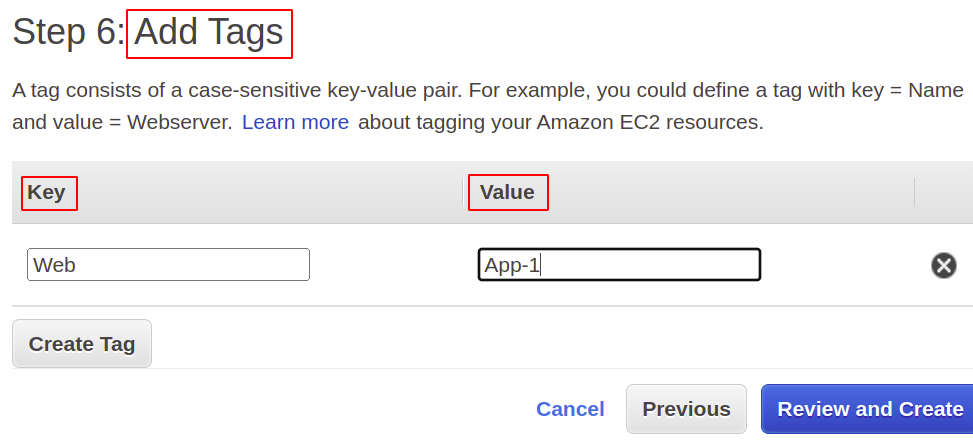
You can also “Add Tags” to keep track of your resources created for a particular application.
Now, the last step is to review and create our load balancer.

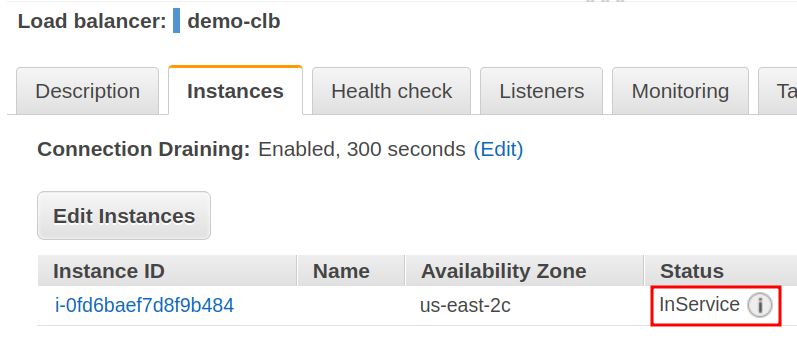
So, our classic load balancer is ready to be used. Now, check the health status of the EC2 instances configured with the load balancer. Select the load balancer, and then, choose instances. If the status of the instance is “in service”, it means the instances have successfully passed the health check.
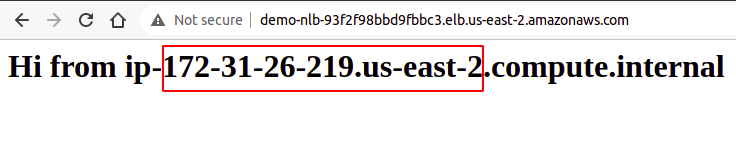
Once our load balancer is created, AWS provides us a DNS name that is an endpoint for our load balancer. All the network traffic is routed to the target instances through this URL endpoint.
You can try to make requests through this endpoint. Your request will be fulfilled by any attached instances depending on the load balancer algorithm, network load in that instance, and the health of that instance.
Creating Classic Load Balancer Using AWS CLI
Now, let us see how to configure a load balancer using AWS command-line interface. To create the Classic Load Balancer via CLI, we run the following command:
--subnets <Subnet ID> --security-groups <Security group ID>
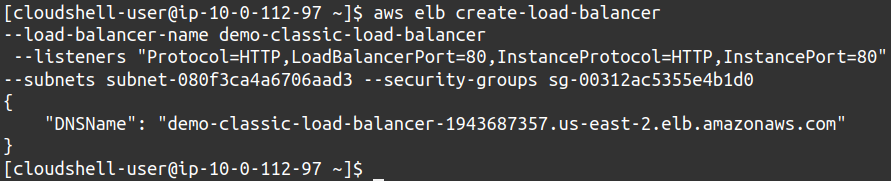
So, we have configured our Classic Load Balancer using the AWS command-line interface.
Conclusion
Load balancers provide a reliable way of handling high request rates on our applications and try to route the traffic to healthy servers in case of any disaster or network breakdown. They follow different routing algorithms to provide users with the best services at the customer endpoint. Load balancers provide another layer of security to your instance by defining the exposed ports as the traffic is routed to an instance through the load balancer. They can also effectively increase your application structure’s efficiency, reliability, scalability, and flexibility. We hope you found this article helpful. Check the other Linux Hint articles for more tips and tutorials.