Before starting, let’s see the ls -l command output, which will bring us information on file and directory permissions.
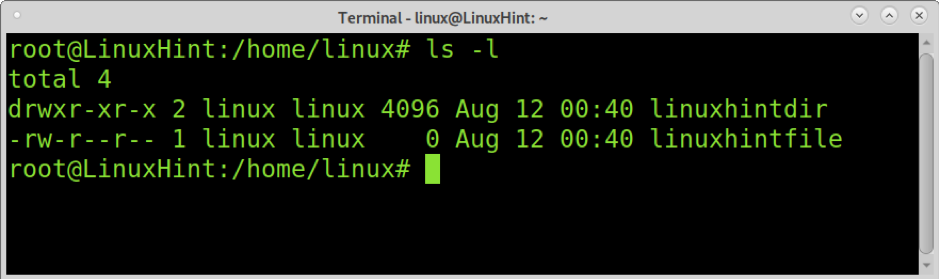
As you can see in the user’s home directory named Linux, there is a file named linuxhintfile and a directory named linuxhintdir. As you can see in the second and third columns, the owner and group for both file and directory are linux.
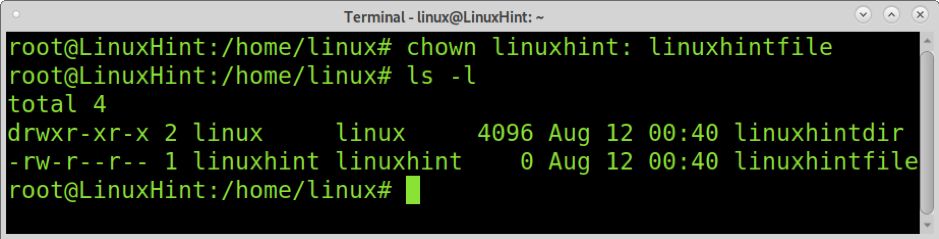
Let’s say we want to change the user ownership from the user linux, and make the user named linuxhint owner of the linuxhintfile file while leaving the group as linux.
The correct syntax is shown below to change the user ownership of a file without affecting its group.
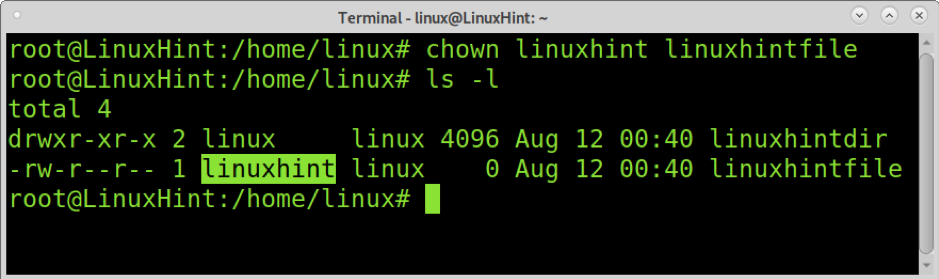
As you can see in the image above, after running ls -l again, we can see the user ownership changed from linux to linuxhint while the group remains the same.
This second example shows how to use the chown command to change both user and group ownership of the same file (linuxhintfile). The syntax is similar to the previous example, with the difference that a colon followed by the group name must be added after the username, as shown below.
In my case, I want to change the user and group ownership of the <em>linuxhintfile</em> to the root user and root group, so I type the following.
[cc lang="text" width="100%" height="100%" escaped="true" theme="blackboard" nowrap="0"]
chown root:root linuxhintfile
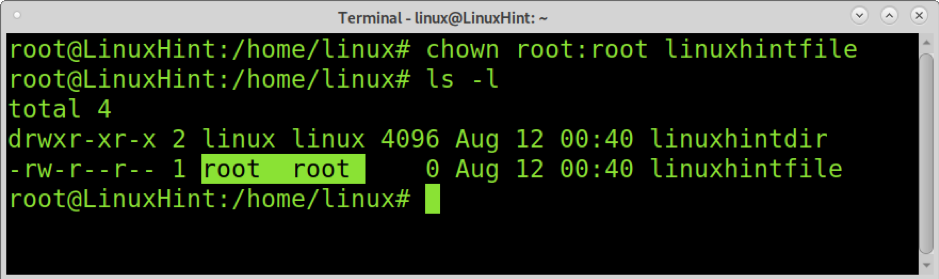
As you can see now, both the user and group ownership were changed to root.
It is important to note that you don’t really have to specify the group if you want to change both user and group ownership to the same user. In such a case, you only need to type the user followed by a colon without a group, and the group will automatically change to the same as the new owner. This means if you type <User:> followed by a colon and no group after that, the file’s group will change to the user’s group.
In the example below, both user and group must change from root:root to linuxhint:linuxhint even though we didn’t type the group, just because we added the colon after the username.
As you can see, both user and group ownership were changed to linuxhint.
Changing directory ownership requires the same syntax and requires implementing a flag if you want to change the ownership recursively, including subdirectories and files contained in the directory.
Let’s see the directories, subdirectories, and their current ownership.
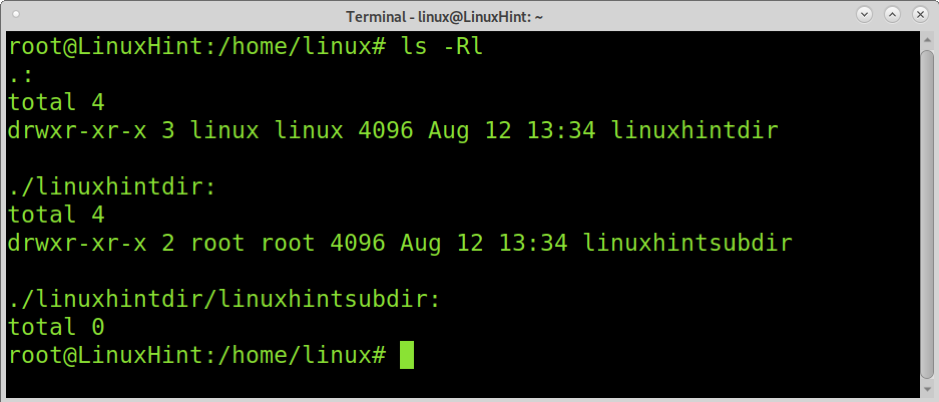
As you can see, we have a directory named linuxhintdir, whose owner is the linux user, and the group is the linux group. Inside there is a subdirectory named linuxhintsubdir whose owner and group are the root.
Before going with the recursive permissions, let’s see what happens if we change the linuxhintdir ownership without flags. In the example below, I will change the user and group ownership of linuxhintdir from linux to linuxhint.
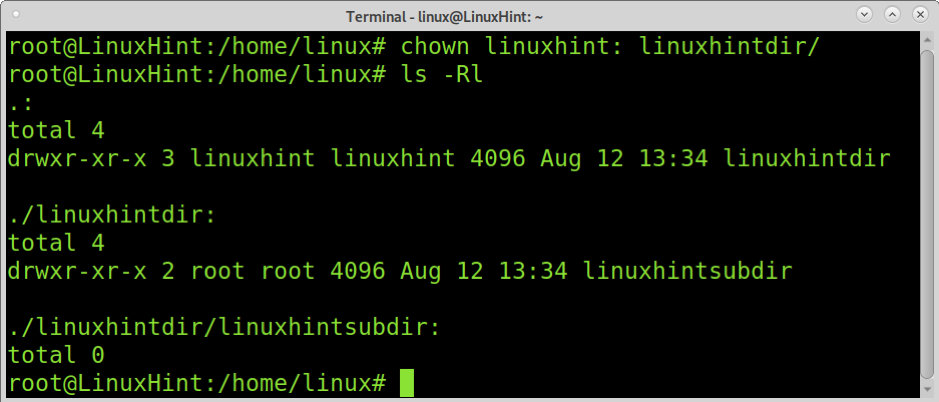
As you can see, the linuxhintdir ownership was changed successfully to linuxhint. But the linuxhintsubdir subdirectory user and group remains root.
So, how to change the ownership recursively, including subdirectories and subfiles?
For this, you only need to add the -R (Recursive) flag.
The following example shows how to change the ownership recursively for the linuxhintdir directory and its files and subdirectories. As shown previously, the main directory user and group belong to linuxhint, and the subdirectory user and group belong to root.
The command below recursively changes user ownership to the user named linux and the linuxlat group.
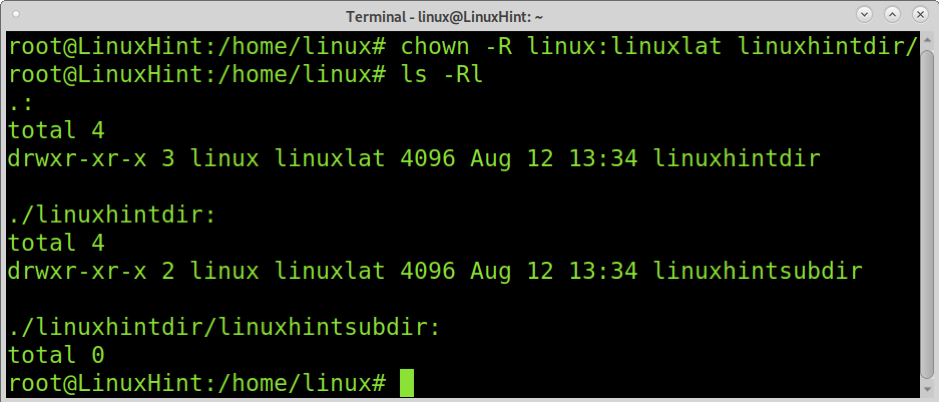
As you can see now, the directory ownership was changed and its content; that’s what the -R flag does.
The following scenario explains how to recursively change ownership of all files and directories belonging to a specific user.
In this new scenario, as you can see in the following picture, we have the main directory linuxhintdir, which belongs to the user named linux, and the group linuxlat. The subdirectories and files inside belong to users named linux, root, and linuxlat, groups named linuxlat, linux, and linuxhint.
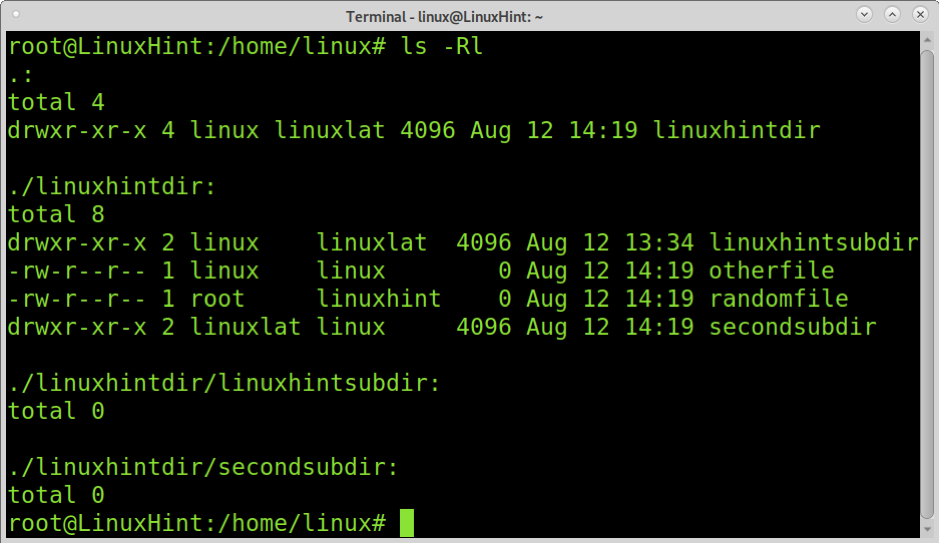
Now let’s say we want to change the user and group ownership only of files/directories belonging to a specific user. In this case, we will give the main directory and all files and subdirectories belonging to the user named linux to the user named linuxhint.
For this, we need to implement the -R flag explained before because we want to change permissions recursively. Additionally, we need to implement the –from= option followed by the current owner username (and/or group if necessary), the new user who will own the files and directories., as shown in the image below.
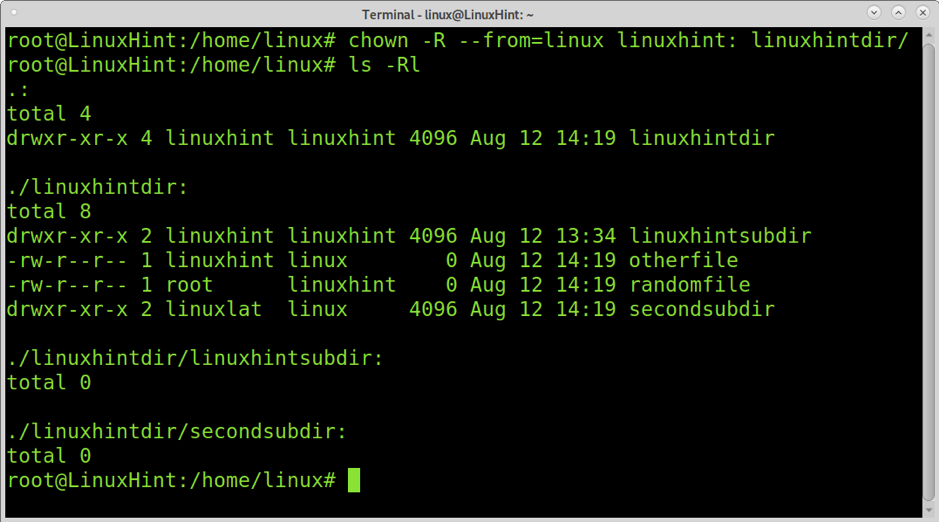
As you can see, all files belonging to the user named linux now belong to the user named linuxhint. In this way, we change the ownership of many files belonging to a specific user with a single command.
Conclusion
Managing files and directories ownership properly is a must for any Linux user working with shared resources. As you can see, the commands are pretty simple to learn and apply.
You can get more information on chown at https://linux.die.net/man/1/chown. Also, you may be interested in reading Setuid, setgid, and sticky bit explained.
I hope this tutorial explaining how to use the chown command in Linux was useful. Keep following this blog for additional Linux tips and tutorials.