This write-up will present a step-by-step guide to check and update the Java version on Windows 10:
- How to check Java version
- How to remove older version of Java
- How to update Java version
So, let’s begin!
How to check Java version on Windows 10
To determine which version of java is installed on your system, you have to follow the below-listed steps:
First Step
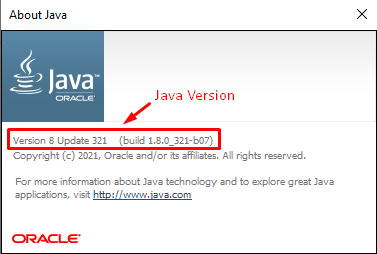
Search for the “About Java” in the search bar as shown in the below snippet:

Once you clicked on the “About Java”, a window will appear which shows the details about the java version:
You can check the Java version using a command prompt as well, and to do so, first, you have to search for the command prompt and once the command prompt is open type the following command:
Typing the above-mentioned command will let you know the java version installed on your windows.
How to remove older Java version and update new Java version on Windows 10
In this section, we will provide you a generic way, which will remove the older java version if installed and update the latest version on your Windows 10 operating system. It will also be helpful in such a scenario if you didn’t already have java installed on your windows.
So, let’s begin with the step-by-step guide to update/install the latest Java version and remove the older version.
First Step
Open your favorite browser and search for “Java”:

Make sure that you have selected the official link of java: “www.java.com”.
Second Step
Once you click on the above-mentioned link it will take you to java’s home page:

Third Step
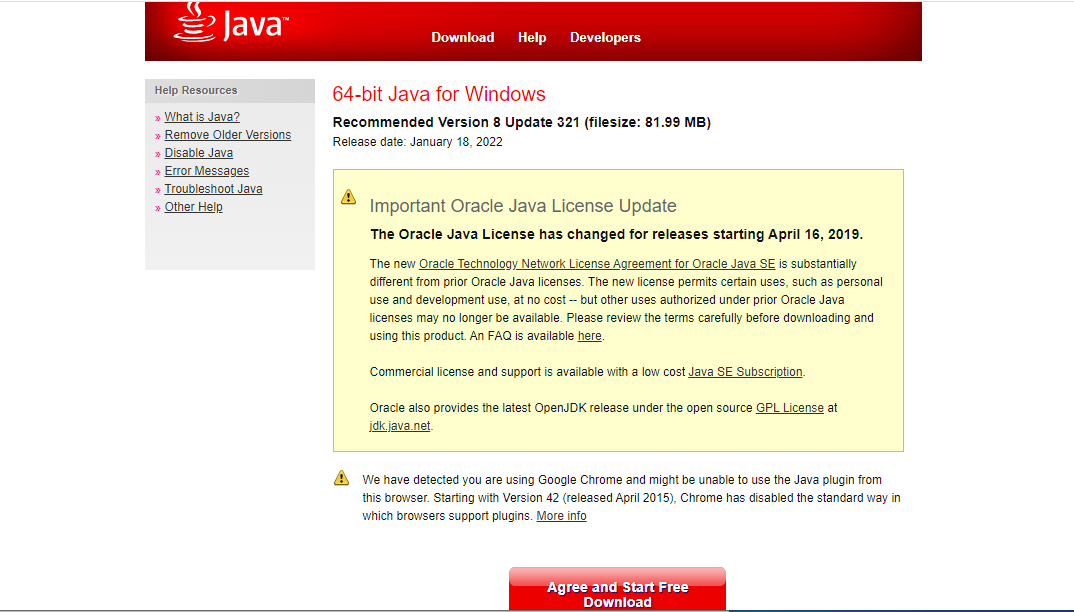
Clicking on the “Java Download” button will lead you to the following window:
Fourth Step
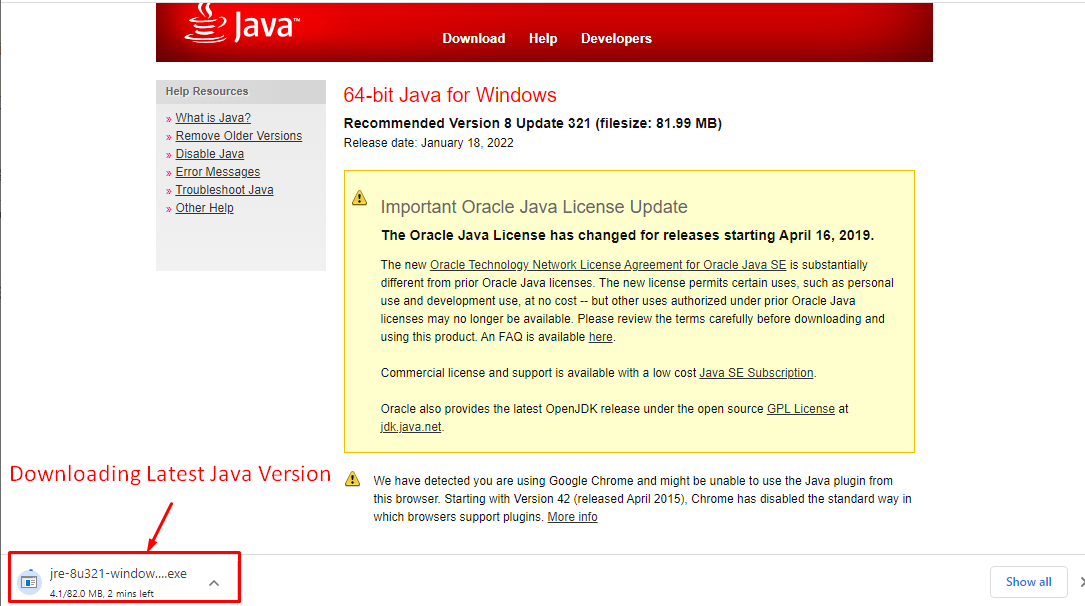
Clicking on the “Agree and Start Free Download” will start the downloading process:
Fifth Step
Once the downloading process is complete, click on the .exe file and allowing the app to make changes on your system will start the installation process:

Sixth Step
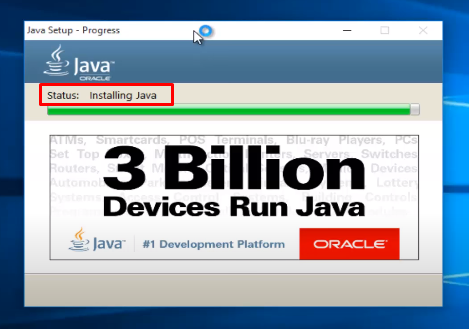
Clicking on the install button will start the installation as shown in the below snippet:
Seventh Step
Now, if you have previously installed the java version on your computer then the following pop-up window will appear in such case:
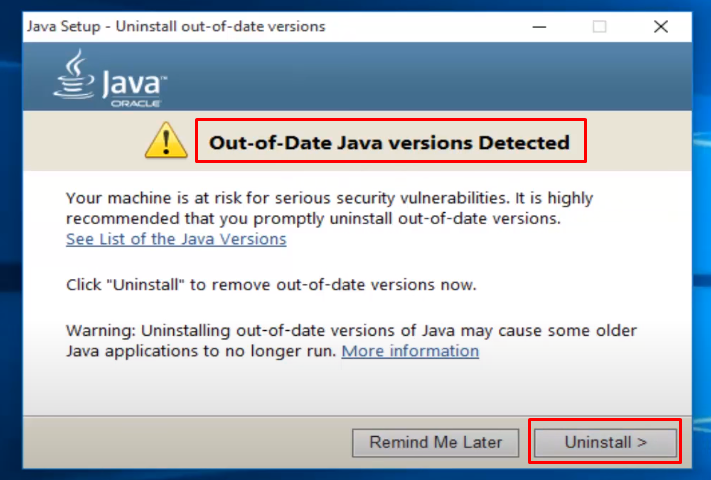
Eight Step
Click on the Uninstall button to remove the older version of java.
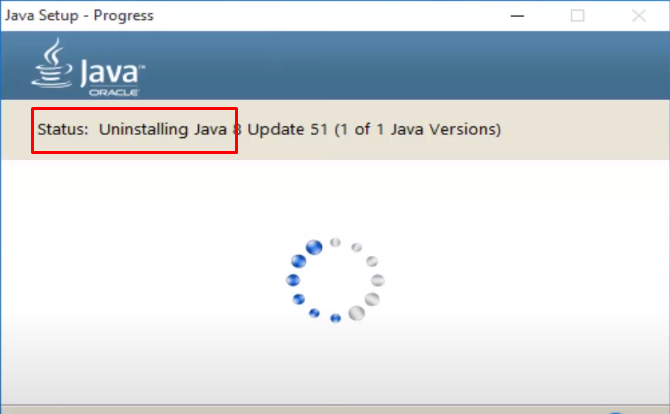
Ninth Step
If everything goes fine then you will get the following message on successful uninstallation of Java’s older version:
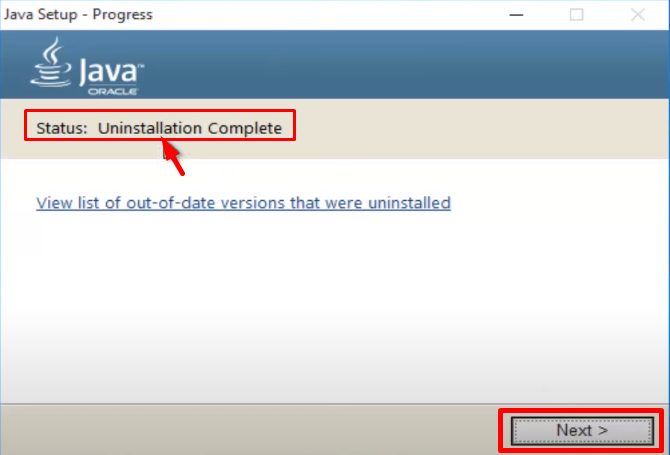
Tenth Step
Clicking on the Next button will show a message of successful installation of java’s latest version:
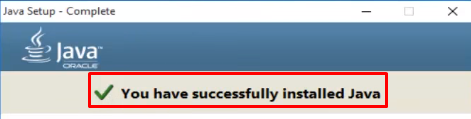
This is how you can remove the older Java version and update the newer Java version on your Windows operating system.
Conclusion
To Check the version of java on windows, search for the “About Java” in the search bar and click on it to check the details about the java version or type the java -version command on the command prompt to check the details about the java’s installed version. To update the java version, download the latest version of java from www.java.com and then install the downloaded file on your PC. The older version will be detected automatically during the installation process and ask you to remove it. Clicking on Uninstall will remove the older version of java from your windows 10 operating system.