Java is a general-purpose client-side programming language that serves several functionalities like android application development, game development, web applications development, and many other software products. To build any application, first, we have to install Java on our computer systems. However, some applications are not capable to run on java’s outdated version. So, it’s essential to know which Java version is installed on our operating system and if our machine is running an outdated version of java, then how to update it.
This post will explain how to check and upgrade the Java version on Ubuntu 22.04. So, let’s begin!
How to check Java version on Ubuntu 22.04
Open the terminal on your ubuntu 22.04 operating system and type the below-mentioned command to check which Java version is installed on your machine:
Once you typed the above-given command on the terminal, it will produce the following outcome:
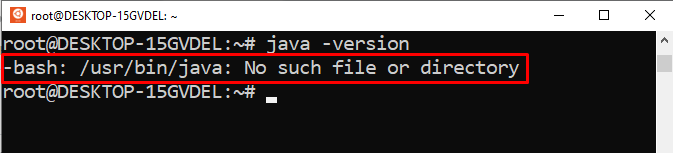
The above snippet shows that Java is not installed on our machine. Now, let’s move one step further to learn how to install/upgrade the Java version on Ubuntu 22.04.
How to Update Java version on Ubuntu 22.04
To update the java version or to install the latest java version, firstly you have to upgrade the apt repository. To do so, type the below-given command on the terminal:
Next, run the below-enlisted command to install the default Java Runtime Environment(JRE) on your operating system:
When you execute the above-given command, it will work like this:
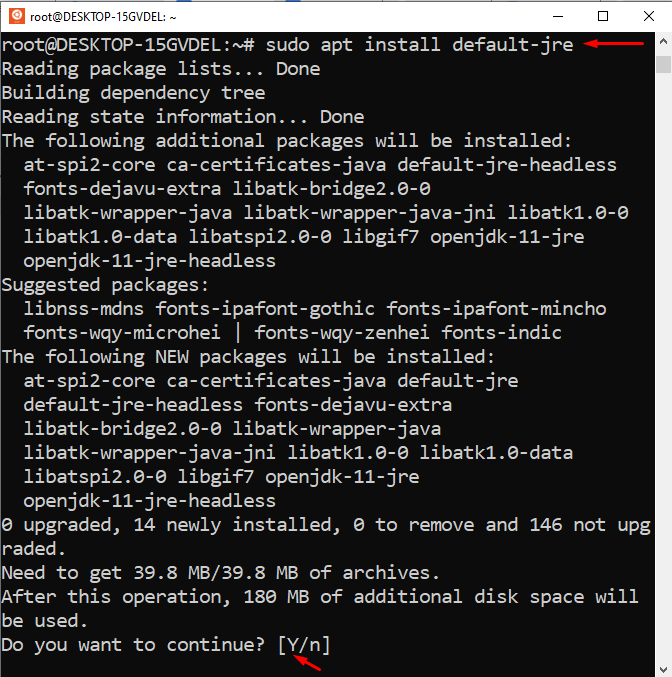
Type “Y” to continue the installation process:
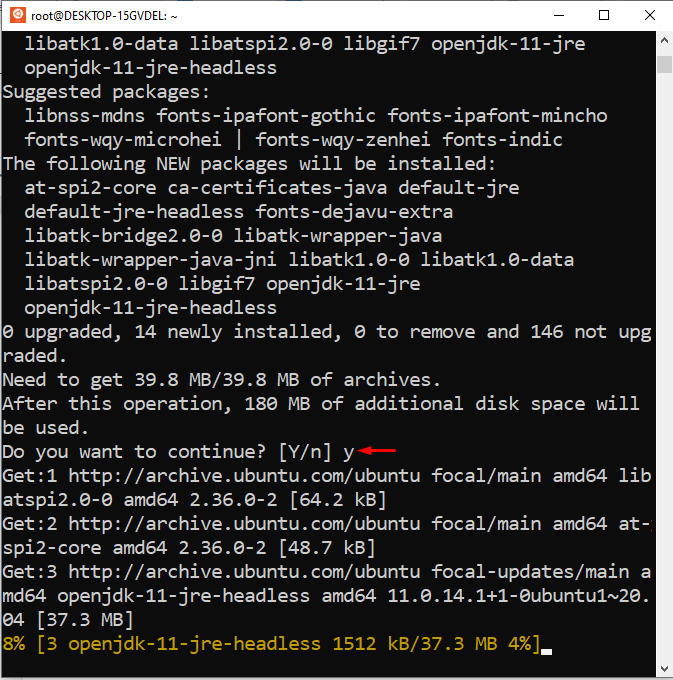
The whole installation process will take a few minutes to install JRE on your system. You can verify the JRE’s installation by typing the following command:
If JRE is successfully installed on your Ubuntu 22.04, then you will witness the result something like this:
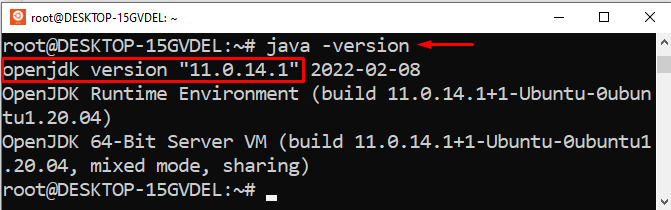
Congratulations! You have successfully installed the latest and updated version of Java on Ubuntu 22.04.
As the JRE’s installation is done, now you can run almost every java software on your machine. However, some java-oriented software may require the Java Development Kit(JDK) to compile/run some particular tasks. In such cases, you can install the JDK by typing the below-given command:
The above-given command will work something like this:
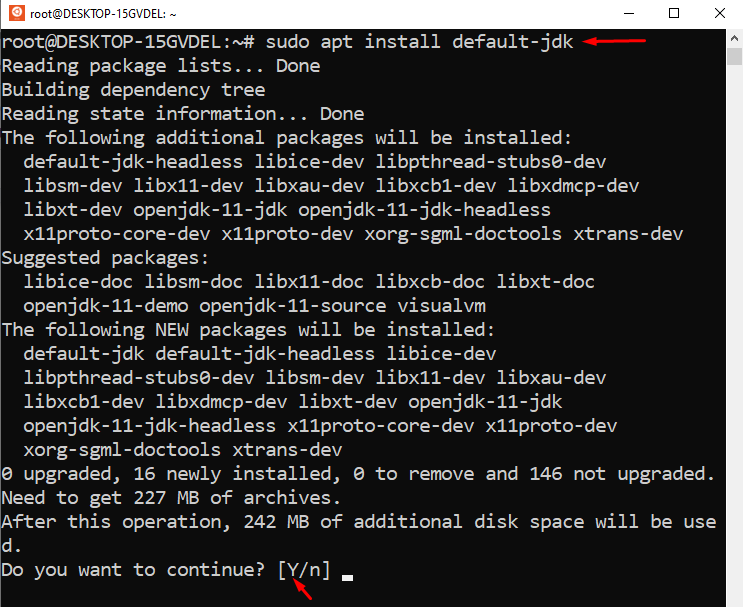
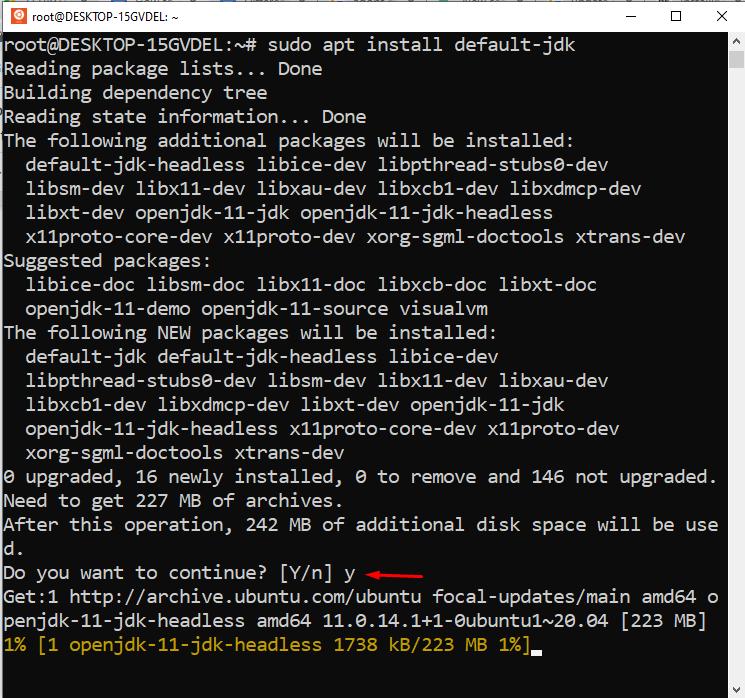
Type “Y” to continue the JDK’s installation process:
Type the below-given command on the terminal of ubuntu 22.04 to verify whether the updated JDK is installed on your machine or not:
You will witness the below-given output:

Congrats! You are running an updated Java version on your ubuntu 22.04.
Conclusion
Open the terminal and type “sudo apt install default-jre” to install JRE, and type “sudo apt install default-jdk” to install JDK on ubuntu 22.04. To check or verify the java version type “java -version” on the terminal of Ubuntu 22.04. This write-up provided a step-by-step guide on how to check, update, and verify the java version on ubuntu 22.04.