How to Check for and Patch Spectre and Meltdown Vulnerability on Ubuntu 17.10 Artful Aardvark
Before I show you how to check and patch Spectre and Meltdown Vulnerability on Ubuntu 17.10. Let’s take a look at what these are.
Spectre Vulnerability:
Spectre vulnerability breaks the isolation between the applications in your computer. So an attacker can trick a less secure application to reveal information about other secure applications from the kernel module of the operating system.
Meltdown Vulnerability:
Meltdown breaks the isolation between the user, the applications and the operating system. So an attacker can write a program and it can access the memory location of that program as well as other programs and get secret information out of the system.
Checking for Spectre and Meltdown Vulnerabilities:
You can use Spectre and Meltdown Checker script to check whether your processor is affected by Spectre and Meltdown vulnerabilities.
I am going to download Spectre and Meltdown Checker script now. I will download the script to the /tmp directory. Because the script will be automatically removed on the next reboot. But if you want to keep it, consider downloading it somewhere else.
Navigate the to the /tmp directory with the following command:
Now run the following command to download the Spectre and Meltdown Checker script from GitHub using wget:
The Spectre and Meltdown Checker Script should be saved as ‘spectre-meltdown-checker.sh’.
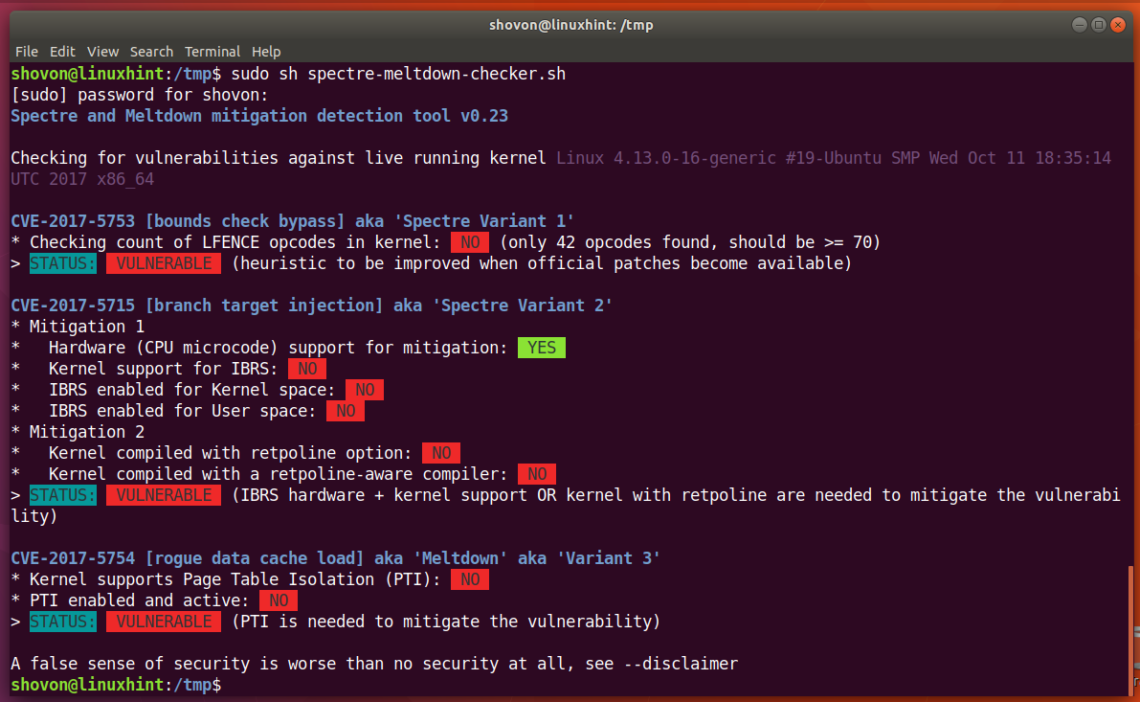
Now you can run the Spectre and Meltdown Checker Script with the following command:
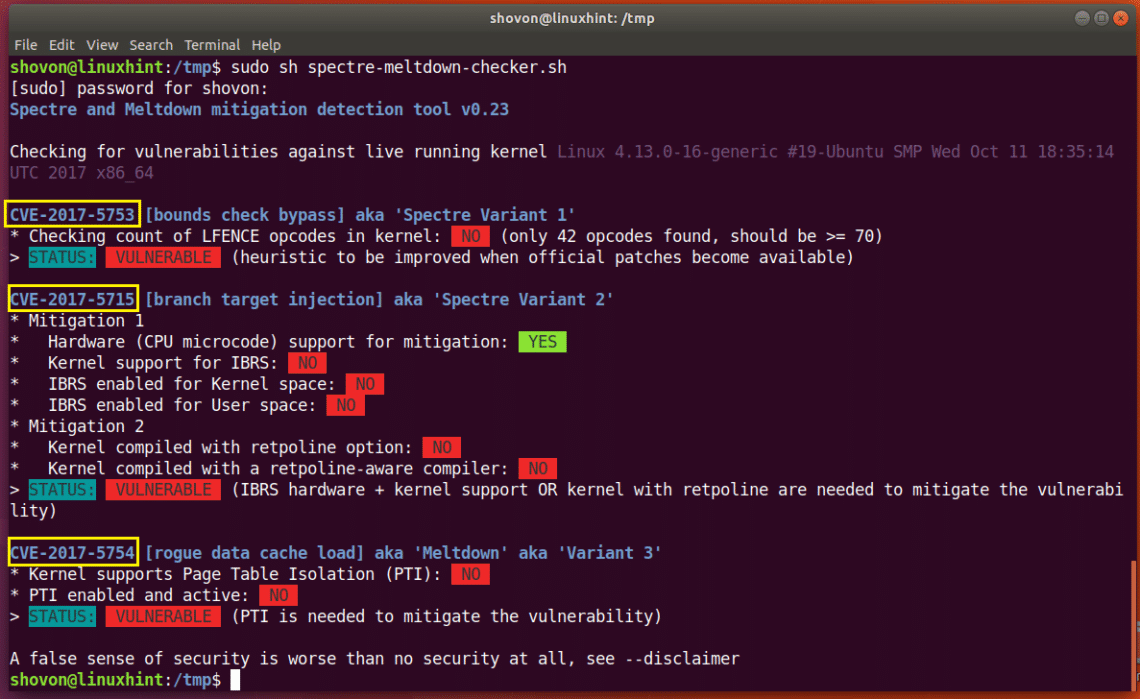
On my Laptop, I got the following output as shown in the screenshot below. You can see that my processor is vulnerable to Spectre Variant 1 (CVE-2017-5753), Spectre Variant 2 (CVE-2017-5715), Meltdown or Variant 3 (CVE-2017-5754).
CVE-2017-5753, CVE-2017-5715, CVE-2017-5754 are the codes for these vulnerabilities. If you want to learn more about these vulnerabilities, search by these codes on Google and hopefully you will find something interesting.
Patching Spectre and Meltdown Vulnerabilities:
Spectre and Meltdown patches are delivered as kernel updates on Ubuntu 17.10. Ubuntu 17.10 has been releasing kernel updates as Spectre and Meltdown vulnerabilities are fixed.
To get these kernel updates, you must have ‘artful-security’ and ‘artful-updates’ repository enabled.
To check whether these repositories are enabled, go to the Applications menu and look for “Software & Updates”. You should see “Software & Updates” app as shown in the screenshot below. Click on it.
“Software & Updates” should open. Now click on the marked tab “Updates”.
You should see the following window. You can see that on my Ubuntu 17.10 machine, ‘artful-security’ and ‘artful-updates’ repositories are not enabled.
Click on the checkboxes to enable them as shown in the screenshot below. Once you’re done, click on “Close”.
You should see the following window. Click on “Reload”. Ubuntu should update its package repository cache.
Once the package repository cache is updated, we can install kernel updates. Before you go for a kernel update, it’s a good idea to check for the kernel version you’re currently using. So you will be able to verify whether the kernel is updated or not.
Check the version of Kernel you’re using on your Ubuntu 17.10 Artful Aardvark operating system with the following command:
You can see that the version of kernel on my Ubuntu 17.10 machine Is 4.13.0-16
Now run the following command to update all the available packages of your Ubuntu 17.10 operating system:
Press ‘y’ and press <Enter>. The apt package manager should download and install all the available updates.
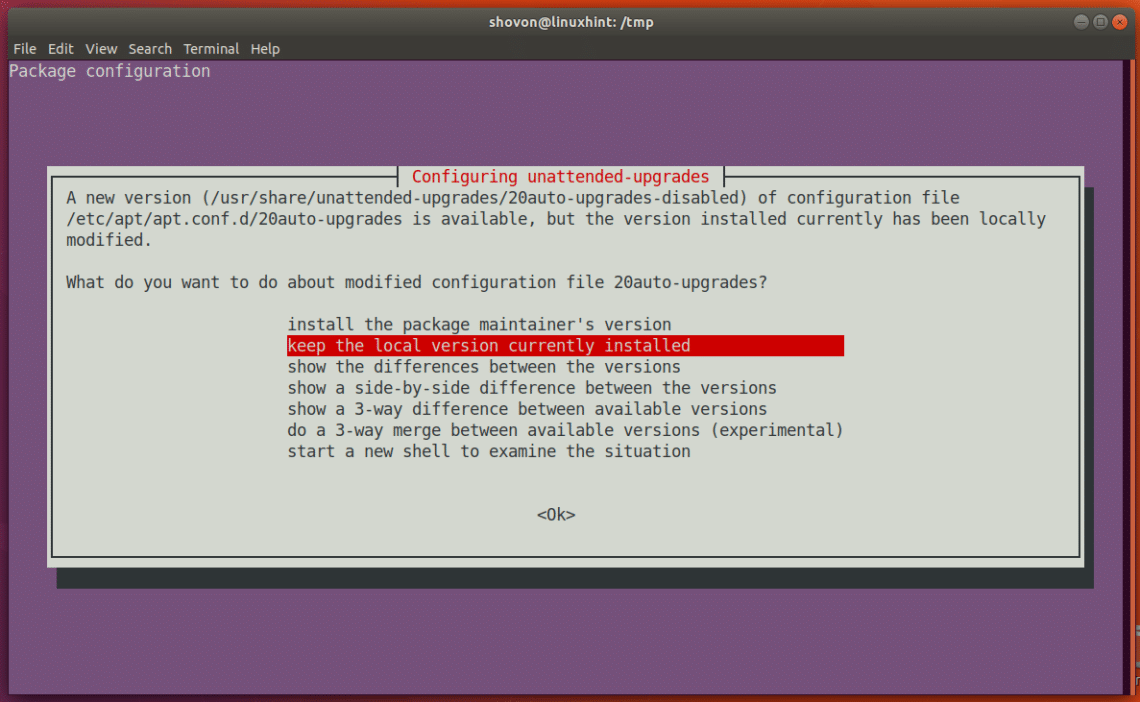
While the updates are being installed, you may see something like this if you disabled auto update manually. You may leave the default and press <Enter>.
Everything should be updated.
Now reboot your computer.
Once your computer boots, check for the kernel version again with the following command:
You should see a different kernel version than before.
On Ubuntu 17.10, I had a problem. The kernel wasn’t updated. I checked and the problem was for some unknown reason the kernel updates were held back as you can see from the screenshot.
To install the kernel updates manually, run the following command:
Press ‘y’ and press to continue.
Once the installation is completed, reboot your computer with ‘reboot’ command.
Your kernel should be updated.
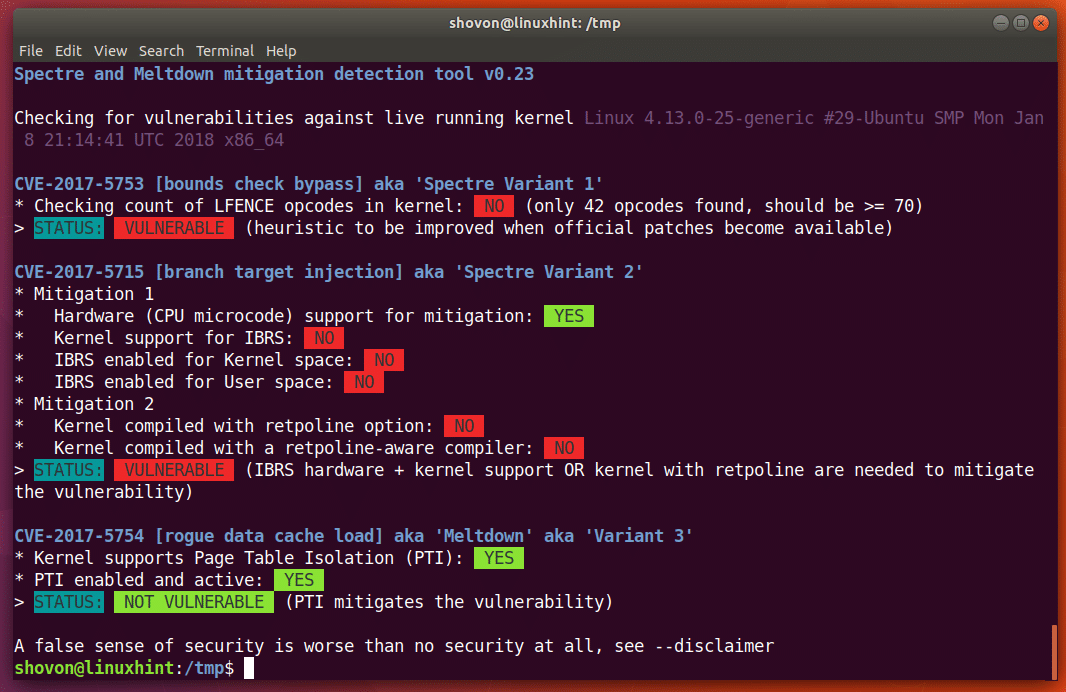
Now if you run the Spectre and Meltdown Checker Script again, you should see some changes.
You can see that as of this writing only Meltdown vulnerability is fixed on Ubuntu 17.10. Spectre is a little bit harder to fix. Ubuntu team is working on it even as we speak. Keep your eyes on the kernel updates, Ubuntu team should release updates as they fix other vulnerabilities. You may turn auto update on as well.
So that’s how you check and patch Spectre and Meltdown Vulnerability on Ubuntu 17.10 Artful Aardvark. Thanks for reading this article.


