This article will go through the details of how to change the system hostname on the Ubuntu system. We will use the Ubuntu 20.04 Linux distribution to implement all commands and procedures for changing the hostname. Let us start with the details!
Prerequisites
Users must have sudo privileges to edit the /etc/hosts file.
Methods for changing hostname on Ubuntu 20.04
The system hostname changing is not a challenging task. There are two methods are available for changing the hostname of the Ubuntu 20.04 system:
- Changing system hostname permanently using Command-line on Ubuntu 20.04
- Change system hostname using GUI on Ubuntu 20.04
Method 1: Changing system hostname permanently using Command-line on Ubuntu 20.04
Just following a few simple commands, the user can easily change the hostname of the Ubuntu system through the terminal.
Step 1: Display the current hostname of the Ubuntu system
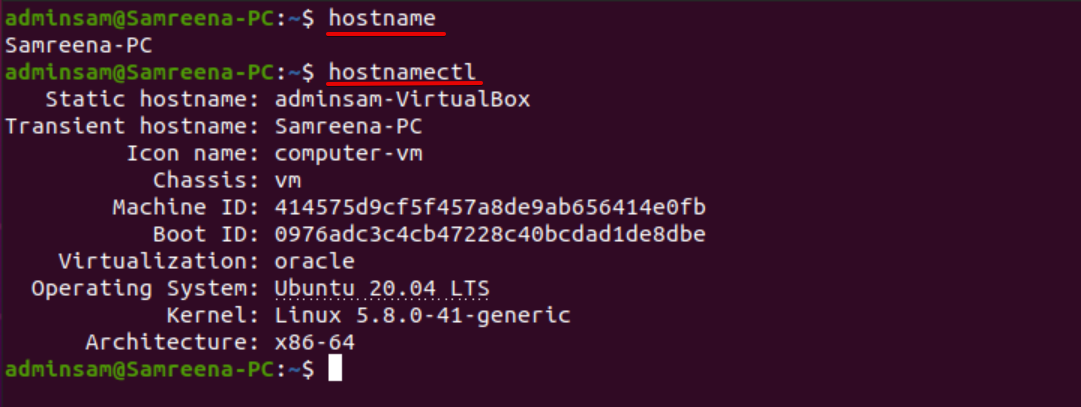
First, check the current hostname of your Ubuntu system by using the following command:
The hostname command only displays the current hostname of your system.
The ‘hostnamectl’ command displays the current system hostname along with the following information on the terminal:
Using the cat command, the user can also view the system hostname as follows:
Step 2: Changing hostname using hostnamectl command
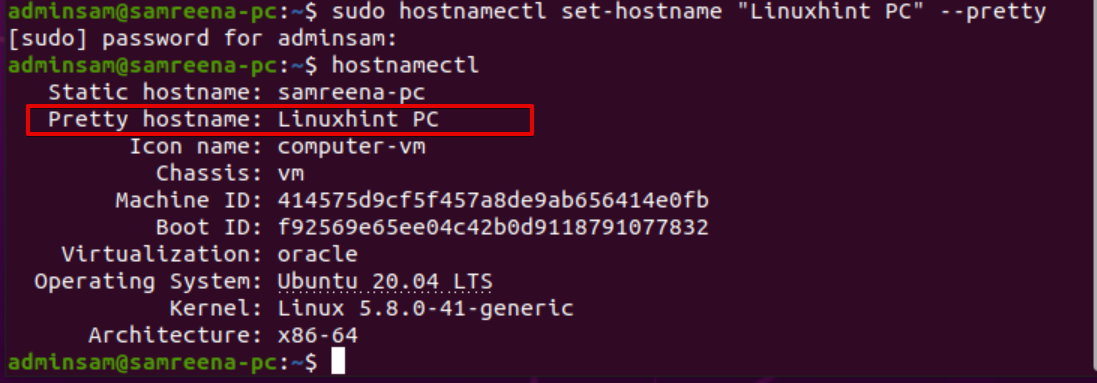
Now, change the system hostname to any other desired hostname. For example, we want to change the hostname of the current system from ‘Samreena-PC’ to ‘Linuxhint’. For this purpose, the following command helps you to change the hostname of the Ubuntu system:
After changing the system hostname, verify that either hostname has been changed or not by running the following command:
While you changed the hostname through the ‘hostnamectl’ command, you are not required to reboot the Ubuntu system to see the effects of the hostname change.
To change the static, pretty, and transient hostname, which we have discussed above, run the following commands:
$ sudo hostnamectl set-hostname new_hostname.com --transient
Step 3: Edit hostname /etc/hosts
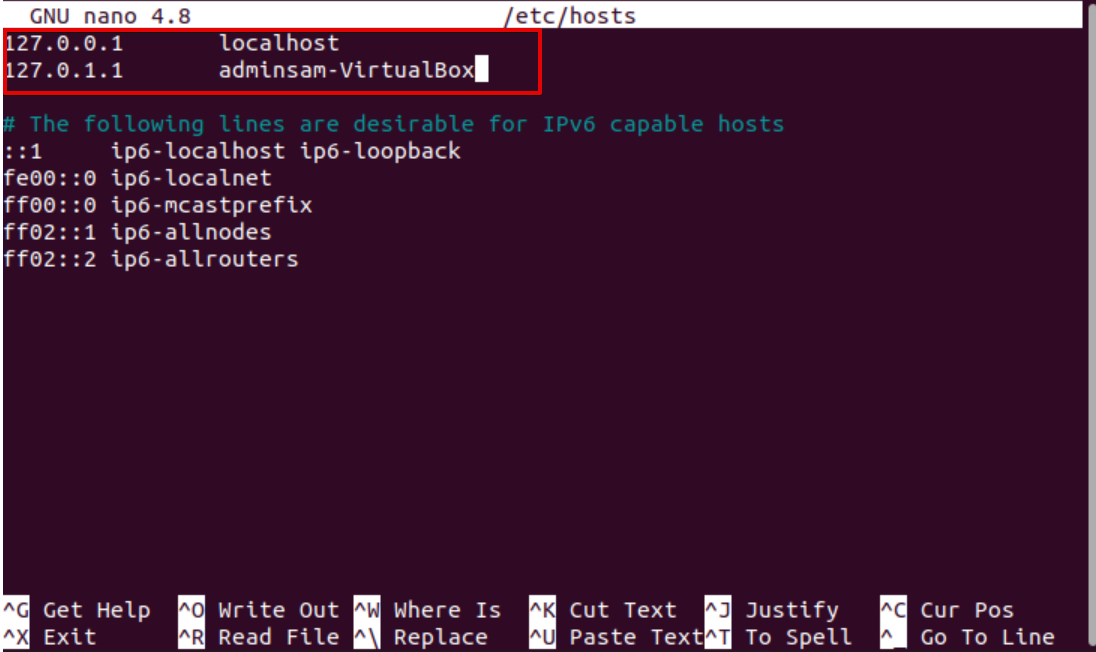
To apply changes permanently, edit the ‘/etc/hosts’ file. Open ‘/etc/hosts’ file using any source code or text editor.
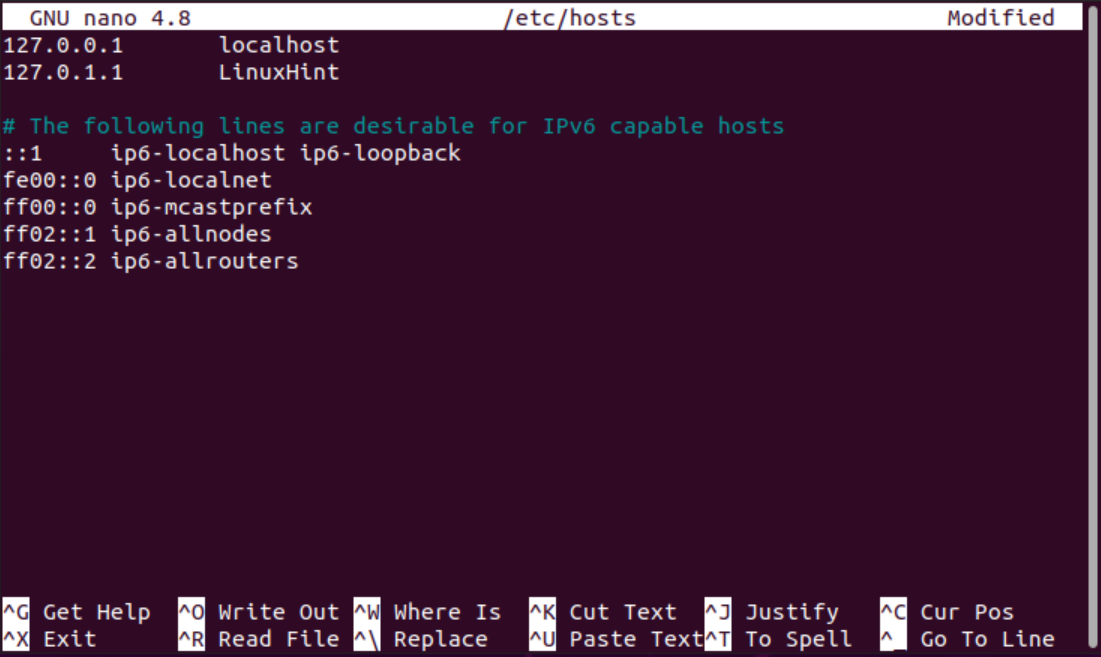
Now, change the highlighted hostname from ‘adminsam-Virtualbox’ to ‘LinuxHint’. Save the changes and exit from the ‘/etc/hosts’ file.
Reboot the system by running the following command:
Now, open the terminal and, using the ‘hostnamectl’ verify the changes as follows:
As you can see in the above screenshot, the hostname has been changed to ‘LinuxHint’.
Method 2: Change system hostname using GUI on Ubuntu 20.04
Follow the following procedure to change the hostname of the Ubuntu system using the graphical user interface:
1. Click on the top left ‘Activities’ section and then search the ‘settings’ menu using the application search bar as follows:
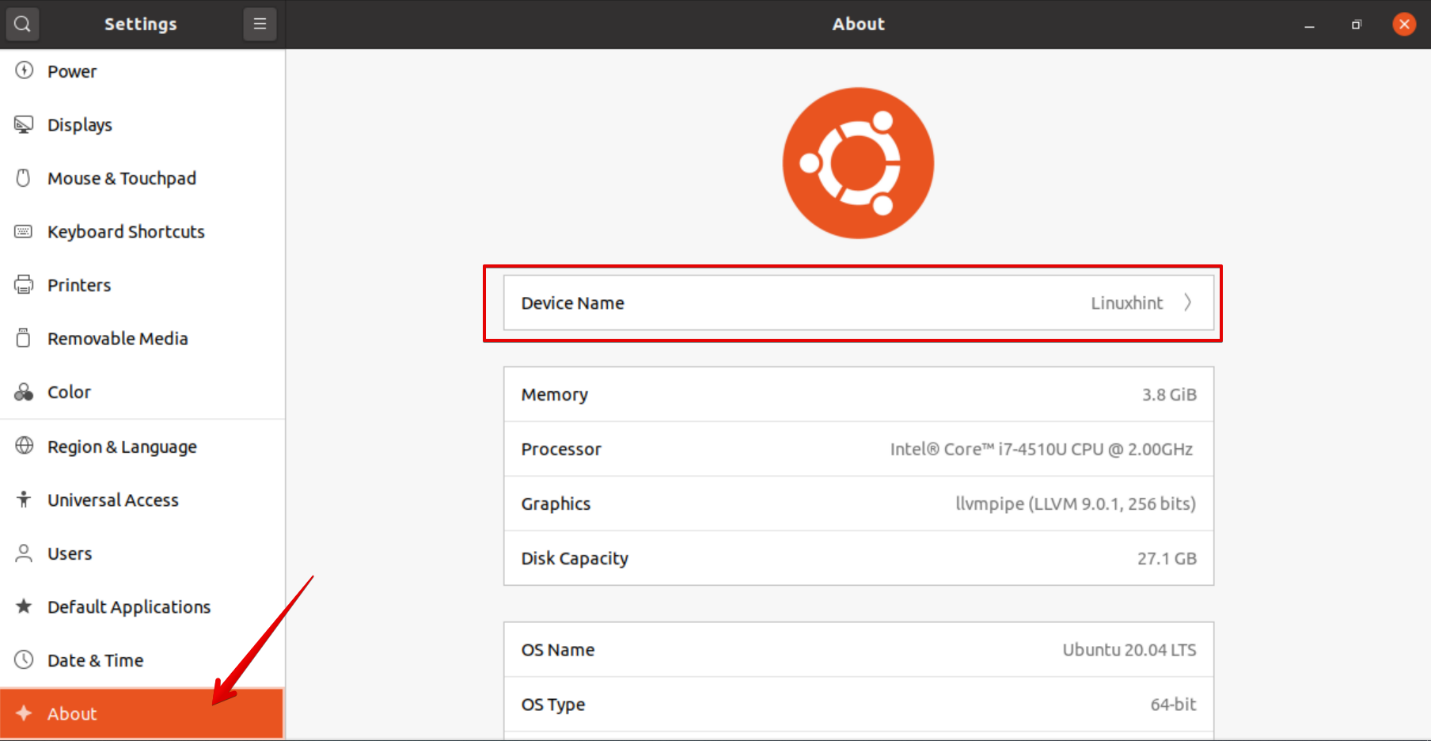
2. Now, click on the ‘Settings’ icon, and the following window shows on the terminal. Find ‘About’ from the left, displaying the menu list.
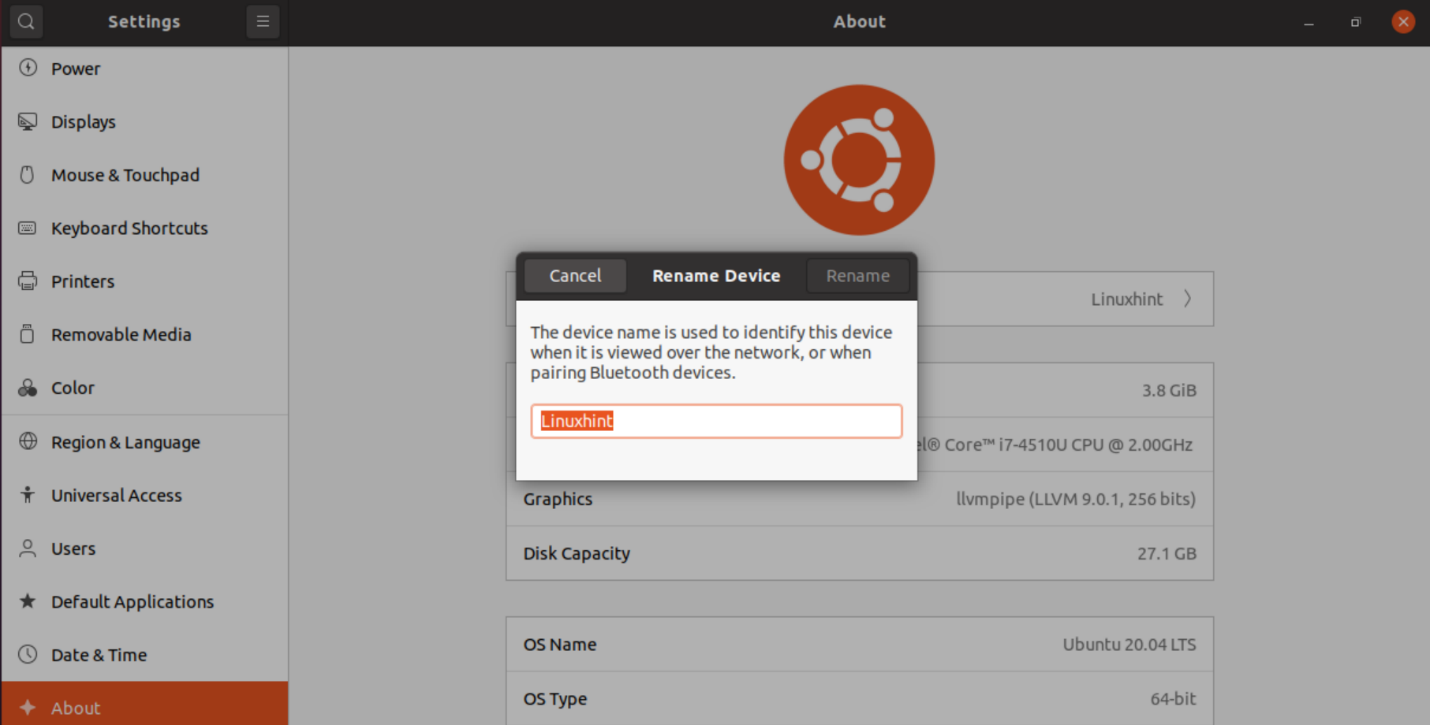
3. The device name shows at the top box of the displaying window. Click on the ‘Device Name’, and the following dialogue will show on the system:
4. Change the device name as ‘Samreena-PC’ and click on the ‘Rename’ to permanently change the Ubuntu system’s hostname.
Now, you can observe that the hostname has been changed successfully. To print the currently changed hostname, execute the hostnamectl command in the terminal.
Conclusion
We discussed in this article how to change the hostname of the Ubuntu 20.04 system using both methods, either using the command line and via using the GUI. We have various reasons that may require changing the system hostname. One of the most common is the hostname change automatically upon instance creation. I hope the information mentioned above about changing the hostname would help you in the future. Thanks!

