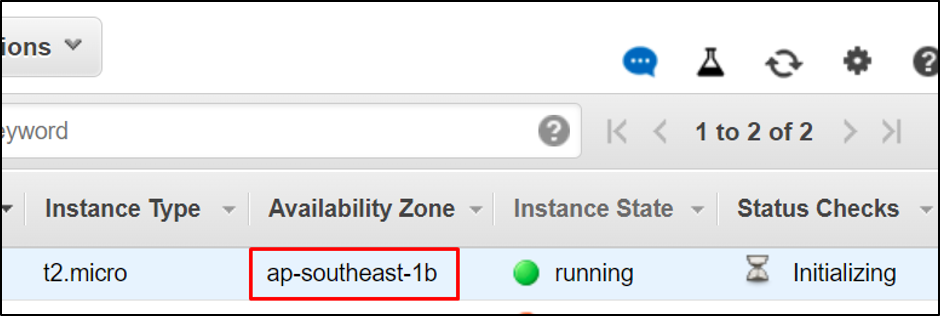
Let’s start with the process of changing the availability zone of the subnet in AWS.
Change Availability Zone of Subnet in AWS
We already have an instance in the running state now you just have to create an image of the instance. You need to select the instance and click on the “Actions” button. From the drop-down menu, choose “Image and templates” and click on the “Create image” button:

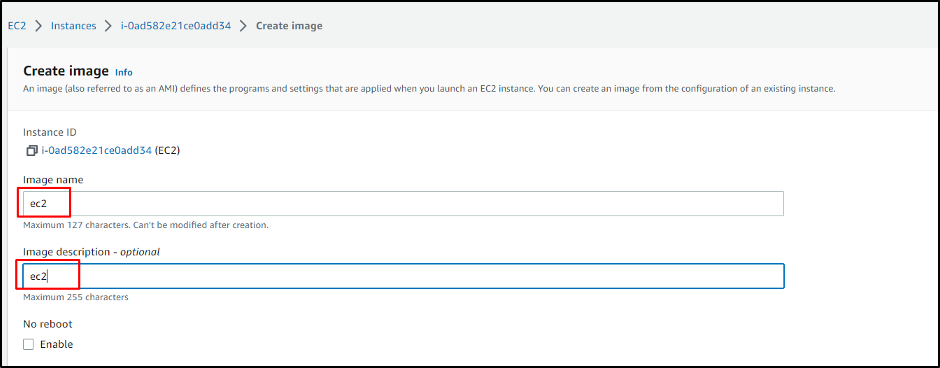
On this page, we have to enter the name and description for the instance’s image. After completing this section, scroll down the page:
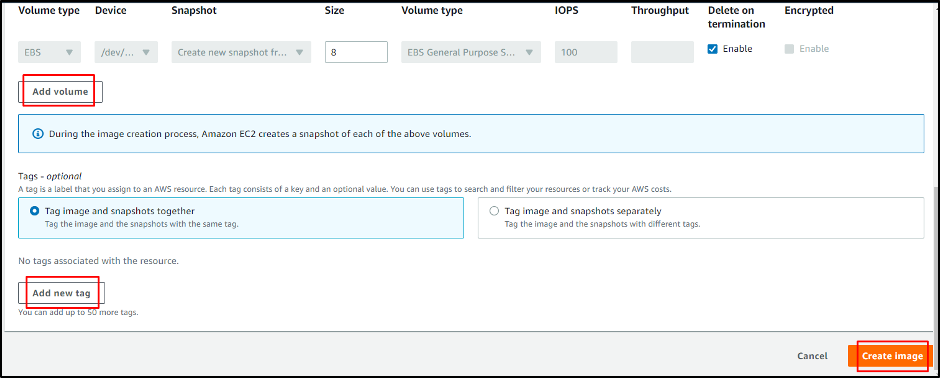
At the bottom of the page, you can add volume and tags to the image of your instance. And now, you can click on the “Create image” button. It will create an image of your instance. The instance’s availability zone will be changed using this image:
On the Amazon Machine Image (AMI) page, we can see our image in the available state. Now select the image and click on the “Launch instance from image”. It will direct you to the next page:
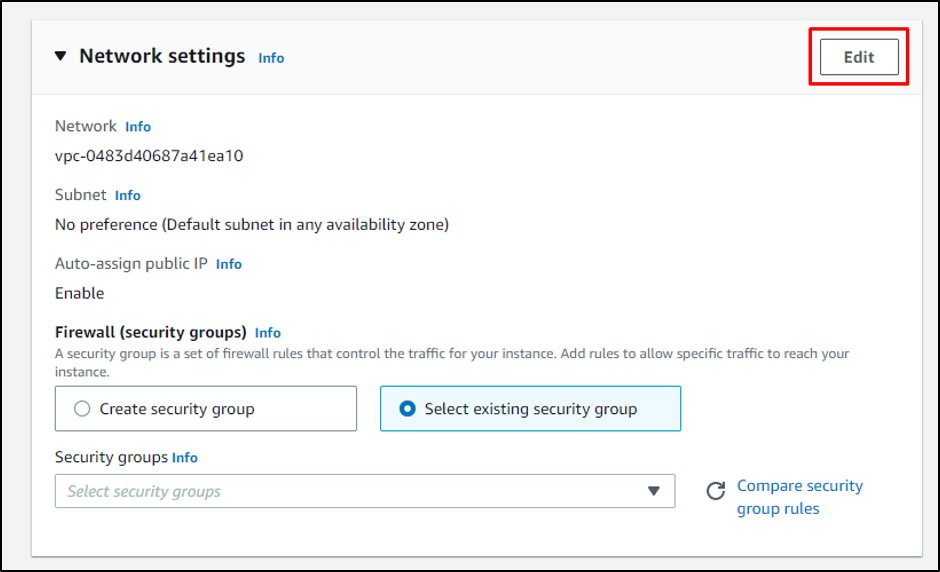
On this page, you can change the availability zone of the subnet in AWS from “Network Settings”. To change the setting, you need to click on the “Edit” button. From there, you can change the availability zone:
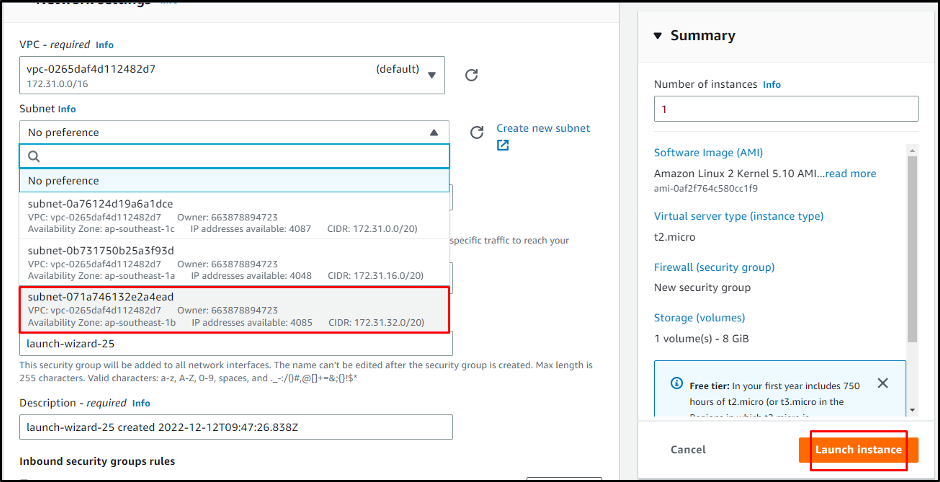
On the “Edit” page, you need to change the availability zone from the subnet menu. If you click on the Subnet button, the drop-down menu will allow you to change the availability zone by clicking on it. Now you need to click on the launch instance:
On this page, you can see that your availability zone has been changed from the screen below:
You have successfully changed the availability zone of the subnet in AWS.
Conclusion
You can divide your data into different availability zones in the region. AWS does not allow us to change the availability zone directly from the instance. It is possible by creating its image first and changing the availability zone through that. In this post, you have learned how to change the availability zone of the subnet in AWS.

