Every device comes up with the “Recovery Mode” feature which has the capability to perform different operations. These operations include cleaning the junk data, update installation, data restoration, back up or device reset.
Similarly, in Linux distributions, we also have the accessibility of the “Recovery Mode” feature. It allows the user to reboot the system and get it with a new setup.
We may need “recovery mode” at any time in the system. There could be many possibilities, i.e when the system slows down, it fails to start up for any reason, or if you find any glitches, then it means your system needs to recover. You can also recover broken files and test if the memory is working correctly or not.
How to Boot Ubuntu into Recovery Mode
To get the recovery mode option, you need to access the Grub boot-loader. Reboot the system to have the Grub menu.
For this, you can either restart the Ubuntu machine or use the following command in the terminal:

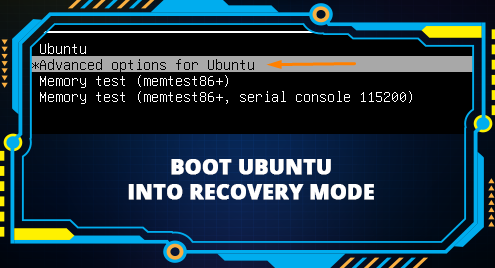
After typing the password, the system will restart. To get the Grub menu, press the “Esc” button quickly; when BIOS loading has finished, a Grub menu window will come with few options as shown in the image below:

From the menu, select the “Advanced options for Ubuntu” by using the down arrow key and press “Enter”.

After selecting, you will get the sub-menu window of the “Advanced options for Ubuntu” entry.
Use the down arrow key to navigate towards “Ubuntu, with Linux 5.8.0-50-generic (recovery mode)” and hit Enter.
This recovery mode allows the user to convert the boot system into recovery mode to resolve quickly.
In the Recovery mode, you will find multiple options. Select according to the issue you are facing:
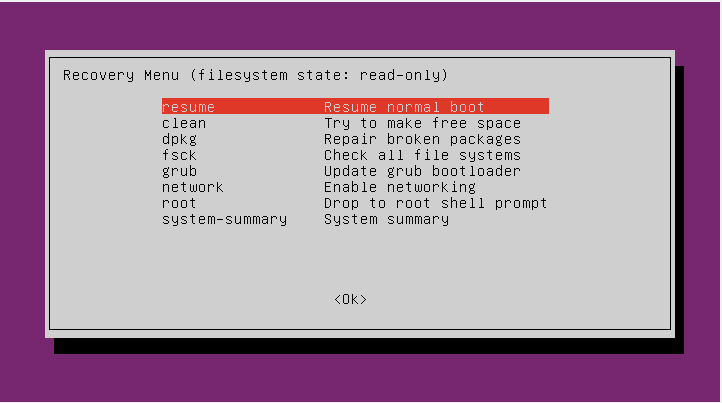
Let’s define each of the option that might help you to select.
Resume:
The resume option will end the recovery mode and allow the system to boot again.
Clean:
The clean option will help you to free up space from the system. If the system’s storage is about to end, it will help to get free space.
Dpkg:
Select the “dpkg” category if the package you installed fails and won’t allow the system to work properly. Moreover, if you have broken packages in the system, the “dpkg” option will help resolve this.
Fsck:
The “fsck” option is used for the configuration of graphics drivers, or if your hard drive is corrupted, it might help.
Grub:
Use the “grub” option to update the Grub boot loader. It will scan the system and upgrade the Grub boot loader automatically.
Network:
The “network” option helps to enable networking which is disabled by default in the system.
Root:
Sometimes, the system fails to boot due to some errors. For this purpose, “root” entry is used; it allows the system to open write mode and resolve the issues using commands.
If all the above options are not resolving the errors, there would be some significant complications with your operating system. In this case, the best chance to restore the system is to reinstall it.
Conclusion:
We have learned how to use the “Recovery Mode” feature to resolve Ubuntu machine errors. You can get recovery mode by restarting the machine and pressing the “Esc” key repeatedly.
The Grub boot-loader menu has multiple choices and can be selected according to need. Follow the guide carefully to get the “recovery mode” menu list. There are several options, i.e., clean, dbkg, fsck, network, grub, and root. We can fix most of the issues using these options.